
Subscribe to Our Youtube Channel
Related Manuals for Ametek ECLIPSE II


Summary of Contents for Ametek ECLIPSE II
- Page 1 OWNER’S MANUAL 193111-095 Issued September 30, 2011 IMPORTANT: Read these instructions before installing, operating, or servicing this system. ECLIPSE II DO NOT DESTROY AMETEK/PRESTOLITE POWER , TROY, OHIO 45373-1099, U.S.A.
- Page 3 NOTE: Information regarding obtaining additional copies of this manual is located in the Introduction chapter of this manual. A battery charger is identified by model number. Incorporated into the model number is the ampere-hour capacity, case size, input power phase, and number of cells in battery for which charger is intended.
-
Page 5: Table Of Contents
193111-095 TABLE OF CONTENTS INTRODUCTION ..........................How To Use This Manual ....................1-1 Equipment Identification ....................1-1 Receipt Of Equipment ....................... 1-1 SAFETY INSTRUCTIONS AND WARNINGS ............... 2 DESCRIPTION OF EQUIPMENT ....................Operating Modes ......................3-1 EC2000 Control ........................ 3-2 INSTALLATION ............................ -
Page 6: September
193111-095 TABLE OF CONTENTS This page intentionally left blank. September 30, 2011... -
Page 7: How To Use This Manual
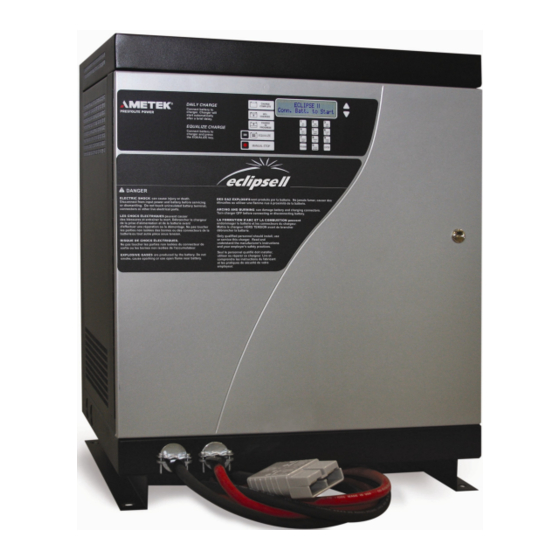
193111-095 INTRODUCTION INTRODUCTION How To Use This Manual Equipment Identification The unit's identification number (specification, model, serial number) usually appears on a nameplate IMPORTANT: It is especially attached to the front panel. important that all charger internal components be kept Receipt Of Equipment clean and dry, and all electrical connections... - Page 8 193111-095 INTRODUCTION This page intentionally left blank. September 30, 2011...
-
Page 9: Safety Instructions And Warnings
193111-095 SAFETY INSTRUCTIONS AND WARNINGS SAFETY INSTRUCTIONS AND WARNINGS 1. Installation and Grounding of Electrically Powered FOR OPERATION OF BATTERY Equipment – Electrical equipment must be installed CHARGING EQUIPMENT and maintained in accordance with the National Electrical Code, NFPA 70, and local codes. A power disconnect switch must be located at the equipment. - Page 10 193111-095 SAFETY INSTRUCTIONS AND WARNINGS C. Burn and Bodily Injury Prevention The battery produces very high currents when short circuited, and will burn the skin severely if in contact DANGER: ELECTRICAL SHOCK with any metal conductor that is carrying this current. Do not permit rings on fingers to come in contact with CAN BE FATAL.
-
Page 11: Ec2000 Control
See the Troubleshooting chapter of this manual to determine the cause of the fault. The ―Equalize‖ Upon connection of the battery, the Eclipse II reads LED will light solid when an equalize charge is the information programmed into the BID and identi- requested by pressing the equalize push button. - Page 12 193111-095 DESCRIPTION OF EQUIPMENT This page intentionally left blank. September 30, 2011...
-
Page 13: Location
193111-095 INSTALLATION INSTALLATION Location In addition to the usual function of protecting personnel against the hazard of electrical shock due to fault in the For best operating characteristics and longest unit life, equipment, grounding serves to discharge the static take care in selecting an installation site. Avoid electrical charges which tend to build up on the locations exposed to high humidity, dust, high ambient surfaces of equipment. -
Page 14: Line Connections To Battery Charger
193111-095 INSTALLATION COPPER CABLE SIZE AWG * * DISCONNECT BRANCH FUSE SIZE LINE AMPS SWITCH * (AMPERES) POWER GROUND 0-2.5 No. 14 No. 14 2.6-4.5 No. 14 No. 14 4.6-7.5 No. 14 No. 14 7.6-12 No. 14 No. 14 12.1-16 No. -
Page 15: Charging Cable Connectors
193111-095 INSTALLATION Charging Cable Connectors Pre-Operation Changes To The Factory Control Settings If connectors are already attached to charging cables, make sure that they are attached so that positive Typically few changes are required to be made if the charger polarity will connect to positive battery terminal. amp hour rating is sized to the battery and the voltage rating is equal to or greater than the battery. -
Page 16: Fuse Replacement
193111-095 MAINTENANCE MAINTENANCE Lubrication WARNING: ELECTRICAL SHOCK HAZARD — Before inspecting or None required. cleaning inside cabinet, turn OFF and remove fuses of disconnect switch (supplying AC power to Fuse Replacement charger) and disconnect battery. The output silicon diodes in this charger are protected by a ―fast-clearing‖... -
Page 17: Preliminary
OPERATION The operating procedure given here explains the 6. When the charge termination point is reached, the operation of a Prestolite Eclipse II equipped with the charger will turn off and the ―Charge Complete‖ LED Prestolite EC2000 control. will be lit. If an equalize charge has been selected, the ―Equalize‖... -
Page 18: Equalize Or Weekend Charge
193111-095 OPERATION Equalize or Weekend Charge AC Power Fail Batteries may need periodic equalizing to correct for The EC2000 Control will resume the charge where it inequalities between cells that result from daily or left off when the AC power failure occurred, virtually frequent cycling. - Page 19 193111-095 OPERATION 4. Low Current Shutdown 9. High Amp Hour Returned Shutdown If the charger output falls below a predetermined If the cycle amp hours returned exceed the BID AH level, a low current shutdown will occur. All 4 setting or charger maximum AH rating for a prede- LEDS will be flashing and the display will read ―Low termined amount, the charger will shutdown.
- Page 20 193111-095 OPERATION This page intentionally left blank. September 30, 2011...
- Page 21 193111-095 EC2000 CONTROL FEATURES EC2000 CONTROL FEATURES 11. Review of Archived Charge Cycle Data for the Last 512 Charge cycles. - Amp hours returned during charge cycle - Total time on charge - 80% point to end of charge timer Connect battery to TIME TIME...
-
Page 22: Description Of Features
An 18 cell Eclipse II will safely charge 18, 12, EC2000 Control is capable of modifying the output 9, and 6 cell batteries. A 12 cell Eclipse II will voltage to compensate for ranges of battery electro- safely charge 12, 9, and 6 cell batteries. - Page 23 193111-095 EC2000 CONTROL FEATURES When the battery is equipped with a Prestolite BID Review of Charge Cycle — When the charge cycle module, the charger automatically reads the battery is in progress or has been terminated, either by the temperature throughout the charge cycle and EC2000 Control or the operator, the charge cycle adjusts the output voltage to match the battery history can be automatically read out by pressing...
- Page 24 193111-095 EC2000 CONTROL FEATURES The alphanumeric display will display fault lockout, WARNING: Enabling the Finish Cell and the status LEDs will continue to flash even with Forming feature will cause the charger to no battery connected to the charger until the fault continue to run for a period of time if the condition is cleared.
- Page 25 193111-095 EC2000 CONTROL FEATURES When a EC2000 is programmed for delayed start, The automatic equalize features allow for the and a battery is connected to the charger, the pro- consistent application of equalize charges without grammed delay time will be displayed. constant attention by the operators.
-
Page 26: Ec2000 Charge Archive Function
193111-095 EC2000 CONTROL FEATURES EC2000 Charge Archive Function START VOLTS The value of the battery voltage (in volts/cell) of the The archive function allows up to 20 items of charge battery at the start of the charge cycle. cycle information to be retrieved and displayed. The last 512 charge cycles are stored, with the most FINISH AMPS recent cycle labeled #1 and earlier cycles labeled in... -
Page 27: Ec2000 Charge Cycle Review Function
193111-095 EC2000 CONTROL FEATURES BID END TEMP 02. CHARGE TIME The temperature of the battery sensed by the The total charging time of the charge cycle. This Prestolite Battery Identification Module at the end of number includes the time of the Verify, 0-80%, the charge cycle. - Page 28 193111-095 EC2000 CONTROL FEATURES 10. EQUALIZE TIME 22. EQUALIZE CYCLES The time of the equalize portion of the charge cycle. The number of charge cycles between equalize Equalize can be automatically or manually selected. charges when the auto equalize function is pro- grammed ―ON‖...
- Page 29 193111-095 EC2000 CONTROL FEATURES 32. SPECIAL OPTION 38. BATTERY TYPE Special option modes see below. The battery type the charger uses to select the proper output voltage and current characteristic, if the charger does not detect a Prestolite BID. ―P.T.S.― = Push to start mode.
- Page 30 The number of Hours before the charger can begin the gassing portion of the charging cycle. (0 – 8 47. PRESENT DATE Hours) Not Available on the Standard Eclipse II The current day of the month (1 to 31). Charger 48.
- Page 31 An Amp Hour Accumulator and the maximum current rating. Not Available on BID module assembly must be installed on the the Standard Eclipse II Charger battery to use this function. The control continually updates this calculation using the total accumulated 65.
- Page 32 Figure 7-2...
- Page 33 Programming Your EC2000 Control The programming function allows 42 functions to be EQUALIZE TYPE programmed to customize your Prestolite Eclipse II The type of auto equalize selected. The types that to your battery charging application. Programming is can be selected are listed below.
- Page 34 193111-095 PROGRAMMING YOUR EC2000 CONTROL BLOCK END SPECIAL OPTION Sets the ending time of the time of day blockout Sets special option modes, see below: function (0000 to 2359 military time). See START OFF = factory setting MODE. ―P.T.S.‖ Push to start mode Factory = 01:00 The charger will not start until the ―ENTER‖...
- Page 35 193111-095 PROGRAMMING YOUR EC2000 CONTROL FIX. BAT. TEMP. LID. V/C. The battery temperature used for charger output The custom output curve lid voltage setting voltage compensation, if the charger does not (2.00 to 2.99 volts/cell). detect a Prestolite BID module (032 to 132°F). Factory setting = 2.70 77°...
- Page 36 (0000 to 9999 Not Available on the Standard Eclipse II Charger September 30, 2011...
- Page 37 Factory Setting = 25 The BID continually updates the average while it is installed on the battery. Not Available on the Standard Eclipse II Charger The data is automatically read from the bid when 66. MAX CELL SIZE the Control terminates each charge cycle, except for Programs the Max Cell Size available on 40 cell Manual Stop.
- Page 38 Program Review Menu Tree 1 – 4 The Multi AH Feature of the EC2000 Control allows the user to customize his Eclipse II to fit his multi– Multi AH Mode OFF battery application. Using this feature, the flexibility of the Eclipse II can be used to charge batteries of...
-
Page 39: Timer Start Mode Programming
Timer Start Mode. Listed to the right is an example of Enter Battery Type FLD programming an Eclipse II to constant current charge a Battery Type CTM. battery for 20 hours at a 5 amp/100AH rate. Enter Battery Type CTM. - Page 40 193111-095 PROGRAMMING YOUR EC2000 CONTROL Figure 8-1 September 30, 2011...
-
Page 41: Troubleshooting Table
193111-095 TROUBLESHOOTING TROUBLESHOOTING Troubleshooting Table ACTION SYMPTOM PROBABLE CAUSES STEPS (1) No AC Voltage To Charger No Display And No LED’s (2) Charger Input Fuses Are Blown (3) Bad Harness/Cable Connection (4) Bad Control Board (5) Bad Internal Charger Primary Board (1) Keypad Not Connected No Keypad Response... -
Page 42: Action
193111-095 TROUBLESHOOTING ACTION SYMPTOM PROBABLE CAUSES STEPS (1) Reading Not Temperature Corrected Battery Has Low S.G.s (2) Bad Battery (3) Bad Equalize Schedule (4) Charge Curve Incorrect (5) Rates Set Incorrectly (6) Fixed Temperature Set Incorrectly (7) Too Cold (8) Bad BID (9) Not Enough Charging Time (1) Faulty >... - Page 43 193111-095 TROUBLESHOOTING ACTION SYMPTOM PROBABLE CAUSES STEPS (1) Insufficient Cool Down Before And/Or After Charging Battery Temperature (2) Battery Power Demand Too Great Too High (3) Rates Set Incorrectly (4) Fixed Temperature Set Incorrectly (5) Charge Curve Incorrect (6) Equalize Schedule (7) Control Set For Voltage/Time (8) Control Set For Cell Forming (9) Bad BID...
- Page 44 193111-095 TROUBLESHOOTING ACTION SYMPTOM PROBABLE CAUSES STEPS (1) Bad Output Connector Meter Reading Wrong (2) Bad Harness/Connections – Loose Or Incorrect (Amps) (3) Internal Power Connection (4) Bad Control Board (5) Shunt Calibration needed (1) Bad Internal Charger Primary Board High Input Current (2) AC Supply (3) Bad Control Board...
- Page 45 193111-095 TROUBLESHOOTING ACTION SYMPTOM PROBABLE CAUSES STEPS (1) Fixed Cell Setting Incorrect Display Reads - Low Battery (2) Bad Harness/Connections – Loose Or Incorrect Fault (3) Bad Battery (4) Bad Control Board (5) Bad Output Cables/Connector (6) BID Not Programmed Properly (1) Fixed Cell Setting Incorrect Display Reads - High Battery (2) Bad Battery...
- Page 46 193111-095 TROUBLESHOOTING ACTION SYMPTOM PROBABLE CAUSES STEPS Display Reads - High Amp Hour (1) Bad Battery Fault (2) Bad Control Board (3) Bad BID Display Reads - Low Voltage (1) Bad Battery Fault (2) Bad Control Board (3) Bad Internal Power Connection (4) Bad Harness/Connections - Loose or Incorrect Unable to download Datalink (1) Bad Harness/Connections - Loose or Incorrect...
- Page 47 If for some reason a DC Fuse measures somewhere in between, replace the DC Fuse and send it in to your local Ametek representative. 12. Remove the charger side cover(s) to expose where the output cables connect to the charger. The black (Negative) output cable goes into the charger and connects to bus bar adjacent to the DC output fuse.
-
Page 48: Troubleshooting
193111-095 TROUBLESHOOTING Check the fan power wiring on the primary pcb. The connector is on the upper left side of the board and is labeled J4. The 2 fan wiring connections are labeled J4-1 and J4-2. 19. Remove power from the charger, and then open the charger door. Let the unit cool to room temperature. Find J5 connector on the center top side of the primary pcb. - Page 49 193111-095 TROUBLESHOOTING 34. If battery electrolyte temperatures are well below 32ºF, the Eclipse will not be able to adequately charge the battery. Battery insulation or heaters would be required to keep the battery electrolyte temperatures close to 32ºF. 35. If the control is set to perform forming cycles, DV/DT termination is disabled, and the low current shutdown is disabled. To return to normal operation, program the control to ―00‖...
- Page 51 193111-095 DIAGRAMS TYPE DIAGRAM OUTLINE 1 PAK 198533 2 PAK 198554 198536 2 PAK W/DUAL CABLES 198555 2 CIRCUIT 198504 September 30, 2011...
Need help?
Do you have a question about the ECLIPSE II and is the answer not in the manual?
Questions and answers