Digital Watchdog DW-BJER2U Quick Start Manual
State of the art hyper-optimized video management platform designed for ease, speed and efficiency, servers powered by dw spectrum ipvms, up to 128 2.1mp cameras 1080p true hd resolution
Hide thumbs
Also See for DW-BJER2U:
- Service manual (17 pages) ,
- Quick start manual (17 pages) ,
- Quick start manual (16 pages)
Table of Contents
Advertisement
Quick Links
State of the art hyper-optimized video management platform designed for ease, speed and efficiency.
Blackjack
DW-BJER4U
DW-BJER2U
E-RACK Server
Quick Start
Guide
NOTE: Download All Your Support Materials and Tools in One Place
1. Go to: http://www.digital-watchdog.com/support-download/
2. Search your product by entering the part number in the 'Search by Product' search bar. Results for applicable part numbers will
populate automatically based on the part number you enter.
3. Click 'Search'. All supported materials, including manuals, Quick Start Guides (QSG), software and firmware will appear in the results.
Attention: This document is intended to serve as a quick reference for initial set-up.
See the DW Spectrum full manual for more information on features and functionality.
Tel: +1 (866) 446-3595 / (813) 888-9555
Technical Support Hours: 9:00AM – 8:00PM EST, Monday thru Friday
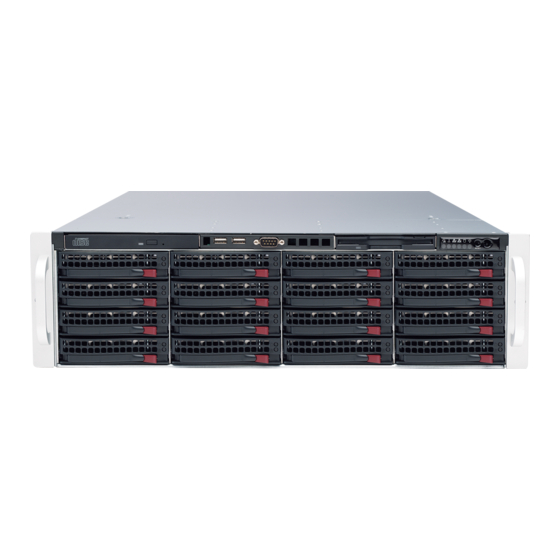
E-RACK — Up to 128 2.1MP Cameras (1080p True HD Resolution)
®
DW-BJER2U
Default Login Information for DW Spectrum
Username: admin
Recovery USB
1 Set
(LX models only)
Keyboard and
1 Set
Mouse
DW-BJER3U
Password: admin1234
WHAT'S IN THE BOX
Quick Start Guide
DW-BJER4U
IPVMS
®
1 Set
Power Cable
miniDP to True
1 Set
HD Output
Adapter
DW-BJER3U
2 Set
4 Sets
digital-watchdog.com
Advertisement
Table of Contents

Subscribe to Our Youtube Channel
Related Manuals for Digital Watchdog DW-BJER2U


Summary of Contents for Digital Watchdog DW-BJER2U
- Page 1 Quick Start Guide State of the art hyper-optimized video management platform designed for ease, speed and efficiency. Blackjack E-RACK — Up to 128 2.1MP Cameras (1080p True HD Resolution) ® DW-BJER2U DW-BJER3U DW-BJER4U DW-BJER4U DW-BJER3U DW-BJER2U Default Login Information for DW Spectrum IPVMS ®...
- Page 2 BLACKJACK E-RACK HARDWARE Power Button Reset / Reboot System Power LED HDD LED Network 1 LED Network 2 LED Power Failure LED Overheat LED Power - SMPS 2x SSD Drive Bay for OS 2x USB 2.0 Ports Keyboard / Mouse Connector VGA Port (Disabled) Serial Port 2x HDMI Ports (Disabled)
- Page 3 SETTING UP THE E-RACK Quick Start Guide STEP 1: Connect Peripherals, power and network 1. Connect a monitor, USB keyboard, USB mouse and network cable to one of the ethernet ports (B8 on the diagram) Configure the camera n SETTING UP THE E-RACK SETTING UP THE E-RACK then will configure local network later.
- Page 4 Press OK after adjusting to the correct date and/or time. Press OK after adjusting to the correct date and/or time. 4. Press OK to close Date and Time when done. Linux 4. Press OK to close Date and Time when done. he correct date and/or time.
-
Page 5: Configure Network
STEP 3: Configure Network Please have the following information ready before starting the network configuration. Quick Start Guide Camera Network Local Network (LAN) IP Address STEP 3: Configure Network Subnet Mask / Netmask Please have the following information ready before starting the network configuration. Default Gateway / Not Applicable Camera Network... -
Page 6: Local Network
4. Select Use the following IP address (Use the following DNS server addresses will be selected automatically) 5. Enter IP address and Subnet mask of the camera network. (do not enter anything for the Default gateway, Preferred DNS server and Alternate DNS server. NOTE It must be the same network as the cameras and must not be the same network as the local network. - Page 7 * Consult with your IT department if you do not know what IP address to use. Quick Start Guide * Consult with your IT department if you do not know what IP address to use. * Consult with your IT department if you do not know what IP address to use. 11.
- Page 8 7. Enter IP Address then press Tab on the keyboard to move to Netmask. 7. Enter IP Address then press Tab on the keyboard to move to Netmask. 7. Enter IP Address then press Tab on the keyboard to move to Netmask. 7.
- Page 9 Quick Start Guide CONFIGURE CAMERAS USING DW IP FINDER Refer to the camera’s QSG to configure Digital Watchdog camera’s IP address using DW IP finder. Configure Cameras using DW IP Finder Refer to the camera’s QSG to configure Digital Watchdog camera’s IP address using DW IP finder.
- Page 10 3. Enter password and click connect. Default password : admin1234 (case sensitive) STEP 2: To rename the server 1. Right click on the server name listed on the Resources then click Server Settings. 2. Go to General tab, then type in the new server name in the Name field and click OK.
- Page 11 STEP 3: To check for update 1. Click on the menu then click System Administration. 2. Go to Updates tab. Click Update System if turned orange. If you are on the latest version, it will say “You have the latest version installed” and the Update System button will be greyed out.
- Page 12 Quick Start Guide 3. Click OK when update is completed. STEP 4: Enter License 1. Go to System Administration then click License tab. 2. Enter License Key then click Activate License button. (Internet connection required) Click on Activate Trial License if you have not purchased the valid license. 3.
-
Page 13: Configure Recording
STEP 5: Configure recording 1. Right click on the camera to setup recording, then click Camera Settings. 2. Go to Recordings tab. 3. Click to turn on recording. 4. Configure Schedule Settings for Quality, FPS and Recording Type. 5. Click and drag mouse over the Recording Schedule to assign the recording setting. - Page 14 Quick Start Guide Click on All to apply to the all schedules. 6. Red dot will appear next to the camera when the recording is started.
- Page 15 STEP 6: Backuping Database 1. Go to System Administration and click General tab. 2. Click Create Backup… button. 3. Navigate to the folder where to save and enter name of the backup file then click save. Strongly recommend to also backup to the external storage media. NOTE: More information and instructions are available in the Spectrum 3.0 Manual.
-
Page 16: Troubleshooting Tips
Important: OS not listed will be not be supported by DW™ Tech Support Tel: +1 (866) 446-3595 www.digital-watchdog.com Fax: (813) 888-9262 sales@dwcc.tv Copyright © Digital Watchdog. All rights reserved. Rev Date: 06/18 Specifications and pricing are subject to change without notice.
Need help?
Do you have a question about the DW-BJER2U and is the answer not in the manual?
Questions and answers