Table of Contents
Advertisement
Advertisement
Table of Contents

Related Manuals for iBaby M7


Summary of Contents for iBaby M7
- Page 1 Labs, Inc.
-
Page 2: Table Of Contents
Monitor User Manual Contents PRODUCT OVERVIEW ....................... 3 Package List ..........................3 Interface Introduction ......................3 Product Specifications ......................4 INSTALLATION GUIDE ....................... 5 App Download ........................5 Getting Started ........................5 Register and Login ........................5 Device Activation ........................ -
Page 3: Product Overview
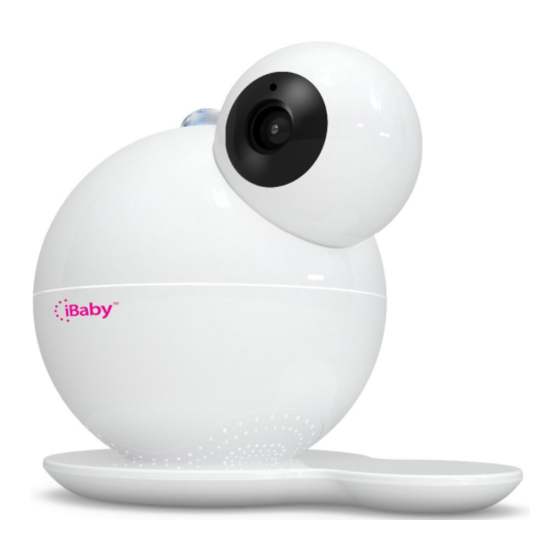
Monitor User Manual 1 Product Overview 1.1 Package List ü iBaby Monitor ü Base ü Power Adapter ü User Manual 1.2 Interface Introduction Figure 1 1) Night Vision Sensor 2) Microphone 3) Camera Lens 4) Monitor Serial Number : Monitor unique ID, such as “708Qaaaa”... -
Page 4: Product Specifications
Monitor User Manual 1.3 Product Specifications Model:M7 Compression H.264 Frame rate 1~12 frame Resolution Ultra (1920*1080),HD(1280*720),VGA(640*480) Video Standard:4.0mm F=2.2fixed aperture (3 million Camera camera lens) view angle 87.6° Online users Support 4 users online simultaneously Compression G711 Sampling frequency... -
Page 5: Installation Guide
FCC CE ROSH RCM KC 2 Installation Guide 2.1 App Download Apple Users:Search on the App Store for“iBaby Care” Android Users:Search on the Google Play Store for“iBaby Care” The icon of the app as follows: 2.2 Getting Started Connect your device to power adapter and wait for the iBaby jingle. -
Page 6: Apple Users Activation
Monitor User Manual install. 2.4.1 Apple Users Activation 1.Open the USB cover on the bottom of the device, then connect your iPhone or iPad to the device with the original iPhone USB cable. 2.You will see a “Share Wi-Fi Settings?” prompt on your screen. Once this window shows, click “Allow”. -
Page 7: Android Users Activation
Monitor User Manual Note: If you still cannot activate the device, please refer to the “Installation Issues”in section 4.2. 2.4.2 Android Users Activation 1.From the “Add a Device”menu, select the device you want to install. Figure 4 2.Connect your Android device to a Wi-Fi network. Then, connect the power adapter to the monitor. - Page 8 Monitor User Manual Figure 5 The processing bar will fill up to 100% Deleted: There are two processing bar during the Note: If you are unable to activate the device, please refer to “Installation Issues” in section installation. 4.2.
-
Page 9: App Operation And Function
Monitor User Manual 3 APP Function 3.1 The Main Viewing Screen 收听: Figure 6 1.Function Guide : Function Guide Button: A menu will pop up on the left showing device settings and functions. :Devices List: Switching different devices using the downward arrow. - Page 10 Monitor User Manual :Current temperature :Current humidity :Current carbon dioxide level :The signal of the Wi-Fi network on the device 3.Function Button Section : Listen button : Speak button : Record button: Captures videos which are saved in the Media Gallery.
-
Page 11: App Function Menu
Help Center: Answer the frequently asked questions. My Account: Set and display the personal information. Settings: Set the parameters and functions on the device. Contact iBaby: Contact iBaby for support or just send your feedback. Logout: Log out. Deleted: . -
Page 12: Deleted
Monitor User Manual Figure 8 Feeding Alert: You can set this to remind yourself to feed for your child. It will remind you Deleted: your when times up. Deleted: feeding Diaper Alert: You can set this to remind youto change the diaper your child. - Page 13 Monitor User Manual 3.3.2 Invite & View Users You can invite unlimited friends to have access to the monitor. As for specific steps, please refer to “Q2”of section 4.4. 3.3.3 Settings -> Display Settings Figure 9 Night Vision: Auto: The image on the screen will turn into colored/black and white according to the light intensity automatically.
- Page 14 Monitor User Manual 3.3.4 Settings ->Sleep Mode When the Sleep Mode is on, other users cannot access or view the monitor. Figure 10 3.3.5 Feedback Settings = 》 Shake to report bug Figure 11 Report Bug via tag: Tap screen to add a tag=》Tap tag to flip=》Longpress tag to edit or delete.
-
Page 15: Help Button On The Base
Monitor User Manual Figure 12 3.3.7 Camera & App Information It shows the camera and app information, including firmware version, app version, S/N, etc. Figure 13 4 Help Button On The Base 4.1 Moonlight... -
Page 16: Voip
Monitor User Manual One click for moonlight display projection. Two clicks for rotating moonlight display projection. Three clicks to turn off moonlight display. 4.2 VOIP Hold for five seconds to start your 2-way audio call. Figure 14... -
Page 17: Frequently Asked Questions
Monitor User Manual 5 Frequently Asked Questions 5.1 LED Light Status LED status Monitor Status A blinking red light Device is not connected to Wi-Fi and not activated A blinking green light Device is connected to Wi-Fi, but not... - Page 18 Monitor User Manual If this prompt shows, it may be that the monitor is not connected to your Wi-Fi network. Please follow the steps as below: 1)Please use the phone’s original USB cable to enable a great connection. 2)Place the monitor near the router as close as possible while installing. If your router...
- Page 19 Monitor User Manual 3) The best Wi-Fi name & password will be 8-32 characters comprised of upper and lower- case letters, numbers, and underscores. And they should not contain symbols or special characters such as Chinese, Japanese, Korean, etc.
-
Page 20: Loading Wheel
Monitor User Manual 1)Please use the iPhone’s original USB cable. 2)Verify that your phone has connected to your Wi-Fi network. 3)The power adapter has been plugged and the device has started (the LED status light on the back of the monitor is a blinking red light). - Page 21 Monitor User Manual Q2.If it gets stuck on a loading screen while viewing at home and the LED status light on the back of the monitor is a steady red light. Figure 19 It indicates that your monitor has not connected to your Wi-Fi network. Please follow the...
- Page 22 Monitor User Manual Figure 20 It indicates that your monitor has connected to your Wi-Fi network, but the bandwidth is not high enough to load videos. Please follow the steps below: 1)The router might have heavy load, please unplug the power cord of the router and then plug back it to restart.
-
Page 23: Features Faq
Q2.I am the owner, how do I invite users to view the monitor? There are some tips to follow: 1)The invited user must first register an account by downloading the iBaby Care App and registering the email they want to share with the owner of the iBaby monitor. -
Page 24: Contact Information
Monitor User Manual Here are some tips to follow: Check whether the monitor is placed on its base properly or not. The humidity& temperature module is built in the magnetic base. You should aim the monitor at the four metal prongs on the base and place the monitor smoothly. It is a good sign if the monitor can stay attached to the base when you pick up the monitor. - Page 25 Monitor User Manual This transmitter must not be co- located or operating in conjunction with any other antenna or transmitter. Wi-Fi 5G indoor use only ! Operations in the 5.15- 5.25 GHz band are restricted to indoor usage only.
Need help?
Do you have a question about the M7 and is the answer not in the manual?
Questions and answers