Table of Contents
Advertisement
Quick Links
Advertisement
Table of Contents

Related Manuals for iBaby M7 Lite


Summary of Contents for iBaby M7 Lite
- Page 1 Labs, Inc.
-
Page 2: Table Of Contents
Monitor User Manual Contents PRODUCT OVERVIEW ......................2 Package List ........................2 Interface Introduction ....................... 3 Product Specifications ....................... 4 INSTALLATION GUIDE ......................5 App Download ........................5 Getting Started ........................5 Register and Login ......................5 Device Activation ....................... 5 Apple Users Activation ...................... -
Page 3: Interface Introduction
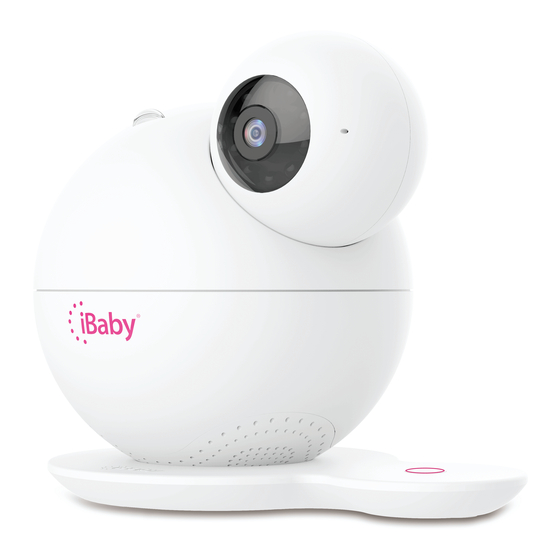
Monitor User Manual 1.2 Interface Introduction Figure 1 1) Photosensitive Sensor:Changes to night vision automatically 2) Microphone 3) Camera Lens 4) Monitor Serial Number:Uniquely identifies monitor, such as “6039aahs” 5) USB Interface:iPhone users,used for first installation or changing Wi-Fi 6) Reset Button:Long press, for 30 seconds, to restore factory settings... -
Page 4: Product Specifications
Monitor User Manual 1.3 Product Specifications Model:M7 Lite Compression H.264 Frame rate 1~12 frame Resolution Ultra (1920*1080),HD(1280*720),VGA(640*480) Video Standard:4.2mm F=2.0fixed aperture (3 million camera Camera lens) view angle 85° Online users Support 4 users online simultaneously Compression G711 Sampling frequency... -
Page 5: Installation Guide
2 Installation Guide 2.1 App Download Apple Users:Search on the App Store for“iBaby Care App” Android Users:Search on the Google Play Store for“iBaby Care App” The icon of the app is as follows: 2.2 Getting Started Connect your device to power adapter and wait for a jingle tone to sound. The LED status light on the back will turn into a blinking red light after about 30s. -
Page 6: Android Users Activation
Monitor User Manual shows, click “Allow”. The LED status light will then turn into a blinking green light. Figure 2 Note: 1) If the prompt does not show, unplug and re-plug the USB cable. 2) If the LED status light does not turn a blinking green, please contact Customer Service or refer to the FAQ of section 4.2 for help. - Page 7 Monitor User Manual Figure 4 2.Connect your Android device to a Wi-Fi network. Then, connect the power adapter to the monitor. Click “Next”once these steps are completed. 3.The screen will appear as shown below. Click“Next”after entering the correct Wi-Fi password.
-
Page 8: App Operation And Function
Monitor User Manual 4. A progress bar will indicate the progression of your device installation. Note: If you are unable to activate the device, please refer to“Installation Issues”in section 4.2. 3 APP Operation and Function 3.1 The Main Viewing Screen... - Page 9 Monitor User Manual 收听: Figure 6 1.Function Guide Section : Function Menu Guide Button: A menu will appear to the left containing device settings and functions. : Devices List: Toggle between different devices using the downward arrow. : Media Gallery: View all of your saved photos and videos here.
-
Page 10: App Function Menu
: Capture button: Captures photos which are saved in the Media Gallery. : Air quality icon: It shows the current air quality rating. View previous air quality statistics by clicking on the icon. 3.2 App Function Menu Figure 7 Switch Products:Users can switch between other iBaby devices. -
Page 11: Frequently Used Function
Help Center:Answer the frequently asked questions. My Account:Set and display the personal information. Settings:Set the parameters and functions on the device. Contact iBaby:Contact iBaby for support or just send your feedback. Logout:Exit the current account. 3.3 Frequently Used Function 3.3.1 Alert Settings Figure 8 Feeding Alert: You can set to remind your feeding for your child. - Page 12 Monitor User Manual Temperature Alerts:The device will give an alert when the temperature around the device is below the minimum value (eg.32℉) or above the maximum value (eg.86℉). Humidity Alerts:The device will give an alert when the humidity around the device is below the minimum value (eg.50%) or above the maximum value (eg.60%).
- Page 13 Monitor User Manual Figure 9 Night Vision: Auto:The image on the screen will turn into colored/black and white according to the light intensity automatically. This is the default setting. On:Night vision will always be on and the image on the screen will be in black and white.
- Page 14 Monitor User Manual network connection. Hide Connection Bar: Hide the Wi-Fi network signal on the main viewing screen. Hide Humidity & Temperature:Hide the humidity & temperature on the main viewing screen. 3.3.4 Settings =》Sleep Mode When the Sleep Mode is on, other users cannot access or view the monitor.
-
Page 15: Frequently Asked Questions
Monitor User Manual 3.3.6 Camera & App Information It shows the camera and app information, including firmware version, app version, S/N, etc. If there is a updated firmware version, you can upgrade the firmware by clicking the “Firmware Upgrade”button. -
Page 16: Installation Faq
Monitor User Manual Not bright The power adapter is not plugged or there is an issue on the device Table 1 4.2 Installation FAQ Q1.iOS Device: Click “Cancel”when you see a prompted message“If You Do Not See Any Progress”as below(the LED status light on the back of the monitor is a blinking red light). - Page 17 Monitor User Manual type on the router. Q2.Android Device: There is a prompted message indicates installation failed.Why? (the LED status light on the back of the monitor is a blinking red light) Figure 14 It indicates that your monitor has not connected to your Wi-Fi network. Please follow the steps as below: 1)Verify that the Wi-Fi password you enter is correct.
- Page 18 Monitor User Manual not jingle. Restart the router to reinstall the monitor. You can reinstall the monitor at another time if available. Q3.Click “Cancel”when you see a prompted message“If You Do Not See Any Progress”(the LED status light on the back of the monitor is a blinking green light).
-
Page 19: Loading Wheel
Monitor User Manual iOS Device:Please use the USB cable to connect your iOS device and the monitor. And then click“Allow”when you see a prompted message “Share Wi-Fi Settings?”. Android Device:Reset the monitor and then reinstall it. As for the specific steps about reset, please refer to “Q6”... - Page 20 Monitor User Manual Figure 17 It indicates that your monitor has not connected to your Wi-Fi network. Please follow the steps below: 1)Unplug the power adapter of the monitor and then restart to check whether the LED status light turns into a steady green light.
- Page 21 Monitor User Manual Figure 18 It indicates that your monitor has connected to your Wi-Fi network, but the bandwidth is not high enough to show videos. Please follow the steps below: 1)The router might have heavy load, please unplug the power cord of the router and then plug back it to restart.
-
Page 22: Features Faq
Q2.I am the owner, how do I invite users to view the monitor? There are some tips to follow: 1)The invited user must first register an account by downloading the iBaby Care App and registering the email they want to share with the owner of the iBaby monitor. -
Page 23: Contact Information
Monitor User Manual Q5.There is no humidity & temperature display. Here are some tips to follow: 1)Check whether the monitor is placed on its base properly or not. The humidity& temperature module is built in the magnetic base. You should aim the monitor at the three metal prongs on the base and place the monitor smoothly. - Page 24 Monitor User Manual ‐Consult the dealer or an experienced radio/TV technician for help. FCC Radiation Exposure Statement: This equipment complies with FCC radiation exposure limits set forth for an uncontrolled environment .This equipment should be installed and operated with minimum distance 20cm between the radiator&...
Need help?
Do you have a question about the M7 Lite and is the answer not in the manual?
Questions and answers