
Subscribe to Our Youtube Channel
Related Manuals for iBaby VM-CAM2


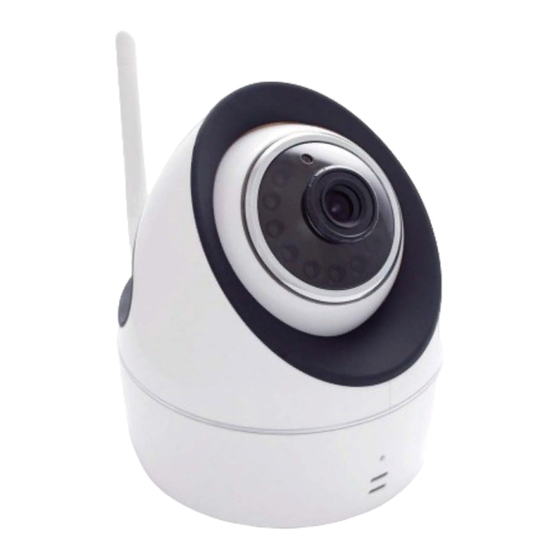
Summary of Contents for iBaby VM-CAM2
- Page 1 ONITOR ULTIFONCTIONS VM-CAM2 ODÈLE LIRE IMPERATIVEMENT AVANT UTILISATION...
- Page 2 3. UP ……………………………………… 19 V. S ERVICES 1. P ……………………………………… 19 ARAMETRES EMAIL 2. P ……………………………………… 21 ARAMETRES LARME 3. P ……………………………………… 22 ARAMETRES 4. P ……………………………………… 23 ARAMETRES ® © IBabyVision VM-CAM2 – User Manual V 2 - 201210...
-
Page 3: Table Of Contents
E FABRICANT NE SAURAIT ETRE TENU POUR LEGALEMENT RESPONSABLE EN CAS DE NEGLIGENCE E FABRICANT SE RESERVE LE DROIT DE MODIFIER SANS AUCUN AVIS PREALABLE LES CARACTERISTIQUES TECHNIQUES DU PRODUIT ® © IBabyVision VM-CAM2 – User Manual V 2 - 201210... -
Page 4: I. C Onsignes De Securite
- En cas de problème, contacter votre revendeur ® - Ne jamais utiliser iBabyVision à proximité d’eau ® - Ne jamais utiliser iBabyVision à proximité d’une source de chaleur. * : En respectant les consignes ci-dessous ® © IBabyVision VM-CAM2 – User Manual V 2 - 201210... -
Page 5: Ii. I Ntroduction
WIFI 802.11 b/g WEP / WPA / WPA2– UpnP –TCP/IP / HTTP Support téléphone 3G, 4G, 4G+ 1. V ISUELS Face Avant Objectif (CMOS 3.6mm) Microphone LED réseau informatique LED alimentation électrique ® © IBabyVision VM-CAM2 – User Manual V 2 - 201210... - Page 6 Face arrière Antenne WiFi LAN (10/100 Auto) Prise casque Alarme Externe Alimentation électrique (5V/2A) Bouton Reset Appuyer 15 seconde pour restaurer les paramètres usine (l’appareil doit être alimenté électriquement). ® © IBabyVision VM-CAM2 – User Manual V 2 - 201210...
- Page 7 , merci de paramétrer Internet Explorer comme suit : Aller dans le menu Outils, puis dans Options Internet : Dans l’onglet Sécurité, cliquer sur Intranet Local, puis sur Personnaliser le niveau. ® © IBabyVision VM-CAM2 – User Manual V 2 - 201210...
- Page 8 Activer les paramètres suivants : - Exécuter les contrôles ActiveX et Plug-ins - Télécharger les contrôles ActiveX non signés - Contrôles d’initialisation et de script ActiveX non marqués comme sécurisés. ® © IBabyVision VM-CAM2 – User Manual V 2 - 201210...
- Page 9 La sélectionner(2) et cliquer sur ‘Browse’(3) Le navigateur internet par défaut s’ouvre sur une fenêtre d’authentification : Utilisateurs par défaut (Attention à la majuscule, celle-ci est importante): Maman 123456 Papa 123456 ® © IBabyVision VM-CAM2 – User Manual V 2 - 201210...
- Page 10 Une fois le bon navigateur sélectionné, l’écran d’accueil s’affiche comme suit (voir page suivante). ® *Pour avoir accès à toutes les fonctions de la iBabyVision , il est recommandé d’utiliser internet explorer. ® © IBabyVision VM-CAM2 – User Manual V 2 - 201210...
- Page 11 L’écran d’accueil est divisé en 4 Zones : AMERAS ENUS Les disques pleins indiquent le Accès aux fonctions et nombre de caméras configurées paramètres de la ® iBabyVision détaillées ci-après. ® © IBabyVision VM-CAM2 – User Manual V 2 - 201210...
- Page 12 C. C ONTROLES Affichage de plusieurs caméras Vitesse : Réglage de la vitesse d’affichage Résolution : Sélection de la résolution – basse (320x240), ou haute (640x480) Mode : Fréquence de rafraichissement de l’image Brillant : Réglage de la brillance de l’image Contraste : Réglage du contraste ®...
- Page 13 (B) afin de commencer à remplir les champs. Entrer les identifiants et mot de passe. ® Cliquer sur appliquer. La nouvelle iBabyVision sera visible si l’affichage multi- caméra est sélectionné (I-1) ® © IBabyVision VM-CAM2 – User Manual V 2 - 201210...
- Page 14 Permet d’activer, et de sélectionner la couleur du menu à l’écran. Thu Aug 16 :24 :25 2012 iBabyVision Thu Aug 16 :24 :25 2012 EMPERATURE Permet de sélectionner l’unité de mesure de la température 22,1 C2 ® © IBabyVision VM-CAM2 – User Manual V 2 - 201210...
-
Page 15: M Elodie
180° ELODIE Le lancement ou l’arrêt se commande depuis l’écran Live ( I-1), en cliquant sur les icones : : Démarrage mélodie : Arrêt de la mélodie. ® © IBabyVision VM-CAM2 – User Manual V 2 - 201210... - Page 16 JOUT Permet d’ajouter la date et l’heure sur l’OSD Thu Aug 16 :24 :25 2012 ® © IBabyVision VM-CAM2 – User Manual V 2 - 201210...
- Page 17 Par défaut, l’option DHCP (attribution automatique) est activée. Le port est paramétrable, et l’adresse IP publique est fournie automatiquement. Si besoin, décocher la case DHCP pour faire apparaitre le menu de configuration manuelle : ® © IBabyVision VM-CAM2 – User Manual V 2 - 201210...
- Page 18 Sélectionner le vôtre, le type de cryptage sera automatiquement ajusté. Entrer votre mot de passe puis cliquer sur appliquer. Type WEP : Entrer le mot de passe ici Type WPA : Entrer le mot de passe ici ® © IBabyVision VM-CAM2 – User Manual V 2 - 201210...
- Page 19 Concernant le reste des paramètres, merci de vous rapprocher de votre prestataire de messagerie. Dans le cas probable où une authentification est nécessaire, cochez la case, et remplissez les champs adéquats. ® © IBabyVision VM-CAM2 – User Manual V 2 - 201210...
- Page 20 Exemples de configurations classiques : Gmail : Hotmail : Note : avant de cliquer sur ‘test’, cliquez sur ‘appliquer’, afin d’enregistrer les paramètres. ® © IBabyVision VM-CAM2 – User Manual V 2 - 201210...
- Page 21 ‘paramètres emails’. L’état d’alarme dure 60 secondes. Détection du Son : active l’alarme sur détection du son. Sensibilité de la détection : 1 sensibilité minimum 10 sensibilité maximum ® © IBabyVision VM-CAM2 – User Manual V 2 - 201210...
-
Page 22: P Arametres Rec
(https:) pour tous les sites de la zone’) Solution 2 : lancer Internet Explorer en mode administrateur : dans le menu démarrer, localiser l’icône internet explorer, faire un clic droit dessus et ‘Exécuter en mode administrateur’. ® © IBabyVision VM-CAM2 – User Manual V 2 - 201210... -
Page 23: Systemes
Si une alarme est configurée, le statut passera de « Aucune » à « Activée » Si MSN est configuré, le statut passera de « infructueux » à « Succès »’ ® © IBabyVision VM-CAM2 – User Manual V 2 - 201210... -
Page 24: Nom Du I Baby Vision
-‘Maman’ ou ‘Papa’* (mot de passe par défaut : 123456): peuvent accéder à toutes les fonctionnalités de l’appareil. -Les visiteurs : ont accès à la visualisation seulement. Ne peuvent paramétrer ou modifier les réglages de l’appareil. * : les administrateurs ® © IBabyVision VM-CAM2 – User Manual V 2 - 201210... -
Page 25: Pt Manager
Sauvegarde : Une fois la caméra configurée, vous pouvez cliquer sur appliquer, et ® vous pourrez sauver les paramètres de la iBabyVision sous un fichier bin. Restaurer : permet de sélectionner un fichier bin (voir ci-dessus) pour charger une configuration. ® © IBabyVision VM-CAM2 – User Manual V 2 - 201210... -
Page 26: Mise A Jour Camera
SINE Les paramètres par défaut sont chargés, tous les anciens paramètres sont effacés. L’action est équivalente au reset (pressez le bouton reset pendant 15 secondes). 10. R EDEMARRAGE AMERA ® © IBabyVision VM-CAM2 – User Manual V 2 - 201210... -
Page 27: Journal
11. J OURNAL La caméra tient à jour un journal des connexions et des alarmes. ® © IBabyVision VM-CAM2 – User Manual V 2 - 201210... -
Page 28: Caracteristiques Echniques
2.0GHZ ou plus Mémoire Vive 256MB ou plus Carte vidéo 64M ou plus OS supports Microsoft Windows XP/Vista/7 Navigateurs Internet IE6.0 et sup., Firefox, Safari, Google, chrome,… Certification CE, FCC, RoHS ® © IBabyVision VM-CAM2 – User Manual V 2 - 201210... - Page 29 ULTIFUNCTIONS ONITOR VM-CAM2 ODÈLE ® © IBabyVision VM-CAM2 – User Manual V 2 - 201210 EAD CAREFULLY BEFORE USE...
- Page 30 3. UP ……………………………………… 47 ERVICES 1. E ……………………………………… 47 MAIL ARAMETERS 2. A ……………………………………… 49 LARM ARAMETERS 3. REC S ……………………………………… 50 ETTING 4. MSN S ……………………………………… 51 ETUP ® © IBabyVision VM-CAM2 – User Manual V 2 - 201210...
- Page 31 S REACH ." HE MANUFACTURER CANNOT BE HELD LEGALLY RESPONSIBLE FOR NEGLIGENCE THE MANUFACTURER RESERVED THE RIGHT TO MODIFY WITHOUT ANY PRELIMINARY NOTICE THE TECHNICAL CHARACTERISTICS OF THE PRODUCT ® © IBabyVision VM-CAM2 – User Manual V 2 - 201210...
-
Page 32: Safety Instruction
Do not provide your own maintenance on this unit. In case of problems, contact your retailer. ® Do not use iBabyVision near water. ® Do not install iBabyVision near a heat source. * : Please respect these instructions ® © IBabyVision VM-CAM2 – User Manual V 2 - 201210... -
Page 33: Introduction
WIFI 802.11 b/g WEP / WPA / WPA2– UpnP –TCP/IP / HTTP Phone support 3G, 4G, 4G+ 1. V ISUALS Front view Lense (CMOS 3.6mm) Microphone LED LAN LED Power ® © IBabyVision VM-CAM2 – User Manual V 2 - 201210... - Page 34 Rear View WiFi Antenna LAN (10/100 Auto) Headphone External Alarm Electric Power (5V/2A) Reset Button Reset: press of 15 s. causes a reset to factory settings(power must be connected. ® © IBabyVision VM-CAM2 – User Manual V 2 - 201210...
-
Page 35: Internet Explorer Setup
NTERNET XPLORER To get the full functionality of the camera, thank you to configure Internet Explorer as follow: Select Tools/Internet Options: Security Tab / Local Intranet / Custom Level ® © IBabyVision VM-CAM2 – User Manual V 2 - 201210... - Page 36 Enable the following settings: -Run ActiveX controls and plug-ins -Download unsigned ActiveX controls -Controls Initialize and script ActiveX controls not marked as safe. ® © IBabyVision VM-CAM2 – User Manual V 2 - 201210...
- Page 37 ‘Browse’(3) Internet browser open on authentification pop-up Default users (be careful with the capital letter, this one is important): Maman 123456 Papa 123456 ® © IBabyVision VM-CAM2 – User Manual V 2 - 201210...
- Page 38 You have to choose the web browser. To have the better experience, and acces to all iBabyVision© functions, please use Internet Explorer : Once web browser is selected, the welcome page is displayed : ® © IBabyVision VM-CAM2 – User Manual V 2 - 201210...
-
Page 39: Video
III. IDEO The home screen is divided into 4 zones: AMERAS ENUS The full circle indicates the number Access to functions and settings of configured cameras iBabyVision©, detailed below. ® © IBabyVision VM-CAM2 – User Manual V 2 - 201210... - Page 40 C. C ONTRÔLS Display of several cameras Adjust the display speed Adjust of the resolution – low (320x240), or high (640x480) Brillant : adjust video brightess Contrast : adjust video ® Orientation of the l’iBabyVision head. Patrol mode vertical / off / horizontal Starting and stopping the melody D.
-
Page 41: Multicamera
Double click on the camera selected in the list 'iBabyVision© detected ' (B) to start filling the fields. Enter the appropriate username and password Then click on Apply. The new camera will be visible if the multi-camera display is selected (I-1) ® © IBabyVision VM-CAM2 – User Manual V 2 - 201210... -
Page 42: Osd
Allow to activate and choose the color of the menu on the screen. Thu Aug 16 :24 :25 2012 iBabyVision Thu Aug 16 :24 :25 2012 EMPERATURE Allow to enable the temperature unit measure 22,1 C2 ® © IBabyVision VM-CAM2 – User Manual V 2 - 201210... -
Page 43: Ceiling Mode
180 ° rotation ° ELODY The start up or termination is controlled from the Live screen (I-1), by clicking on the icons: : Start melody : Stop melody. ® © IBabyVision VM-CAM2 – User Manual V 2 - 201210... -
Page 44: Add Date
Allow to add dates and time on the screen display Thu Aug 16 :24 :25 2012 ® © IBabyVision VM-CAM2 – User Manual V 2 - 201210... -
Page 45: Lan Setup
By default, DHCP (automatic) is activated. The port is configurable, and the public IP address is automatically provided If necessary, uncheck DHCP to bring up the menu for manual configuration: ® © IBabyVision VM-CAM2 – User Manual V 2 - 201210... -
Page 46: Wifi Setup
Click on search button, the iBabyVision© will detect all WiFi networks around Select yours, the type of encryption will be automatically adjusted. Enter your password and click apply. WEP : Enter password here WPA : Enter password here ® © IBabyVision VM-CAM2 – User Manual V 2 - 201210... -
Page 47: Upnp
In cases where authentication is required, click the box in the menu, and fill the appropriate fields. Please, example, Hotmail Gmail typical setup. ® © IBabyVision VM-CAM2 – User Manual V 2 - 201210... - Page 48 Configurations examples: Gmail : Hotmail : Note: before you click 'test', click 'apply' in order to save the settings ® © IBabyVision VM-CAM2 – User Manual V 2 - 201210...
-
Page 49: Alarm Parameters
Send mail on alarm: sends an email, configured in the previous menu 'email settings' Upload image on alarm: sends a burst of six pictures on the mail configured in the previous menu 'email settings'. The alarm state lasts for 60 seconds. ® © IBabyVision VM-CAM2 – User Manual V 2 - 201210... -
Page 50: Rec Setting
Solution 2: Launch Internet Explorer in admin mode: in the Start menu, locate the Internet Explorer icon, right click on it and 'Run as an administrator' ® © IBabyVision VM-CAM2 – User Manual V 2 - 201210... -
Page 51: Msn Setup
YSTEM 1. S TATUS Displays the camera information and status. If an alarm is set, the Status Enabled is displayed, if Alarm is unset, then Status NONE is displayed. ® © IBabyVision VM-CAM2 – User Manual V 2 - 201210... -
Page 52: I Baby Vision ® Name
4. U SERS The iBaby vision can potentially be linked to 4 different users. There are two types of users: “Maman & Papa” (password 123456 for both) : have access to all functions Visitors have access to viewing only. -
Page 53: Pt Manager
Backup: Once the camera is configured, you can click apply, and you can save the settings of the camera in a bin file. Restore: Select a bin file (see above) to load a configuration. ® © IBabyVision VM-CAM2 – User Manual V 2 - 201210... -
Page 54: Update Camera
Do not unplug the device during the update 9. F ACTORY ETTINGS All customs set up will be canceled. Same action is to press reset button for 15 seconds 10. R EBOOT AMERA ® © IBabyVision VM-CAM2 – User Manual V 2 - 201210... -
Page 55: Access Log
11. L Access log of the camera. ® © IBabyVision VM-CAM2 – User Manual V 2 - 201210... -
Page 56: Features
2.0GHZ or higher 256MB or more Video card 64M or more OS supports Microsoft Windows XP/Vista/7 Internet browser IE6.0 et sup., Firefox, Safari, Google, chrome,… Certifications CE, FCC, RoHS ® © IBabyVision VM-CAM2 – User Manual V 2 - 201210... -
Page 57: Garantie
This guarantee is the only valid one at Visiomed, any other guarantee (commercial guarantee) except this one will not be taken into account. IMPORTANT: During the guarantee period if you are dissatisfied with the repairs of this product, please contact the Visiomed customer service ® © IBabyVision VM-CAM2 – User Manual V 2 - 201210... - Page 58 Caution: The user is cautioned that changes or modifications not expressly approved by the party responsible for compliance could void the user's authority to operate the equipment. Note: This equipment has been tested and found to comply with the limits for a Class B digital device, pursuant to part 15 of the FCC Rules.
- Page 59 ® La caméra iBabyVision Monitor est un modèle breveté et déposé. ® The camera iBabyVision Monitor is a registered model. ® © IBabyVision VM-CAM2 – User Manual V 2 - 201210...
- Page 60 Tel : 0892 350 334 Fax : +33 1 44 17 93 10 Email : contact@visiomed-lab.com © 2012 VISIOMED GROUP - Tous droits réservés - Reproduction interdite Made in China ® © IBabyVision VM-CAM2 – User Manual V 2 - 201210...
Need help?
Do you have a question about the VM-CAM2 and is the answer not in the manual?
Questions and answers