Table of Contents
Advertisement
Quick Links
Advertisement
Table of Contents

Related Manuals for Edimax EW-7733UnD


Summary of Contents for Edimax EW-7733UnD
- Page 2 Copyright by Edimax Technology Co, LTD. all rights reserved. No part of this publication may be reproduced, transmitted, transcribed, stored in a retrieval system, or translated into any language or computer language, in any form or by any means, electronic, mechanical, magnetic, optical, chemical, manual or otherwise, without the prior written permission of this company.
-
Page 3: Table Of Contents
CHAPTER II: Driver Installation and Configuration ......8 2-1 Network Card Installation ....................8 2-2 Connect to Wireless Access Point ................. 15 2-2-1 Using Edimax Utility ....................16 2-3 Connection Profile Management ..................21 2-3-1 Add a new entry..................... 21 2-3-2 Remove an existing profile .................. -
Page 4: Chapter I: Product Information
Chapter I: Product Information 1-1 Introduction and safety information Thank you for purchasing this high-speed wireless dual band network card! This network card can operate in 2.4GHz or 5GHz wireless network. Excepting common wireless standards 802.11a/b/g, this wireless network card is also able to access 802.11n wireless networks - data transfer rate is 450Mbps, and that’s six times faster than 802.11g wireless network! With easy-to-install USB 2.0 interface - a very common expansion port of computers - plug... -
Page 5: Safety Information
1-2 Safety Information In order to keep the safety of users and your properties, please follow the following safety instructions: 1. This USB wireless network card is designed for indoor use only. DO NOT expose this network card to direct sun light, rain, or snow. 2. -
Page 6: System Requirements
1-3 System Requirements One CD-ROM drive Hard Disk : At least 100MB available space One available USB 2.0 port (May not work on USB 1.1 port, and performance will be greatly reduced) Operation System : Windows XP/Vista/7 1-4 Package Contents ... -
Page 7: Familiar With Your New Wireless Network Card
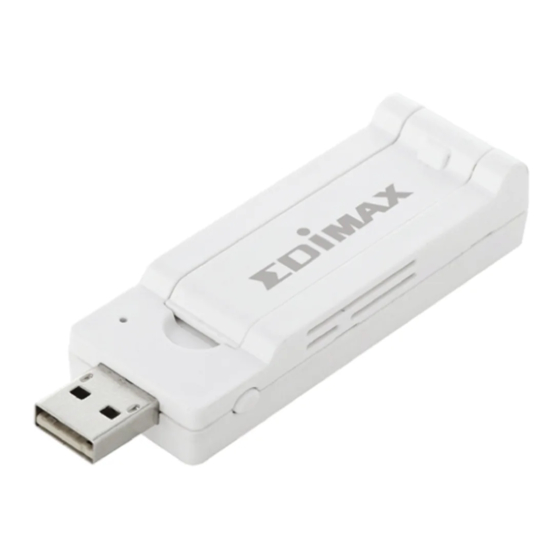
1-5 Familiar with your new wireless network card 1. USB Connector 2. Flippable Antenna 3. Link/Activity LED 4. WPS Button (Press to activate WPS pairing mode) LED Name Light Description Status Link/ Blinking Linked to a wireless access point / Activity Transferring data Power off... -
Page 8: Chapter Ii: Driver Installation And Configuration
CHAPTER II: Driver Installation and Configuration 2-1 Network Card Installation Please follow the following instructions to install your new wireless network card: 1. Insert the USB wireless network card into an empty USB 2.0 port of your computer when computer is switched on. Never use force to insert the card, if you feel it’s stuck, flip the card over and try again. - Page 9 2. The following message will appear on your computer, click ‘Cancel / Close’. Under Windows XP Under Windows Vista...
- Page 10 3. Software Installation, This wizard can be run in Windows XP/Vista/7. The following procedures are operated in Windows XP. You can install the Wireless Adapter by EZMAX Setup Wizard in the CD-ROM including in the package. The wizard is an easy and quick configuration tool for internet connection with series process.
- Page 11 If you lose the CD ROM or you prefer the traditional setup procedure, please follow the instruction as following step. 1. Execute ‘Setup.exe’ program inside the CD then the programs will appear. Please read the end user license agreement and click ‘I accept the terms of the license agreement’ then click ‘Next’...
- Page 12 3. You can choose the configuration tool used to configure the wireless network card here. It’s recommended to select ‘Edimax Configuration Tool’, which provides fully access to all functions of this wireless network card. If you prefer to use the wireless configuration tool provided by Windows XP or Vista, please select ‘Microsoft Zero Configuration Tool’...
- Page 13 5. Please wait while the install procedure is running. When you see this message, please click ‘Finish’ to complete the driver installation process. 6. After installation is complete, wireless configuration utility will be shown in the desktop of your computer automatically. You will also see an icon at the lower-right corner of your windows system.
- Page 14 8. Please note that if you stopped config utility by ‘Exit’ function, you’ll not be able to maintain the wireless link to the access point you wish to use. In this case, you can start config utility again by clicking ‘Edimax Wireless Utility’ icon from ‘Start’ -> ‘All Programs’ -> ‘Edimax Wireless’, as shown below.
-
Page 15: Connect To Wireless Access Point
The current status of wireless connection will be displayed by Edimax configuration utility icon: Wireless connection is established, good signal reception. -
Page 16: Using Edimax Utility
2-2-1 Using Edimax Utility Please follow the following instructions to use Ralink configuration utility to connect to wireless access point. 1. Left-click the Ralink configuration utility icon located at lower-right corner of computer desktop, and configuration menu will appear: HERE! 2. - Page 17 There are 6 fields in ‘Site Survey’ list: Field# Description 1 (SSID) The Service-Set IDentifier of network device (The name of network device) 2 (Type) The type of network device Infrastructure (Access Point) Ad-Hoc 3 (Channel) The channel number of this network device Available wireless mode.
- Page 18 5 (Security) Security mode. When nothing is displayed here, means this network device does not require security and anyone can connect to it. Shows the wireless signal strength in (Signal percentage. Higher percentage means better Strength) signal quality. 3. To connect to a wireless access point, double click on it: 4.
- Page 19 6. Please input encryption key (or passphrase, depends on encryption method) here, then click right arrow. 7. Network card will attempt to connect to access point now, this may require few seconds to minutes, please be patient. When you see there’s a check shown beside the access point you wish to connect, your computer is connected to access point you selected.
- Page 20 Windows will prompt you for establish connection also:...
-
Page 21: Connection Profile Management
2-3 Connection Profile Management For connections you’ll frequently use, you can save them as a profile and you can recall all settings (security type, password, etc.) back soon. 2-3-1 Add a new entry By this function you can setup the connection parameters for a specific wireless access point in advance, so you can recall a set of connection parameters quickly. - Page 22 2. Please name the profile in ‘Profile Name’ field, and select the AP you wish to connect in ‘SSID’ dropdown list, then click right arrow If you’re connecting to a network device using AD-HOC connection method, select ‘Ad Hoc - Connect to other computers’ first.
- Page 23 3. Select this AP’s authentication and encryption method from dropdown list, then click right arrow 4. Input passphrase key here (or WEP key, if required), then click right arrow 5. Check this box if you wish to enable pre-logon connection. When this feature is enabled, wireless network connection will be established before you logon Windows so you can authenticate yourself against network server.
- Page 24 You can repeat step 2 to 6 to setup more profiles of wireless connection. When you wish to connect to a certain wireless access point, click ‘Active’ button (as indicated above). A check mark will be displayed beside active profile.
-
Page 25: Remove An Existing Profile
2-3-2 Remove an existing profile When you no longer need an existing profile, just select it from the list and click ‘Delete’ button. If the profile you wish to delete is active now, you’ll be prompted to confirm deletion: To delete anyway, click ‘OK’; to cancel, click mark. -
Page 26: Edit An Existing Profile
2-3-3 Edit an existing profile If you have added a profile before, and you wish to change the content of the profile, you can use this function. Please select a profile from the list first, then click ‘Edit’ button. You’ll be provided with the contents of selected profile; you can edit them and save changes. -
Page 27: Import / Export Profile
2-3-4 Import / Export profile If you need to move your wireless settings to another computer, or you just want to make a backup, you can use import / export function to make a copy, or restore current profile. To backup a profile, click ‘Export’ You’ll be prompted to select a place to save profile setting file. - Page 28 To recall previously-saved profiles, click ‘Import’ Select a profile (file with .prof extension), and click ‘Open’ Please note that this will overwrite any existing profile(s).
-
Page 29: Wps Profile Setup
2-3-5 WPS Profile Setup WPS (Wi-Fi Protected Setup) is a new, convenient way to setup secured wireless connections. You only need to push a button or input a set of 8-digit random number, and you can setup a secure connection between wireless devices, like what a professional wireless expert can do. - Page 30 You’ll be prompted to select WPS method and WPS AP: To use PIN (8-digit or 4-digit random number) to setup WPS, select ‘PIN / numeric code’, and you have to select an AP from ‘WPS AP List’ dropdown menu; to establish connection by Push-Button Configuration (PBC), you don’t have to select an AP from ‘WPS AP List’...
-
Page 31: Pbc Mode Wps Configuration
2-3-5-1 PBC mode WPS configuration When you want to use ‘PBC’ mode: Click ‘Start PBC’ button: Now, please push the WPS button on the access point (a physical button or a software button in its configuration menu - please refer to access point’s user manual) within 2 minutes. -
Page 32: Pin Mode Wps Configuration
2-3-5-2 PIN mode WPS configuration There are two roles in PIN mode WPS configuration: registrar and enrollee. Registrar is the one who waits for incoming WPS request, and enrollee is the one who searches for WPS registrar and will attempt to connect it. The WPS role of two devices should not be same: When one device is registrar, the other one must be enrollee, and vice versa. - Page 33 Click ‘StartPIN’ to begin WPS connection, please be patient. You’ll be prompted when WPS connection is established successfully; if you received an error, you can try again, but please remember to make sure the PIN you obtained from access point is still valid.
-
Page 34: View Link Status
2-4 View Link Status You can check the status of active wireless connection by clicking ‘Link Information’ button: A new window will appear: There are 3 kinds of link information: a. Link status Displays the status of active connection. - Page 35 b. Throughput Displays the throughput of active connection. c. Statistics Displays the statistics of active connection. Select ‘Transmit’ or ‘Receive’ to switch displaying statistics of transmitted and received data packets. To reset counters, click...
-
Page 37: Advanced Settings
2-5 Advanced Settings Click ‘Advanced’ button to show advanced configuration menu. In this menu, you can configure some advanced wireless settings. Normally you don’t need to change these settings to establish wireless connection. Only change these settings when you know what you’re doing and you really need these changes. -
Page 38: Chapter Iii: Soft-Ap Function
CHAPTER III: Soft-AP Function Excepting become a wireless client of other wireless access points, this wireless card can act as a wireless service provider also! You can switch this wireless card’s operating mode to ‘AP’ mode to simulate the function of a real wireless access point by software, and all other computers and wireless devices can connect to your computer wirelessly, even share the internet connection you have! -
Page 39: Configure Ap
To launch AP manager, right-click configuration utility’s icon, and select ‘Launch Config Utilities’. The soft-AP configuration utility will appear, along with the status of software 3-2 Configure AP To use software AP, you need to configure it first to accept incoming wireless connections. - Page 40 Input SSID in ‘SSID’ field. If you wish to hide SSID so only clients who know your actual SSID can get connected, check ‘Hide SSID’ box. You can also change wireless operating mode by ‘Wireless Mode’ dropdown menu. When you finish, click right arrow In this page, you can select the country region of this software AP.
- Page 41 When you finish, click right arrow In this page, you have to select the authentication and encryption method of this software AP. Available ‘Authentication’ options are: Open: No security. Anyone who found this AP can get connected. Shared: Use shared key authentication (WEP). WPA-PSK: Use WPA-PSK authentication.
- Page 42 In this page, you can configure WEP / WPA passphrase (password). For WEP: Select default Tx Key (normally you can just use Key 1), Key Format (Hex characters or ASCII characters), and input WEP key. If you select Hex key format, input 10 or 26 characters (number 0-9 and alphabets A-F);...
-
Page 43: Advanced Functionality
Input WPA-PSK / WPA2-PSK key here. If you wish to change group rekey time interval, you can change it, but normally you don’t need to change it and software AP will still work fine. WPA-PSK / WPA2-PSK key must be 8 to 63 ASCII characters or 64 Hex characters. -
Page 44: Access Control
No forwarding among wireless clients: Check this box and every wireless clients will not be able to communicate with each other. Beacon Interval (ms): Change wireless radio beacon time interval in milliseconds. Normally you don’t have to change this setting. TX Power: Change the wireless radio output power here. - Page 45 Access control list will appear: First you have to select access control policy: Disable: No access controlling Allow All: Only allow clients in the list to establish connection (white list). Reject All: Rejects all clients in the list to establish connection (black list). Then you have to input the 12-character MAC address in ‘MAC Address’...
-
Page 46: Associate List
3-5 Associate List You can see the list of all wireless clients that connected to this software AP. Click ‘Connected Devices’ button to show the list. -
Page 47: About
3-6 About Click this button to see the version information of software AP configuration utility. -
Page 48: Chapter Iv: Appendix
CHAPTER IV: Appendix 4-1 Hardware Specification Standards: IEEE 802.11a/b/g/n Interface: USB 2.0 (USB 1.1 Compatible) Frequency Band: 2.4000 ~ 2.4835GHz (Industrial Scientific Medical Band) 5.1500 ~ 5.8250GHz (subject to local regulations) Data Rate: 11b: 1/2/5.5/11Mbps 11g: 6/9/12/24/36/48/54Mbps 11n (20MHz): MCS0-23 (up to 216Mbps) 11n (40MHz): MCS0-23 (up to 450Mbps) ... -
Page 49: Troubleshooting
4-2 Troubleshooting If you encounter any problem when you’re using this wireless network card, don’t panic! Before you call your dealer of purchase for help, please check this troubleshooting table, the solution of your problem could be very simple, and you can solve the problem by yourself! Scenario Solution... - Page 50 ‘SSID’ field in ‘Site Survey’ function), you point have to input correct SSID of the access point you wish to connect. Please contact the owner of access point to ask for correct SSID. 3. You have to input correct passphrase / security key to connect an access point with encryption.
-
Page 51: Glossary
4-3 Glossary 1. What is the IEEE 802.11g standard? 802.11g is the new IEEE standard for high-speed wireless LAN communications that provides for up to 54 Mbps data rate in the 2.4 GHz band. 802.11g is quickly becoming the next mainstream wireless LAN technology for the home, office and public networks. - Page 52 5. What is Infrastructure? An integrated wireless and wireless and wired LAN is called an Infrastructure configuration. Infrastructure is applicable to enterprise scale for wireless access to central database, or wireless application for mobile workers. 6. What is BSS ID? A specific Ad hoc LAN is called a Basic Service Set (BSS).
- Page 53 generates a redundant bit pattern for each bit to be transmitted. This bit pattern is called a chip (or chipping code). The longer the chip is, the greater the probability that the original data can be recovered. Even if one or more bits in the chip are damaged during transmission, statistical techniques embedded in the radio can recover the original data without-the need for retransmission.
-
Page 54: Federal Communication Commission
Federal Communication Commission Interference Statement This equipment has been tested and found to comply with the limits for a Class B digital device, pursuant to Part 15 of FCC Rules. These limits are designed to provide reasonable protection against harmful interference in a residential installation. This equipment generates, uses, and can radiate radio frequency energy and, if not installed and used in accordance with the instructions, may cause harmful interference to radio communications. - Page 55 Slovenia, the Netherlands, Portugal, Spain, Sweden, and the United Kingdom. The ETSI version of this device is also authorized for use in EFTA member states: Iceland, Liechtenstein, Norway, and Switzerland. EU Countries not intended for use None Please check the declaration of conformity on www.edimax.com...
Need help?
Do you have a question about the EW-7733UnD and is the answer not in the manual?
Questions and answers