Advertisement
Quick Links
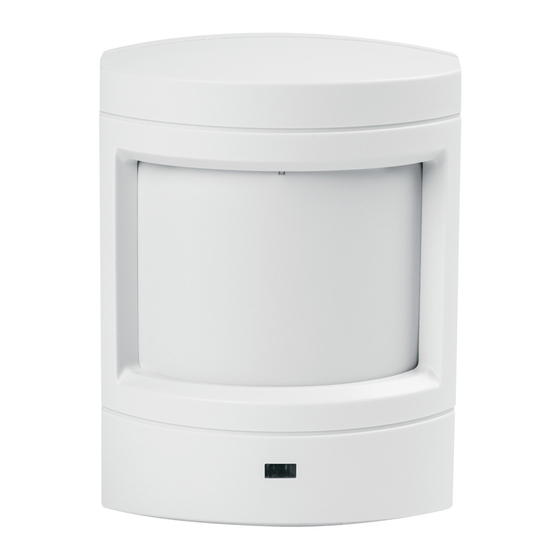
DS924iPET (ITI # 60-511-02-95)
Learn Mode (LM) Wireless PIR Motion Sensor
Installation Instructions
1.0 Overview
The DS924iPET is a Passive Infrared (PIR) Motion Sensor designed to
detect movement in the interior of a structure by sensing the Infrared
energy emitted from the human body as it moves across the Sensor's field
of view. When motion is detected the unit sends an alarm signal to the
Control Panel. The DS924iPET is a high performance PIR Motion Sensor
which uses advanced signal processing to provide outstanding catch
performance and unsurpassed false alarm immunity. The DS924iPET is
designed to ignore a dog up to 40 pounds, two cats and small rodents.
2.0 Specifications
General
• Power is supplied by 3.6 VDC Lithium Battery. Saft LS14250
(0.85 AH, 1/2AA battery).
• Typical current draw is 12 micro-amps with LED disabled.
• Typical battery life is 5 years.
• Operating temperature range of +32°F to +120°F (0°C to +49°C).
PIR Motion Sensor
• Coverage area 35 ft. by 35 ft.
• Internal coverage pointability +2° to -10° Vertical and ±10° Horizontal.
• Field selectable sensitivity options of Standard, Intermediate, or High.
• Three minute transmitter lockout time after alarm extends battery life.
• Timed Walk Test Mode automatically disables LED after setup to extend
battery life.
• Cover activated Tamper indication. Optional wall activated Tamper is
included.
RF Transmitter
• Integral RF transmitter capable of transmitting at least 500 feet open air.
(Actual acceptable transmitter range should be verified for each
installation).
• Transmits low battery report (trouble) to the Control Panel.
• Transmits supervisory signal to the Control Panel every 64 minutes.
• Intended for use with listed compatible ITI Learn Mode control panels.
3.0 Installation Guidelines
Do
• Keep all sensors within 100 feet of the Control Panel. The 100 foot
distance recommendation is given as a starting guideline. The LM PIR
Transmitter has an open air range of at least 500 feet, but the installation
environment may influence this range.
• Mount the sensor so there is a reference point (such as a wall) at the
end of its detection pattern.
• Mount the sensor so that an intruder will most likely walk across the
detection pattern.
• Mount the sensor 6.5 feet above the floor.
• Mount on an insulated outside wall facing in.
• Mount on a surface which is rigid and free from vibration.
Don't
• Mount in direct sunlight.
• Aim at air conditioners, heat vents, wood stoves, fireplaces, intermittent
heat sources, etc.
• Aim at solar heated walls or uninsulated metal walls.
• Aim at normally moving objects (ceiling fans, pets over 40 pounds, etc.).
• Mount the sensor where it can be exposed to moisture.
• Mount in locations where the temperature may be outside the sensor's
operating limits of +32°F to +120°F (0°C to +49°C).
• Mount in areas with large metallic surfaces (e.g. heating ducts) or electrical
wiring which may inhibit the sensor's RF signals from reaching the
Control Panel.
• Mount in areas where the coverage may be blocked by any temporary
items such as boxes or freight.
AVOID
Hot or cold air
directed onto
sensor
4.0 Mounting Procedure
4.1
Surface or Corner Mounting
For Pet Applications, surface or corner mount the
detector. Do not use the optional swivel bracket.
IMPORTANT
Don't
point
at
stairs
6.5 Ft
(2 M)
Mount the detector 6 1/2 feet
(2 meters) above the floor
• Remove the sensor's cover by gently inserting a screwdriver into the
notch at the bottom of the cover.
• Completely loosen the mounting
base locking screw.
• Remove the mounting plate from
the enclosure by prying it up
and out from the bottom.
• Punch out 2 appropriate holes
in the mounting plate (for
surface or corner applications).
Note: The wall tamper cannot
be used when corner
mounting.
• If the wall tamper function is
required,
remove
the
rectangular knockout. Locate the small spring in the hardware kit. Hold
the PIR base so the battery is visible. Place the spring on the black plastic
shaft of the wall tamper switch just below the battery.
• Remove the wall tamper bypass jumper located next to the walk test
switch.
• Using the mounting plate as a template, mark the location of the required
holes on the mounting surface.
• For installation on drywall or plaster, drill a 1/8" pilot hole to determine if a
wall anchor is required.
• Secure the mounting plate to the wall with the #6 x 1" wood screws
provided.
HINGE
CORNER
SURFACE
SURFACE
CORNER
CORNER
KNOCKOUT
FOR
WALL TAMPER
TAB
MOUNTING
Direct or
reflected
sunlight
Figure 1
Don't
point
where
pets
can
climb
NO
NO
Figure 2
COVER
HINGES
10 5 0 5 10
LENS
WALK TEST LED
0
S
4
I
H
8
WALK TEST
TEST
SWITCH
WALL TAMPER
BYPASS
TAMPER
JUMPER
SWITCH
MOUNTING BASE
COVER
LOCKING
LATCH
SCREW
FRONT VIEW OF ENCLOSURE WITH COVER OFF
Figure 3
FLUSH
CORNER
MOUNT
MOUNT
Figure 4
LENS
FRAME
SENSITIVITY PINS
VERTICAL ADJUST
SCREW
Advertisement

Related Manuals for Bosch DS924iPET


Summary of Contents for Bosch DS924iPET
-
Page 1: Installation Instructions
Learn Mode (LM) Wireless PIR Motion Sensor Installation Instructions 1.0 Overview Hot or cold air Direct or The DS924iPET is a Passive Infrared (PIR) Motion Sensor designed to directed onto reflected sensor detect movement in the interior of a structure by sensing the Infrared sunlight energy emitted from the human body as it moves across the Sensor’s field... - Page 2 90 seconds, the LED will North Saint Paul, MN 55109 flash to indicate that the Walk Test mode is ending. 1-800-777-1415 © 2009 Bosch Security Systems, Inc. 06/09 130 Perinton Parkway, Fairport, New York, USA 14450-9199 DS924iPET Installation Instructions...
Need help?
Do you have a question about the DS924iPET and is the answer not in the manual?
Questions and answers