Advertisement
Table of Contents
- 1 Installation Requirements
- 2 Location Requirements
- 3 Tools and Parts
- 4 Product Dimensions
- 5 Venting Requirements
- 6 Electrical Requirements
- 7 Installation Instructions
- 8 Prepare Location
- 9 Install Range Hood
- 10 Connect Vent System
- 11 Make Electrical Connection
- 12 Install Vent Covers
- 13 Complete Installation
- 14 Range Hood Use
- 15 Range Hood Controls
- Download this manual
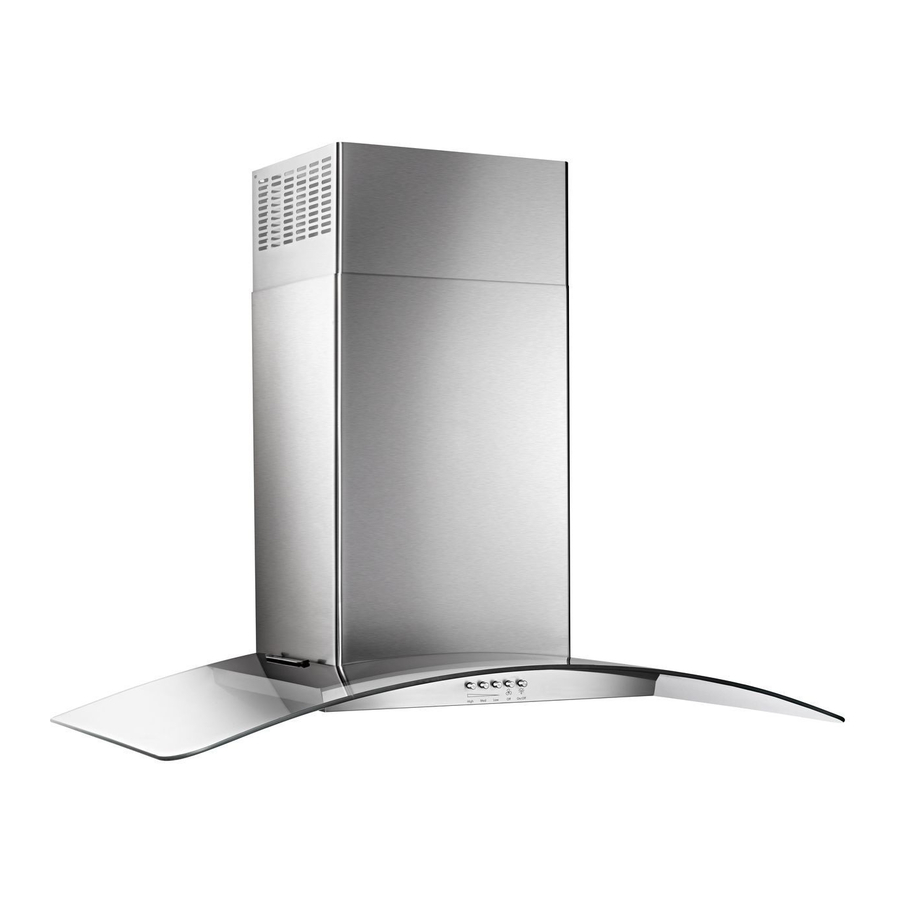
30" AND 36" (76.2 AND 91.4 CM)
WALL‑MOUNT CANOPY RANGE HOOD
Installation Instructions and Use and Care Guide
For questions about features, operation/performance, parts, accessories or service, call: 1-800-253-1301
or visit our website at www.whirlpool.com
In Canada, call 1-800-807-6777 or visit our website at www.whirlpool.ca
HOTTE DE CUISINIÈRE À MONTAGE MURAL
DE 30" ET 36" (76,2 ET 91,4 CM)
Instructions d'installation et Guide d'utilisation et d'entretien
Au Canada, pour assistance, installation ou service, composer le 1-800-807-6777
ou visiter notre site Web à www.whirlpool.ca
Table of Contents/Table des matières ..................................... 2
IMPORTANT: READ AND SAVE THESE INSTRUCTIONS.
FOR RESIDENTIAL USE ONLY.
IMPORTANT : LIRE ET CONSERVER CES INSTRUCTIONS.
POUR UTILISATION RÉSIDENTIELLE UNIQUEMENT.
LIB0115584C/W11134241C
Advertisement
Table of Contents

Related Manuals for Whirlpool WVW51UC6FS


Summary of Contents for Whirlpool WVW51UC6FS
- Page 1 For questions about features, operation/performance, parts, accessories or service, call: 1-800-253-1301 or visit our website at www.whirlpool.com In Canada, call 1-800-807-6777 or visit our website at www.whirlpool.ca HOTTE DE CUISINIÈRE À MONTAGE MURAL DE 30" ET 36" (76,2 ET 91,4 CM) Instructions d’installation et Guide d’utilisation et d’entretien...
-
Page 2: Installation Requirements
INSTALLATION REQUIREMENTS Tools and Parts Location Requirements IMPORTANT: Observe all governing codes and ordinances. Gather the required tools and parts before starting installation. Read and follow the instructions provided Have a qualified technician install the range hood. It is the with any tools listed here. -
Page 3: Venting Requirements
The chimneys can be adjusted for different ceiling heights. See the following chart. Vented Installations Min. ceiling height Max. ceiling height **27¹⁄₈" (68.9 cm) min. **41¹⁄₈" (104.5 cm) max. Electric cooking 7' 4" (2.23 m) 9' 5" (2.87 m) *27¹⁄₈" (68.9 cm) min. surface *45¹⁄₂"... -
Page 4: Electrical Requirements
Makeup Air Example Vent System Local building codes may require the use of makeup air systems Wall cap 90 Elbow 6 ft (1.8 m) when using ventilation systems greater than specified CFM of air movement. The specified CFM varies from locale to locale. Consult your HVAC professional for specific requirements in your area. -
Page 5: Installation Instructions
INSTALLATION INSTRUCTIONS Prepare Location 4. Mark centers of the fastener locations through the template It is recommended that the vent system be installed ■ before hood is installed. to the wall. IMPORTANT: All canopy mounting screws must be installed Before making cutouts, make sure there is proper ■... -
Page 6: Install Range Hood
For non-vented (recirculating) installation only: Install Range Hood 1. Assemble the air deflector with the duct cover bracket using (4) 4.2 x 8 mm screws. NOTE: Remove protective film from range hood and metal filters. 1. Using two or more people, hang range hood on two mounting screws through the mounting slots on back of hood. -
Page 7: Make Electrical Connection
6. Use UL Listed wire connectors and connect Make Electrical Connection white wires (C) together. WARNING WARNING Electrical Shock Hazard Electrical Shock Hazard Electrically ground blower. Disconnect power before servicing. Connect ground wire to green and yellow ground wire Replace all parts and panels before operating. in terminal box. -
Page 8: Complete Installation
2. Secure the bottom of the duct with (2) 4.2 x 8 mm screws. Complete Installation 1. For non-vented (recirculating) installations only, install charcoal filters over metal grease filter. See the “Range Hood Care” section. 2. Install metal filters. See the “Range Hood Care” section. 3.