Table of Contents
Advertisement
Quick Links
OPERATOR'S MANUAL
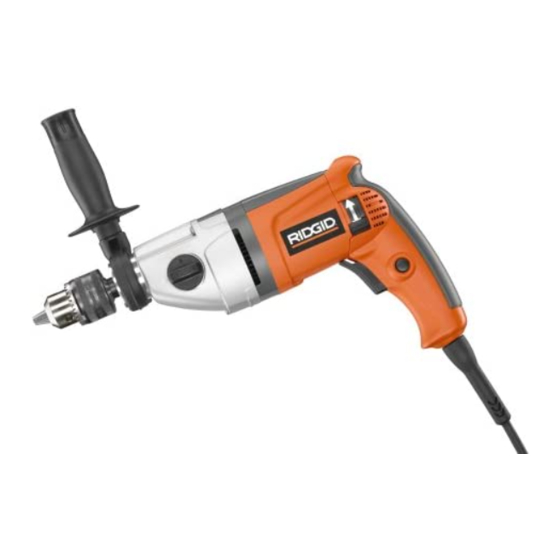
1/2 in. (13 mm) Drill
R7100
Two Speed/Reversible
Double Insulated
This new two speed drill has been engineered and manufactured to our high standard for dependability, ease of operation
and operator safety. When properly cared for, the drill will give you years of rugged, trouble-free performance.
WARNING
To reduce the risk of injury, the user must read and understand the operator's manual before using this product.
Thank you for buying a RIDGID product.
1
®
Advertisement
Table of Contents

Subscribe to Our Youtube Channel
Summary of Contents for RIDGID R7100
- Page 1 Two Speed/Reversible Double Insulated This new two speed drill has been engineered and manufactured to our high standard for dependability, ease of operation and operator safety. When properly cared for, the drill will give you years of rugged, trouble-free performance.
-
Page 2: Table Of Contents
INTRODUCTION Your two speed drill has many features for making the use of this product more pleasant and enjoyable. Safety, performance, and dependability have been given top priority in the design of this product making it easy to maintain and operate. -
Page 3: General Safety Rules
GENERAL SAFETY RULES WARNING: Read and understand all instructions. Failure to fol- low all instructions listed below, may result in elec- tric shock, fire and/or serious personal injury. SAVE THESE INSTRUCTIONS Work Area ■ Keep your work area clean and well lit. Cluttered benches and dark areas invite accidents. -
Page 4: General Safety Rules
GENERAL SAFETY RULES Service ■ Tool service must be performed only by qualified re- pair personnel. Service or maintenance performed by unqualified personnel could result in a risk of injury. SPECIFIC SAFETY RULES ■ Hold tool by insulated gripping surfaces when performing an operation where the cutting tool may contact hidden wiring or its cord. -
Page 5: Symbols
SYMBOLS Important: Some of the following symbols may be used on your tool. Please study them and learn their meaning. Proper interpretation of these symbols will allow you to operate the ool better and safer. SYMBOL NAME Volts Amperes Hertz Watt Minutes Alternating Current... -
Page 6: Specifications
Electrical Connection The drill has a precision-built electric motor. It should be con- nected to a power supply that is 120 volts, 60 Hz, AC only (normal household current). Do not operate this tool on di- rect current (DC). -
Page 7: Unpacking
Keystrap Cordwrap Operator’s Manual APPLICATIONS You may use the two speed drill for the purposes listed below: ■ Drilling in wood ■ Drilling in ceramics, plastics, fiberglass, and laminates ■ Drilling in both hard and soft metals ■ Using driving accessories, such as driving screws with screwdriver bits ■... -
Page 8: Features
To turn the drill ON, depress the switch trigger. Release the switch trigger to turn the drill OFF. Two-Speed Switch This drill has a two-speed switch on the side of the motor housing. Lock-On Button This tool is equipped with a lock-on feature for continuous drilling. -
Page 9: Assembly
Installing Auxiliary Handle See Figure 2. An auxiliary handle is packed with the drill for ease of opera- tion and to help prevent loss of control. To use the auxiliary handle: 1. Open the clamping ring by turning the handle counterclock- wise. - Page 10 1. Unplug the drill. 2. Insert the chuck key and twist counterclockwise as shown in figure 3. 4. Insert the drill bit into the chuck the full length of the jaws. WARNING: Do not insert drill bit into chuck jaws and tighten as shown in figure 4.
-
Page 11: Operation
(driving screws), the arrow on the switch should be pointing upward on the left side of the drill and downward on the right side of the drill as shown in figure 5 . To reverse the direction to counterclockwise (for removing screws), the arrow on the switch should be pointing down- ward on the left side of the drill and upward on the right side. - Page 12 Two-Speed Settings See Figure 7. The drill features a High or Low speed selector. Select the desired speed by turning the selector to either 1 (Low) or 2 (High). The following guidelines may be used in determining correct speed for various applications.
- Page 13 4. Plug the drill into power supply source. 5. Hold the drill firmly and place the bit at the point to be drilled. 6. Depress the switch trigger to start the drill. Do not lock the switch ON for jobs where the drill may need to be stopped suddenly.
-
Page 14: Adjustments
2. Open chuck jaws using the provided chuck key. 3. Insert a 5/16 inch (8 mm) or larger hex key wrench into the chuck of the drill and tighten the chuck jaws securely. 4. Tap the hex key wrench sharply with a mallet in a clock- wise direction. -
Page 15: Maintenance
MAINTENANCE WARNING: When servicing use only identical RIDGID ment parts. Use of any other parts may create a hazard or cause product damage. WARNING: This tool should never be connected to a power sup- ply when you are assembling parts, making adjust- ments, cleaning, performing maintenance, or when the tool is not in use. - Page 16 NOTES...
- Page 17 NOTES...
- Page 18 NOTES...
-
Page 19: Warranty
THREE YEAR WARRANTY This warranty covers all defects in workmanship or materials in this RIDGID tool for the three year period from the date of purchase. This warranty is specific to this tool. Warranties for other RIDGID products may vary. -
Page 20: Customer Service Information
Customer Service Information: For parts or service, contact your nearest RIDGID authorized service center. Be sure to provide all relevant information when you call or visit. For the location of the authorized service center nearest you, please call 1-866-539-1710 or visit us online at www.ridgidwoodworking.com.


Need help?
Do you have a question about the R7100 and is the answer not in the manual?
Questions and answers