Table of Contents
Advertisement
Your drill has been engineered and manufactured to our high standards for dependability, ease of operation, and operator
safety. When properly cared for, it will give you years of rugged, trouble-free performance.
WARNING:
To reduce the risk of injury, the user must read and understand the operator's manual before using this product.
Thank you for buying a RIDGID product.
SAVE THIS MANUAL FOR FUTURE REFERENCE
OPERATOR'S MANUAL
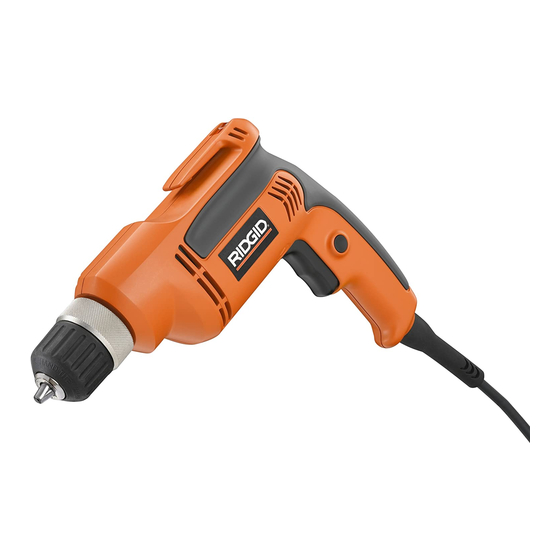
3/8 in. PROFESSIONAL
ELECTRIC DRILL
DOUBLE INSULATED
VARIABLE SPEED
R7000
Advertisement
Table of Contents

Summary of Contents for RIDGID R7000
-
Page 1: Variable Speed
Your drill has been engineered and manufactured to our high standards for dependability, ease of operation, and operator safety. When properly cared for, it will give you years of rugged, trouble-free performance. WARNING: To reduce the risk of injury, the user must read and understand the operator’s manual before using this product. -
Page 2: Table Of Contents
Customer Service Information ... 16 INTRODUCTION This drill has many features for making its use more pleasant and enjoyable. Safety, performance, and dependability have been given top priority in the design of this product making it easy to maintain and operate. -
Page 3: General Safety Rules
GENERAL SAFETY RULES WARNING: Read and understand all instructions. Failure to follow all instructions listed below, may result in electric shock, fire and/or serious personal injury. SAVE THESE INSTRUCTIONS WORK AREA n Keep your work area clean and well lit. Cluttered benches and dark areas invite accidents. -
Page 4: Specific Safety Rules
GENERAL SAFETY RULES SERVICE n Tool service must be performed only by qualified re- pair personnel. Service or maintenance performed by unqualified personnel could result in a risk of injury. SPECIFIC SAFETY RULES n Hold tool by insulated gripping surfaces when per- forming an operation where the cutting tool may contact hidden wiring or its own cord. -
Page 5: Symbols
SYMBOLS Some of the following symbols may be used on this tool. Please study them and learn their meaning. Proper interpreta- tion of these symbols will allow you to operate the tool better and safer. SYMBOL NAME Volts Amperes Hertz Watt Minutes Alternating Current... - Page 6 SYMBOLS The following signal words and meanings are intended to explain the levels of risk associated with this product. SYMBOL SIGNAL DANGER: WARNING: CAUTION: CAUTION: SERVICE Servicing requires extreme care and knowledge and should be performed only by a qualified service technician. For service we suggest you return the product to your nearest AUTHO- RIZED SERVICE CENTER for repair.
-
Page 7: Extension Cords
Always use original factory replace- ment parts when servicing. ELECTRICAL CONNECTION The drill has a precision-built electric motor. It should be connected to a power supply that is 120 volts, 60 Hz, AC only (normal household current). Do not operate this tool on direct current (DC). -
Page 8: Product Specifications
Two convenient features provided on your drill are a level and a belt clip. The level is recessed in the motor housing on your drill. It can be used to keep drill bits level during both horizontal and vertical drilling operations. The belt clip is molded into the top of the motor housing on your drill. -
Page 9: Unpacking
LOCK-ON BUTTON See Figure 2. Your drill is equipped with a lock-on feature, which is conve- nient when continuous drilling for extended periods of time is required. To lock-on, depress the switch trigger, push in and hold the lock-on button located on the side of the handle, then release switch trigger. -
Page 10: Variable Speed
KEYLESS CHUCK See Figure 3. Your new drill has a keyless chuck. As the name implies, you can hand tighten or release drill bit in the chuck jaws. Grasp and hold the collar of the chuck with one hand. Rotate the chuck body with your other hand. - Page 11 Also, raise the front of your drill slightly to keep the drill bit from falling out of the chuck jaws. n Insert drill bit into chuck the full length of the jaws. WARNING: Do not insert drill bit into chuck jaws and tighten as shown in figure 7.
- Page 12 The oil will prolong the life of the bit and increase the drilling action. If the bit jams in the work piece or if your drill stalls, stop the tool immediately. Remove the bit from the work piece and determine the reason for jamming.
-
Page 13: Maintenance
To tighten, follow these steps: n Unplug your drill. WARNING: Failure to unplug your drill could result in accidental starting causing serious injury. n Insert hex key into chuck and tighten chuck jaws securely. Tap hex key sharply with a mallet in a clockwise direc- tion. -
Page 14: Chuck Removal
To remove the chuck: n Unplug your drill. WARNING: Failure to unplug your drill could result in accidental starting causing serious injury. n Insert a 8 mm (5/16 in.) or larger hex key into the chuck of your drill and tighten the chuck jaws securely. -
Page 15: Warranty
2/1/04 and after. This product is manufactured by One World Technologies, Inc. The trademark is licensed from RIDGID, Inc. All warranty communications should be directed to One World Technologies, Inc., attn: RIDGID Hand Held and Stationary Power Tool Technical Service at (toll free) 1-866-539-1710. -
Page 16: Customer Service Information
R7000 Customer Service Information For parts or service, contact your nearest RIDGID authorized service center. Be sure to provide all relevant information when you call or visit. For the location of the authorized service center nearest you, please call 1-866-539-1710 or visit us online at www.ridgid.com.


Need help?
Do you have a question about the R7000 and is the answer not in the manual?
Questions and answers