Table of Contents
Advertisement
Advertisement
Table of Contents

Subscribe to Our Youtube Channel
Related Manuals for ANFIM Pratica


Summary of Contents for ANFIM Pratica
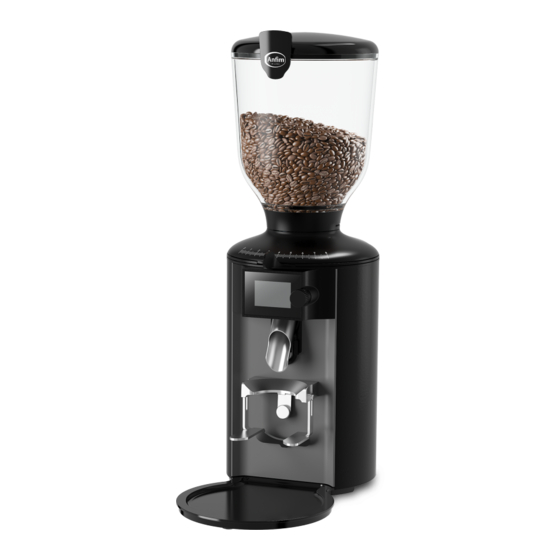
- Page 1 Original instruction manual Single Espresso Grinder Pratica...
-
Page 2: Overview
Single eSpreSSo grinder Overview... - Page 3 Pratica | EN...
- Page 4 Single eSpreSSo grinder...
- Page 5 Pratica | EN...
- Page 6 Single eSpreSSo grinder...
-
Page 7: Scope Of Delivery
Pratica | EN Scope of delivery No. Name Bean container (incl. lid) Bean container intake Controller Grinding degree lock On/Off switch Release button (thermal overcurrent circuit-breaker) Power cable Screw for adjusting the portafilter support (left and right), 2× Drip tray... -
Page 8: Table Of Contents
Single eSpreSSo grinder Pratica Contents Overview ......2 Grinding espresso beans – Manual grinding ....... 20 Scope of delivery ....7 Suspending grinding General information .... 9 (break function) ......20 Reading and storing the Changing the type of instruction manual ......9 espresso beans ...... -
Page 9: General Information
European Union. Please also note the guidelines and laws that apply in your country. For greater clarity, the Pratica Single Espresso Grinder will be referred to below simply as the “grinder”. - Page 10 Single eSpreSSo grinder This symbol provides you with useful information about opera- tion or handling. Declaration of Conformity (see “Declaration of Conformity” section): Products marked with this symbol fulfill all applicable community provisions of the European Economic Area. ETL Listed seal of approval: Products marked with this symbol meet the requirements for electrical product safety in the United States of America.
-
Page 11: Safety
Pratica | EN Safety Intended use The grinder is suitable only for grinding whole roasted espresso beans. Do not use the grinder to grind other products or objects. It is intended for com- mercial use and may only be serviced by trained personnel. It may, however, be operated by other persons in a place where its use is supervised. - Page 12 Single eSpreSSo grinder – Do not operate the grinder above an altitude of 2,000 meters. – Do not immerse the grinder, the power cable or the power plug in water or any other liquids. – Do not clean the grinder with a water jet. –...
- Page 13 Pratica | EN WARNING! Danger for children and persons with reduced physical, sensory or mental capacities (e.g. partially disabled persons, elderly persons with limited physical and mental capacities) or a lack of experience and knowledge (e.g. older children). – This grinder may be used by children older than eight years and...
-
Page 14: Before Using For The First Time
Functioning and basic settings The shot sizes, i.e. the volume of grounds per serving, are defined by the grinding time in the Pratica grinder. The user can specify up to six different recipes (grinding times) and also has the option to control the grinding time manually (manual grinding). -
Page 15: Setting Up The Grinder And Inserting The Bean Container
Pratica | EN Setting up the grinder and inserting the bean container You will need a slot screwdriver to fix the bean container (not supplied). 1. Place the grinder on a level and stable surface that does not vibrate. 2. Ensure that the outlet (13) is pushed as far upwards as possible and en- gages securely in the outlet lock (see Fig. -
Page 16: Setting The Portafilter Support And Outlet
Single eSpreSSo grinder Setting the portafilter support and outlet You will need a slot screwdriver to adjust the portafilter support (not supplied). Adjust the portafilter support (10) to the size of your espresso machine’s portafilter (see Fig. C): 1. Make sure that the grinder is switched off (On/Off switch (5) to position 0). 2. -
Page 17: Operation
Pratica | EN Operation NOTE! Risk of overheating! Exceeding the maximum permissible operating cycle can cause the grinder to overheat. – Do not exceed the maximum operating cycle (see “Technical data” section). – Observe the recommended break when the maximum permissi-... -
Page 18: Adding Espresso Beans
Single eSpreSSo grinder Adding espresso beans 1. Remove the lid from the bean container (1). 2. Pour whole roasted espresso beans into the bean container from above. • The maximum filling quantity should be approx. 1 cm below the edge of the bean container. •... -
Page 19: Selecting The Recipe/Grinding Time
Pratica | EN • Reduce the grinding degree only while the grinder is in operation. • In order to avoid/eliminate imbalances in setting the grinding degree, it is advisable first to set a coarser grinding degree (about one level/unit above the grinding degree required) and only then move the grinding degree slide down from there to the finer grinding degree required. -
Page 20: Grinding Espresso Beans - Grinding According To A Recipe
Single eSpreSSo grinder Grinding espresso beans – Grinding according to a recipe 1. Turn the controller (3) to select the recipe required (see “Selecting recipe/grinding time” section). 2. Insert the portafilter between the portafilter intake (12) and the portafil- ter support (10) until it touches the start button (11). The grinder starts the grinding process automatically, runs for the set grinding time and then stops. -
Page 21: Changing The Type Of Espresso Beans
Pratica | EN Changing the type of espresso beans 1. Close the bean container (1) by pushing in the sliding valve (20). 2. Grind the espresso beans that remain in the grinding mechanism until the grinder runs idle. 3. Use a slot screwdriver to release the locking screw (19) for the bean container. -
Page 22: Using The Main Menu
Single eSpreSSo grinder Using the main menu You can retrieve appliance data and change the settings on the main menu. Display/navigation symbols Symbol Meaning “Service Log” item on the main menu “Recipes” item on the main menu “Settings” item on the main menu Exit main menu/submenu “Reset counter”... -
Page 23: Opening And Using The Main Menu
Pratica | EN Opening and using the main menu 1. Press and release the controller (3) 2× to open the main menu on the display (14). 2. Rotate the controller to select the menu item you require (see “Display/ navigation symbols” section). -
Page 24: Cleaning
Single eSpreSSo grinder Cleaning CAUTION! Risk of injury! The grinder can fall over and cause injury when moved. – Place the grinder on a stable surface that will not tilt. – Ask another person for help if the grinder is too heavy. NOTE! Risk of short-circuit! Water penetrating the grinder can cause a short-circuit. -
Page 25: Cleaning The Surface On Which The Grinder Stands
Pratica | EN Cleaning the surface on which the grinder stands 1. Switch off the grinder (On/Off switch (5) to position 0) and remove the power plug from the socket. 2. Lift the grinder by the casing with both hands and place on a clean sur- face. -
Page 26: Cleaning The Bean Container
The manufacturer recommends using a bean container cleaner. For more information about the cleaner, visit www.anfim.it. 1. Close the bean container (1) by pushing in the sliding valve (20). -
Page 27: Cleaning The Grinding Mechanism
Pratica | EN Cleaning the grinding mechanism • The manufacturer recommends using GRINDZ grinder cleaner. For more information about GRINDZ , visit www. anfim.it. • The grinding mechanism should be cleaned every 2–5 days. 1. Close the bean container (1) by pushing in the sliding valve (20). -
Page 28: Troubleshooting
Single eSpreSSo grinder 13. Press the start button (11) to start the grinding process and keep it pressed in until the grinder cleaner has been completely ground. 14. Grind a quantity of espresso beans equal to the quantity of grinder cleaner used in order to remove leftover cleaning particles. Set the grinding degree to the setting required during the grinding process. - Page 29 Pratica | EN Problem Cause Remedy The grinder is • The grinding t Release the lock on the grinding humming but mechanism is degree adjuster and set the grinding not grinding. blocked. degree to “8”. Start the grinding process. The grinder will clear itself.
- Page 30 Single eSpreSSo grinder Problem Cause Remedy • The grinding t Contact your supplier The grinder is discs are worn (see “Maintenance and service” section). not grinding out or need to finely enough. be readjusted. The grinder • The start but- t Contact your supplier does not ton is faulty.
-
Page 31: Technical Data
Technical data Model: Pratica (AE 65 2.4B) Voltage / frequency: 100 V; 50 Hz 100 V; 60 Hz 110–127 V; 60 Hz 220–240 V; 50 Hz 220–240 V; 60 Hz... -
Page 32: Disposal
Single eSpreSSo grinder Recommended break: 15–26 seconds (depending on voltage type) Max. grinding time: 10 min. in continuous operation Max. daily output: 30 kg Dimensions (W × D × H): 195 × 283 × 583 mm Weight (net): 11.2 kg Max. -
Page 33: Maintenance And Service
Maintenance and service If service or maintenance is required, contact an authorized customer service center for Anfim products. Customer Service can answer your questions about repairing and maintaining your product and spare parts. Exploded diagrams and information about spare parts are also available at: www.anfim.it... -
Page 34: Notes
Notes... - Page 35 Notes...
- Page 36 ANFIM S.r.l. +39 02 - 846 50 54 www.anfim.it Via B. Verro 33/5 20141 Milan, Italy...
Need help?
Do you have a question about the Pratica and is the answer not in the manual?
Questions and answers