Table of Contents
Advertisement
Advertisement
Table of Contents

Related Manuals for Idexx SNAPshot Dx


Summary of Contents for Idexx SNAPshot Dx
- Page 1 IDEXX SNAPshot Dx* Analyzer Operator’s Guide...
- Page 2 © 2017 IDEXX Laboratories, Inc. All rights reserved. • 06-0002404-03 *IDEXX VetLab, SNAPshot Dx, Catalyst, SNAP , SNAP cPL, SNAP fPL, 4Dx, VetStat, and IDEXX SmartService are trademarks or registered trademarks of IDEXX Laboratories, Inc. in the United States and/or other countries.
-
Page 3: Table Of Contents
Other Symbols ............................vii Getting Started ..........................A-1 Introduction .............................. A-1 SNAPshot Dx Analyzer Components....................... A-2 Installing the SNAPshot Dx Analyzer ....................... A-2 Powering On the Analyzer ........................A-4 Shutting Down the Analyzer........................A-4 Connecting/Disconnecting the Power Cord .................... A-4 Printing Test Results.......................... - Page 4 Sample Preparation and Storage ....................E-1 Overview ..............................E-1 IDEXX Quality Sample Preparation ......................E-2 Sample Collection Order ......................... E-3 Centrifuged Sample Inspection ....................... E-3 Sample Storage ............................E-4 Maintenance ..........................F-1 Overview ..............................F-1 Upgrading the Software........................... F-1 Cleaning the Case ........................... F-1 Cleaning the SNAP Ports .........................
-
Page 5: Preface
– Polish – Room freshener • Line voltage for the SNAPshot Dx Analyzer power supply is 100–240 V AC, 50–60 Hz. Be sure to plug all equipment into properly grounded electrical outlets. • Use only the power cable supplied. •... -
Page 6: International Symbol Descriptions
(such as expiration date, temperature limitations, batch code, etc.). IDEXX Laboratories has adopted the use of international symbols on our analyzers, product boxes, labels, inserts, and manuals in an effort to provide our users with easy-to-read information. -
Page 7: Other Symbols
Preface Symbol Description Symbol Description Manufacturer Biological Risks Fabricant Risques biologiques Hersteller Biogefährlich Ditta produttrice Rischi biologici Fabricante Riesgos biológicos 製造元 生物学的リスク Caution, consult accompanying Do Not Reuse documents Usage unique Attention, consulter les documents Nicht wiederverwenden joints No reutilizarw Achtung, Begleitdokumente beachten Non riutilizzare Attenzione, consultare la... -
Page 8: A Getting Started
The SNAPshot Dx Analyzer is for veterinary use only. IDEXX VetLab* Station Connectivity The SNAPshot Dx Analyzer is part of the IDEXX VetLab* suite of analyzers, all of which connect to the IDEXX VetLab Station (IDEXX’s laboratory information management system). Connecting multiple analyzers to the IDEXX VetLab Station allows you to view a comprehensive picture of your patient’s health, with the ability to view test results from multiple analyzers on a single report,... -
Page 9: Snapshot Dx Analyzer Components
Note: If you already have a network router connected directly to the IDEXX VetLab Station computer, you can skip this section and move to the “To Connect the SNAPshot Dx Analyzer to the IDEXX VetLab Station” section on page A-3. - Page 10 To Connect the SNAPshot Dx Analyzer to the IDEXX VetLab Station 1. Connect the Ethernet cable provided with the SNAPshot Dx Analyzer to the next available port on the back of the router. IMPORTANT: Do not connect the SNAPshot Dx Analyzer directly to the Internet port on the router.
-
Page 11: Powering On The Analyzer
After the VetStat analyzer returns to the Home screen, the VetStat icon will appear at the bottom of the IDEXX VetLab Station Home screen. Note: If the VetStat icon does not appear on the IDEXX VetLab Station Home screen within 3 minutes, contact IDEXX Technical Support for assistance. -
Page 12: B Using The Snapshot Dx * Analyzer
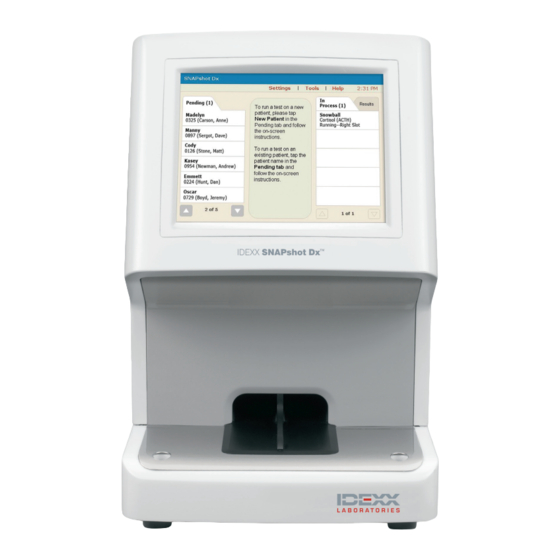
Using the SNAPshot Dx Analyzer Overview The SNAPshot Dx Analyzer is controlled via a touch-screen monitor on the front of the analyzer and by the IDEXX VetLab* Station. Using the Touch Screen To get the best results when using the touch screen: •... -
Page 13: Viewing Test Results
arrows to view additional patient names. 3. Tap View Results to display the Test Results screen. To View the Test Results on the IDEXX VetLab Station See the IDEXX VetLab Station Operator’s Guide for detailed instructions on viewing test results. -
Page 14: Csnap* Test Procedures
SNAP* Test Procedures Overview This chapter includes detailed information for each of the SNAP tests that the SNAPshot Dx* Analyzer supports. You can use the information in this section to: • Read a description of each SNAP test. • Learn how to prepare each test for analysis (the process varies by test type). -
Page 15: Snap* Total T
1. Enter the patient information on the IDEXX VetLab* Station (for more information, see the “Analyzing Samples” chapter of the IDEXX VetLab Station Operator’s Guide). 2. Once the patient’s name appears in the Pending list on the SNAPshot Dx Home screen, tap the patient’s name and then tap Select. The Identify Sample screen appears. - Page 16 When analysis is complete, the patient’s name will move from the In Process list to the Results list (you may also receive a “New Results” alert message and/or hear a beep on the IDEXX VetLab Station, depending on the option(s) you selected in the New Results Alert tab on the IDEXX VetLab Station’s Settings screen).
- Page 17 SNAP Test Procedures Interpreting Test Results The recommendations below are intended to provide general guidance only. As with any diagnosis, you should use clinical discretion with each patient based on a complete evaluation of the patient, including history, physical examination, and complete laboratory profile. Species Results U.S.
-
Page 18: Snap* Cortisol
1. Enter the patient information on the IDEXX VetLab Station (for more information, see the “Analyzing Samples” chapter of the IDEXX VetLab Station Operator’s Guide). 2. Once the patient’s name appears in the Pending list on the SNAPshot Dx Home screen, tap the patient’s name and then tap Select. The Identify Sample screen appears. - Page 19 When analysis is complete, the patient’s name will move from the In Process list to the Results list (you may also receive a “New Results” alert message and/or hear a beep on the IDEXX VetLab Station, depending on the option(s) you selected in the New Results Alert tab on the IDEXX VetLab Station’s Settings screen).
- Page 20 SNAP Test Procedures A. ACTH Stimulation Test Pre-ACTH Interpretation <2 μg/dL Must evaluate in conjunction with post-ACTH result. If both (55.2 nmol/L) results are <2 μg/dL (55.2 nmol/L), results are consistent with hypoadrenocorticism. Begin treatment with mineralocorticoid and/or glucocorticoid as appropriate. 2–6 μg/dL Normal (55.2–165.6...
- Page 21 SNAP Test Procedures C. High-Dose Dexamethasone Suppression Test 4-Hour Cortisol Level 8-Hour Cortisol Level Interpretation <1.5 μg/dL (41.4 >1.5 μg/dL (41.4 Consistent with PDH nmol/L) or <50% of nmol/L) and >50% of baseline baseline >1.5 μg/dL (41.4 <1.5 μg/dL (41.4 Consistent with PDH nmol/L) and >50% of nmol/L) or <50% of...
-
Page 22: Snap* Bile Acids
1. Enter the patient information on the IDEXX VetLab Station (for more information, see the “Analyzing Samples” chapter of the IDEXX VetLab Station Operator’s Guide). 2. Once the patient’s name appears in the Pending list on the SNAPshot Dx Home screen, tap the patient’s name and then tap Select. The Identify Sample screen appears. - Page 23 SNAP Test Procedures Interpreting Test Results The recommendations below are intended to provide general guidance only. In all cases, it is important to exercise clinical judgement in interpreting bile acid results in the context of the patient’s history, clinical signs, physical status, and other laboratory data. Postprandial Result <12 µmol/L 12–25 µmol/L...
-
Page 24: Snap* Fpl
1. Enter the patient information on the IDEXX VetLab Station (for more information, see the “Analyzing Samples” chapter of the IDEXX VetLab Station Operator’s Guide). 2. Once the patient’s name appears in the Pending list on the SNAPshot Dx Home screen, tap the patient’s name and then tap Select. The Identify Sample screen appears. -
Page 25: Snap* Cpl
1. Enter the patient information on the IDEXX VetLab Station (for more information, see the “Analyzing Samples” chapter of the IDEXX VetLab Station Operator’s Guide). 2. Once the patient’s name appears in the Pending list on the SNAPshot Dx Home screen, tap the patient’s name and then tap Select. The Identify Sample screen appears. -
Page 26: Snap* 4Dx* Plus
1. Enter the patient information on the IDEXX VetLab Station (for more information, see the “Analyzing Samples” chapter of the IDEXX VetLab Station Operator’s Guide). 2. Once the patient’s name appears in the Pending list on the SNAPshot Dx Home screen, tap the patient’s name and then tap Select. The Identify Sample screen appears. -
Page 27: Snap* Fiv/Felv Combo
1. Enter the patient information on the IDEXX VetLab Station (for more information, see the “Analyzing Samples” chapter of the IDEXX VetLab Station Operator’s Guide). 2. Once the patient’s name appears in the Pending list on the SNAPshot Dx Home screen, tap the patient’s name and then tap Select. The Identify Sample screen appears. -
Page 28: Snap* Heartworm Rt
1. Enter the patient information on the IDEXX VetLab Station (for more information, see the “Analyzing Samples” chapter of the IDEXX VetLab Station Operator’s Guide). 2. Once the patient’s name appears in the Pending list on the SNAPshot Dx Home screen, tap the patient’s name and then tap Select. The Identify Sample screen appears. -
Page 29: Snap* Feline Probnp
1. Enter the patient information on the IDEXX VetLab Station (for more information, see the “Analyzing Samples” chapter of the IDEXX VetLab Station Operator’s Guide). 2. Once the patient’s name appears in the Pending list on the SNAPshot Dx Home screen, tap the patient’s name and then tap Select. The Identify Sample screen appears. -
Page 30: D Modifying The Settings On The Analyzer
Notes: • This option is unavailable when the SNAPshot Dx* Analyzer is processing a sample run. • The analyzer will prompt you to restart it whenever the language/local settings are changed. You must restart the analyzer in order for the changes to take effect. -
Page 31: Adjusting The Volume Of The Analyzer
To Delete a Patient from the In Process List You can also delete a patient from the In Process list by selecting the patient in the In Process list (on the SNAPshot Dx Home screen) and then tapping Stop Run in the Home screen’s center display area. -
Page 32: E Sample Preparation And Storage
This chapter provides instructions for preparing quality samples, the recommended order of draw, and more. See the table on pages E-2–E-4 for a list of the different sample types that each IDEXX VetLab* analyzer is capable of running. The table provides the sample volume required for each sample type as well as how to prepare the sample. -
Page 33: Idexx Quality Sample Preparation
Sample Preparation and Storage IDEXX Quality Sample Preparation Sample Volume Centrifuge Test Required Sample Preparation (time/speed) serum: allow to clot for 20 minutes plasma: gently invert collection tube for 30 seconds serum/plasma: 120 seconds at SNAP* Total T Test 65 μL ... -
Page 34: Sample Collection Order
Sample Preparation and Storage Sample Collection Order In order to prevent coagulation and contamination, blood should be drawn into the collection tubes in a specific order. Note: While the following orders are recommended by the various tube manufacturers, always follow your clinic’s protocol for order of draw. Order for Evacuated Collection Tubes The following is the recommended order of draw when using evacuated tubes: 1. -
Page 35: Sample Storage
Sample Preparation and Storage Lipemia Visual: Sample has a pale, milky appearance, possibly with floating fat globules. Indications: Recent ingestion of a fatty meal or dysfunction in lipid metabolism. Sample Storage We recommend that you prepare and analyze samples immediately after collection for best results. However if storage is necessary, follow these sample storage and testing guidelines. -
Page 36: F Maintenance
SNAP* ports often. Upgrading the Software IDEXX will provide you, on a periodic basis and at no charge, updated instrument software that may include new features. Be sure to read the software notes contained with each new release. -
Page 37: G Troubleshooting
Are there any abnormalities on the SNAP* device (e.g., streaking or high background color)? • For SNAP tests that can also be read visually (e.g., SNAP* 4Dx Plus), the SNAPshot Dx* Analyzer was developed to read any color in the sample spots as positive, as outlined in the product insert. -
Page 38: Viewing The Event Log
If the connections are secure and the problem persists, shut down (or power off) the analyzer and then turn it back on. If the problem still persists, contact IDEXX Technical Support (see the “IDEXX Technical Support Contact Information” section on page H-21 for the applicable phone number for... -
Page 39: Sending Your Analyzer To Idexx
Troubleshooting Sending Your Analyzer to IDEXX Before you send your analyzer to IDEXX, contact IDEXX Technical Support to arrange for a replacement analyzer and to obtain a prepaid shipping label. To Package Your Analyzer for Shipment 1. Gather the IDEXX SNAPshot Dx Analyzer packaging components. - Page 40 Can I run non-bar-coded SNAP tests on the Only SNAP tests that have a bar code and analyzer? appear on the SNAPshot Dx test type menu can be run on the analyzer. We recommend that you work through your non-bar-coded inventory using the visual- read work flow and the IDEXX VetLab Station feature for recording SNAP test results.
-
Page 41: H Appendices
Appendices Technical Specifications Dimensions Width: 8.1 inches (20.5 cm) Depth: 11.4 inches (29 cm) Height: 12.8 inches (32.5 cm) Weight: 9.4 pounds (4.25 kg) Power Supply External power supply adapter, model XP Power PDM60US24 Input: 100–240 V AC, 50–60 Hz, 1500 mA Output: 24 V DC, 2500 mA Consumption Operating: maximum 60 W, typical 44 W... -
Page 42: Idexx Technical Support Contact Information
Appendices IDEXX Technical Support Contact Information IDEXX Sales Representative: Telephone/Voice Mail: United States: 1-800-248-2483 Luxembourg: 352 (0)34 20 80 87 22 Australia: 1300 44 33 99 Netherlands: 31 (0)70 700 7033 Austria: 43 (0)1 206 092 729 New Zealand: 0800 10 20 84...
Need help?
Do you have a question about the SNAPshot Dx and is the answer not in the manual?
Questions and answers