Rane HAL1x System Installation Manual

Rane HAL1x System Installation Manual

Multiprocessor hal series
Table of Contents

Advertisement

HAL
System Installation Guide
Halogen Software Version 6.2

Advertisement

Table of Contents
loading
Need help?

Need help?

Do you have a question about the HAL1x and is the answer not in the manual?

Questions and answers

Subscribe to Our Youtube Channel

Summary of Contents for Rane HAL1x

  • Page 1 System Installation Guide Halogen Software Version 6.2...
  • Page 2: Important Safety Instructions

    • Connect the equipment into an outlet on a circuit different from that to which the receiver is connected. • Consult the dealer or an experienced radio/TV technician for help. CAUTION: Changes or modifications not expressly approved by Rane Corporation could void the user's authority to operate the equipment. CAN ICES-3 (B)/NMB-3(B)
  • Page 3 • Consulter un revendeur ou un technicien radio / TV expérimenté. ATTENTION: Les changements ou modifications non expressément approuvés par Rane Corporation peuvent annuler l'autorité de l'utilisateur à manipuler cet équipement et rendre ainsi nulles toutes les conditions de garantie.
  • Page 4: Table Of Contents

    Table of Contents CHAPTER 1: Getting Started The Installation Workflow Introduction to the HAL System System Requirements Minimum Requirements for Running Halogen Recommendations for Best Performance Administrative Rights Requirements Required Ports Required Processes Using the HAL System Documentation CHAPTER 2: Hardware Component Details Overview of HAL Devices Available HAL Models 
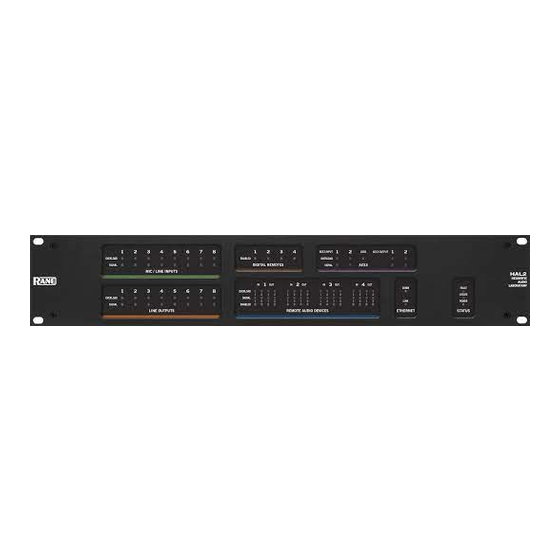
HAL Front and Rear Panels...
  • Page 5 HAL SYSTEM INSTALL GUIDE Infrared Remote Devices IR2 Device Expansion Units HAL1x Expansion Units Discontinued EXP Models Shielded CAT 5e Cable Requirements Momentary and Latching Toggle Configuration CHAPTER 3: Installing Your HAL System Task 1: Install and Connect HAL Task 2: Configuring HAL...
  • Page 6 Troubleshooting EXP Devices Troubleshooting the HAL Connection Using Meters to Troubleshoot Rane Technical Support Index Warranty Information Declaration of Conformity...
  • Page 7: Chapter 1: Getting Started

    You perform this configuration using the Halogen software that is shipped with the HAL hardware. (The software is also available on the Rane website at rane.com/hal.) You can configure the system by loading a configuration file that contains the appropriate hardware settings, audio flow, and proc- essing;...
  • Page 8 HAL SYSTEM INSTALL GUIDE Where this configuration task falls in the installation process is somewhat flexible. If you prefer, you NOTE can install and connect the RADs, DRs, and EXPs prior to loading the configuration file. There are advan- tages, however, in loading the configuration first. Whether or not the configuration is loaded, as long as the HAL is powered on and connected prior to installing the peripheral devices, you can determine immediately upon installing a RAD, DR, or EXP (by observing its status indicators) if it is functioning properly.
  • Page 9 85 for more information. You’ll be happy to learn that Rane has taken much of the guesswork out of the verification process. Although you will review the status indicators on the HAL, EXPs, RADs, and DRs at the time you install these components, we recommend double-checking these indicators in the final verification task.
  • Page 10: Introduction To The Hal System

    Introduction to the HAL System The HAL System, Rane's revolutionary new audio product, makes it possible for you to solve age-old audio issues with a simple click or two (or sometimes three). In designing this system, Rane's engineers have anticipated the needs of the installer, the designer, and the end user, resulting in an intuitive and relatively simple system to oper- ate.
  • Page 11 CHAPTER 1:  Getting Started...
  • Page 12 HAL SYSTEM INSTALL GUIDE Software Component Included in the HAL System is a software application, called Halogen, that you use to configure and manage the entire system. Halogen contains two primary graphical workspaces, the Hardware Workspace and the Processing Workspace, in which you simply drag and drop hardware components and processing blocks to set up the audio system you want.
  • Page 13: System Requirements

    2 GB available hard disk space Display Resolution: 1024x768, 24 bit color Ethernet adapter: 100baseT DVD Drive for installation from DVD (or can install from Rane website) Recommendations for Best Performance Microsoft Windows 7 or greater (32 or 64-bit) PC with mid-level processor @ 2GHz multi-core or better (for example, Intel i3 or greater)
  • Page 14: Administrative Rights Requirements

    HAL SYSTEM INSTALL GUIDE Administrative Rights Requirements The following table outlines which Halogen tasks require administrative rights and which do not: Does not require administrative Requires administrative rights rights Installing Halogen Running and using Halogen Installing software updates to Halogen Updating the HAL firmware Manually starting or stopping the RaneLink II service...
  • Page 15: Required Processes

    The following processes are required for working with the HAL System and for establishing a connection between Halogen and HAL. Process Purpose Location Use to design your entire audio C:\Program Files (x86)\Rane Cor- Halogen.exe‡ system and connect to your HAL poration\Halogen\Halogen.exe device. Simulates the behavior of a HAL when Halogen is not connected to a HAL.
  • Page 16: Using The Hal System Documentation

    Clicking the icon itself opens the Help System. Clicking the down arrow displays a list of options including such things as access to the Rane web- site, checking for updates to the Halogen software, and sending an email to Rane.
  • Page 17 This guide, includes an introduction to using external control systems with HAL. It also discusses an exam- ple HAL1x configuration and how to set up a Crestron controller and virtual touch panel to communicate with a Halogen/HAL Control Server. In addition, an appendix is included with reference information on the HAL external control message protocol and how to use a telnet client to monitor and troubleshoot the oper-...
  • Page 18 Windows Start Menu under Halogen -> Guides. If you want to access the files directly they are available on the product DVD or from the Halogen install directory: C:\Program Files (x86)\Rane Corporation\Halogen\Guides\Support Packages\Stardraw Control direc- tory You can also download the most up-to-date version of this support package from the Rane website (http://rane.com/hal).
  • Page 19: Chapter 2: Hardware Component Details

    Displays various status indicators (LEDs) providing information about the health of the system Available HAL Models The following HAL models are currently available. For the most current list of HAL models, see the Rane website. HAL1x The device connections that are possible on a HAL1x are as follows: 4 Remote Audio Devices (RADs) 8 Digital Remotes (DRs)—Can add up to 4 more by plugging them into the RAD ports...
  • Page 20: Hal Front And Rear Panels

    HAL SYSTEM INSTALL GUIDE 4 IR Remotes 8 Mic/Line Inputs 8 Line Outputs 1 AES3 Stereo Input 1 AES3 Stereo Output 4 Logic Inputs 2 Relay Outputs HAL3s The device connections that are possible on a HAL3s are as follows: 2 Remote Audio Devices (RADs) 2 Digital Remotes (DRs)—Can add up to 2 more by plugging them into the RAD ports 2 Mic/Line-Plus Inputs...
  • Page 21 CHAPTER 2:  Hardware Component Details 1. The Power IEC jack connects to AC line voltage, 100-240 VAC, 50/60 Hz. 2. Fault, Locate, and Power LEDs The Fault LED (red) turns on when something in the hardware goes awry. The first step in trou- bleshooting the problem is to open the Halogen software and check the status of this HAL device.
  • Page 22 HAL SYSTEM INSTALL GUIDE This Ethernet port contains auto-MDIX functionality, which means that you can use either a NOTE standard Ethernet cable or a crossover cable to connect to a computer or Ethernet switch. The auto- MDIX functionality takes care of coordinating the proper connection between the devices. The Ethernet LAN LED flashes when HAL detects any Ethernet packets on the network.
  • Page 23 CHAPTER 2:  Hardware Component Details The Remote Audio Device LEDs on the front panel differ from those on the rear panel. The NOTE front panel LEDs provide information about signal activity on each audio channel. See the "Over- view of HAL Devices" on page 13 for more details. You can use the Remote Audio Device LEDs on the rear panel and on the RAD to trou- bleshoot connection problems.
  • Page 24 HAL SYSTEM INSTALL GUIDE Front Panel Description 1. Mic/Line Input LEDs Provides status information about mic/line analog inputs connected to the HAL. The numbers correspond to the mic/line input ports on the rear panel. These LEDs provide information on the following: Overload LED (red) –...
  • Page 25 6. The Ethernet Comm and Link LEDs Provides status information about the HAL Ethernet connection. Comm LED (yellow) – flashes when HAL has been discovered by at least one PC running Rane- Link II , is solid when Halogen is exclusively connected to HAL, is off when HAL has yet to be discovered.
  • Page 26: Discontinued Hal Models

    Rane website. Data Sheets for discontinued models may also be downloaded from the Rane website. The following devices are no longer available: HAL1, EXP1, and HAL3. While Rane no longer produces the HAL3, Halogen software continues to provide support for this product, allow- ing customers to:...
  • Page 27 512 input channels with a maximum cable length of 330 feet (100 meters). There are currently four expansion devices for the HAL1x: EXP1x, EXP3x, EXP5x and EXP7x. The new bus is a significant improvement over the original FireWire bus.
  • Page 28 HAL SYSTEM INSTALL GUIDE Click on Show Discontinued Devices to add discontinued HAL devices to the list as shown below: If you click on the New menu button, Halogen opens the HAL Model Picker dialog box. To display discontinued models, check the Show discontinued devices when creating configurations checkbox:...
  • Page 29: Remote Audio Devices

    RADs are capable of transmitting and receiv- ing up to four channels of digital audio (two in each direction). To better fit your needs, however, Rane offers var- ious RAD models.
  • Page 30: Rad Grounding

    HAL SYSTEM INSTALL GUIDE The orange pair is reserved for data communications between the RAD and HAL. Data communications is needed for such things as sending configuration information from HAL to the RAD, sending firmware updates from HAL to the RAD, and sending status information from the RAD to HAL. Configuration information for a specific RAD (for example, LED intensity, microphone sensitivity, NOTE and RAD and channel names) is stored in the HAL device, not in the RAD.
  • Page 31 CHAPTER 2:  Hardware Component Details ernet-like electrostatic protection as the RAD16z cables get hot plugged and unplugged.
  • Page 32: The Parts Of A Rad

    HAL SYSTEM INSTALL GUIDE The Parts of a RAD Following is an illustration of the front of a typical RAD, accompanied by descriptions of the RAD’s various hard- ware features: 1. Label: a location on the RAD for inserting a custom label. One possible use of this label is to identify the channel number associated with the corresponding jack.
  • Page 33 CHAPTER 2:  Hardware Component Details 10. Locate mode: The Halogen software application contains a feature allowing you to verify the physical location of a specific RAD or HAL device. When you place a RAD in Locate mode, the Power, Comm, Audio Tx, and Audio Rx LEDs on the front of the corresponding RAD flash green.
  • Page 34: Pager1 Rad

    HAL SYSTEM INSTALL GUIDE PAGER1 RAD Setting up paging in the HAL System is as easy as adding zones to groups (called Scenarios), and then specifying the Scenarios into which each paging station can page into. The paging hardware (the Pager1 RAD) then displays the Scenario options available at that station.
  • Page 35: Rad16Z

    CHAPTER 2:  Hardware Component Details RAD16z The RAD16 is a popular device for adding flexible I/O capability to Halogen systems. The new RAD16z adds fur- ther flexibility with the following improvements: Two universal Mic/Line/Line-Plus inputs Two logic inputs and two logic outputs Improved audio performance 500-volt galvanic isolation from RAD port Same plenum-rated chassis as RAD16...
  • Page 36 HAL SYSTEM INSTALL GUIDE characteristic when bridging between locations with divergent technical grounds, eliminating any need for individ- ual isolation transforms on audio inputs and outputs. Application Example - Small Meeting Rooms The application shown below represents a small meeting, classroom or distance learning room. Typical uses require a remote for preset recall, level control and source selection.
  • Page 37 CHAPTER 2:  Hardware Component Details...
  • Page 38: Am1 And Am2 Rads

    HAL SYSTEM INSTALL GUIDE Application Example - Galvanic Isolation The application shown below represents a HAL system where a RAD16z must connect to audio devices in another part of the building with a divergent technical ground. This can require galvanic isolation from a HAL host or individual isolation transformers on analog I/O.
  • Page 39: Rad26 - One Room Rad

    CHAPTER 2:  Hardware Component Details For more details, see the manuals that accompany the AM1 and AM2. More information on these RADs is also available in the Halogen Help System. RAD26 - One Room RAD The RAD26 provides support for all of the audio I/O and control required to support a typical small room in a larger distributed audio system.
  • Page 40 HAL SYSTEM INSTALL GUIDE Key Features Connects to any Halogen system RAD port via an RPI power injector (included) Audio and Logic I/O are galvanically isolated from the RAD port...
  • Page 41 CHAPTER 2:  Hardware Component Details Flexible Inputs Two universal Mic/Line/Line-Plus Inputs Rear panel Euro connectors Configure for: Dynamic Mic, Condenser Mic with 24 V phantom power, Unbalanced L+R Mono or Balanced Line Aux Input via mini TRS jack End user accessible input Configure for Mono or Stereo Input Read-only Logic indicates insertion of mini TRS Flexible Outputs...
  • Page 42 HAL SYSTEM INSTALL GUIDE Power Injector (RPI) power supply to be connected “inline” with its RAD port connection. Application Example - Meeting or Classroom This configuration works for presentations in both boardrooms and classrooms. The mic connects to the rear of the RAD26. It can be from a ceiling mic, or from a handheld or lavalier wireless mic, with 24 V phantom power available for condenser mics.
  • Page 43 CHAPTER 2:  Hardware Component Details Application Example - Hotel or Cruise Ship Guest Room This configuration works for private guest rooms in hotels, resorts, and cruise ships. The television line output connects to the rear of the RAD26, delivering better sound than the TV speakers. In- house video can deliver shows to guests, virtually expanding theater capacity to the entire ship or resort.
  • Page 44 HAL SYSTEM INSTALL GUIDE Application Example - Massage Studio This configuration provides a masseuse with easy and intuitive selection of either local or central background music sources and volume. A desktop computer can supply audio to the rear of the RAD26 as a local background music source. A masseuse can easily bring in a laptop, tablet, or smartphone connecting via a regular consumer stereo 3.5 mm cable to the AUX input.
  • Page 45: Rad27 - Usb Audio

    CHAPTER 2:  Hardware Component Details RAD27 - USB Audio The RAD27 provides a USB audio interface to the HAL system capable of simultaneous stereo playback and recording. Since the RAD27 uses native operating system drivers, no driver installation is required on either Win- dows operating system or Apple OS X.
  • Page 46 HAL SYSTEM INSTALL GUIDE System Preferences > Sound > Input: OS X Playback and Recording:...
  • Page 47 Start > Control Panel > Hardware and Sound > Sound This brings up the Sound control dialog, showing the Playback tab: Select the Rane RAD27 device and click the Set Default button. Now switch to the Recording tab:...
  • Page 48 HAL SYSTEM INSTALL GUIDE Select the Rane RAD27 device and click the Set Default button. Windows will automatically switch a running application to the newly selected RAD27 default device. Remember that Windows likes to play different bleeps and bloops when updates install, devices are plugged in and unplugged, or other operating system events happen.
  • Page 49: Discontinued Rad Models

    HAL system and record from the HAL system into Audacity. Discontinued RAD Models The following RAD models are no longer in production. For the most current list of RAD models, see the Rane website. Data Sheets for discontinued models may also be downloaded from the Rane website.
  • Page 50: Dr Grounding

    HAL SYSTEM INSTALL GUIDE A huge advantage of these DR devices is their plug-and-play nature. When you connect a DR to the system, HAL automatically discovers and addresses it. In addition, just as with RADs, DRs use point-to-point wiring which elim- inates problems of cable length, termination, and addressing.
  • Page 51: Available Digital Remote Models

    Following are the types of DRs currently available for your HAL System. The DR models available will vary over time as Rane's engineers ponder and design new and better ways to remotely control an audio system. For the most current list of DRs, see the Rane website.
  • Page 52 HAL SYSTEM INSTALL GUIDE A DR1 provides a single level control. A DR1 is used most commonly to control volume. A DR1 requires a one-gang standard switchbox for installation into a wall. NOTE A DR2 works well for selecting sources, presets, and room configurations. You can configure a DR2 to behave in one of two ways: Single Selector: The control acts as a selector switch that can select only one item on the display screen.
  • Page 53 CHAPTER 2:  Hardware Component Details A DR2 requires a two-gang standard switchbox for installation into a wall. NOTE The DR3 is extremely flexible, as it can control both selection and volume. You can think of the DR3 as two dif- ferent remotes—a selector and a level.
  • Page 54 V). To trigger the command, a hardware device connected to the Logic In port must pull the port volt- age lower than the logic low threshold, which is specified in the Rane data sheet for the DR4. One way to do this is to connect a physical normally open momentary push button switch to the port.
  • Page 55 CHAPTER 2:  Hardware Component Details Selector: In this option, you can configure one or more Logic In ports to control the state of a corresponding selector control in the Control palette of the Processing Workspace. You can connect a physical device to any or all of the Logic In ports and configure the ports in Halogen so that they make the desired selection according to the state of the physical device.
  • Page 56 HAL SYSTEM INSTALL GUIDE The following table shows how changing the physical switch position affects the Logic In ports and the corresponding Selector control: Logic In Port Switch Position Selector Control High High High Selection 1 High High High Selection 2 High High High...
  • Page 57 CHAPTER 2:  Hardware Component Details The other type of physical selector device that you can use with a DR4 Logic In is called a ‘Binary Selector’. This type of device converts a physical control setting to a binary output value. For example, you might have a switch that has a number of selections, say from 1 to 10.
  • Page 58 HAL SYSTEM INSTALL GUIDE The following table shows how changing the physical switch position affects the Logic In ports and the corresponding Selector control: Logic In Port Switch Position Selector Control High High High High Selection 1 High High High Selection 2 High High...
  • Page 59 One way to use a DR4 Analog Control Input port is to connect a physical potentiometer as shown in the dia- gram below, which shows the Rane VR2 Volume Remote connected to a DR4. By wiring it this way, the Vc wiper provides the control voltage to the DR4.
  • Page 60 These ports are read-only and are not configurable, but are intended for use with a Rane IR2 device. When the IR Remote is sensing infrared the wall is considered 'open' and the associated toggle control in the Control palette of the Processing Workspace is checked.
  • Page 61 CHAPTER 2:  Hardware Component Details Logic Out ports are used to signal another device. A common implementation is to link a Logic Out port to a Toggle control in Halogen so that an end user can change its value from a DR remote, for example.
  • Page 62 HAL SYSTEM INSTALL GUIDE Provides information about the health of the shielded CAT 5e connection between the DR4 and HAL or EXP1. The Comm LED (on the top row) lights solidly if the DR's data communications pair is working properly. The Power LED (on the bottom row) lights solidly if a HAL or EXP1 is supplying adequate power to the DR port.
  • Page 63 CHAPTER 2:  Hardware Component Details The DR5 provides eight LED output ports that are coupled to the state of the corresponding DR5 switch input con- trols. You can connect an LED to each port to have a visual indicator of the DR5 operations. The operation of an LED Output port is governed by the Switch Input port configuration as follows: Toggle: If the corresponding Switch Input port is configured as a toggle, the LED Output port follows the state of the Toggle control in the Control palette of the Processing Workspace.
  • Page 64 HAL SYSTEM INSTALL GUIDE A DR5 is designed to fit in a standard US two-gang electrical box. Alternatively, you can mount it NOTE near a room combine switch panel. The DR6 is a fully customizable touch-screen remote for the HAL system. It supports multiple pages or tabs and any set of levels, toggles, selectors and/or commands.
  • Page 65 CHAPTER 2:  Hardware Component Details Connection Diagram The DR6 uses a Remote Power Injector (RPI) that connects between a DR port and the DR6 device. The RPI provides power for the DR6 and has a dedicated port for the connection to the DR port on a HAL or EXP and another for the connection to the DR6 device:...
  • Page 66 HAL SYSTEM INSTALL GUIDE DR6 Wall Plate The DR6 includes a wall plate that lets you mount the device in a variety of ways: The assembled rear view showing the CAT 5e cable connection to the RPI:...
  • Page 67 CHAPTER 2:  Hardware Component Details Remote Power Injector (RPI)
  • Page 68: Infrared Remote Devices

    HAL SYSTEM INSTALL GUIDE Infrared Remote Devices Wouldn't it be great if the HAL system could sense when movable walls change position and automatically recon- figure the Room Combine block to reflect those changes? This is exactly what Infrared Remotes bring to the party. An Infrared (IR) Remote consists of two parts, an IR transmitter that continuously sends an invisible beam of light and an IR receiver that receives that beam.
  • Page 69: Expansion Units

    EXP1. Halogen version 3.0.0 introduced a new expansion bus, the HAL1x host, and a variety of new Expansion Units that you can connect to the bus. This section explains both the old and the new expansion systems and the avail- able expansion units.
  • Page 70: Hal1X Expansion Units

    Available expansion devices are as follows: EXP1x adds eight RAD ports to a HAL1x via the Expansion Bus. Keep in mind that DR remotes are also supported on any RAD port, so the EXP1x also adds support for additional DR remotes when needed.
  • Page 71 CHAPTER 2:  Hardware Component Details To extend farther than 100 meters, the HAL1x expansion bus is compatible with unmanaged Gigabit Ethernet Media Converters where multi-mode optical fiber allows a maximum distance of 1 km (0.6 miles) and single-mode allows 12 km (7.5 miles) between each EXP device.
  • Page 72: Discontinued Exp Models

    Discontinued EXP Models The following EXP models are no longer in production. For the most current list of EXP models, see the Rane web- site. Data Sheets for discontinued models may also be downloaded from the Rane website. EXP1...
  • Page 73: Shielded Cat 5E Cable Requirements

    RJ-45. RAD and DR Grounding Careful grounding of Rane RADs (remote audio devices) and DRs (digital remotes) is important for optimum per- formance. Except for the DR4, all RADs and DRs are powered from the +24 VDC & Ground twisted pair located within the shielded CAT 5e (or better) cable connecting them to the HAL system of multiprocessors.
  • Page 74: Momentary And Latching Toggle Configuration

    HAL SYSTEM INSTALL GUIDE cable ends. This in turn connects the HAL/audio equipment rack grounding point and the metal (if used) junction box mounting the RADs and DRs. For some electrical systems (e.g., isolated grounding systems - sometimes called a single point or star NOTE ground) the grounding procedure outlined above may short two fingers of the building ground system.
  • Page 75 CHAPTER 2:  Hardware Component Details Once you have configured the DR5 in the Hardware Workspace, Toggle controls appear in the HW Control pal- ette of the Processing workspace. You can then link each control to any other Toggle control in your system. The following diagram shows the Control palette and a corresponding Toggle control for the DR5 and how to link it to a wall toggle control in a Room Combine block.
  • Page 76 HAL SYSTEM INSTALL GUIDE What is Latching and how do I use it? The other way to configure a Logic In port is Latching. You use this setting when you wish to connect a two state device to the Logic In port, where the device remains in one state or the other for the duration of the condition you are signaling to HAL.
  • Page 77 CHAPTER 2:  Hardware Component Details What are other differences between Momentary and Latching settings for a Logic In toggle? Momentary and Latching are also different in the following ways: When a port is set to Latching, the corresponding toggle control is read-only. This means that when the tog- gle control is a participant in a link, it is the only control that sets the value for all participants in the link.
  • Page 78: Chapter 3: Installing Your Hal System

    CHAPTER 3: Installing Your HAL System This chapter includes all the details for the seven steps required for installing your HAL System. Task 1: Install and Connect HAL You can work on-site or off-site to install the HAL into the audio rack. Following are a few things to consider for each approach;...
  • Page 79 HAL SYSTEM INSTALL GUIDE If your network requires that the HAL use one or more static IP addresses, you should WARNING configure these addresses prior to connecting the HAL to your network. To do so, install and start the Halogen software, connect your computer directly to the device, and then open the device and configure its IP address(es).
  • Page 80: Task 2: Configuring Hal

    CHAPTER 3:  Installing Your HAL System then add the desired IP address. If the DHCP server on the network supports setting up the Gateway and DNS, the HAL uses these addresses and places them in the proper priority order in the Gateway and DNS lists. Gateway and DNS setup is important if you want your HAL to synchronize its internal clock with an NTP server.
  • Page 81 HAL SYSTEM INSTALL GUIDE Device Firmware Older and the Operations column displays an Update Firmware button. For details, see "Upgrading Halogen Software and HAL Firmware" on page 92. 5. Load the configuration file: 1. From the Device menu on the application toolbar, click Load. 2.
  • Page 82: Task 3: Pulling And Terminating Shielded Cat 5E Cabling

    HAL. Subsequent EXP devices can be installed but are then daisy-chained together. You need shielded CAT 5e or better cables to connect these devices. The HAL1x supports a maximum of thirty-two EXP devices. NOTE To install a single EXP device: 1.
  • Page 83 HAL SYSTEM INSTALL GUIDE cable into the Expansion Bus on the HAL. Plug the other end of the cable into one of the Expansion Bus slots on the EXP. You can use either one of the slots: When HAL recognizes the EXP device, the Link light on the EXP turns green.
  • Page 84: Task 5: Installing And Connecting Rads And Drs

    CHAPTER 3:  Installing Your HAL System To install more than one EXP device: 1. Install the first EXP as described above, connecting it directly to the HAL. 2. Attach the remaining EXP devices to the audio rack in their designated locations. 3.
  • Page 85 HAL SYSTEM INSTALL GUIDE If you want to use RAD functionality in your audio rack near a HAL or EXP, a nice solution is to NOTE install RADs in the rack using special expansion devices. We suggest you take a look at the rack device products by Lowell (specifically the LD9-RMP) or by Radio Design Labs (specifically the RM-D9 rack mount product).
  • Page 86 CHAPTER 3:  Installing Your HAL System configuration's processing map or it has been added but does not have any Scenarios assigned to it. If all is A-OK with the Pager1, its status LEDs on the front of the device become active. In most cases when first installing the product, the Ready light will turn green.
  • Page 87 If you do not have a Neutrik pin available, contact Rane Corporation and we will gladly send one to you. Use the captivated screws on the RAD or DR to attach it to the switchbox. Note that the screws are in slots so that you can adjust the device if need be (for example, to level it inside a switchbox that isn’t level).
  • Page 88 CHAPTER 3:  Installing Your HAL System Attach the Decora plate using the provided hardware. Installing a RAD or DR in an existing HAL System There may be times when you need to install a new RAD or DR after a HAL System is already up and running. Because the RADs and DRs are hot-swappable, in other words, you can replace a RAD or DR without having to power down the system, the process is fairly simple.
  • Page 89: Task 6: Installing And Connecting Analog Devices

    HAL SYSTEM INSTALL GUIDE 3. Verify that the device is functioning correctly (as explained earlier in this section). 4. Attach the RAD or DR to the switchbox. When replacing a RAD or DR with the same model, HAL automatically sends configuration NOTE data to the RAD/DR.
  • Page 90 CHAPTER 3:  Installing Your HAL System 2. Verify that the EXPs, RADs and DRs are connected and configured properly. Look at the Hardware Work- space. Are there any orange Device Missing, Device Mismatch, or Device Unexpected messages? If not, congratulations! Everything is A-OK. If, however, one or more of these device messages are present, you have a little extra troubleshooting work to do.
  • Page 91 HAL SYSTEM INSTALL GUIDE to DR Port 5 on the HAL, yet the port is not configured. The DR Port 5 in the Halogen Hardware Workspace dis- plays an orange Device Unexpected message: Hover your cursor over the orange message to see what physical device HAL detects on that port. This problem occurs in two situations: either you have not yet configured the port or you have configured the wrong port.
  • Page 92 CHAPTER 3:  Installing Your HAL System verification configuration. This procedure assumes that you have installed and connected the HAL and all the EXPs, RADs, and DRs, and have verified that the devices are communicating successfully (by viewing their LEDs or LCD screens.) To perform a simple verification of audio signal receipt and transmission: 1.
  • Page 93: Chapter 4: Introduction To The Halogen Software

    CHAPTER 4: Introduction to the Halogen Software The Halogen software application is your home for designing, configuring, and controlling your HAL audio sys- tem. Halogen's easy-to-use graphical user interface simplifies the design and configuration process so much that your only concern will be deciding how to use the extra time you suddenly have! Basic Structure The Halogen software is divided into three main sections: the Application Framework, the Hardware Workspace, and the Processing Workspace.
  • Page 94: Workspace Layout

    HAL SYSTEM INSTALL GUIDE Following is an explanation of the purpose of each section: Application Framework: Manage global tasks such as discovering, connecting to, and applying con- figurations to HAL devices. Manage and configure the software application itself. Hardware Workspace: Specify, configure, and troubleshoot the physical hardware components of your audio system.
  • Page 95: Installing And Starting The Halogen Software

    DVD is gone – accidentally tossed in the recycle bin along with the cardboard box. If that’s the case, no need to worry. Simply go to the Rane website at rane.com/hal and download the software, free-of-charge. You must be logged in with administrator rights to install this software.
  • Page 96 8. When the installation is complete, the following dialog box appears: Click Finish to complete the installation and open Halogen. There are two versions of the Halogen installer on the Rane website. The web installer and NOTE the single file installer. The web installer is a smaller download, but during the installation it requires an Internet connection to complete the installation.
  • Page 97: Uninstalling The Halogen Software

    Running multiple versions of Halogen on one computer: Installers can run any and every version of Hal- ogen software needed, at any job site, new or old, without uninstalling and reinstalling anything. Halogen allows running any and every version – one at a time – on the same computer. Here are details: http://blog.rane.com/2013/01/15/tip-running-multiple-versions-of-halogen-on-one-computer/...
  • Page 98: Upgrading Halogen Software And Hal Firmware

    Halogen allows running any and every version – one at a time – on the same computer. Here are details: http://blog.rane.com/2013/01/15/tip-running-multiple-versions-of-halogen-on-one-computer/ To upgrade the Halogen software:...
  • Page 99 CHAPTER 4:  Introduction to the Halogen Software behavior. At this point, HAL begins the update of its peripheral devices. EXP—LEDs on front of EXP display a racing pattern. The racing pattern ceases when the update is complete. RAD—LEDs on front of RAD display a racing pattern of green lights; RAD port LEDs on the front panel of HAL or EXP also display a racing pattern.
  • Page 100: Generating Device Labels

    HAL SYSTEM INSTALL GUIDE Generating Device Labels Most RADs (with the exception of the RAD16z, RAD26, AM1, and AM2) contain an area near its top in which you can insert a custom label. We recommend that you use these labels to identify the channel associated with the corresponding jack.
  • Page 101 If you want to use different fonts or colors for the label text, you will need to create the label doc- NOTE ument yourself. To do so, download the Microsoft Word template from the Rane website. Enter the channel names, apply the appropriate fonts and/or colors, print the document, and cut and insert the labels.
  • Page 102: Generating Hardware Lists

    HAL SYSTEM INSTALL GUIDE Generating Hardware Lists The Generate List button creates an Excel file containing the models and quantities of all Rane devices in the Hal- ogen configuration file. This is useful in a variety of ways: 1. It provides an accurate list of the Rane hardware in your design. You can paste this into: A bid’s spreadsheet for fast, accurate pricing...
  • Page 103 CHAPTER 4:  Introduction to the Halogen Software Device Behavior when placed in Locate Mode Type The Locate LED on the front and rear panels of the corresponding device flashes green. The Power, Comm, Audio Tx, and Audio Rx LEDs on the corresponding RAD flash green. The bottom four status LEDs flash green to indicate Locate mode and flash red to NOTE indicate a model Mismatch.
  • Page 104: Swapping Hardware Devices

    HAL SYSTEM INSTALL GUIDE To locate a HAL device: 1. In the application toolbar, click Connect. 2. In the Connect to Device dialog box that appears, click the Locate button associated with the HAL device you want to locate: To locate a peripheral device: 1.
  • Page 105 CHAPTER 4:  Introduction to the Halogen Software To swap RAD or DR hardware devices: 1. On the Hardware Map in the Hardware Workspace, click the title bar of the RAD or DR that you want to move. 2. Drag the RAD or DR to the swap location and drop it there: The hardware at that location moves to the original location of the RAD or DR that you are moving: Voila! That is all you have to do to fix your mis-wired hardware.
  • Page 106 If that maximum number of output channels (32 for HAL1, 512 for HAL1x) is exceeded the configuration cannot be applied to a HAL system. Also, if this happens while you are connected to a HAL system you will first be disconnected from HAL and then the move will be applied...
  • Page 107: Chapter 5: Troubleshooting Your Hal System Installation

    CHAPTER 5: Troubleshooting Your HAL System Installation This section provides troubleshooting tips for specific situations. In each subsection are tables that list potential problems paired with possible causes and proposed action. Troubleshooting the HAL Hardware Problem Possible Causes Suggested Action Power outlet or power strip Try a different outlet or power strip.
  • Page 108 HAL SYSTEM INSTALL GUIDE HAL Rear Panel RAD Status Possible Causes Suggested Action Audio Audio Power Comm The HAL is not pow- Power on the HAL and wait ered. for it to boot up. A cable wired incor- Use a cable tester to verify rectly is loading down the wiring of the shielded the RAD power supply.
  • Page 109: Troubleshooting Rad Devices

    CHAPTER 5:  Troubleshooting Your HAL System Installation Troubleshooting RAD Devices If a RAD is functioning properly and communicating with the HAL, all four of its LED status indicators (Power, Comm, Audio Rx, and Audio Tx) will be green. The following table details possible causes and solutions if one or more of these indicators are off or red.
  • Page 110: Troubleshooting Dr Devices

    HAL SYSTEM INSTALL GUIDE RAD Status Indicators Possible Causes Suggested Action Use a cable tester to verify the wiring of the shielded CAT 5e The twisted pair in the cable. shielded CAT 5e cable GREEN GREEN that carries com- If using a punch block, verify munications data is mis- that the orange pair is properly wired or broken.
  • Page 111 CHAPTER 5:  Troubleshooting Your HAL System Installation DR LCD Display Possible Causes Suggested Action The HAL is not powered. Power on the HAL. Use a cable tester to verify shielded CAT 5e termination. A mis-wired or broken cable is dis- If using a punch block, verify rupting power to the DR.
  • Page 112: Troubleshooting Exp Devices

    HAL SYSTEM INSTALL GUIDE Troubleshooting EXP Devices When an EXP is functioning properly and communicating with the HAL, the Link LED status indicator is green. When an EXP is powered on and connected to the Expansion Bus via shielded CAT 5e cable but cannot com- municate with its upstream connection, the LED is off.
  • Page 113: Troubleshooting The Hal Connection

    CHAPTER 5:  Troubleshooting Your HAL System Installation When an EXP is missing, all downstream EXPs also indicate Missing status. NOTE 5. If all EXPs are present but not connected in the configuration's expected order on the expansion bus, Hal- ogen displays Device Mismatch status for the affected devices. The following image shows that the EXP5x and EXP3x are connected to the expansion bus but not in the correct order: In the above example, you should fix the problem by either changing the physical cabling or by swap- ping the devices in the Halogen Hardware Workspace EXP Navigation Panel.
  • Page 114 The most common culprit at this point is your firewall (either the Windows firewall or a third- party firewall), or maybe your virus protection software. One or both of these applications may be preventing communications. To avoid this problem, add the Halogen and hal1.pcops executables as well as the Rane- Link II service (and both the TCP and UDP port 4994) to your virus protection and firewall exception lists.
  • Page 115 If RaneLink II fails to start after trying all the above options, it’s time to call Rane (see"Rane Technical Sup- port" on page 111). If you are familiar with the Windows Event Viewer, viewing any messages related to RaneLink II may shed some light on the problem.
  • Page 116 HAL SYSTEM INSTALL GUIDE If these broadcast messages do not appear, this indicates a connectivity problem and you will not be able to connect to a HAL device on the local network until the problem is corrected. Try power cycling the HAL and then repeating this step. 7.
  • Page 117: Using Meters To Troubleshoot

    To talk to a real person, call 425-355-6000 between 8:00 AM and 5:00 PM USA Pacific Time Monday through Friday. For software updates as well as access to all product documentation, see Rane's website (rane.com/hal). You can find product warranty information at the back of this guide.
  • Page 118: Index

    66 computer to HAL device 74 Expansion UnitsSee EXPs HAL device 72 EXPs RADs and DRs 78 HAL1x expansion bus overview 64 Connections installing and connecting 76 maximum on HAL1 21, 66 legacy models 66 maximum on HAL1x 13 locating 96...
  • Page 119 4 installing and connecting EXP 76 HAL1 device installing Halogen 89 maximum connections 21 of HAL device 72 HAL1x device pulling/terminating CAT 5e cabling 76 maximum connections 13 RADs and DRs 78 HAL2 device troubleshoot 83 maximum connections 13...
  • Page 120 Required processes 9 Momentary 68 Requirements Overview Administrative rights 8 DRs 43 system 7 HAL1x expansion bus 64 Routers, using with HAL 73 Halogen 87 Starting Halogen 89 IR Remotes 62 Static IP addresses, using with HAL 73 RADs 23...
  • Page 121 RADs 103 technical support 111 using meters 111 Uninstalling Halogen 91 Upgrading Halogen/HAL firmware 92 Verifying installation 83 Workflow of installation 1...
  • Page 122 Rane Factory in the original packaging or a replacement supplied by Rane, with all transportation costs and full insurance paid each way by the purchaser or owner.
  • Page 123 Rane Corporation within 10 days from the date of purchase. If you purchased the product outside the U.S.A. you must file your warranty registration with the Rane Distributor in that country. It is advised that you keep your bill of sale as proof of purchase, should any difficulties arise concerning the registration of the warranty card.
  • Page 124: Declaration Of Conformity

    Manufacturer: Rane Corporation Address: 10802 47th Avenue West, Mukilteo WA 98275-5000 USA This declaration is issued under the sole responsibility of Rane Corporation. The object of the declaration described above is in conformity with the relevant Union harmonisation legislation: 2014/35/EU...
  • Page 125 Manufacturer: Rane Corporation Address: 10802 47th Avenue West, Mukilteo WA 98275-5000 USA This declaration is issued under the sole responsibility of Rane Corporation. The object of the declaration described above is in conformity with the relevant Union harmonisation legislation: 2014/35/EU...
  • Page 126 Manufacturer: Rane Corporation Address: 10802 47th Avenue West, Mukilteo WA 98275-5000 USA This declaration is issued under the sole responsibility of Rane Corporation. The object of the declaration described above is in conformity with the relevant Union harmonisation legislation: 2014/35/EU...
  • Page 127 Manufacturer: Rane Corporation Address: 10802 47th Avenue West, Mukilteo WA 98275-5000 USA This declaration is issued under the sole responsibility of Rane Corporation. The object of the declaration described above is in conformity with the relevant Union harmonisation legislation: 2014/35/EU...
  • Page 128 Apple, Mac, Macintosh, iTunes, Safari, QuickTime, GarageBand, and OS X are registered trademarks of Apple Inc., registered in the U.S. and other countries. Halogen is a trademark of Rane Corporation. ©Rane Corporation 10802 47th Ave. W., Mukilteo WA 98275-5000 USA TEL 425-355-6000 FAX 425-347-7757 WEB rane.com...

This manual is also suitable for:

Hal3sHal2Hal4

Table of Contents