Table of Contents
Advertisement
Advertisement
Table of Contents
Troubleshooting

Related Manuals for Mash Two Fifty 250 cc


Summary of Contents for Mash Two Fifty 250 cc
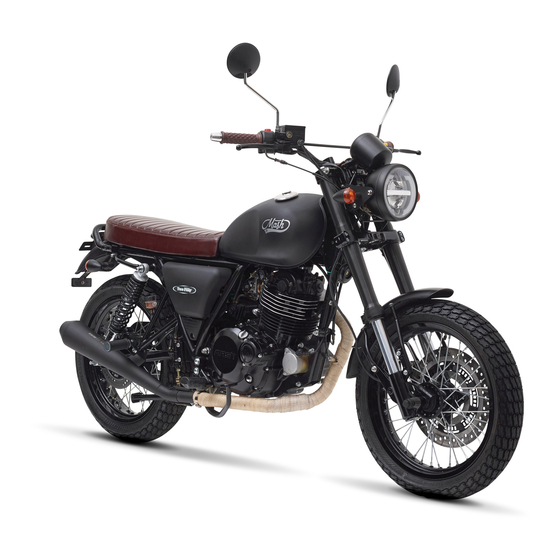
- Page 1 User Manuel...
- Page 2 Congratulations! You are the happy new owner of a MASH which embodies a new spirit, a new trend: a motorcycle with a look and a philosophy "Vintage", synonymous with freedom. Please read this manual thoroughly before using your MASH. Enjoy the ride!
- Page 3 Important Cautions About running-in of a motorcycle The first 1000 km operation is very important in the entire service life of a motorcycle. A correct running-in can guarantee both the longest service life and the best performance of the vehicle. Running-in can polish machined surfaces and form smooth engagement.
- Page 6 There are some differences among various models. For any unconformity between your vehicle and the instruction manual, the real vehicle shall prevail. Foreword Thank you for your choosing our motorcycle. In design, development and manufacture of the series motorcycle, our company applies the latest advanced technology and equipment to provide you with a motorcycle that is reliable in performance, novel in design and elegant in appearance.
-
Page 7: Table Of Contents
Table of contents Specification Two Fifty ......................8 Chapter 1 User Instructions ..................... 9 Chapter 2 Installation position of parts ................11 Chapter 3 Control Part ..................... 12 Chapter 4 Instructions on fuel and engine oil ..............22 Chapter 5 Running in of new motorcycle ................ -
Page 8: Two Fifty
Mash Two Fifty 250 cc Motor type Single cylinder 4T, Air cooling Engine capacity 249cc Compression ratio 9.2:1 Idle speed 1450±100RPM Power max 20 cv à 7500 tr/min Torque max. 20.30Nm/6000r/min Ignition Speed max. ≥ 110 km/h Spark plug DR8EA... -
Page 9: Chapter 1 User Instructions
Chapter 1 User Instructions Instructions on safe riding of motorcycle Always observe the traffic and licensing laws in your country and follow the five points below. Wear safety helmet Safe riding starts from wearing a safety helmet. This is an important factor in motorcycle riding. - Page 10 Position of serial numbers: Chassis number (code VIN) Engine number Position of metal nameplate Chassis number (or VIN code) and engine number is necessary for registration of your motorcycle. Such numbers are needed with order components or service, to allow the distributor to provide you with better service. Chassis number (or VIN code) is on the riser pipe of chassis.
-
Page 11: Chapter 2 Installation Position Of Parts
Chapter 2 Installation Position of Parts Handle bar instrument Rearview Ignition mirror switch Speedometer Front brake grip Clutch grip Accelerator Right handlebar Left handlebar switch switch Right side Battery and fuse box Spark plug Rear footrests Brake Drain Front pedal plug Footrests Left side... -
Page 12: Chapter 3 Control Part
Chapter 3 Control Part Two keys are provided. Please use one key and put the other in a safe place for future use. Instrumental panel Analogue counter Digital counter Reset counter Tachometer : Miles, km/h General Odometer Indicates the total distance traveled by the motorcycle since its first use. Turn signal indicator Lights up when turn signals are used. - Page 13 Gearshift indicator This indicator will show the current gear where the motorcycle is. There are all 5 gears. The 5 number indicators will be lit in turn on shifting. However, when the gear shifter is set in the neutral mode, they will extinguish, but only neutral indicator (N) is lit.
- Page 14 Ignition switch FIG. 1 There are four types position as showed in following sketches OFF Position All circuits are disconnected and the key can be removed. ON Position All igniting circuits are ON and the engine can be started. The key cannot be removed in this position.
- Page 15 Before turn the key to position, park the vehicle with its side stand or central stand in a firm way. If the handlebar is locked, the motorcycle is never pushed any longer; otherwise you will lose balance. Left handlebar control system Clutch grip To start the engine or make a gear shifting, press the grip to release the ride system and cut off the clutch.
- Page 16 Remember to turn on the flashing light each time you change lanes or directions. Switch it off immediately afterwards. Horn button Push the button » to use the buzzer. Right handlebar control system 1. Engine shutdown switch The switch is a rocker switch, located on the tip of right handlebar control panel, with the rockshaft at the center of the rocker.
- Page 17 The starter motor shall be operated not more than 5 seconds. Heavy discharge may cause overheat to circuit and starter motor. If starting is failed after several attempts, stop to check the fuel supply system and starting circuit (refer to "Troubleshooting"). 4.
- Page 18 (1) Fuel nevel (2) Filler Do not fill the tank excessively. Never splash fuel to hot engine. No fuel shall be left on the upper part of the filler, or the fuel may overflow when fuel temperature rises and expands, causing hazard. During fuel refilling, shutdown the engine and turn the key to OFF position.
- Page 19 Warning When the transmission is in neutral position, the neutral indicator lamp is lit on the instrument board. Despite the lamp is lit, be careful to release the clutch grip slowly to make sure if the transmission is really in neutral position. When engaging into a low gear during high speed riding, the engagement of clutch may make a sudden increase in engine speed.
- Page 20 Warning If you park the vehicle on sloped ground, please let it head higher direction to prevent it from sliding down. For the sake of riding safety, before setting out, please make sure that stands are return to upper position and they don’t loose and swag. Rear shock damper Spring adjustment The shock damper springs of rear wheel can be adjusted according to the...
- Page 21 Original factory setting. Tool kit. The tools box is right of side cover. To open the box, insert the ignition key and turn it clockwise and take down the box cover.
- Page 22 Chapter 4 Recommendations for fuel and engine 1. Fuel Gasoline is inflammable and explosive. When handling gasoline, attention should be paid to prevent burnt or accident. ● In places where gasoline is stored or handled, shutdown the engine, do not smoke, and keep away from naked flame or spark. ●...
- Page 23 Haute Degré de viscosité Faible C° -30 -20 -10 0 10 20 30 40 The use of SAE5 10W-30 4-stroke lubricant is recommended. Note : Lubricant shall be replaced at 1000km or about one month for the first time, every 3000km thereafter. Amount of oil : 1700 ml Note : Always check the oil level to make sure the oil quantity is correct.
- Page 24 Chapter 5 Running-in of a new motorcycle The importance of correct new vehicle running-in was mentioned in Foreword. The correct running-in method is as follows. Maximum speed The maximum speed during running-in period is shown in the table. Maxi 70% of the throttle grip First 800 kilometers <...
- Page 25 Timely making 1000 km maintenance can guarantee a long engine life and the best engine performance. Precaution 1000 km maintenance shall be carried out according to the "Troubleshooting" in the manual. Pay special attention to the "precaution" and "warning" in the section.
-
Page 26: Chapter 6 Inspection Before Riding
Chapter 6 Inspection before riding Before riding, make sure to carefully check the following items. Never ignore the importance of the inspection. Contents Purpose Smooth Free steering Steering handlebar No loose Operate all lamps -- head light, tail light, brake light, instrument Lighting board lighting lamp, turning signal lamps Transmission oil... -
Page 27: Chapter 7 Essentials Of Riding
Chapter 7 Essentials of Riding If it is the first time for you to ride this type of motorcycle, you are advised to practice on a road away from highways, until you have completely been familiar with the control and operation of the vehicle. Before riding, make sure that the side stand is returned to the uplift position. - Page 28 Note : After engine ignition, immediately release the starting button, to avoid adverse effects to the engine. If the engine is not started after 5 seconds, wait for 10 seconds before making another attempt to prevent damaging the battery. In case of failure in engine starting after two or three attempts, rotate the accelerator grip for 1/8 or 1/4 turns and try again.
- Page 29 Start riding the motorcycle Precaution Start the engine with the transmission in neutral position, the clutch engaged and rider riding in normal riding position. Firmly press the clutch grip, wait a little moment, press down the gear lever to engage the first gear, rotate the accelerator grip slowly to you and smoothly and slowly release the clutch grip.
- Page 30 Use of brake and parking method Rotate the accelerator grip outward to fully close the throttle. At the same time, apply the front and rear brakes with even forces. Use gear shifting to slow down. Before the motorcycle is stopped, firmly press the clutch grip, shift into neutral gear and observe the neutral indicator to make sure the neutral gear is engaged.
-
Page 31: Chapter 8 Inspection And Maintenance
Chapter 8 Inspection and maintenance The following table shows the interval of regular maintenance in travel distance or number of months. At the end of an interval, be sure to carry out the specified inspection, lubrication and maintenance. If your motorcycle is used with heavy loads, such as high power riding in a dusty environment, the maintenance shall be carried out more frequently. - Page 32 Caption : Inspection : I / Tightening : S / Cleaning : C / Replace : R Note that the revision interval is 3000 km. Do not forget to certify them in the warranty booklet provided by your MASH dealer...
- Page 33 Lubrication Table Interval Every 6000 km or 6 Every 12000 km or Item months 12 months Engine oil or Accelerator wire Engine oil or Clutch wire Speedometer wire Grease (2) Riding chain Lubricate every 1 000 km (3) Brake cam shaft Grease (2) Accelerator grip Grease (2)
- Page 34 Before using, fill electrolyte to a level between the upper and lower limits. During using, the fluid level must be kept between the upper limit and lower limit. Once the battery has been in use, no diluted sulfuric acid shall be added. If the fluid level drops below the lower limit, fill distilled water to the upper limit.
- Page 35 In case that electrolyte gets in eyes, immediately wash the eyes with plenty of clear water for at least 15 minutes, before going to hospital. In case that electrolyte is drunk, drink a large amount of water or milk, and then milk or vegetable oil containing magnesia.
- Page 36 Spark plug After the first 1000 km and every 3000 km thereafter, clean off any carbon deposit from spark plug by using a small steel wire brush or a spark plug cleaner. Readjust the spark plug gap with a thickness feeler to keep it between 0.6 - 0.8 mm.
- Page 37 Engine oil The longevity of the engine depends on the quality of the oil used, the frequency of its replacement and the checking of the oil level.
- Page 38 Vérification engine oil 1. Fil cap 2. Porthole F : Level maxi L : Level mini Warning Engine oil ruler shows the oil level. When oil level is low, never start the engine. Fill oil until the oil level is just below the upper limit of oil window. Replacement of engine oil and oil filter Replace engine oil the first 1000 km and every 3000 km thereafter.
- Page 39 Remove drain plug from strainer cover on the engine bottom to drain oil. Tighten the oil drain ring and fill fresh engine oil into the oil filler, before gently tightening the top cover Note : Always check the oil level to make sure the oil quantity is correct. Start the engine and allow it running idle speed for several seconds.
- Page 40 (ABS). If the ABS warning light is switched on, it is necessary to go to an authorized Mash dealer for an accurate diagnosis. Check the brake after first 1000 km and every 3000 km thereafter.
- Page 41 Warning : Disc brakes are part of a high-pressure system. For your safety, the replacement interval and hydraulic oil should not exceed the interval specified in the maintenance schedule of the manual. Brake fluid It is harmful if brake fluid is drunk by mistake or contacts the eyes or skin.
- Page 42 Brake lining The essential of checking the front wheel brake lining is to see if the lining is worn to the limit mark. If wearing exceeds the mark, the brake lining shall be replaced with a new one. Do not ride immediately after replacing a new wheel disk brake lining. Press the braking grip for several times to allow the brake lining fully extended, the grip spring force restored, and the brake fluid is circulated smoothly.
- Page 43 Front brake light switch The switch of front brake light is located below the brake grip. Loosen the screw and move the switch position back and forth to find a proper point so that the lamp is lit immediately when pressure is applied but before the grip is fully pressed.
- Page 44 Regularly degrease the rear brake disc (5) to ensure optimum braking performance at all times. In the event of a brake fluid leak, contact your MASH dealer. In the event of a braking problem, contact your Mash dealer. Brake Fluid Type : DOT4 Rear brake light switch Rear brake light switch is located at the right side of chassis.
- Page 45 Sliencer Please keep away from the motorcycle silencer after a long time riding, to avoid being burned. Fuse The fuse box is located inside the guard board on the right side of the chassis. A fuse is provided for all the electrical system. In case of any trouble to electrical system, check the fuse first.
- Page 46 Replacement of bulb The rating of bulbs can be found in Chapter 13 Parameter List. Always replace a bulb with a new one of the same rating. Otherwise, overload to electric system and premature bulb damage may be caused. Precaution The head light is generally reflection lamp.
- Page 47 Take out the air filter foamed plastic sleeve shell. Separate the foamed plastic from the outer frame. Precaution During cleaning the filter element, check for any damage to the filter element and replace when necessary. Never start the engine without the filter element installed, or the engine wearing may be increased Clean the foam type filter as follows: 1.
- Page 48 / fuel mixture. Prohibition and impossibility of adjusting the injection system. Therefore, it isn’t possible and formally prohibited to adjust the injection system of the motorcycle. If the EFI lamp is switched on, it’s necessary to go to an authorized Mash dealer for a diagnostic...
- Page 49 Adjustment of carburetor idle speed RPM 1. Locking nut 2. Adjuster 1. Loosen the locking nut. 2. Rotate the adjuster to make the wire clearance between 0.5 - 1.0 mm. 3. After clearance adjustment, tighten the locking nut once again.
- Page 50 Warning After accelerator wire adjustment, check the operation of accelerator grip. Engine idle speed shall not increase due to the adjustment, and the grip shall return to the closed position automatically. Adjustment of clutch Clutch adjustment is made through adjusting the tension of wire rope for clutch grip.
- Page 51 Loosen the nut (1) and turn the tension ring of the lever (2) fully clockwise. Unscrew the lock nut of the cable tension ring (5) before turning the ring (4) in one direction and then the other until the clearance of the lever reaches approximately 4 mm.
- Page 52 20 - 30 mm Precaution The open end of riding chain connection clip shall point away from the direction of rotation. 1.Chain connector clip 2. Direction of rotation Cleaning and lubrication of riding chain Dirt on riding chain may intensify the wearing of riding chain and chain wheels. Therefore, clean the riding chain every 1000 km with cleaning solvent, and lubricate it with special chain lubricant or engine oil.
- Page 53 Pressure 250cc : Avant - 1,80kg / Arrière - 2,20 kg When riding a motorcycle with over-worn tires, the riding stability is low and it may get out of control. When the depth of front wheel tread pattern is reduced to 1.6 mm or less, it is advisable to replace the cover tire.
-
Page 54: Chapter 9 Measures To Reduce Pollution
Chapter 9 Measures to Reduce Pollution To reduce exhaust emission and noise pollution, please follow the several points below: Use special purpose lubricant Use unleaded gasoline 95 or 98 Do not use fuel E10. Observe any abnormal engine noise... -
Page 55: Chapter 10 Troubleshooting
Chapter 10 Troubleshooting If the engine cannot be started, check the following items to locate the cause. If there is fuel in fuel tank. 1、 If fuel flows from fuel valve to carburetor. 2、 Disconnect the fuel pipe from carburetor and turn the fuel valve to open 3、... - Page 56 If the motorcycle is still in warranty period, be sure to contact your distributor before making any attempt to repair by yourself. Tampering with the vehicle in warranty period may invalidate the basis of warranty. (Refer to the warranty book provided by the authorized MASH dealer.)
- Page 57 Table of engine troubleshooting Problem Cause Remedy • • • Oil stained spark Remove, clean and plug dry it Sparking normal in high • • Broken spark plug Replace spark plug voltage cable and no magnetic core or sparking in broken electrode spark plug •...
- Page 58 • Adjust free play or engine • Slipping clutch replace clutch, friction lining and spring • • Too tight chain Adjust tension • Unreleased brake • Adjust brake clearance (Refer to the warranty book provided by the authorized MASH dealer.)
-
Page 59: Chapter 11 Storage
Chapter 11 Storage Method If the motorcycle is not used for a long time in winter or other seasons, it is necessary to carry out special maintenance with appropriate materials, equipment and techniques. Motorcycle When a motorcycle is not used for a long time, make preparation before storage: Wash the motorcycle, park it with the central stand on a solid and flat ground and prevent it from rolling. - Page 60 Steps during storage For conventional battery, check electrolyte level every month. If the fluid level is low, timely replenish it with distilled water or pure water to the highest level mark. (Never use electrolyte or tap water) Battery shall be kept clean. Corrosion may happen if electrolyte is splashed to the vehicle body, terminal or wires.
- Page 61 The copyright and final power of interpretation of the manual belongs to our Motorcycle Inc. Without prior permission by our company, no part of the manual shall be reproduced, quoted or reprinted. All information, descriptions pictures and specifications in the manual are the latest before publishing.
- Page 62 Votre revendeur mash-motors.fr...
Need help?
Do you have a question about the Two Fifty 250 cc and is the answer not in the manual?
Questions and answers