Table of Contents
Advertisement
Available languages
Available languages
Quick Links
Operating instructions
EN
ES
Español, 13
Hrvatski, 37
LSF 712
Contents
PL
Installation, 2-3
Polski, 25
Start-up and use, 6-7
Wash cycles, 8
Table of wash cycles
Shutting off the water and electricity supplies
Cleaning the dishwasher
Preventing unpleasant odours
Cleaning the sprayer arms
Cleaning the water inlet filter
Assistance
Troubleshooting, 12
DISHWASHER
Advertisement
Chapters
Table of Contents

Related Manuals for Hotpoint Ariston LSF 712


Summary of Contents for Hotpoint Ariston LSF 712
-
Page 1: Table Of Contents
Loading the racks, 5 Lower rack Cutlery basket Upper rack Start-up and use, 6-7 Starting the dishwasher LSF 712 Measuring out the detergent Wash options Wash cycles, 8 Table of wash cycles Rinse aid and refined salt, 9 Measuring out the rinse aid... -
Page 2: Installation
Installation Positioning and levelling see Assistance see adjacent information see the Assembly instruction sheet New Acqua Stop Connecting the water and electricity supplies see figure... -
Page 3: Advice Regarding The First Wash Cycle
Advice regarding the first wash cycle chapter entitled Rinse aid and refined salt see chapter entitled Rinse aid and refined salt see figure Technical data width 45 cm Dimensions height 85 cm depth 60 cm Capacity 10 standard place-settings Water supply 0,05 ÷... -
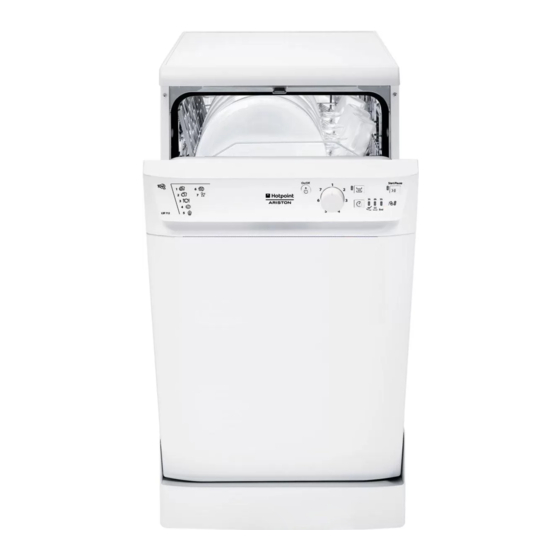
Page 4: Description Of The Appliance
Description of the appliance Overall view Upper rack Upper sprayer arm Tip-up compartments Rack height adjuster Lower rack Lower sprayer arm Cutlery basket Washing filter Salt dispenser Detergent and rinse aid dispensers Data plate Control Panel Control panel Half load button and indicator light Select wash cycle knob Start/Pause button... -
Page 5: Loading The Racks
Loading the racks Tilt A Tilt B Tilt C Before loading the racks, remove all food residues from the crockery and empty liquids from glasses and cups. Arrange the crockery so that it is held in place firmly and does not tip over. After loading the appliance, check that the sprayer arms can rotate freely. -
Page 6: Start-Up And Use
Start-up and use Starting the dishwasher Measuring out the detergent A good wash result also depends on the correct 1. Turn the water tap on. amount of detergent being used; exceeding the stated 2. Press the ON/OFF button: all the indicator lights on amount does not result in a more effective wash and the control panel will light up for a few seconds. -
Page 7: Wash Options
Wash options* The OPTIONS may only be set, modified or reset If there are not many dishes to be washed, a half load after the wash cycle has been selected and before cycle may be used in order to save water, electricity and the Start/Pause button has been pressed. -
Page 8: Wash Cycles
Wash cycles Detergent Wash Wash cycle (A) = compartment A cycles duration Wash cycle selection Wash cycle Options (B) = compartment B which (tolerance instructions include ±10%) Powder Liquid Tablets drying Hrs. Min. Heavily soiled dishes and pans (not to be used for 25 g (A) 25 ml (A) 1 (A) -
Page 9: Rinse Aid And Refined Salt
Rinse aid and refined salt Only use products which have been specifically designed for dishwashers. Do not use table salt or industrial salt, or washing up liquid. we recommend that you add salt, ON/OFF especially if you live in an area where the water is hard or very hard. -
Page 10: Care And Maintenance
Care and maintenance Clean the water inlet filter at the tap outlet regularly. - Turn off the water tap. - Unscrew the end of the water inlet hose, remove the filter and clean it carefully under running water. - Replace the filter and screw the water hose back into position. -
Page 11: Precautions, Advice And Assistance
Precautions, advice and Assistance Saving energy and respecting the environment General safety see Wash cycles Table of wash cycles see Start-up and use see Start-up and use Disposal Assistance see Troubleshooting Description of the appliance... -
Page 12: Troubleshooting
Troubleshooting Whenever the appliance fails to work, check for a solution from the following list before calling for Assistance. Problem: Possible causes / Solutions: The dishwasher does not start. • T h e p l u g h a s n o t b e e n i n s e r t e d i n t o t h e e l e c t r i c a l s o c k e t p r o p e r l y , o r t h e r e i s n o p o w e r i n t h e h o u s e . - Page 13 Panel de control Cargar los cestos, 17 Cesto inferior Cesto de los cubiertos Cesto superior Puesta en funcionamiento y uso, 18-19 LSF 712 Poner en funcionamiento el lavavajillas Cargar el detergente Opciones de lavado Programas, 20 Tabla de programas Abrillantador y sal regeneradora, 21...
-
Page 14: Instalación
Instalación Conexión del tubo de carga de agua Colocación y nivelación ver la hoja de Montaje ver Asistencia Técnica ver al lado Dispositivo de seguridad contra inundación Conexiones hidráulicas y eléctricas New Acqua Stop ATENCIÓN: ¡VOLTAJE PELIGROSO! ver la figura "... -
Page 15: Advertencias Para El Primer Lavado
Conexión del tubo de descarga de agua Cinta anticondensación Advertencias para el primer lavado ver el capítulo Abrillantador y sal regeneradora ver el capítulo Abrillantador y sal regeneradora ver la figura Conexión eléctrica Datos técnicos ancho: 45 cm Dimensiones altura: 85 cm profundidad: 60 cm Capacidad 10 cubiertos estándar... -
Page 16: Descripción Del Aparato
Descripción del aparato Vista de conjunto Cesto superior Rociador superior Cestos adicionales Regulador de la altura del cesto Cesto inferior Rociador inferior Cesto para cubiertos Filtro de lavado Depósito de sal Cubetas de detergente y depósito de abrillantador Placa de características Panel de control Panel de control Botón y piloto... -
Page 17: Cargar Los Cestos
Cargar los cestos Inclinación A Inclinación B Inclinación C Antes de cargar los cestos, elimine de la vajilla los residuos de alimentos y vacíe los vasos y copas. Coloque la vajilla cuidando que quede bien firme y que no se vuelque. Después de haber realizado la carga, controle que los rociadores giren libremente. -
Page 18: Puesta En Funcionamiento Y Uso
Puesta en funcionamiento y uso Cargar el detergente Poner en funcionamiento el lavavajillas Utilice sólo detergente para lavavajillas. ver más adelante NO UTILICE detergentes para lavado a mano. ver Cargar los cestos Al finalizar el ciclo, un uso excesivo de detergente puede dejar residuos de espuma. -
Page 19: Opciones De Lavado
Opciones de lavado* Media carga Recuerde que debe reducir a la mitad la cantidad de detergente. (ver la tabla de programas) Es preferible utilizar detergente en polvo. Esta opcin no est disponible con el programa: Rapido. Comienzo retrasado Tabla de Comienzo Media 3, 6 o 9... -
Page 20: Programas
Programas Para las OPCIONES consulte la tabla de Opciones que se encuentra en la página de Puesta en funcionamiento y Uso. Si la vajilla está poco sucia o ha sido aclarada precedentemente bajo el agua, recuerde disminuir la dosis de detergente. La cantidad y el tipo de programas y opciones varían según el modelo de lavavajillas. -
Page 21: Abrillantador Y Sal Regeneradora
Abrillantador y sal regeneradora Use solamente productos específicos para lavavajillas. No use sal de cocina o industrial ni detergente para lavar a mano. Respete las indicaciones contenidas en el envase. se aconseja agregar sal, especialmente si el agua es muy dura. Tabla de Durezas del Agua Si no se agrega ni sal ni abrillantador, es normal °dH... -
Page 22: Mantenimiento Y Cuidados
Mantenimiento y cuidados Periódicamente limpie el filtro de entrada de agua colocado a la salida del grifo. - Cierre el grifo de agua. - Desenrosque el extremo del tubo de carga de agua, quite el filtro y límpielo delicadamente bajo un chorro de agua corriente. -
Page 23: Precauciones, Consejos Y Asistencia Técnica
Precauciones, consejos y Asistencia Técnica Ahorrar y respetar el medio ambiente Ahorre agua y energía ver Programas Seguridad general Tabla de programas Puesta en funcionamiento y uso ver Puesta en funcionamiento y uso Detergentes sin fosfatos, sin cloro y que contengan enzimas Asistencia Técnica Eliminación... -
Page 24: Anomalías Y Soluciones
Anomalías y soluciones Si el aparato presenta anomalías de funcionamiento, controle los siguientes puntos antes de llamar al Servicio de Asistencia Técnica. Anomalías: Posibles causas / Solución: El lavavajillas no arranca • El e n c h u f e n o e s t á b i e n i n t r o d u c i d o e n l a t o m a d e c o r r i e n t e o e n l a c a s a n o h a y c o r r i e n t e . - Page 25 Dane techniczne Widok ogólny Panel sterowania Kosz dolny Kosz na sztuæce Kosz górny Uruchomienie zmywarki Dozowanie œrodka myj¹cego LSF 712 Opcje mycia Tabela programów Dozowanie œrodka nab³yszczaj¹cego Dozowanie soli regeneracyjnej Wy³¹czanie wody i pr¹du elektrycznego Czyszczenie zmywarki Unikanie powstawania brzydkich zapachów Czyszczenie spryskiwaczy Czyszczenie filtra dop³ywu wody...
- Page 26 Instalacja patrz karta monta¿owa patrz Serwis Techniczny patrz obok New Acqua Stop patrz rysunek...
- Page 27 Po zabudowaniu zmywarki otworzyæ drzwi i przykleiæ przezroczysty pasek samoprzylepny pod drewnianym blatem, aby zabezpieczyæ go przed ewentualnymi skroplinami. patrz rozdzia³ Œrodek nab³yszczaj¹cy i sól regeneracyjna patrz rozdzia³ Œrodek nab³yszczaj¹cy i sól regeneracyjna patrz rysunek Dane Techniczne szerokość cm 45 Wymiary wysokość...
- Page 28 Opis urz¹dzenia Kosz górny Spryskiwacz górny Pó³eczki Regulacja wysokoœci kosza Kosz dolny Spryskiwacz dolny Kosz na sztuæce Filtr zmywania Pojemnik na sól Pojemniki na œrodek myj¹cy i nab³yszczaj¹cy Tabliczka znamionowa Panel sterowania Przycisk i kontrolka Po³owa wsadu Przycisk i kontrolka Pokrêt³o Wybór Start/Pauza p r o g r a m ó...
- Page 29 Nape³nianie koszy Nachylenie A Nachylenie B Nachylenie C Przyk³adów nape³niania. patrz rysunek patrz rysunek Przyk³adów nape³niania...
- Page 30 Uruchomienie i u¿ytkowanie Tabeli programów...
- Page 31 (patrz tabela programów) Tabela opcji Start z Połowa opóźnieniem wsadu 1. Intensywny 2. Normalny 3. Codzienny 4. Namaczanie 5. Eko 6. Szybki 7. Kryształy...
- Page 32 Programy Środek myjący Czas trwania (A) = pojemnik A programu Wskazówki ułatwiające Programy z Program Opcje (B) = pojemnik B (tolerancja wybór programu suszeniem ±10%) proszek płyn tabletki Godz. Min. Bardzo brudne naczynia i garnki (nie stosować do mycia delikatnych 25 g (A) 25 ml (A) 1 (A)
- Page 33 Œrodek nab³yszczaj¹cy i sól regeneracyjna Tabelka Twardości Wody °dH °fH mmol/l poziom Od 0°f do 10°f nie należy stosować soli. * tym ustawieniem czas trwania cyklów może lekko przedłużyć się. patrz Opis...
- Page 34 Konserwacja i utrzymanie rys.4 !"...
- Page 35 Œrodki ostro¿noœci zalecenia i Serwis Techniczny patrz Programy Tabel¹ programów patrz Uruchamianie i u¿ytkowanie patrz Uruchamianie i u¿ytkowanie Serwis Techniczny patrz Nieprawid³owoœci w dzia³aniu i sposoby ich usuwania patrz Opis urz¹dzenia...
- Page 36 Anomalie i œrodki zaradcze Nieprawidłowości: Możliwe przyczyny / Rozwiązanie: Zmywarka nie uruchamia się. • Wtyczka jest niewłaściwie włożona do gniazdka elektrycznego lub w mieszkaniu nie ma prądu. • Drzwiczki zmywarki nie są dokładnie zamknięte. • Została ustawiona funkcja Start z opóźnieniem (patrz Uruchamianie i użytkowanie). Zmywarka nie odprowadza wody.
- Page 37 Upute za uporabu Pregled LSF 712...
- Page 38 Postavljanje vidi upute o “Montiranju”). vidi “Servisiranje”). vidi sa strane (Vidi upute za ugradnju u privitku dokumentacije.) New Acqua Stop POZOR! VISOKI NAPON! vidi sliku...
- Page 39 vidi “Sredstvo za sjaj i regenerirajuæa sol”): (vidi poglavlje „Sredstvo za sjaj i regenerirajuæa sol“ vidi sliku Tehnički podaci Širina 45 cm Dimenzije Visina 85 cm Dubina 60 cm Kapacitet Standardno posuđe za 10 osoba vidi odlomak 0,05 ÷ 1 MPa (0,5 ÷ 10 bar) „Opis perilice posuða“);...
- Page 40 Opis aparata...
- Page 41 Stavljanje posuða na police Primjeri punjenja. vidi sliku vidi sliku ”Primjere punjenja”.
- Page 42 Pokretanje i korištenje vidi dolje vidi “Stavljanje posuða na police”) (vidi sa strane). Posudica A: Posudica B: - Radi smanjenja potrošnje elektriène energije, u pojednim uvjetima NEKORIŠTENJA, stroj se automatski iskljuèuje. ”Tablici programa”:...
- Page 43 Pola punjenja (vidi tablicu programa) Ovaj naèin nije raspoloživ s programom: Kratki. Tablica Načini Kašnjenje u Pola pokretanju punjenja 1. Intenzivni 2. Obični 3, 6, 9 sati. 3. Daily 60'/Dnevno 4. Namakanje (3 sata), sušenja (6 sati) i kraja (9 sati) 5.
- Page 44 Programi Deterdžent Trajanje (A) = posudica A programa Upute za izbor programa Program Sušenje Načini (B) = posudica B (odstupanje ±10%) U prahu Tekući U tabletama h: min Vrlo prljavo posuđe i lonci (ne smije se koristiti za krhko 25 g (A) 25 ml (A) 1 (A) 2:25’...
- Page 45 Sredstvo za sjaj i regenerirajuæa sol Tablica tvrdoжe vode °dH °fH mmol/l Razina Od 0°f do 10°f savjetujemo da ne koristite sol. s ovom postavkom trajanje ciklusa moћe biti neљto duћe. vidi “Opis”) vidi sliku Postavljanje tvrdoæe vode...
- Page 46 Održavanje i èišæenje - sl. 4). "...
- Page 47 Mjere predostrožnosti savjeti i Servisiranje vidi “Programi”). • vidi “Pokretanje i korištenje”). • (vidi “Pokretanje i korištenje”) Servisiranje...
- Page 48 Nepravilnosti i rješenja 195080213.00 09/2009 - Xerox Fabriano Nepravilnosti: Mogući uzroci / rješenje: Perilica se ne pokreće • Utikač nije dobro utaknut u utičnicu ili nema struje u kući. • Vrata pe rilice posu đa nisu dobro zat vo ren a. •...
Need help?
Do you have a question about the LSF 712 and is the answer not in the manual?
Questions and answers