Table of Contents
Advertisement
Advertisement
Table of Contents

Related Manuals for Conbrov WF98


Summary of Contents for Conbrov WF98
- Page 1 World's Smallest Wifi Cam User Manual Model No.: WF98...
-
Page 2: Table Of Contents
Warning on Invasion of Privacy......What's Included ..........8 Before Using Your Conbrov WF98 Camera..1 0-11 How to Use Your Conbrov WF98 Camera ..12-14 1.Turning the Camera on/off....... 12 2.Record Videos Manually......... 1 3 3.Play the Video..........1 3 About Night Vision ......... - Page 3 Table of Contents Remote View Setting ........21-24 1. Connect the Camera to WiFi Router ....21 2. Choose Your WiFi........22 .......... 23 3. Restore Default 4. Add More Cameras........24 APP Instruction ........25-34 1.Menu Instruction........25-28 2.Settings Instruction........29 (1) WiFi Settings........
-
Page 4: Part 1:Before First Use
Part1: Before First Use Installing the microSD card Installing a microSD card before the first use, the camera supports a class 10 microSD card at least 4GB and max 128GB. With the contacts facing down Charging the camera Before the first use, charge the camera for about 30 minutes via your PC or USB charger (Power adapter should be no more than 5V/1A). - Page 5 Part1: Before First Use 1.Format the SD card in the camera Turn on the camera, press and hold the WiFi Button and REC/RESET Button at the same time, the LED will flash blue and yellow, which indicates the SD card is being formatted;...
- Page 6 Part1: Before First Use How to Mount the Camera With the included magnetic clip and magnetic bracket, you can mount the camera on a desk, and even as a pocket or body camera by hanging it on your pocket. Note: There is a built-in magnet at the back of the camera that can be attached to the surface of a metal such as a refrigerator.
- Page 7 Part1: Before First Use Reset the camera If the camera malfunctions for any reason, reset it by pressing and holding the REC/RESET Button for 5 seconds. WIFI REC/RESET...
-
Page 8: Part 2:Quick Guide
Part2: Quick Guide B.Connect the camera A.Turn on the camera to your phone Slide the switch down to turn on the camera D.Play the video C. Record videos For more detailed information, see Part 3: Detailed User Manual. Note: The camera defaults wifi connection mode for the first use, and the second time will default to the last mode, etc. -
Page 9: Safety Precautions
Safety Precautions •Read this instruction manual carefully before using the camera. It contains important information for your safety as well as operating and maintenance instructions. •Follow all safety precautions in order to prevent damage due to improper use of the camera. •Keep this user manual for future use. -
Page 10: Warning On Invasion Of Privacy
Warning on Invasion of Privacy The camera should be used for legal purpose only. Follow the laws of your country. Recording and circulating an image of an individual may constitute an infringement of their privacy for which you could be liable. Ask for authorization before filming individuals, particularly if you want to keep your recordings and/or circulate images on the Internet or any other medium. -
Page 11: What's Included
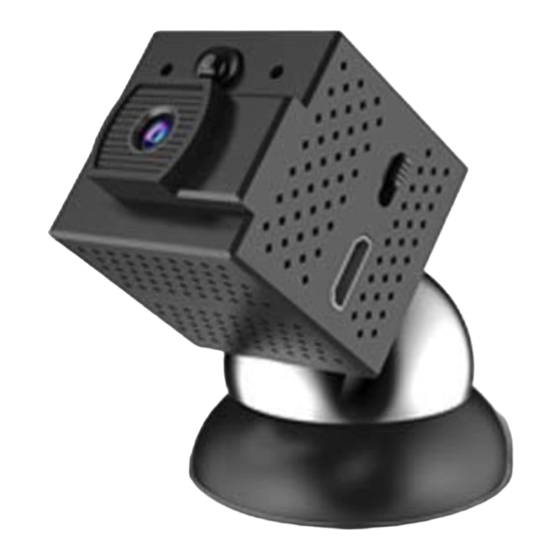
What's Included Camera USB Cable Magnetic Bracket World's Smallest Wifi Cam User Manual Model No.: WF98 Camera Clip Card Reader User Manual... - Page 12 WF98 Diagram Microphone Power ON/OFF Photoresistor Lens REC/RESET WIFI SD Card Slot...
-
Page 13: Before Using Your Conbrov Wf98 Camera
Before Using Your Conbrov WF98 Camera 1.Charging Your Camera Red Indicator Fully charged Steady red Charging Fully charged (1)Charge the camera for about 30 minutes via your PC or USB charger 5V/1A. (2)Connect the supplied USB cable to the Micro USB port and a suitable USB port on your PC or a USB charger (separate charger not included). - Page 14 Before Using Your Conbrov WF98 Camera Caution! Format the micro SD card before first use. Doing this, however, will remove all data from the card. Make sure to back up any data before formatting. 3.Format the SD Card Turn on the camera, press and hold the...
-
Page 15: How To Use Your Conbrov Wf98 Camera
How to Use Your Conbrov WF98 Camera 1.Turning the Camera on/off (1) Slide the switch down to turn on the camera, the LED will light up blue for 15 seconds and then turn off, then the LED will light up blue again, which indicates that the camera is in the standby mode. -
Page 16: Record Videos Manually
How to Use Your Conbrov WF98 Camera 2.Record Videos Manually In standby mode, press the REC/RESET button, the LED will flash blue for 3 time and then turn off, which indicates that it is in the manual recording mode. Press the... -
Page 17: About Night Vision
How to Use Your Conbrov WF98 Camera 4.About Night Vision Whether under manual recording or motion detection, the camera will automatically switch into night vision when ambient light brightness is lower than 10LUX, and the video is black and white. -
Page 18: Set Up Your Wf98 Camera
Set up Your WF98 Camera Step 1:APP Download Please search in Google Play or APP store for “Mini WiFi cam”, you can also download directly by scanning the QR code, which are something as below. Mini WiFi Cam Step 2 : Connect the Camera to Your Phone... -
Page 19: Step 3:Add The Camera To Your App
Set up Your WF98 Camera RCAM-061888-HDWFF Android Or IOS Important notes: -If you can not find the camera's hotpot WiFi from your WiFi list. Please refresh it. -It is only designed for android or IOS smart phone platform. -It is not recommend to set up on laptop computer. -
Page 20: Auto Search The Camera
Set up Your WF98 Camera 1. Auto Search the Camera Camera found Auto search IPC-E8ABFA2E8062 RCAM-007250-NZCZS Manually add IPC-E8ABFA2E8062 RCAM-007250-NZCZS... -
Page 21: Manually Add The Camera
Set up Your WF98 Camera 2.Manually Add the Camera Name your camera Input the ID number from the bottom of your camera Auto Search Manually (See bottom of WiFi Camera) Do Not Change Keep Blank... -
Page 22: Open The Camera In Your App
Set up Your WF98 Camera 3.Open the Camera in Your APP -The WiFi Cam will be found automatically as: RCAM-XXXXXX-XXXXX, click on that and Wait until the camera is activated. IPC-E8ABFA2E8062 RCAM-007250-NZCZS This is your camera's ID found by auto search... -
Page 23: Set Up Your Wf98 Camera
Set up Your WF98 Camera - Now that you have finished the connection through the WiFi Cam’s WiFi hotpot, you can see the viewing area of the camera on your mobile/ smart phone. Through WiFi hotspot If you want to remotely view the camera, please... -
Page 24: Remote View Setting
Remote View Setting 1.Connect the Camera to WiFi Router Connect the WiFi Cam to your WiFi router to remotely view the WiFi Cam on your mobile/ smart phone. Click the gear tool to view and choose settings. Click here Note: Before you connect the WiFi Cam to your WiFi router for remote viewing, please make sure you have already connected your mobile /smart phone as directions above. -
Page 25: Choose Your Wifi
Remote View Setting 2.Choose Your WiFi Choose WiFi Settings and choose your local WiFi name. Input your WiFi password and then Tap “Save”.The camera will be restarted, the LED will flash blue and then turn off, after that, the LED will flash yellow and then turn off, which indicates the camera is in the Wifi Connection Mode. -
Page 26: Restore Default
Remote View Setting 3.Restore Default After connecting your Wifi router, please click “Restore default”, wait 1-2 minutes until the WiFi camera is active. (The green network indicator is always on) User Settings Wifi Settings Mail Settings Alarm Settings Click Restore default “Yes”... -
Page 27: Add More Cameras
Remote View Setting 4.Add More Cameras Click here to add more cameras You can now view what your WiFi Cam sees from the WWW any where you have WiFi access on your mobile/smart phone. Important note: - If you cannot activate or see the WiFi Cam image, please move your WiFi Cam and mobile /smart phone as close to your router as possible to get a stronger WiFi signal. -
Page 28: App Instruction
Part 4. APP Instruction 1. Menu Instruction Add new camera Camera added Settings All cameras added APP Gallery recorded files System Settings... - Page 29 Part 4. APP Instruction Snapshot Manually Video recording TV mode/resolution adjust Two way talking ( Not applicable for this mode) Audio from camera...
- Page 30 Part 4. APP Instruction Enter settings Set camera time same as mobile Edit camera information Delete present camera Click here to check all manually recorded videos and photos in the app.
- Page 31 Part 4. APP Instruction You will get the push photo message once your camera Receive push message triggered a motion. (You have to make sure you've already set the Alarm setting to ON for Motion detection and Alarm Recording)
-
Page 32: Settings Instruction
Part 4. APP Instruction 2.Settings Instruction Set WiFi network Set email alarm upon motion Motion alarm Wifi Settings settings Mail Settings Set user account and password Alarm Settings User Settings Restore default Restore default... -
Page 33: Wifi Settings
Part 4. APP Instruction (1) WiFi Settings User Settings Wifi Settings Mail Settings Alarm Settings Restore default Choose your own WiFi Click “save” Input your WiFi password... -
Page 34: Mail Settings
Part 4. APP Instruction (2) Mail Settings Stated at step 4 in setting Wifi Settings up camera section Mail Settings Alarm Settings Please input your email address, sender and receiver can input same email address. Please check and input your SMTP server address (Usually check it from your email web backend) -
Page 35: Alarm Settings
Part 4. APP Instruction (3) Alarm Settings Wifi Settings Mail Settings If you want to receive alarm push upon motion, please Alarm Settings switch the following buttons to on. User Settings Restore default If you don’t set mail settings, this function will not work. -
Page 36: How To Invite More Users
Part 4. APP Instruction How to Invite More Users 1) Create a new user name and password 2) Let new user to download the mini WiFi Cam APP and then go to manually add the camera... -
Page 37: App Instruction
Part 4. APP Instruction 3) Share your camera ID and step 1) created new user name and password to the user you want to invite 4) Click save and then wait the camera to be active on user's mobile/smart phone... -
Page 38: Technical Specifications
Technical Specifications 24x24x24mm Dimensions /0.95x0.95x0.95inch Battery capacity 240 mAh Camera angle 75° Night vision range 10-15ft Day continuous 60 minutes recording time Charging time 30 minutes Image quality 960p Frames per second 30 fps Max storage capacity 128GB class 10 microSD card WiFi distance 160ft (in open space) -
Page 39: Led Status
LED Status Operation LED status indication Steady red and turns off Charging once fully charged Video recording LED flashes blue 3 times manually and turns off Connect to the LED flashes yellow slowly mobile phone LED flashes yellow and then Connect to Wifi turns off LED flashes blue and yellow... -
Page 40: Warranty
Warranty All products sold by the Conbrov Group are covered by a 12-month full replacement warranty. Happy with it? Share your experience with an Amazon review. Or any questions? Our friendly customer service team is ready to help: support@conbrov.com Contacting us via the above email address,which is the quickest way to reach our support team. - Page 41 All trademarks or registered trademarks are the property of their respective owners. About Us Conbrov Electron Co., Ltd. founded in 2003 is an innovative technology research company specialized in personal surveillance cameras and on-dash cameras. Conbrov products and technology are patent protected by PCT or U.S. Patent Office.
Need help?
Do you have a question about the WF98 and is the answer not in the manual?
Questions and answers