Table of Contents
Advertisement
IMPORTANT:
THESE INSTRUCTIONS ARE TO
REMAIN WITH THE HOMEOWNER.
SAVE THESE INSTRUCTIONS
SAFETY NOTICE
Please read this entire manual
before installation and use of this
pellet fuel-burning room heater.
Failure to follow these instructions
could result in property damage,
bodily injury or even death.
Contact your local building or re of cials
regarding permits and any information on
installation and inspection requirements in
your area.
Conforms with: ASTM 1509-12,
Certi ed to: ULC S628
Visit www. truenorthstoves.com for the most up-to-date version of this manual
080317-28
Wood Energy
Technical Training
www.wettinc.ca
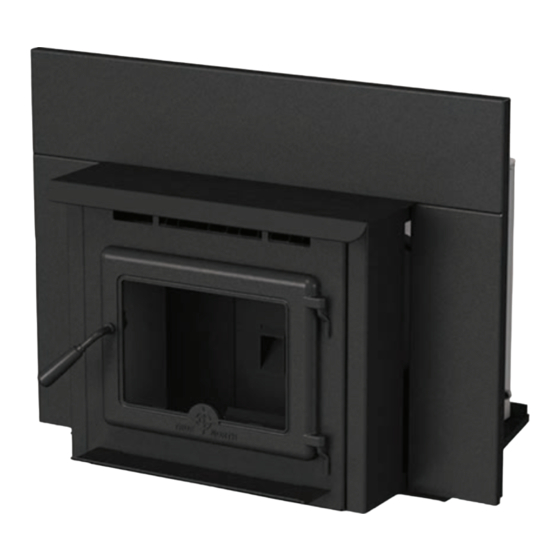
TN40 INS
INSTALLATION
AND OPERATING
INSTRUCTIONS
FIREPLACE INSERT
PELLET
MODEL:
TN40 INSERT
SERIES: A
5055.538-A
Advertisement
Table of Contents

Subscribe to Our Youtube Channel
Related Manuals for True North TN40 INSERT


Summary of Contents for True North TN40 INSERT
- Page 1 PELLET your area. Conforms with: ASTM 1509-12, MODEL: Certi ed to: ULC S628 TN40 INSERT SERIES: A Wood Energy Technical Training www.wettinc.ca Visit www. truenorthstoves.com for the most up-to-date version of this manual 080317-28 TN40 INS 5055.538-A...
-
Page 2: Table Of Contents
Operating Instructions Table of Contents Contents TABLE OF CONTENTS ............ 2 ROUTINE CHECKS AND MAINTENANCE ....12 Warning: Soot/Creosote: ........... 12 INTRODUCTION .............. 3 SAFETY NOTICE: ............3 Cleaning Glass:............12 Operation: ..............3 Burn-Pot and Liner Cleaning: ........13 Cleaning: .............. -
Page 3: Introduction
Introduction SAVE THIS INSTRUCTION MANUAL FOR FUTURE REFERENCE This manual describes the installation and operation of the True North TN 40 Insert Pellet Stove. PLEASE READ THIS ENTIRE OWNER’S MANUAL BEFORE INSTALLING OR OPERATING YOUR PELLET STOVE. FAILURE TO FOLLOW INSTRUCTIONS MAY RESULT IN PROPERTY DAMAGE, BODILY INJURY, OR EVEN DEATH. -
Page 4: Specifications
Your True North TN40 Insert stove may be able to operate with power from a portable generator. However, the generator’s electrical regulator may not be compatible with the stove’s electronics. The higher the qual- ity of the generator, (smoother the output sine wave) the greater the chance that it is compatible with the stove. -
Page 5: Warnings
Operating Instructions Warnings Caution: Unit hot while in operation. Parts of the appliance, especially the external radiant surfaces, will be hot to touch when in operation. Keep children, pets, clothing and furniture away. Contact may cause skin burns. Children and adults should be alerted to the hazards of high surface temperatures and should stay away to avoid burns or clothing igni- tion. -
Page 6: Negative Pressure Warning
Operating Instructions Negative Pressure Warning This appliance has not been designed to be operated in a negatively pressurized room. Provide adequate air for combustion. The stove’s combustion system works with negative combustion chamber pressure and a slightly positive chimney pressure. It is very important to ensure that the exhaust system be sealed and airtight. The viewing door and Hopper Lid must be closed securely for proper and safe operation of the pellet stove Do not burn with insuf cient combustion air. -
Page 7: Pellet Fuel Specifications
Operating Instructions Pellet Fuel Specifications This stove is designed and EPA certi ed to burn Premium wood pellet fuel only. Burning any other fuel that is not approved for use with this appliance will void the appliance warranty. Caution: It is important to select and use only fuel that is free of dirt or other impurities such as chemical binders or high salt content. -
Page 8: Controls
8. COMBUSTION TRIM - This button is hidden to prevent mistaken use of the feature. It is used with the Heat level buttons to trim the Figure 1: TN40 INSERT Control Panel Combustion Blower voltage when the pellet quality/size requires more or less air to burn correctly. -
Page 9: Operation
Operating Instructions Operation Note: when the stove is plugged into power for the rst time the combustion blower will come on and run for 8-10 minutes, this is the same function as after a power failure. Filling the Hopper: The hopper can be accessed by sliding the the stove top toward you. The hopper will hold up to 65 pounds (29 Kg) of pellets. -
Page 10: Convection Blower Operation
Normal Operating Sounds: As the True North TN40 stove is burning, a number of normal operational sounds may be heard. When the blowers come on, the sound of rushing air can be heard as well as some small creaks. The lower the burn rate the slower the fan operates. -
Page 11: Thermostat Operation
Operating Instructions Thermostat Operation: Once installed, the thermostat can control the operation of the stove. Use a low voltage/millivolt thermostat. (See "Optional Thermostat installation" on page 22) for installation instructions. Important: When connected to a thermostat, it is necessary to push the ON/OFF button for the initial burn, when the electrical ow to the stove is interrupted, or if the stove runs out of pellets and therefore shuts off with a fault code. -
Page 12: Routine Checks And Maintenance
Operating Instructions Routine Checks and Maintenance Inspection /cleaning weekly monthly yearly Burn-Pot or Every 5 bags of fuel burned Burn-Pot Liner Daily - depending on fuel quality Blower - Convection or more frequently if pets present Blower - Exhaust or more frequently depending on fuel quality Firebox or more frequently depending on fuel quality Venting system... -
Page 13: Burn-Pot And Liner Cleaning
Operating Instructions Burn-Pot and Liner Cleaning: The Burn-Pot Liner has a number of holes in the bottom and sides that provide combustion air to the pel- lets. The extreme temperatures in the Burn-Pot can cause the impurities in the pellets to form ash and clinkers. -
Page 14: Surround And Cabinet Side Removal
Operating Instructions Surround and Cabinet Side Removal • Un-plug the stove. • Lift the complete surround up slightly to disengage the mounting tabs and carefully pull towards you about 3"(76mm). • Disconnect the ribbon cable from the back of the control panel. -
Page 15: Cleaning The Exhaust/Combustion Blower
Operating Instructions With a 3/8" socket, remove the two screws securing the Drop Tube Shield section and remove it from the rebox.(See Figure 6) Figure 5: TN40.INSA Drop tube shield screws. Using an ash or shop vacuum, clean out all the ash in the exhaust passages. -
Page 16: Door Glass - Replacement
Operating Instructions Cleaning the Vent Pipe: The products of combustion will contain small particles of yash and/or soot. The Flyash and/or soot will collect in the exhaust venting system and restrict the ow of the ue gases. The exhaust venting system should be inspected at least twice every year to determine if cleaning is necessary. -
Page 17: Stove Dimensions
Installer Information Stove Dimensions Weight - 300 pounds (140 Kg.) Hopper Capacity - up to 60pounds (28 Kg.) Results will vary based on fuel density. 28 1/2" 42" [725mm] [1.07m] 23 1/2" [622mm] 15-1/2 " **34" 31" [865mm] [394mm] [790mm] 21"... -
Page 18: Fireplace Dimensions
Installer Information Fireplace Dimensions [ ] Dimensions are in mm Minimum Fireplace Size: Width: at front 29-1/2" [750mm] at rear 24" [610mm] Depth 16" [405mm] 21-1/4” 16” Height 21-1/4" [540mm] [540] [405] 24” [610] Hearth must extend 16 inches from the replace face 29 -1/2”... -
Page 19: Installation
Installer Information Installation Before you begin: Please read and carefully follow all of the installation and operating instructions found in this manual. Please pay special attention to the safety instructions provided in this manual. The services of a competent installer, certified by the Wood Energy Technical program (WETT) - in Canada, Hearth Education Foundation (HEARTH) - in U.S.A. -
Page 20: Installing Into A Masonry Fireplace
Installer Information Installing into a Masonry Fireplace Inspect your fireplace for cracks, loose mortar or other physical defects. If repairs are required, they should be completed before installing your insert. The fireplace chimney must be suitable for wood burning use. Check for creosote build up or other obstructions, especially if it has not been in use for some time. -
Page 21: Direct Flue Connection - (Usa Only)
Installer Information Direct Flue Connection - (USA only) 1) Measure from the first chimney flue liner to the Non-combustible top of the Insert. Allow 12inches extra length insulation of liner to insert into flue tile. 2) Feed the stainless steel liner through the damper area and into the first chimney flue tile. -
Page 22: Outside Air
Installer Information Outside Air Connecting the True North TN40 stove to outside combustion air is optional, but recommended except when required by local building codes. The stove’s air intake will accept 2”(51mm) ID non combustible pipe to accommodate outside air installations. The air intake on the exterior of the home should always be located substantially below the ue termination and terminate with a screen cover to keep out weather and pests. -
Page 23: Setting The Damper
Installer Information Setting the damper The stove's damper will need to be set after installation, during the intial burn in. This will optimize the stoves performance and reduce emissions based on the installation. This should be done with a low pres- sure digital vacuum gauge or magnehelic. -
Page 24: Basic Troubleshooting
Installer Information Basic Troubleshooting PROBLEM CAUSE SOLUTION Stove won’t turn ON No Power to stove Check power cord is plugged in. Check household Circuit Breaker lights or fan noise after 30sec.) High Limit switch faulty or tripped Contact dealer/Service Pellets won’t drop in to Hopper Empty Check Hopper fuel level Burn Pot Liner... -
Page 25: Wiring Diagram
Installer Information Wiring Diagram Fuses EXHAUST BLOWER IGNITER CONVECTION AUGER BLOWER MOTOR USED 2 A. 2 A. 3 A. 5 A. Figure 16: TN40 Wiring Diagram.ai TN40 INS 5055.538-A_080317-28... -
Page 26: Components List
Installer Information Components List QTY. PART NUMBER DESCRIPTION TN40.BRKA ..........DOOR TN40.RP752550 ......... BURN-POT TN40.RP752525 ......... BURN-POT LINER TN40.RP753034 ......... INSERT SIDE PANEL, RHS TN40.RP753054 ......... INSERT SIDE PANEL, LHS TN40.RP5027171 ........120 F - N/O Temp Switch, Proof of Fire TN40.RP5024503 ........ -
Page 27: Rating Label
Installer Information Rating Label TN40 INS 5055.538-A_080317-28... - Page 28 © 2016 Copyright Paci c Energy Fireplace Products LTD Reproduction, adaptation, or translation without prior written permission is prohibited, except as allowed under the copyright laws. 2975 Allenby Rd., Duncan, B.C. V9L 6V8 For technical support, please contact your retailer. Web site: www.truenorthstoves.com Printed in Canada...
Need help?
Do you have a question about the TN40 INSERT and is the answer not in the manual?
Questions and answers