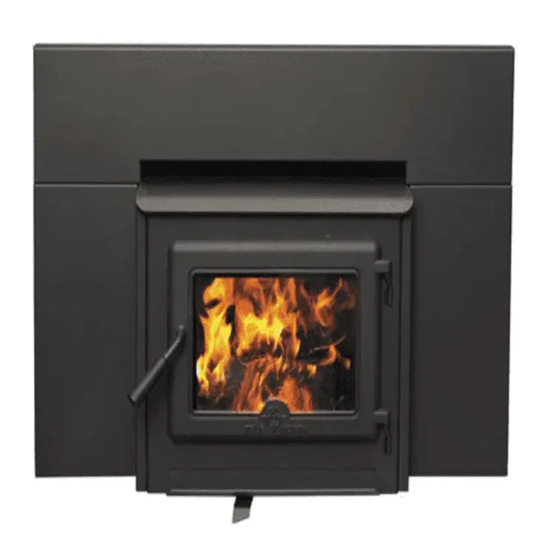
True North TN20 INSERT Installation And Operating Instructions Manual
A series
Hide thumbs
Also See for TN20 INSERT:
- Installation and operating instructions manual (24 pages) ,
- Installation and operating instructions manual (28 pages) ,
- Installation and operating instructions manual (28 pages)
Table of Contents
Advertisement
IMPORTANT:
THESE INSTRUCTIONS ARE TO REMAIN
WITH THE HOMEOWNER
INSTALLATION
AND OPERATING
INSTRUCTIONS
SAFETY NOTICE
If this stove is not properly installed, a house
fire may result.
the installation instructions. Contact local
building or fire officials about restrictions
and installation inspection requirements in
you area.
TESTED and LISTED
to ULC S628 / UL 1482
Meets the U.S. Environmental Protection
Agency's May 2015 Particulate Emission
Standards
©PACIFIC ENERGY FIREPLACE
140515-20
PRODUCTS LTD. - 2015
For your safety, follow
Model:
TN20 INSERT
Series: A
TN20 INSERT-A
SERIAL #
5055.553-A
Advertisement
Table of Contents

Subscribe to Our Youtube Channel
Related Manuals for True North TN20 INSERT


Summary of Contents for True North TN20 INSERT
-
Page 1: Safety Notice
TESTED and LISTED to ULC S628 / UL 1482 Meets the U.S. Environmental Protection Agency's May 2015 Particulate Emission Standards Model: TN20 INSERT Series: A ©PACIFIC ENERGY FIREPLACE 140515-20 TN20 INSERT-A 5055.553-A PRODUCTS LTD. - 2015... -
Page 2: Table Of Contents
PLEASE SAVE THESE INSTRUCTIONS This manual describes the installation and operation of the True North, TN20 INSERT wood heater. This heater meets the 2015 U.S. Environmental Protection Agency's crib wood emission limits for wood heaters sold after May 15, 2015. -
Page 3: Safety
Safety Clearances Masonry or Factory Built Fireplace READ ALL INSTRUCTIONS BEFORE INSTALLING AND USING THIS APPLIANCE. FAILURE TO FOLLOW INSTRUCTIONS MAY RESULT IN PROPERTY DAMAGE, The minimum required clearances to surrounding combustible BODILY INJURY, OR EVEN DEATH. materials when installed into a masonry or factory built fireplace are listed below and in Fig. -
Page 4: Chimney Smoke And Creosote Formation
In Case of a Chimney Fire Chimney Smoke and Creosote Formation 1. Prepare to evacuate to ensure everyone’s safety. Have When wood is burned slowly, it produces tar and other or- a well understood plan of action for evacuation. Have a ganic vapours, which combine with expelled moisture to form place outside where everyone is to meet. -
Page 5: Operation
2) Adjust air control to “High” position(all the way to the left) Your TRUE NORTH heater is designed for years of trouble and in just a few minutes, logs should begin burning. free operation. Over firing the appliance will shorten the life 3) After wood has charred, reset air control to desired setting. -
Page 6: Maintenance
Maintenance WARNING: tighten screws very carefully. Do not overtighten. - Do not clean glass when hot 1. Burn wood only, dry and well seasoned. The denser or - Do not use abrasive cleaners on glass heavier the wood when dry, the greater its heat value. This is why hardwoods are generally preferred. -
Page 7: Blower Removal
Blower Removal Fig. # 4 1. Remove the surround by lifting to disengage the securing hooks at the top and bottom of the surround sides and pulling away from the unit. (Fig. #2) Remove the Blower Control from the side panel. Fig. -
Page 8: Maintenance Checks
Maintenance Checks Check the following parts for damage such as cracks, excessive corrosion, burned out sections and excessive warping. Also check for proper placement of tubes and baffle boards. (See website for descriptions and more detail) Weekly: - Firebrick - Visual, for cracking. - Door Gasket - sagging, placement, damage. -
Page 9: Installation
Installation Into a Masonry Fireplace Inspect your fireplace for cracks, loose mortar or other physi- cal defects. If repairs are required, they should be completed Your Insert is designed to be installed into an approved ma- before installing your insert. sonry or factory built zero-clearance fireplace. - Page 10 Fireplace hearth requirements: In Canada - The hearth must extend a minimum of 16”(406mm) in front and 8”(203mm) beyond each side of the fireplace opening and can be flush with adjacent combustible floor. MINIMUM EMBER PROTECTION DIMENSIONS 22 7/8” 581mm Non-combustible hearth 18”...
-
Page 11: Full Flue Liner - (Required In Canada)
Full Flue Liner: where a listed stainless steel rigid or flexible liner extends from the Insert flue collar to the top of the chimney. Full Flue Liner Fig. #5 Direct Flue Connection: where a listed stainless steel rigid or flexible liner extends from the Insert flue collar to the first chimney flue liner. -
Page 12: Into A Factory Built Fireplace
Into a Factory Built Fireplace Leveling Legs Your Insert may be installed into a factory built fireplace (size Use the Leveling legs provided to stabilize the unit on uneven permitting) with the following requirements: surfaces. Surround Assembly and Installation 1) Inspect your fireplace for damage or other physical defects. The fireplace must be in good working condition. -
Page 13: Blower
Blower Fig #11 Blower The Insert comes equipped with a variable speed circulating air blower. The Blower Control is located on the lower right controller side edge of the Surround panel. ground Fig. # 10 powercord Blower Operation To operate the blower, rotate the fan speed control clockwise to turn ON then continue to rotate to find a desired setting. -
Page 14: Firebrick Installation
Firebrick Installation The package contains 20 full-size firebricks. With the wood- stove in the upright position, install firebricks as follows: 1) Place 4 full-size firebricks against the rear wall. 2) Next install firebricks on the bottom of the unit. Use a total of 8 full-size. -
Page 15: Troubleshooting
Troubleshooting Problem Cause Cure Excessive Creosote 1) Wood is too wet - Use dry wood Buildup 2) Turning down air control - Do not turn down until: too soon a) there is a good bed of coals b) the wood is charred 3) Draft too low - Improper chimney height and/or diameter - Chimney plugged or restricted, check flue... -
Page 16: Replacement Parts
Replacement Parts DESCRIPTION PART NO. Surround, Standard Size Set, ....TN20.SURRA Baffle Board (2pcs.) ........TRNO.BAFF Baffle Tube Set(4pcs.) ....... TRNO.50001101 Complete Door Assy(c/w Handle).... TRNO.DRBK Replacement Glass (c/w gasket) ....TRNO.7025 Door Gasket ........... TRNO.DGKIT Glass Clamps (4 pc.) ........ TRNO.7608 Firebrick Set 9"x4 1/2"x1 1/4"(20pcs.) .. -
Page 17: Warranty Information
(dated, bill of sale), model name and serial number must be supplied when making any warranty claim to your TRUE NORTH Dealer. This warranty covers brand new products only, which have not been altered, modified nor repaired since shipment from factory. This warranty applies to normal residential use only. - Page 18 TN 20 INSERT-A 140515-20 ©PACIFIC ENERGY FIREPLACE PRODUCTS LTD.
-
Page 19: Label
CERTIFIED FOR USE IN CANADA AND U.S.A./CERTIFIE AU CANADA ET AUX ETATS-UNIS TESTED TO / ÉPROUVÉ SELON: ULCS628-93 / IN THE USA: CONFORMS TO UL1482 (2011) MODEL / MODÈLE: TN20 INSERT SERIES / SÉRIE: A ETL# 4001507 INSTALL AND USE ONLY IN ACCORDANCE WITH PACIFIC ENERGY’S INSTALLATION AND OPERATING INSTRUCTIONS. - Page 20 PACIFIC ENERGY FIREPLACE PRODUCTS LTD. Web site: http://www.pacificenergy.net 2975 Allenby Rd., Duncan, B.C. V9L 6V8 Printed in Canada ©PACIFIC ENERGY FIREPLACE PRODUCTS LTD.
Need help?
Do you have a question about the TN20 INSERT and is the answer not in the manual?
Questions and answers