Advertisement
Advertisement
Table of Contents

Related Manuals for RecorderGear TR600


Summary of Contents for RecorderGear TR600
- Page 1 USER MANUAL...
- Page 2 Diagram 1 Diagram 2...
- Page 3 Diagram 3 Diagram 4...
- Page 4 MID: AR100 1 Year Warranty All RecorderGear™ brand products are backed by our 1 Year Warranty. For full details visit www.recordergear.com...
-
Page 5: Table Of Contents
Table of Contents 1 Insert SD card 2 Navigation 3 Line Mode 4 Handset Mode 5 Mic Mode 6 Settings 7 Playback 8 Software 9 Software Overview 10 Specs... -
Page 6: Insert Sd Card
Insert SD card The TR600 supports up to a 32GB SD card. Do not power on the TR600 before inserting an SD card. 1. Insert an SD card into the SD card slot. We recommend using a brand new class 10 SD card. -
Page 7: Navigation
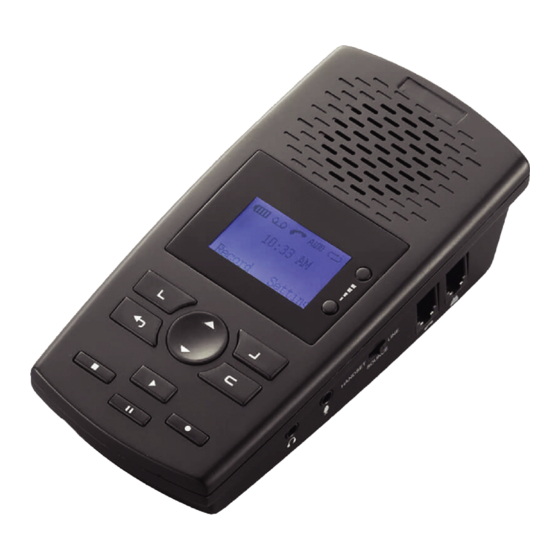
Navigation As you are navigating your TR600 use the select keys on the top right and top left labeled “Left Select Key” and “Right Select Key” to enter into and select options. Use the the button labeled “Back Button” to return to the previous screen. -
Page 8: Manual Recording Mode
9. Enter Manu Rec. Mode and select Line Mode. NOTE: The AAA batteries are used as a back up when the TR600 is not connected to a power source. LINE MODE SETTINGS: The Line Mode has 2 different modes. The 2 different modes are explained below. - Page 9 2. Then enter Auto / Manual Rec and select MANUAL. 3. To Start recording in manual mode press the RECORD button on the TR600 when you answer a phone call. 4. To Stop the recording press the STOP button. Auto Recording Mode:...
-
Page 10: Handset Mode
Handset Mode This mode is for connecting your TR600 to Digital PBX telephones, IP telephones, and Multi-Line telephones. ENTER HANDSET MODE: 1. Connect the cord of your phone line to the TR600 phone line handset port. 2. Using the line Cord provided connect the TR600 to the phone system through the line handset port. - Page 11 10. Enter Manu Rec. Mode and select Handset Mode. NOTE: The AAA batteries are used as a back up when the TR600 is not connected to the power outlet HANDSET MODE SETTINGS AND OPERATIONS: The Handset Mode has 2 different modes. The 2 different modes are explained below.
-
Page 12: Voice Activation Mode
2. Then enter Auto/ Manual Rec and select MANUAL. 3. To Start recording in manual mode press the RECORD button on the TR600 when you answer a phone call. 4. To Stop the recording press the STOP button. Voice Activation Mode: The TR600 will begin recording when noise is detected. - Page 13 The default setting is 3. Vox Silence: This setting monitors the duration of time the TR600 hears silence before ending the recording. If set too short, your recordings may be broken into several smaller recordings. If set too long, it may merge one recording into another to produce one recording from two calls.
-
Page 14: Mic Mode
MIC Mode In this mode you are able to use your TR600 as an audio recorder. Manual Recording: 1. Make sure the source switch on the side of the TR600 is slid to the MIC position. 2. Enter into the settings and then into Recording Settings. - Page 15 3. Vox Silence: This setting monitors the duration of time the TR600 hears silence before ending the recording. If set too short, your recordings may be broken into several smaller recordings. If set too long, it may merge one recording into another to produce one.
-
Page 16: Settings
Settings RECORDING: A. MIC REC. Mode - Change between Manual and Vox activation for Mic Mode. B. Auto / Manual Rec - Change between Manual, Auto, and Trig mode. C. Manu Rec Mode - Change between Handset Mode and Line mode. D. - Page 17 You can also test the voltage of the line to determine the correct setting from this screen. (15 - 30 Volts) L. Call Out Delay Time - The time the TR600 will record after you finish the call. (0 - 20 seconds) SYSTEM: A.
-
Page 18: Playback
Playback There are two methods to playback your files. 1. LOG: This is where the recordings are stored on the TR600. To Enter LOG: Use the Left Select Key on Main Menu. A. TYPE: Filter files according to these options: (Right Select Key) 1. - Page 19 4. Delete - You are able to delete the log or the recording. NOTE: If you delete the recording and not the log. The log will stay on the TR600 with no recording file. 5. Search By Time 6. Search By Tel. Number. NOTE: To exit the Log screen press the Back Button.
-
Page 20: Software
Using the Software: There are two methods to use the software provided: 1. Connecting through a PC: a. Connect your TR600 to your PC using the Mini USB cable provided. b. Double click the Icon that was made from the downloaded software. -
Page 21: Software Overview
2. Remove SD card: a. Power off TR600. b. Remove SD card. c. Insert SD card into PC. d. Double click the Icon that was made from the downloaded software. Software Overview Access Panel:... - Page 22 PC. Auto Backup Recordings of Device SD Card - When set, this will automatically backup the call files to your PC when the TR600/SD card is connected. Set Backup Path - Set the desired location of the backup.
- Page 23 Control key on your keyboard to individually select files. Search - Define your search by Date, Phone Number and Type of Call. Refresh - Will rescan the TR600 and refresh the display of calls. Mark - Flags a call for easier reference.
- Page 24 Export - Export Excel - Select the range of calls and export the list view to Excel Export Voice. File - Export the selected call(s) to a specified location. Backup - Backup a call or range of calls to the location set under Tools - “Set Backup Path…”...
-
Page 25: Specs
Specs File Type .WAV Voice Activation, Recording modes Manual Recording, Auto Recording Loop Recording Compatible Phone PBX Digital, IP Phones, Systems Multi-Line Phones (HandSet mode) Compatible Phone Analog Phones Systems (Line Mode) Memory Support Up to 32GB SD Card Weight 6.21 oz Dimensions 5.7 in / 2.8 in / 1.4 in... - Page 26 MID: AR100 1 Year Warranty All RecorderGear™ brand products are backed by our 1 Year Warranty. For full details visit www.recordergear.com www.recordergear.com RecorderGear™ and respective logos are trademarks of Teton Webstores LLC ©2018 ALL RIGHTS RESERVED...
Need help?
Do you have a question about the TR600 and is the answer not in the manual?
Questions and answers
Can I erase all my recordings on the record at one time?
No, the provided information does not mention an option to erase all recordings at once. Recordings can be deleted individually using the Delete option, or by removing the SD card and deleting files manually on a PC.
This answer is automatically generated
Can you transfer the messages to your computer
Yes, you can transfer recordings from the RecorderGear TR600 to a computer. You can do this by either connecting the TR600 to a PC using the provided Mini USB cable or by removing the SD card and inserting it into a computer. The recordings can then be accessed and played back on a computer.
This answer is automatically generated