
Related Manuals for RecorderGear TR500


Summary of Contents for RecorderGear TR500
- Page 1 USER MANUAL www.recordergear.com RecorderGear™ and respective logos are trademarks of Teton Webstores LLC ©2017 ALL RIGHTS RESERVED...
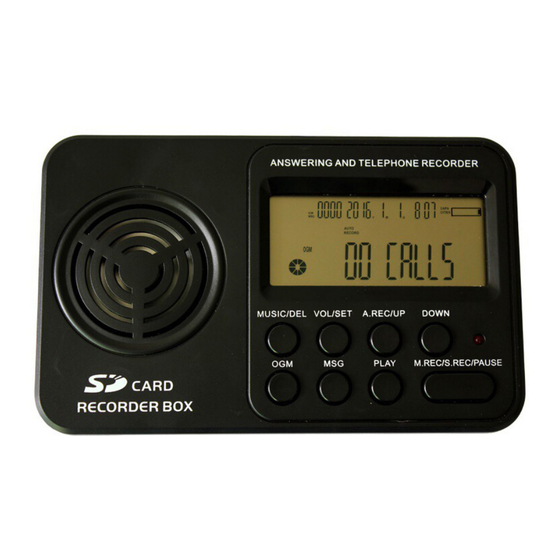
- Page 3 5 - SD Card Capacity 11 - Auto Record Indicator 6 - Caller ID Display 12 - OGM Indicator MID: DAR-4001 MADE IN CHINA 1 Year Warranty included with all RecorderGear™ brand products. See our website at www. recordergear.com for more details.
-
Page 4: Table Of Contents
2 Answering Machine Set-Up 3 Call Recorder Mode 4 Audio Recorder Mode 5 Alarm Clock Set-Up 6 Other Settings 7 Playback / Delete Files via the TR500 8 Playback / Locate / Delete Files via PC 9 Music Function 10 Specs... -
Page 5: Installation Instruction
TR500 C. Insert a SD card into the SD card slot of the TR500 D. Power on the TR500 by connecting it to a power outlet using the adapter provided E. Wait for the TR500 and the SD card to... -
Page 6: Answering Machine Set-Up
Answering Machine Set-Up This section will help you understand how to set up the answering machine function of the TR500 A. Ringer Count Set-Up 1. Make sure the TR500 has been installed correctly as described in section 1 2. While on the main screen, press and hold the “VOL/SET”... -
Page 7: Call Recorder Mode
B. Greetings Set-Up 1. The TR500 comes with a default greeting message. To personalize it, press and hold the OGM button for 3 seconds, you will hear a beep indicating recording has begun 2. Record your new greeting. When done press the OGM button once to save it 3. -
Page 8: Audio Recorder Mode
Audio Recorder Mode This section will help you understand how to use the audio recorder function of the TR500. To use the TR500 as an audio recorder: 1. Press the “M.RECS/S.REC/PAUSE” button once 2. The TR500 will beep once and start recording audio 3. -
Page 9: Alarm Clock Set-Up
Alarm Clock Set-Up This section will help you understand how to use the alarm clock function of the TR500 A. Alarm Clock Setup 1. Press and hold the “VOL/SET” button for 3 seconds 2. Press the “A.REC/UP” button once for the “SET 2 Alert”... -
Page 10: Other Settings
saved to the SD card, you will be promoted to record one 9. Press the “VOL/SET” button to return to the “SET 2 Alarm” screen 10. Press the “MUSIC/DEL” button to exit at any time Other Settings A. Time/Date Setting 1. - Page 11 2. Press the “A.REC/UP” button three times for the “SET 4 RING” option which controls whether the TR500 rings out loud or not 3. Press the “VOL/SET” button to select the “SET 4 RING” option 4. Use the “A.REC/UP” or “DOWN” button to choose between ringer 1 or off 5.
-
Page 12: Playback / Delete Files Via The Tr500
3. Press the “MUSIC/DEL” button to exit at any time Playback / Delete Files via the TR500 This section will help you understand where recordings are saved and how to access them A. Playback Answering Machine... - Page 13 5. Press the MSG button to exit B. Playback Call/Audio Recording 1. Press the “PLAY” button once 2. The recordings will start playing from the newest to oldest 3. Press the “M.RECS/S.REC/PAUSE” button to pause or unpause playback 4. Press the “DOWN” or “A.REC/UP” button to skip forward or backward respectively 5.
-
Page 14: Playback / Locate / Delete Files Via Pc
Playback / Locate / Delete Files via PC A. Power off the TR500 by disconnecting it from the power source B. Eject the SD card C. Insert the SD card into a PC via a card reader D. Open files on desktop E. -
Page 15: Music Function
Music Function For the music function to work, music files must have already being saved to the SD card A. While in the main screen, press the MUSIC/DEL button and saved music files will start playing B. Press A.REC/UP or DOWN to switch between music files Specs Memory... - Page 17 MID: DAR-4001 1 Year Warranty included with all RecorderGear™ brand products. See our website at www.recordergear.com for more details.
Need help?
Do you have a question about the TR500 and is the answer not in the manual?
Questions and answers