Table of Contents
Advertisement
Advertisement
Table of Contents

Related Manuals for Challenge MPS3-08CRN1-QB6G1


Summary of Contents for Challenge MPS3-08CRN1-QB6G1
- Page 1 8000 BTU LOCAL AIR CONDITIONER INSTRUCTION MANUAL...
-
Page 2: Table Of Contents
CONTENTS SAFETY PRECAUTIONS Safety rules............................2 Electrical information...........................2 Operating condition.............................3 Suggested tools for window kit installation....................3 IDENTIFICATION OF PARTS Names of parts........................... Accessories..............................4 INSTALLATION INSTRUCTIONS Installation instruction........................……..5 Exhaust hose installation………......................…6 Water drainage...........................……. 7 OPERATION Control panel………........................…..8 Operating instruction……........................…9 Remark……..............................10 CARE AND MAINTENANCE Care and maintenance……………....................11 TROUBLE SHOOTING TIPS Trouble shooting tips………......................….12... -
Page 3: Safety Precautions
SAFETY PRECAUTIONS Safety rules To prevent injury to the user or other people and property damage, the following instructions must be followed. Incorrect operation due to ignoring of instructions may cause harm or damage. Always do this Never do this Do not operate your air conditioner in a wet room such as a bathroom or laundry room. -
Page 4: Operating Condition
SAFETY PRECAUTIONS Energy Save Use the unit in the recommended room size. Locate the unit where furniture cannot obstruct the air flow. Keep blinds/curtains closed during the sunniest part of the day. Keep the filters clean. Keep doors and windows closed to keep cool air in and warm air out Operating condition The air conditioner must be operated within the temperature range indicated below: MODE... -
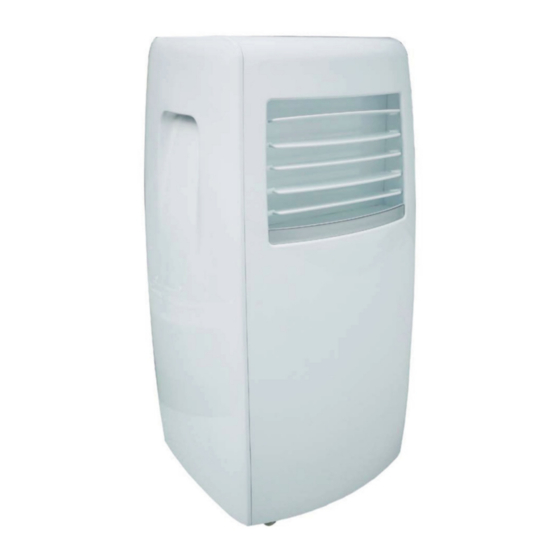
Page 5: Identification Of Parts
(with filter) IDENTIFICATION OF PARTS NAMES OF PARTS Rear Front Upper Air Filter Operation Panel Air Outlet Carrying Handle Wheel (both sides) Air intake (with filter) Cold air outlet Drain Outlet Air intake Bottom tray drain outlet Fig.1 Fig.2 Accessories PARTS : PARTS NAME : QUANTITY :... -
Page 6: Installation Instructions Installation Instruction
INSTALLATION INSTRUCTIONS INSTALLATION INSTRUCTIONS Location The air conditioner should be placed on a firm foundation to minimize noise and virbration. For safe and secure positioning, place the unit on a smooth, level floor strong enough to support the unit. The unit has casters to aid placement, but it should only be rolled on smooth, flat surfaces. -
Page 7: Exhaust Hose Installation
INSTALLATION INSTRUCTIONS Exhaust hose installation: The exhaust hose and adaptor must be installed or removed in accordance with the usage mode. Fig. 4 COOL, AUTO mode Install FAN,DEHUMIDIIFY mode Remove 1. Install the window Exhaust adaptor B onto the exhaust hose as shown in Fig. -
Page 8: Water Drainage
INSTALLATION INSTRUCTIONS Water drainage: Remove the During dehumidifying modes, remove the drain drain plug plug from the back of the unit, install the drain connector(5/8 universal female mender) with 3 4 hose(locally purchased). For the models without drain connector, just attach the drain hose to the hole. -
Page 9: Operation
OP ERATION Control Panel Fig. 11 MODE select button ON-OFF button Selects the appropriate operating mode. Turn the unit ON/OFF Each time you press the button, a mode is selected in a sequence that goes from TIMER button AUTO, COOL, DRY and FAN .The mode Turn the timer function ON/OFF. -
Page 10: Operating Instruction
OPERATING INSTRUCTIONS Power save mode FAN operation When the room temperature is lower than Continue to press "MODE" butt on until the setting temperature for 30 minutes, "FAN " indicator light comes on. the unit will switch itself to power save mode. Continue to press "FAN"... -
Page 11: Remark
OPERATING INSTRUCTIONS SLEEP operation Press this button, the selected temperature will increase by C/30 minutes.The temperature will then increase by another 1 C after after an additional 30 minutes. This new temperature will be maintained for 7 hours before it returns to the originally selected temperature. -
Page 12: Care And Maintenance
CARE AND MAINTENANCE CARE AND MAINTENANCE IMPORTANT: 1) Be sure to unplug the unit before cleaning or servicing. 2) Do not use gasoline, thinner or other chemicals to clean Upper filter (take out) the unit. 3) Do not wash the unit directly under a tap or using a hose. It may cause electrical danger. -
Page 13: Trouble Shooting Tips
TROUBLESHOOTING TIPS TROUBLE SHOOTING Error codes: Protection codes: E1- Room temperature sensor error- P1- Bottom tray is full - Connect the Unplug the unit and plug it back in. drain hose and drain the collected If error repeats, call for service. water away. -
Page 14: Product Specification Product Specification
PRODUCT SPECIFICATION The figures below are for reference only and are based on practical operation. Performance may vary slightly depending on environmental conditions. Description of product Portable Air Conditioner Model MPS3-08CRN1-QB6G1 Voltage/Frequency 220-240V /50Hz 8000BTU/H Cooling capacity 2.3 kW Dehumidifying capacity 0.9L/H... -
Page 16: Technical Information (Erp)
TECHNICAL INFORMATION (ERP) TECHNICAL INFRORMATION 1700~2000 Customer helpline 0845 640 0800...
Need help?
Do you have a question about the MPS3-08CRN1-QB6G1 and is the answer not in the manual?
Questions and answers
Hi im looking to buy a Hose and adapter for the aircon and can't seem to find the correct ones. Can you please help. Thanks
@Sian Jones did you get an answer or find one as I have the same issue? Thanks.