Table of Contents
Advertisement
Advertisement
Table of Contents

Subscribe to Our Youtube Channel
Related Manuals for Door Knox VDP102


Summary of Contents for Door Knox VDP102
- Page 1 Professional Door Entry Systems • • XVDP-01...
- Page 2 Introduction The DoorKnox range of high spec equipment can For added security and peace of mind all of our be combined to create a comprehensive video monitors have a clever feature which captures a door entry system for any environment. From a snapshot whenever the door camera is pressed small residential project with a single camera and...
-
Page 3: Table Of Contents
Contents Commonly Asked Questions VDP101 - Traditional Door Entry Camera VDP102 - Wide Angle Door Entry Camera VDP103 - Secure Access Door Entry Camera Door Entry Monitors Wiring A System Connections Powering & Cabling System Overview Door Cameras To Door Monitors Auxiliary Cameras &... -
Page 4: Commonly Asked Questions
Commonly Asked Questions Q. What does the DoorKnox do? your phone! You could then log into the DVR via the AlienDVR app and see and hear live video and audio! In its basic format it consists of 1 monitor located inside a property and a camera with a “Call button”... - Page 5 Commonly Asked Questions DoorKnox monitor and you would be able to see the Q. So if I just have the camera can I use the Call button to directly trigger the DVR as well, again without the DVR output. The DoorKnox doesn’t control the DVR so you would still need the DVR's remote control.
-
Page 6: Vdp101 - Traditional Door Entry Camera
VDP101 - Traditional Door Entry Camera Features & Connections The stone e ect and classic design of the VDP101 makes it a rm favourite for installs on more traditional Mounting Microphone properties. hole The camera is supplied with an optional sun/rain shield and angled bracket to help you capture the 3.7mm Pinhole... - Page 7 VDP101 - Traditional Door Entry Camera Mounting When mounting the door entry camera we recommend that it is installed between 150 to 160cm above the oor (About 5 feet) and where it will not be in direct sunlight. +12V DC (Red) Surface Mounting Audio (White) Countersunk...
-
Page 8: Vdp102 - Wide Angle Door Entry Camera
VDP102 - Wide Angle Door Entry Camera Features & Connections With its sleek and contemporary design the VDP102 looks great on Microphone modern residential, retail and commercial installs. The wide angle 2.4mm lens allows you to see more giving you a better idea as to who’s calling. - Page 9 VDP102 - Wide Angle Door Entry Camera Mounting When mounting the door entry camera we recommend that it is installed between 150 to 160cm above the oor (About 5 feet) and where it will not be in direct sunlight. +12V DC (Red)
-
Page 10: Vdp103 - Secure Access Door Entry Camera
VDP103 - Secure Access Door Entry Camera Features & Connections With a stylish brushed aluminium nish and quality build the VDP103 is ideal for retail and commercial projects. 3.6mm lens As well as functioning as a Speaker standard door entry camera, trusted users can also gain IR LEDs and entrance to the building using... - Page 11 VDP103 - Secure Access Door Entry Camera Mounting When mounting the door entry camera we recommend that it is installed between 150 to 160cm above the oor (About 5 feet) and where it will not be in direct sunlight. +12V DC (Red) If you choose to recess mount the camera you will need Audio (White) to create a recess of 200mm (h) x 96mm (w) x 29mm (d).
- Page 12 VDP103 - Secure Access Door Entry Camera Creating New Key Codes Pairing Key Fobs & Key Cards Up to 40 key codes can be saved to each VDP103 door A combination of up to 40 key fobs and cards can be camera.
- Page 13 VDP103 - Secure Access Door Entry Camera Deleting Users Using The VDP103 Door Camera To improve security form time to time you may wish Entering Key codes to change key codes and unpair key fobs or key cards. To release an electronic To restore the VDP103 back to factory default deleting door using a key code all users just follow the steps below:...
-
Page 14: Door Entry Monitors
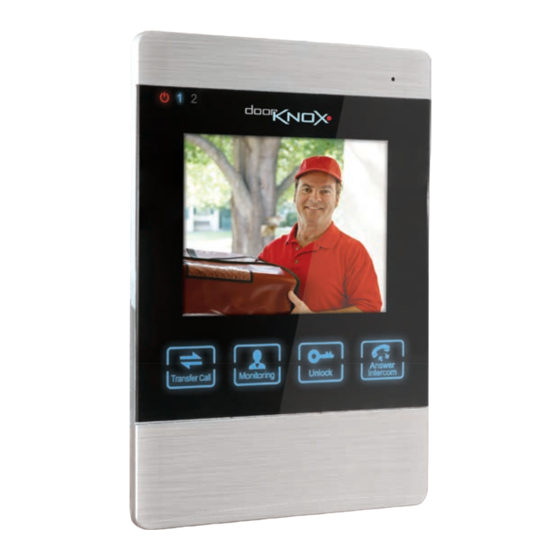
Door Entry Monitors - Speci cations Each of our quality touch button VDP210 VDP204 door monitors can be connected to VDP207 two door cameras plus two auxiliary cameras. Up to four door monitors can be connected together and there’s even a TV monitor output so your door entry system can be fully integrated into your CCTV system. - Page 15 Door Entry Monitors - VDP204 Features Power Indicator Microphone Door camera indicator shows which camera is being displayed Settings - Press to enter menu system / Flick up and down to navigate menu system / Press again to make selection Transfer - Send call to other monitor(s) / Intercom Volume control Monitoring - Switch between camera inputs...
- Page 16 Door Entry Monitors - VDP207 Features Power Indicator Talk - Answer call Door camera indicator shows which camera is being displayed Monitoring - Switch between camera inputs Up - Volume up / Move up in menu system Hang Up - End call / Return to previous screen / Cancel Down - Volume down / Move down in menu system Unlock - Unlock door connected to camera being displayed Transfer - Send call to other monitor(s) / Intercom...
- Page 17 Door Entry Monitors - VDP210 Features Power Indicator Monitoring - Switch between camera inputs Door camera indicator shows which camera is being displayed Talk - Answer call Up - Volume up / Move up in menu system Unlock - Unlock door connected to camera being displayed Down - Volume down / Move down in menu system Hang Up - End call / Return to previous screen / Cancel Settings - Enter menu system / Press again to make selection...
- Page 18 Door Entry Monitors - Mounting & Connections Mounting Connections The principles are the same for mounting each To make life easier all three monitors feature the exact monitor. The mounting plate is secured to the same connection layout as shown below. mounting surface and then the monitor simply slots on to it.
-
Page 19: Wiring A System
Wiring A System - Connections Cameras Monitors All of our door cameras have connection cables Every monitor is supplied with 5x 4 wire y-leads and terminated into the same 7 colour coordinated wires. 1x 2 wire y-lead. 4 wires are used to connect to the monitor and then The 4 wire y-leads are terminated into 4 pin plugs 2 of the 3 remaining wires are used to connect to an which are simply inserted into the sockets on the... -
Page 20: Powering & Cabling
Wiring A System - Powering & Cabling Powering Cameras Cable Runs Door cameras and auxiliary cameras can be powered The maximum achievable cable run is limited by the in two ways, either locally or via the door monitor. voltage drop in the chosen cable. Resistance di ers depending on the cable used and the higher the The DoorKnox monitors can supply a 12V DC output resistance the more dramatic the voltage drop. -
Page 21: System Overview
Wiring A System - System Overview 12V DC Monitor output - Master monitor All cameras must 400mA max across all cameras be connected to 12V DC master monitor TV Out Audio Video Auto switch Door on master monitor Monitor Out when alarm triggers Up to 3 slave monitors Monitor In... -
Page 22: Door Cameras To Door Monitors
Wiring A System - Door Cameras To A Door Monitor PTZ Combo Cable (RG59+4) - Up To 150m 12V DC 12V DC To Door From Up to 150m Monitor Door Camera Audio Audio Video Video CAT5+2 - Up To 100m 12V DC 12V DC Up to 100m... -
Page 23: Auxiliary Cameras & Alarms
Wiring A System - Auxiliary Cameras & Alarms One of the best features of a DoorKnox system is A bene t of powering auxiliary cameras locally is the ability to add two additional CCTV cameras with that it allows you to share the same power supply alarm triggers. -
Page 24: Connecting A System To An Alien Dvr
Wiring A System - Connecting A System To An Alien DVR One of features which sets the DoorKnox range As the DoorKnox door monitor automatically apart from other similar products is the ability to switches to the door or auxiliary camera where the fully integrate your DoorKnox system into a new or event is taking place you won't miss a thing. -
Page 25: Connecting A Camera To An Alien Dvr
Wiring A System - Connecting A Camera To An Alien DVR All of our current door cameras can be connected There are three methods of connecting a door directly to an Alien DVR and used as a high quality, low camera to an Alien DVR. - Page 26 Wiring A System - Connecting A Camera To An AlienDVR Method 2: Video, Audio & Alarm Like the previous method this method delivers video and audio. By adding a 470µF capacitor and a 1K resistor the door camera's Call button can be used to activate an alarm input on an Alien DVR. This could be used to automatically switch the DVR to full screen monitoring of the door camera.
- Page 27 Wiring A System - Connecting A Camera To An AlienDVR Method 3: Video, Audio & Alarm (Simpli ed) The nal method produces the same results as method 2 just with a lot less fuss. There's no soldering of components or making cables just simple screw terminals thanks to the handy REL015 module. Simply connect the four wires from the door camera to the screw terminals inside the module.
-
Page 28: Recording On An Aliendvr
Recording On An AlienDVR Once you have connected a DoorKnox system or a DoorKnox camera to an Alien DVR you need to con gure the DVR to record as e ciently as possible. Setting Up A Single Door Camera If you have a door camera connected directly to the DVR you will need to enable audio and set what action (if any) you wish the alarm input to trigger. - Page 29 Recording On An AlienDVR Now we need to tell the DVR which channel we To set what e ect an alarm trigger has, while want to trigger when the Call button is pressed. still in the alarm input 'Settings' menu, click the Action' tab and a list of possible actions Click the right arrow next to 'Settings' to enter the 'Linking...
- Page 30 Recording On An AlienDVR Secondly tick 'Audible Warning' so that the DVR will sound a series of ve beeps when the Call button is pressed. Note The DVR will only sound ve short beeps when the Call button is pressed. For the warning to last longer or sound in a di erent location you will need to trigger an alarm output to sound a buzzer or a programmable audio warning...
- Page 31 Recording On An AlienDVR When using the VoiceO the warning message connected to an Alien DVR you may wish to set the will only play once per alarm trigger so the dwell DVR to record only when motion is detected. This time is irrelevant.
- Page 32 Recording On An AlienDVR Note: When you have a DoorKnox system connected First choose the channel the DoorKnox system/ to an Alien DVR you may also wish to turn camera is connected to from the 'Camera' drop 'Continuous Video Output' O in the 'Settings' down list.
-
Page 33: Using The Menu System
Using The Menu System Our door monitors all use the same easy to use menu From the main menu you can access the System, Sound, Settings, Alarms, Picture Gallery system. Here you can con gure each monitor to meet sub menus. your requirements. - Page 34 Using The Menu System Language Time sub menu allows you to specify the In the sub menu you can set the time, date and system menu. You can choose from English, Russian or date format to determine how the date is displayed. simpli ed Chinese.
- Page 35 Using The Menu System will turn o and the monitor will go into standby. With Clock turned when the monitor goes into standby it will display a digital clock showing the time and date. Format SD - Format the SD card inserted in the monitor erasing all data.
- Page 36 Using The Menu System Sound Menu Ring Select In the menu you can set the ringtone used when the door camera’s Call button is pressed. The Sound menu consists of the Ring Select There are 12 ringtones to choose from and each door Ring Volume sub menus which allow you to adjust camera can be assigned a unique tone.
- Page 37 Using The Menu System Finally you set the ring duration choosing anywhere between 10 and 45 seconds. Settings Menu Ring Volume In the menu you can create a bespoke schedule to manage ring volume and duration during three di erent periods of the day. You rst set the time period you wish the new Settings menu allows you to con gure key...
- Page 38 Using The Menu System Up to 3 additional monitors can be added to the unless an SD card is present in which case they will system however these need to be set as slaves. be automatically saved to the card. Recordings are saved onto the SD card as AVI les.
- Page 39 Using The Menu System Alarms Menu connected to camera 2. You can set it to (Normally Open), (Normally Closed) or disable it if there is no alarm connected. CAM1 - Enable or disable auxiliary camera 1. When disabled the camera output can be activated by an alarm and CAM1 will not show when cycling through available inputs.
- Page 40 Using The Menu system Picture Menu Picture Settings In the screen the following three parameters can be adjusted: In the Picture menu you can set the brightness, contrast and saturation for each camera independently. Brightness - from 0 to 50. Con guring each camera’s picture settings individually ensures the best results as each camera is usually installed into a slightly di erent environment.
- Page 41 Using The Menu system Gallery a list of all captured les of that nature. The les are named with the date and time on which they were captured and are formatted as YYYYMMDD - HHMMSS. Gallery is where all of the automatically and manually captured snapshots and recordings can be found.
-
Page 42: Using Your Door Entry System
Using The Door Entry System Visitor Calls Unlock the door and allow the visitor into the Unlock building using the button . The When a visitor presses the Call button on a door camera’s image will be displayed for a further camera the ringtone will be played and their image 20 seconds so you can be sure the visitor has will be displayed on all door monitors. - Page 43 Using The Door Entry System Monitoring Cameras Connecting To A DVR You can monitor any camera at anytime by pressing the When connecting a door monitor to a DVR the settings used depend on the intended function of the camera. Monitor button to cycle through camera inputs.
-
Page 44: Fault Finding
Fault Finding Each DoorKnox system is tested at our production facility Firstly check if this is the cause by testing the camera and to ensure a quality product is delivered to you and works screen on a short test cable. If the problem disappears then straight out of the box. -
Page 45: Other Products To Consider
There are three monitor sizes to great options to choose from. There's the traditional suit any installation. VDP101, the wide angle VDP102 and the VDP103 which features Key code, key fob and key card entry. Mini 4" Door Monitor:... - Page 46 1 Monitor & Bracket (10” VDP207), 2 Door Cameras VDP210), 2 Door Cameras (VDP102), 2 Angled Camera (1 x VDP102, 1x VDP103), 1 brackets, PSU, 2 x 10M Angled bracket, 4 key Fobs Cabling Kit (VDP109) and full (VDPFOB01), PSU, 2 x 10M instruction manual.
- Page 47 4 Monitors & Brackets (1 x 4” VDP210), 2 Door Cameras VDP204, 3 x 10” VDP210), 2 (1 x VDP102, 1x VDP103), Door Cameras (1 x VDP102, 1x 1 Angled bracket, 6 Access VDP103), 1 Angled bracket, Fobs (VDPFOB01), PSUs, 2 x...
- Page 48 Other Products To Consider Recess-mount Extra / Replacement Standard & Custom Key Cards Camera Bracket Key Fobs A range of programmable cards for close A range of programmable cards for close proximity door entry access. Suits camera Recess-mount Recess-mount model VDP103. Available as blank cards bracket for bracket for or personalised with your details and...
- Page 49 Other Products To Consider 11 Reasons is great value for money MEGA204 - 4Ch / MEGA208 - 8Ch / MEGA216 - 16Ch 1. An Easy Upgrade Path - HD-TVI uses standard RG59 75 ohm CO-AX cable so no need to re-cable for an upgrade. 2.
- Page 50 Other Products To Consider Programmable Audio Alarm Unit Trigger Up To 9999 RS232 Connection Sounds Weatherproof 20 Alarm Inputs Trigger Activate Remotely Over 20 Recordable Warnings The Internet Removable SD Card Additional Sound Files ...
- Page 51 Other Products To Consider Covert 1080p HD-TVI Keyswitch Camera Pre-Printed CCTV Warning Signs Dual HD-TVI & Analogue 3.7mm Fixed Module Inside Ideal For Entrances This cleverly designed keyswitch camera hides a small 1080p HD-TVI module with a xed 3.7mm lens. Available in four designs to blend into any environment.
- Page 52 Date Installed: For further support or to order additional products please contact your installer below: Company Name: Installer's Name: Phone: Email: Website: Address: This symbol on the products and/or accompanying All speci cations are approximate. We reserve the right to change any documents means that used electronic equipment product speci cations or features without notice.
Need help?
Do you have a question about the VDP102 and is the answer not in the manual?
Questions and answers