Table of Contents
Advertisement
Available languages
Available languages
Quick Links
Download this manual
See also:
Instruction Manual
Advertisement
Chapters
Table of Contents

Related Manuals for Rointe TN030SEB


Summary of Contents for Rointe TN030SEB
- Page 1 INSTRUCTIONS MANUAL MOUNTING, INSTALLATION, STARTING AND OPERATION MANUAL DE INSTRUCCIONES MONTAJE, INSTALACIÓN, PUESTA EN MARCHA Y FUNCIONAMIENTO BEDIENUNGSANLEITUNG MONTAGE, ANBRINGUNG, INBETRIEBNAHME UND FUNKTIONSWEISE MANUAL DE INSTRUÇÕES MONTAGEM, INSTALAÇÃO, LIGAÇÃO E FUNCIONAMENTO...
- Page 3 El perfecto manejo del secatoallas se convertirá en un importante ahorro energético. DEUTSCH ..................28 Wir freuen uns, dass Sie sich für eine energiesparende Heizung von ROINTE entschieden haben. Dieses Handbuch soll Ihnen eine langjährige Nutzungsdauer garantieren. Lesen Sie es vor der Benutzung des Handtuchtrockners genau durch und bewahren Sie es an einem sicheren Ort auf, um es bei Bedarf zu Rate zu ziehen.
-
Page 4: Table Of Contents
ENGLISH TABLE OF CONTENTS 1. Description of the T Series Towel Rail ..................5 1.1. Front Panel Parts ....................... 5 1.2. Switching On & Off (stand-by) ................... 6 1.3. Setting the day and time ....................7 1.4. Locking the Control Panel ....................7 1.5. -
Page 5: Description Of The T Series Towel Rail
1. DESCRIPTION OF ThE T SERIES TOwEL RAIL 1.1. Front Panel Parts TFT DISPLAY CONTROL PANEL... -
Page 6: Switching On & Off (Stand-By)
1.1.1. Display parts SEGMENTO INDICACIÓN PROGRAMMING DAYS OF THE WEEK TIME OF DAY TEMPERATURE SELECTED OPEN WINDOW FUNCTION HEATED TOWEL RAIL ON AUTOMATIC/MANUAL FUNCTION COMFORT/ECONOMY/ANTI-FROST MODE LOCKING THE CONTROL PANEL 1.2. Switching On & Off (stand-by) By pressing the key , we switch the towel rail on or off.The following image will appear on the screen when switched on:... -
Page 7: Setting The Day And Time
The screen will automatically go into sleep mode if no button is pushed for 10 seconds. By pushing the button again the towel rail will go into standby mode with the word “Standby” appearing followed by the Rointe logo. 1.3. Setting the day and time... -
Page 8: Open Window Function
regardless of any other mode. This mode takes priority over any other. When the heated towel rail is set at the two-hour mode the screen will show this image: Once the towel rail is set at the two-hour mode and until the two hours have finished or the key is pressed again, the display will show this image: 1.8. -
Page 9: Programming The T Series Towel Rail
You can change the “Standby” mode brightness by pushing the button to move the frame to the “STAND-BY” position. You can then adjust the brightness by pushing the same keys. To finish the programming wait for 10 seconds without pressing any buttons. 2. - Page 10 The first thing you will see is the sun symbol flashing, representing the comfort mode. The comfort mode temperature will also be displayed. Using the buttons we can increase and decrease the temperature desired within the comfort mode, from 20ºC to 30ºC. This temperature will be applied later when programming an hour with the comfort mode setting.
-
Page 11: Mounting Instructions
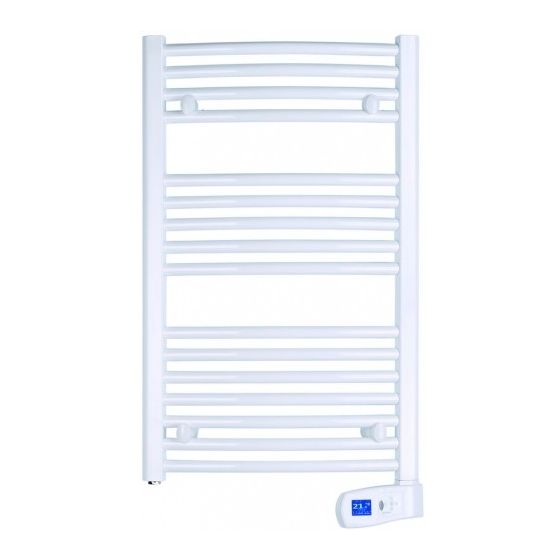
press the button to exit, or leave the unit for 30 seconds without pressing anything. 3. MOUNTING INSTRUCTIONS Inside the box you will find a mounting kit. 1. Choose the right part of the wall. 2. Place the mounting stencil on the wall, marking the places for the holes. 3. - Page 12 300 mm 1,800 mm 1,347 mm 325 mm CODE MODEL POWER VOLTAGE HEIGHT WIDTH DEPTH INST. DEPTH WEIGHT TN030SEB T.WHITE 030 300 W 230V~ 800 mm 500 mm 50 mm 100 mm 11 kg TN050SEB T.WHITE 050 500 W 230V~...
-
Page 13: Connecting Instructions
4. CONNECTING INSTRUCTIONS Connection to the mains must be made observing the voltage stated on the product technical data label. This appliance is designed to be permanently installed connected to fixed facilities. The heated towel rail power supply circuit must have an all-pole circuit breaker switch with a separation of at least 3 mm between the contacts. -
Page 14: Specific Regulations For Bathrooms
6. GUARANTEE 6.1. If your ROINTE heated towel rail needs to be sent to the guarantee service, send it to the dealer / installer where it was purchased. In the event of any problems, you can contact ROINTE on its TECHNICAL ASSISTANCE HELPLINE 0845 604 5987 or e-mail us at peter@rointe.com. - Page 15 (on the technical data label) and its date of purchase. ROINTE reserves the right to refuse the guarantee service when this information has been removed or changed following the original purchase of the product.
- Page 16 ESPAÑOL ÍNDICE DE CONTENIDOS 1. Descripción del Secatoallas “Serie T” .................. 17 1.1. Partes del panel frontal ....................17 1.2. Encendido y apagado (stand-by) ..................18 1.3. Ajuste día y hora ....................... 19 1.4. Bloqueo de teclado ......................19 1.5. Selección de Temperatura ....................19 1.6.
-
Page 17: Descripción Del Secatoallas "Serie T
1. DESCRIPCIóN DEL SECATOALLAS “SERIE T” 1.1. Partes del panel frontal DISPLAY TFT PANEL DE CONTROL... -
Page 18: Encendido Y Apagado (Stand-By)
1.1.1. Partes del Display TFT SEGMENTO INDICACIÓN FRANJA DE PROGRAMACIÓN DÍAS DE LA SEMANA HORA TEMPERATURA FUNCIÓN VENTANA ABIERTA SECATOALLAS EN CONSUMO FUNCIÓN AUTOMÁTICO/MANUAL MODO CONFORT/ECONÓMICO/ANTIHIELO BLOQUEO DE TECLADO 1.2. Encendido y apagado (stand-by) Pulsando la tecla podemos encender o apagar el secatoallas. Al encender el secatoallas aparecerá... -
Page 19: Ajuste Día Y Hora
Pulsando de nuevo la tecla el secatoallas pasará al modo “Stand By”, apareciendo la palabra “STAND BY” seguido del logotipo de ROINTE. 1.3. Ajustar día y hora Asegúrese de estar en la función manual, de manera que la pantalla muestra el símbolo Pulse la tecla 3 segundos, para acceder al ajuste hora y día desde el propio secatoallas. -
Page 20: Función "Ventana Abierta
cualquier otra. Para indicar que el secatoallas activa el funcionamiento intenso dos horas, el display mostrará la siguiente imagen: Una vez activo y hasta que terminen las dos horas o se pulse nuevamente la pantalla mostrará la siguiente imagen: 1.8. Función “Ventana abierta” Esta función se activa cuando la temperatura leída por la sonda detecta un descenso de 4ºC respecto a la temperatura de consigna en media hora. -
Page 21: Programación Del Secatoallas Serie T
Con las teclas podemos disminuir o aumentar la luminosidad de la pantalla del modo ON. Para modicar la luminosidad del modo “Standby”, pulsaremos la tecla y el cuadro delimitador marcará la opción “STAND-BY”, pudiendo modificar la luminosidad con las mismas teclas Para salir de esta función esperaremos 10 segundos sin pulsar ningún botón. -
Page 22: Instrucciones De Montaje
NOTA: Llegado a este punto, recuerde que si el secatoallas ha sido programado con anterioridad, todos los días seleccionados perderán su programación actual y se modificarán por la nueva programación que va a realizar. En la pantalla podrá ver la hora en formato 24 horas (medianoche es 0h, 1h, 2h…). En la barra de programación horaria de la parte inferior de la pantalla verá... - Page 23 300 mm 1.800 mm 1.347 mm 325 mm CÓDIGO MODELO POTENCIA TENSIÓN ALTURA ANCHURA PROF. PROF. INST. PESO TN030SEB T.BLANCO 030 300 W 230V~ 800 mm 500 mm 50 mm 100 mm 11 kg TN050SEB T.BLANCO 050 500 W 230V~ 1.200 mm...
-
Page 24: Normas De Conexión
4. NORMAS DE CONExIóN La conexión a la red debe efectuarse respetando la tensión indicada en la etiqueta de características técnicas del producto. Este aparato está destinado a ser permanentemente conectado a una instalación fija. El circuito de alimentación del secatoallas debe incorporar un interruptor de corte omnipolar con una separación de contactos de al menos 3 mm. -
Page 25: Reglas Particulares Para Los Cuartos De Baño
6.1. Si debe enviar su secatoallas ROINTE al servicio de garantía, remítalo al distribuidor / instalador donde lo adquirió. En el caso de que le surjan dificultades, ROINTE pone a su disposición el TELÉFONO DE ASISTENCIA TÉCNICA 902 130 134 ó el correo electrónico sat@rointe.com. - Page 26 El símbolo del cubo de basura tachado sobre barra horizontal se marca sobre todos los productos ROINTE para recordar al consumidor la obligación de separarlos para la recogida selectiva. El consumidor debe contactar con la...
- Page 28 DEUTSCH INhALTSVERzEIChNIS 1. Beschreibung Des HandtuchtrocknerS „Serie T“ ..............29 1.1. Teile der vorderen Verkleidung ..................29 1.2. Ein- und Ausschalten (stand-by) ..................30 1.3. Zeit- und Datumseinstellung ..................31 1.4. Tastensperre ........................31 1.5. Temperaturauswahl ......................31 1.6. Manuelle und Automatik-Funktion ................. 31 1.7.
-
Page 29: Beschreibung Des Handtuchtrockners „Serie T
1. BESChREIBUNG DES hANDTUChTROCkNERS „SERIE T“ 1.1. Teile der vorderen Verkleidung TFT DISPLAY TASTENFELD... -
Page 30: Ein- Und Ausschalten (Stand-By)
Handtuchtrockner eingeschaltet wird angezeigt das Splash-Image nach TFT Display: Nach 10 Sekunden ohne drücken einer beliebigen Taste wird die Displaybeleuchtung in den Standby mode automatisch gehen.Drücken der Taste wieder Kühler geht, erscheint das Wort “STAND BY” vom Logo von ROINTE gefolgt. -
Page 31: Zeit- Und Datumseinstellung
1.3. zeit- und Datumseinstellung Durch drei-sekündiges Drücken der Taste greifen Sie am Handtuchtrockner selbst auf die Zeit-und Datumseinstellung zu. Nach Drücken von , blinkt, je nach Anzahl der Betätigung, entweder die Angabe zu Stunde, Minute oder Wochentag. Mittels der Tasten verändern Sie die entsprechenden Werte. -
Page 32: Zweistündiger Intensivbetrieb (2H)
1.7. zweistündiger Intensivbetrieb (2h) Durch Drücken der Taste wird der Handtuchtrockner unabhängig des bisherigen Programmierstatus zwei Stunden lang durchgehend in Spitzenleistung Betrieb gesetzt. Diese Funktion überlagert alle anderen. Um diese Funktion zu aktivieren erscheint für 5 Sekunden, das nächste Bild in der Anzeige des Handtuchtrockner: Sobald der “Zweistündiger Intensivbretrieb”... -
Page 33: Beleuchtung Des Displays Funktion
1.9. Beleuchtung des Displays Funktion kann die Beleuchtung durch Drücken der Taste für 3 Sekunden während das Produkt im manuellen Modus ändern. Um diesen Modus zu aktivieren, wird der folgende Bildschirm angezeigt: Schlüssel können verringern oder erhöhen Sie die Helligkeit des Bildschirms in ON Funktion. -
Page 34: Programmierung Am Handtuchtrockner
2.2. Programmierung am handtuchtrockner Der Handtuchhalter kann am Gerät selbst mittels Durchführung folgenden Ablaufes programmiert werden. Hierzu muß die Automatikfunktion ( ) aktiviert sein. Durch dreisekündiges Drücken der Taste blinkt das Sonnensymbol ( ) sowie die programmierte Komforttemperatur. Mit den Tasten wird die Temperatur des Komfortmodus gesenkt oder angehoben (Temperatur zwischen 20 und 30°C). -
Page 35: Montageanleitung
3. MONTAGEANLEITUNG Im Innern der Verpackung befindet sich ein Befestigungs-Set. 1. Wählen Sie eine adäquate Position an der Wand aus. 2. Halten Sie die Montageschablone an die Wand und zeichnen sie die Bohrlöcher an. 3. Nehmen Sie die Montageschablone beiseite und bohren sie die Löcher in die Wand. 4. - Page 36 500 mm 300 mm 1,800 mm 1,347 mm 325 mm KODE MODELL LEISTUNG SPANNUNG HÖHE BREITE TIEFE INSTALLATION GEWIGHT TN030SEB T.WEIß 030 300 W 230V~ 800 mm 500 mm 50 mm 100 mm 11 kg TN050SEB T.WEIß 050 500 W 230V~ 1.200 mm...
-
Page 37: Regeln Für Aufbau Und Anschluss
4. REGELN FüR AUFBAU UND ANSChLUSS Der Anschluss ans Stromnetz muss unter Berücksichtigung der korrekten Spannung erfolgen (siehe Etikett mit den technischen Daten). Für dieses Gerät ist eine dauerhafte Verbindung mit einer ortsfesten Anlage/Anbringung vorgesehen. Der Schaltkreis für die Stromversorgung des Handtuchtrockners muss einen allpoligen Schalter mit mindestens. -
Page 38: Sonderregeln Für Badezimmer
6.1. Benötigt Ihr ROINTE-Handtuchtrockner den Garantieservice, wenden Sie sich bitte an die Verkaufsstelle (Vertreiber/Installateur). Bei jeglichen Schwierigkeiten können sie über die HOTLINE +34 902 130 134 oder per E-Mail sat@rointe.com von ROINTE technische Hilfe anfordern. 6.2. ROINTE garantiert Ihnen, dass dieses Produkt beim ersten Kauf und für die nachfolgen-... - Page 39 Das Symbol mit der durchgestrichenen Mülltonne über einem horizontalen Balken ist auf allen Produkten von ROINTE angebracht, um den Konsumenten an die Verpflichtung der Mülltrennung zur ge- sonderten Abholung zu erinnern. Der Konsument muß sich mit der örtlichen Behörde oder dem Verkäufer...
- Page 40 PORTUGUÊS ÍNDICE DOS CONTEÚDOS 1. Descrição do seca toalhas “Serie T” ..................41 1.1. Painel frontal ........................41 1.2. Ligar e desligar (stand-by) ....................42 1.3. Bloqueio do teclado ......................43 1.4. Selecção da temperatura ....................43 1.5. Função manual / automática .................... 43 1.6.
-
Page 41: Descrição Do Seca Toalhas "Serie T
1. DESCRIÇãO DO SECA TOALhAS “SERIE T” 1.1. Painel frontal VISOR TFT TECLADO... -
Page 42: Ligar E Desligar (Stand-By)
1.1.1. Visor SEGMENTO INDICAÇÃO FAIXA DE PROGRAMAÇÃO DIAS DA SEMANA HORA DO DIA TEMPERATURA SELECCIONADA FUNÇÃO JANELA ABERTA SECA TOALHAS EN CONSUMO FUNÇÃO MANUAL/AUTOMÁTICA MODO CONFORTO/ECONÓMICO/ANTIGELO BLOQUEIO DO TECLADO 1.2. Ligar e desligar (stand-by) Ao pressionar a tecla , podemos ligar ou desligar o seca toalhas. Ao ligar o seca toalhas aparecerá... -
Page 43: Bloqueio Do Teclado
“stand by” á continuação o logotipo da ROINTE. 1.3. Ajuste de relógio: hora e dia Pressionando durante 3 segundos acedemos ao ajuste de hora e dia desde o próprio seca toalhas. Pressionando piscarão hora, minutos e dia da semana, de acordo com o número de toques realizado. -
Page 44: Funcionamento Prolongado Duas Horas (2H)
1.7. Funcionamento prolongado duas horas (2h) Ao pressionar a tecla , o seca toalhas funcionará de forma continuada durante duas horas a máxima potência, independentemente do estado em que se encontre. Esta função tem autonomia sobre uma outra qualquer. Ao pulsar qualquer tecla aparecerá a seguinte imagem: Para indicar que o seca toalhas está... -
Page 45: Programação Do Seca Toalhas " Serie T
Com as teclas aumentar ou disminuir a iluminação do ecrã em ON.Para modificar a iluminação do modo “Stand-by”, pulsaremos a tecla e o quadro delimitador marcará a opção “STAND-BY” pudendo assim modificar a iluminação com as mesmas teclas Para finalizar a programação aguarde 30 segundos sem pressionar nenhum botão. PROGRAMAÇãO DO SECA TOALhAS “... -
Page 46: Instruções De Montagem
Pressionando rapidamente a tecla piscam todos os números da semana (de ). Com as teclas , avançamos ou retrocedemos os dias da semana e aparece Sel1, Sel2, Sel3,... no visor. Com a tecla confirmamos esse dia ficando fixo o número correspondente. Ao pressionar quando estamos no dia , passamos ao dia... - Page 47 Secção transversal do seca toalhas. Figure 1. Taco 10 mm Peça em plástico de suporte Parafuso 2,9 x 9,5 mm Parafuso 6,3 x 50 mm Peça en plástico de fixação Armação do seca toalhas Parafuso 3/8’’ x 40 mm Adorno...
- Page 48 500 mm 300 mm 1.800 mm 1.347 mm 325 mm CÓDIGO MODELO POTÊNCIA TENSÃO COMPRIMENTO LARGURA PROF. INSTALAÇAO PESO TN030SEB T.BRANCO 030 300 W 230V~ 800 mm 500 mm 50 mm 100 mm 11 kg TN050SEB T.BRANCO 050 500 W 230V~ 1.200 mm...
-
Page 49: Normas De Ligação
4. NORMAS DE LIGAÇãO A ligação à corrente deve ser efectuada respeitando a tensão indicada na etiqueta das características técnicas do produto. Este aparelho está destinado a ser permanentemente ligado a uma instalação fixa. O circuito de alimentação do seca toalhas deve integrar um interruptor de corte multipolar com uma separação de contactos de pelo menos 3 mm. -
Page 50: Regras Particulares Para As Casas De Banho
6. GARANTIA 6.1. Se tiver de enviar o seu seca toalhas ROINTE para o serviço de garantia, envie-o para o distribuidor / instalador onde o adquiriu. No caso de surgirem problemas, a ROINTE põe à sua disposição o TELÉFONE DE ASSISTÊNCIA TÉCNICA +34 902 130 134 ou o correio electrónico... - Page 51 O símbolo constituído por um contentor de lixo barrado com uma cruz está marcado em todos os produtos ROINTE para re- cordar ao consumidor a obrigação de separá-los para a coleta seletiva. O consumidor deve entrar em contato com a autoridade local ou com o revendedor para informar-se sobre à...
- Page 52 ROINTE UK ROINTE HEAD OFFICE Catalyst House Pol. Ind. Vicente Antolinos 720 Centennial Court, Centennial Park C/ E, Parcela 43 Elstree, Herts, WD6 3SY 30140 Santomera, Murcia, España CUSTOMER SERVICE T. +34 900 103 061 T. 0845 604 5987 F. +34 968 277 125 FAX NUMBER Servicio Técnico: +34 902 130 134...
Need help?
Do you have a question about the TN030SEB and is the answer not in the manual?
Questions and answers