Table of Contents
Advertisement
Quick Links
Download this manual
See also:
Operating Manual
Quick Start Guide
Read all instructions carefully before operating your Marker 2000.
1. Preparation
a. After removing machine from the box,
make sure that all packing has been
removed. There is a gauging template
secured in the vice jaws, make sure that it
is removed for normal marking.
b. All references with a letter in parentheses
(X) refer to the illustration on page three
of this guide.
c. Attach your IBM compatible keyboard to
the back of the Marker 2000 in keyboard
outlet (M).
need to be connected to your keyboard
cord prior to attachment to the machine
depending on your keyboard style.
d. Attach power cord to machine and plug
into 110VAC circuit. The on/off rocker
main switch (I) is located on the back
right hand side of the machine.
machine on.
2. Press <F5> (Set Up)
Press <F10>
Press 2 (for English)
Press <ESC>
3. Press <F2> on the keyboard (Marking).
4. Press <F3> on the keyboard (New Model). For
advanced Marking features see operations man-
ual.
5. Clamp item to be marked with the key locking
jaw (G) located on the clamp slide (E). The
clamp should
be in the out
(extended or
t r a c k i n g )
position (See
Fig. 1).
The
top (head) of
the item must
be
placed
against
the
stop (See Fig.
4).
Larger
objects
may
The adapter provided may
Fig. 1
Marker 2000
require repositioning of the top clamp slide by
means of slide locking knob (F). If there is a
groove (mill) in the item being marked, posi-
tion the clamping jaw by loosening the jaw
locking knob (G1). Place the back of the key
(opposite blade) against the left or right hand
stop depending on the side being marked.
Center the item if it does not have a groove.
Position the key-locking jaw (G) and then
tighten the jaw locking knob (G1) to lock the
settings in place (See Fig 2).
Fig. 2
Turn
6. Select <F8> for
T r a c k i n g .
Make sure that
the slide clamp
assembly is in
the
out,
tracking, posi-
tion. Turn the
clear
plastic
slide (P) over
the jaw. A red
colored
light now out-
lines the area
where marking
will
Move
marking zone
to the desired
location
the object to
be marked by
means of the
arrow
Fig. 3
or
laser
occur.
the
on
keys
1
Advertisement
Table of Contents

Related Manuals for Silca Marker 2000


Summary of Contents for Silca Marker 2000
- Page 1 Marker 2000 Quick Start Guide Read all instructions carefully before operating your Marker 2000. 1. Preparation require repositioning of the top clamp slide by a. After removing machine from the box, means of slide locking knob (F). If there is a...
- Page 2 Ilco Unican. (See Fig. 4) is displayed on the tracking infor- mation screen of the Marker 2000 display. The + and - keys on the keyboard change the SPECIAL MARKING selection. When correct, press <F10>.
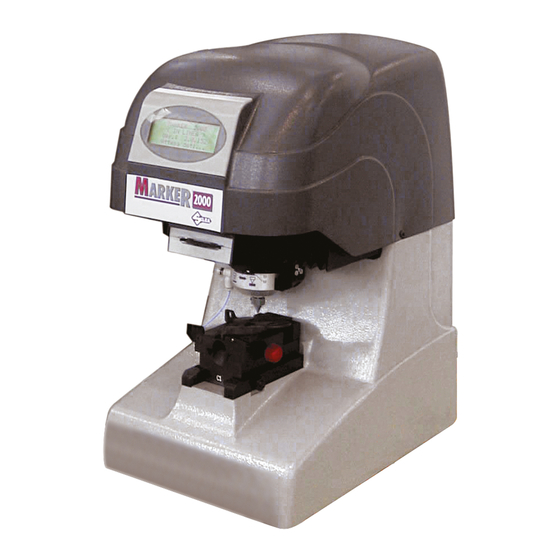
- Page 3 marking punch display marking depth regulation ring tracking device tracking disk clamp slide slide locking knob key locking jaw jaw locking knob head unit master switch feeder outlet keyboard outlet serial port clamp sensor glass slide diffuser glass slide diffuser knob...
-
Page 4: Troubleshooting Guide
Troubleshooting Guide 1. Marking depth is too shallow or deep Fig. 10 Cause: Marking punch ring is not adjust- properly. Solution: Change setting (See figure 8 ). Clockwise will decrease and counter clockwise will increase the punching pressure. 2. Text is marked in an area not selected with the dial.
Need help?
Do you have a question about the Marker 2000 and is the answer not in the manual?
Questions and answers