Table of Contents
Advertisement
Advertisement
Table of Contents

Related Manuals for Donaldson Torit DFO 2-4


Summary of Contents for Donaldson Torit DFO 2-4
-
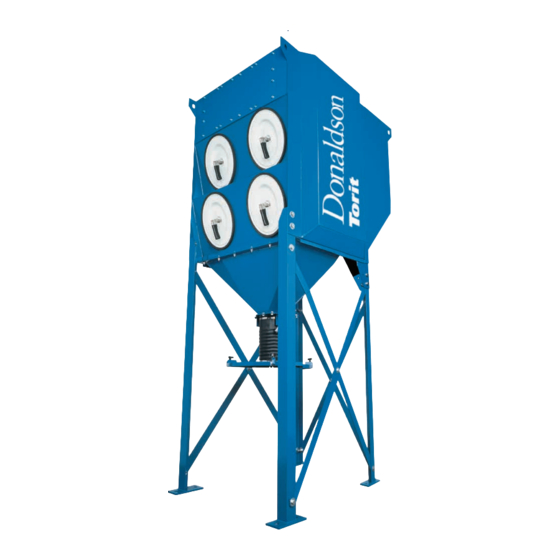
Page 2: Data Sheet
Installation and Operations Manual. For a replacement manual, contact Donaldson Torit. This manual contains specific precautionary statements relative to worker safety. Read thoroughly and comply as directed. Discuss the use and application of this equipment with a Donaldson Torit representative. Instruct all personnel on safe use and maintenance procedures. -
Page 4: Purpose And Intended Use
Consult and comply with all National and Local Codes related to fire and/or explosion properties of combustible materials when determining the location and operation of all dust, fume, or mist collection equipment. Standard Donaldson Torit equipment is not equipped with fire extinguishing or explosion protection systems. -
Page 6: Operation
Donaldson Company, Inc. Operation Filter cleaning is completed using pulse-jet technology. During normal operation, dust-laden air enters the unit A solenoid and air diaphragm valve aligned to each filter through the dirty-air inlet. Airflow is directed downward through the collector and heavier particulate falls provides the pulse cleaning. -
Page 7: Inspection On Arrival
Downflo Oval, DFO 2-4 and 3-6 Inspection on Arrival Installation 1. Inspect unit on delivery. Site suitability must account for wind, seismic zone, and 2. Report any damage to the delivery carrier. other live-load conditions when selecting the 3. Request a written inspection report from the Claims location for all units. -
Page 8: Rigging Instructions
Donaldson Company, Inc. Electrical Wiring Electrical work during installation If explosion protection devices are part of the system, must be performed by a qualified locate the collector in accordance with local code electrician and comply with all applicable requirements (Example: NFPA 654). These codes may national and local codes. -
Page 9: Typical Installation
Downflo Oval, DFO 2-4 and 3-6 Typical Installation 1. Lift cabinet. 4. Assemble legs and cross braces. 2. Apply sealant to hopper flange. 5. Lift unit and hopper into position 3. Fasten hopper to cabinet. over legs and lower slowly. -
Page 10: Standard Equipment
Donaldson Company, Inc. Standard Equipment 3. Lift the collector and position over the hopper and Standard equipment consists of a collector cabinet, lower slowly. hopper, and legs. Basic assembly starts by attaching the hopper to the cabinet, then attaching the legs. A 4. -
Page 11: Leg Assembly
Downflo Oval, DFO 2-4 and 3-6 Leg Assembly Leg sets are designed for standard height collectors 4. Recheck the position of the leg sets and cross and are rated as shown in the Rating and Specification braces. Information. Reference the drawing shown below and 5. - Page 13 Downflo Oval, DFO 2-4 and 3-6 blower fan diaphragm valve solenoid enclosure manifold power supply disconnect switch* 120-Volt blower motor starter* solid-state timer Magnehelic gauge* solenoid electrical connection* air supply to manifold* hopper compressed-air supply line* safety regulator* automatic exhaust...
-
Page 16: Preliminary Start-Up Check
Donaldson Company, Inc. Preliminary Start-Up Check Instruct all personnel on safe use and maintenance 6. Check and remove all loose items in or near the inlet procedures. and outlet of the unit. Electrical work during installation 7. Check that all remote controls and solenoid must be performed by a qualified enclosures (if applicable) are properly wired and all electrician and comply with all applicable... - Page 17 Downflo Oval, DFO 2-4 and 3-6 This Page Intentionally Left Blank...
-
Page 18: Maintenance Information
Donaldson Company, Inc. Maintenance Information Instruct all personnel on safe use and maintenance Drain moisture following the manufacturer’s procedures. instructions. With the compressed air supply ON, check the cleaning valves, solenoid valves, and Use proper equipment and adopt tubing for leaks. Replace as necessary. all safety precautions needed for servicing equipment. -
Page 20: Filter Installation
Donaldson Company, Inc. 5. Slide the filter out the access port along the Dust Disposal suspension yoke and dispose of properly. 1. Turn unit OFF and empty dust container as necessary 6. Clean the sealing surface with damp cloth. to minimize dust in the hopper. Clean dust from gasket sealing NOTICE 2. - Page 21 Downflo Oval, DFO 2-4 and 3-6 This Page Intentionally Left Blank...
-
Page 25: Gallon Drum Pack
Downflo Oval, DFO 2-4 and 3-6 55-Gallon Drum Pack 3. Attach the drum cover to the 55-gallon drum. The drum pack is designed to fit a customer-supplied, standard 55-gallon drum and provides easy access for 4. Use latches to secure the cover to the drum, if dust removal and disposal. - Page 26 Donaldson Company, Inc. 5-Gallon Pail Pack 3. Place pail beneath sealer mechanism. The pail pack includes a 5-gallon pail and provides easy access for dust removal and storage. 4. Tighten clamps on either side by pulling down. 1. Apply sealant to the hopper flange or the pail cover mounting plate flange toward the inside edge of the bolt pattern.
-
Page 27: Magnehelic ® Gauge
Downflo Oval, DFO 2-4 and 3-6 Magnehelic Gauge ® 3. Mount the gauge and bracket assembly to the The Magnehelic is a differential pressure gauge used to supporting structure using two self-drilling screws. measure the pressure difference between the clean- and 4. -
Page 28: Photohelic ® Gauge
Donaldson Company, Inc. Photohelic Gauge ® Electrical work must be #6-32 x 1 1/4-in screws. Do not tighten screws. performed by a qualified Connect two 1/8-in NPT x 1/4-in OD male adapters to electrician and comply with all applicable the gauge’s high- and low-pressure ports. Align the national and local codes. - Page 29 Downflo Oval, DFO 2-4 and 3-6 NPT male adapter 1/8-in NPT male Photohelic gauge adapter high-pressure port low-pressure port two 1/8-in NPT adapters clean air plenum pressure tap location plastic tubing 1/8-in NPT male adapter dirty air plenum pressure tap location...
-
Page 31: Delta P Plus Control
Downflo Oval, DFO 2-4 and 3-6 Delta P Plus Control The Delta P Plus Control monitors the differential zero. After the blower has come to a stop, the Delta pressure between the clean and dirty air plenums, P Plus engages the cleaning mechanism for a pre- providing a visual display of the filter condition. -
Page 32: Damper Installation
Donaldson Company, Inc. Damper Installation A damper can be added to the power pack outlet to limit Backward Inclined and regulate airflow when unit is in operation. 1. Apply sealant around the inside edge of the bolt pattern on the power pack outlet. Radial Blade 1. -
Page 33: Exhaust Silencer
Downflo Oval, DFO 2-4 and 3-6 Plenum Silencer Radial Blade and Backward Inclined 1. Apply 1/4-in diameter rope-type sealant towards the outside edge of the bolt pattern on the clean-air chamber outlet. silencer 2. Position the silencer mounting base aligning the bolt patterns of the collector and the mounting base. -
Page 34: Hepa Or Ashrae Afterfilter Installation
Donaldson Company, Inc. HEPA or ASHRAE Afterfilter Installation The afterfilter plenum is mounted on top of the unit and 6. Apply sealant to the inside perimeter of the mounting the blower is positioned inside the plenum. base. Install the plenum to the mounting base using self-threading bolts with washers. -
Page 35: Abrasion-Resistant Inlet Collar
Downflo Oval, DFO 2-4 and 3-6 Abrasion-Resistant Inlet Collar 1. Remove the unit’s front cover plate. Remove excess sealant from opening. 2. Apply 1/4-in sealant around the opening toward the inside edge of the bolt pattern. 3. Align the holes on the inlet collar with the holes in the unit and secure using 3/8-16 x 1-in bolts and flat washers supplied. -
Page 36: Cold Climate Kit
Donaldson Company, Inc. Cold Climate Kit Electrical work during installation 1. Install the power connection kit on the heat cable must be performed by a qualified following the manufacturer’s instructions. electrician and comply with all applicable 2. Start with the upper right-hand valve, wrap heat national and local codes. -
Page 38: Troubleshooting
Donaldson Company, Inc. Troubleshooting Problem Probable Cause Remedy Improper motor wire size Rewire using the correct wire gauge as specified by Power pack fan and motor do not start national and local codes. Not wired correctly Check and correct motor wiring for supply voltage. See motor manufacturer's wiring diagram. - Page 39 Downflo Oval, DFO 2-4 and 3-6 Problem Probable Cause Remedy Lack of compressed air See Rating and Specification Information for Insufficient airflow continued compressed air supply requirements. Pulse cleaning not energized Use a voltmeter to check the solenoid valves in the control panel.
- Page 40 Donaldson Company, Inc. Troubleshooting Problem Probable Cause Remedy Pressure switch not wired to the Connect the pressure switch on the timer board to Pulse cleaning never stops timer board correctly Terminals 7 and 8 on TB3. Pressure switch terminals on Remove jumper wire on Solid-State Timer board the timer board jumpered before wiring to the Delta P Control.
-
Page 41: Service Notes
Downflo Oval, DFO 2-4 and 3-6 Service Notes Date Service Performed Notes... - Page 42 Donaldson Company, Inc. Service Notes Date Service Performed Notes...
- Page 44 Donaldson does not warrant against damages due to corrosion, abrasion, normal wear and tear, product modification, or product misapplication. Donaldson also makes no warranty whatsoever as to any goods manufactured or supplied by others including electric motors, fans and control components.
Need help?
Do you have a question about the DFO 2-4 and is the answer not in the manual?
Questions and answers