Table of Contents
Advertisement
Quick Links
Advertisement
Table of Contents

Related Manuals for Trust SPYC@M 300


Summary of Contents for Trust SPYC@M 300
- Page 1 Trust SPYC@M 300 TRUST SPYC@M 300 User’s Manual Version 1.0...
- Page 2 TRUST SPYC@M 300 Thank you Thank you very much for purchasing this product from the Trust range. We wish you hours of fun with it. Please read this manual carefully before using the product. Registration Register your purchase now at the Trust Internet site, www.trust.com, so that you are able to receive optimal guarantee and service support.
-
Page 3: Table Of Contents
Contents of the package......................3 Minimum system requirements ....................3 Safety..............................4 General ............................4 Batteries ............................ 4 Functions of the ‘Trust SpyC@m 300’ ..................5 Camera functions ........................5 LCD display Functions ......................5 Installation ............................6 Inserting batteries ........................6 ‘Trust SpyC@m 300’... - Page 4 7.4.4 Creating a VideoMail ....................... 36 Using Ulead COOL 360 ......................37 Troubleshooting..........................38 Specifications ..........................40 10. Trust Customer Care Centres ...................... 41 Italian Office........................... 41 French Office ..........................41 German Office..........................41 Spanish Office ..........................41 Dutch Office ........................... 41...
-
Page 5: Introduction
Additional information will be shown as follows: NOTE: If you connect the ‘Trust SpyC@m 300’ to a USB HUB, then the USB HUB should have its own power supply. The examples assume that the letter “D” has been assigned to your CD-ROM drive. If your system uses a different drive letter for your CD-ROM drive, for example “E”, you should replace “D”... -
Page 6: Safety
TRUST SPYC@M 300 Recommended system configuration for full operation of the programs: • ISDN-adapter or modem • Sound card with speakers and microphone • Internet subscription 2. Safety General Do not use the device in a damp environment. Do not try to repair the device yourself. -
Page 7: Functions Of The 'Trust Spyc@M 300
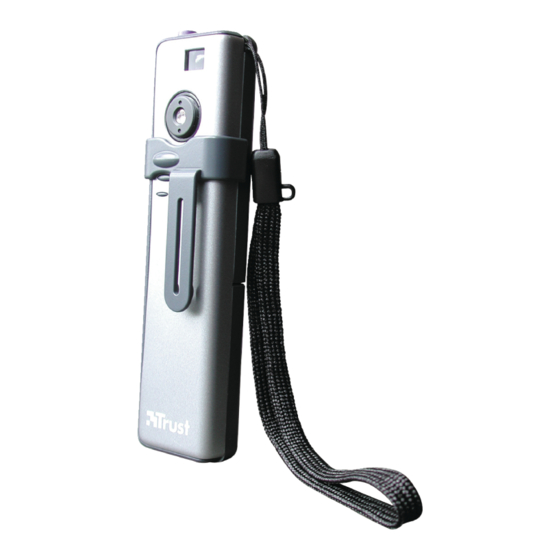
TRUST SPYC@M 300 3. Functions of the ‘Trust SpyC@m 300’ Camera functions Figure 1: ‘Trust SpyC@m 300’ functions Viewer Shutter release Lens LCD screen ON / OFF & Menu Battery cover button USB connection Table 1: SpyC@m 300 functions LCD display Functions... -
Page 8: Installation
If the camera is not used for an extended period, you must remove the batteries from the camera to save the battery capacity. ‘Trust SpyC@m 300’ setup program installation 1. Insert the CD in the PC and the installation program will start up automatically. If this does not occur, start up ‘Setup.exe’... - Page 9 5. Connect the USB connection D (see Figure 1) of the camera to a free USB port of your computer. Windows 98 detects the new hardware and automatically installs the Trust SpyC@m 300 setup program. You have completed installation of the setup program. Proceed to chapter 5 for installation of the software...
-
Page 10: Software Installation
Ulead Photo Express 3.0 SE is an image editor that you can use to load and edit the images on your computer that you have taken using your SpyC@m 300. Follow the instructions below to install Ulead Photo Express 3.0 SE. - Page 11 TRUST SPYC@M 300 Click on 'Next'. Figure 8 will appear. Figure 8: Installing Ulead Photo Express 3.0 SE Click on 'Yes' to accept the license agreement and continue with the installation. Figure 9 will appear. Figure 9: Installing Ulead Photo Express 3.0 SE Click on 'Next'.
-
Page 12: Ulead Photo Explorer 6.0 Installation
Ulead Photo Explorer 6.0 installation Ulead Photo Explorer 6 is an image-processing program that enables you to load and process photos you have taken with your SpyC@m 300 on the PC. For installation of Ulead Photo Explorer 6 follow the instructions below. - Page 13 TRUST SPYC@M 300 Figure 13: Ulead Photo Explorer 6.0 installation 2. Click on ‘Next’. Figure 14 will appear Figure 14: Ulead Photo Explorer 6.0 installation 3. Press ‘YES” to accept the licence agreement and proceed. Figure 15 will appear. Figure 15: Ulead Photo Explorer 6.0 installation 4.
-
Page 14: Installing Cool 360
Ulead COOL 360 is an image-processing program that lets you change various photos you took with your SpyC@m 300 into Panorama photos. Follow the instructions below for installation of COOL 360. See Figure 1. Go to the installation screen and click on ‘Install COOL 360. Figure 17 will appear. - Page 15 TRUST SPYC@M 300 Figure 18: Ulead COOL 360 installation 3. Press ‘YES” to accept licensing and to continue. Follow the instructions on the screen. During installation, Figure 19 will appear. Figure 19: Ulead COOL 360 installation 4. Click on ‘Yes’ and a screen similar to Figure 20 will appear.
-
Page 16: Videolive Mail 4.0 Installation
TRUST SPYC@M 300 VideoLive Mail 4.0 installation VideoLive Mail 4.0 lets you send a video and audio multi-media e-mail. To use this application, you must have a modem or an ISDN device, a sound card with speakers and microphone and an internet subscription. -
Page 17: Installation Microsoft Internet Explorer (Netmeeting)
TRUST SPYC@M 300 Figure 23: VideoLive Mail Plus installation Enter your name, Company and the CD-Key. You can find the CD-key on the sleeve of your CD. Press ‘Next’. Follow the directions on the screen. NOTE: If you leave the ‘Company’ box blank, installation will be terminated. Always fill in this box After installation, Figure 24 will appear. -
Page 18: Ulead Videostudio 3.0 Se Installation
TRUST SPYC@M 300 Ulead VideoStudio 3.0 SE installation Ulead VideoStudio 3.0 SE is a program. The Video Studio program is enclosed in a separate CD-ROM. Follow the instructions below for installation: 1. Insert the VideoStudio CD-ROM in your CD-ROM player. - Page 19 TRUST SPYC@M 300 Figure 27: VideoStudio 3.0 SE installation 6. Press ‘YES” to accept licensing and to continue. Follow the instructions on the screen. During installation, Figure 28 will appear. Figure 28: VideoStudio 3.0 SE installation 7. Switch on both options for installation of the program components and click on ‘Next’. Follow the instructions on the screen.
- Page 20 TRUST SPYC@M 300 8. Click on ‘Yes’ to accept the license agreement and to continue. Follow the instructions on the screen. During installation of the NetShow component, Figure 30 will appear. Figure 30: VideoStudio 3.0 SE (NetShow) installation 9. Select ‘Complete Installation’ and click on ‘Next’. Follow the instructions on the screen.
- Page 21 TRUST SPYC@M 300 Figure 32: VideoStudio 3.0 SE (QuickTime 3.0) installation 12. Click on ‘Next’ to install the QuickTime 3.0 component. During installation, Figure 33 will appear. Figure 33: VideoStudio 3.0 SE (QuickTime 3.0) installation 13. Click on ‘Yes’ to accept licensing and to proceed. Figure 34 will appear.
- Page 22 TRUST SPYC@M 300 Figure 35: VideoStudio 3.0 SE (QuickTime 3.0) installation 15. Switch off both options and click on ‘Finish’ to complete installation. Figure 36 will appear. Figure 36: VideoStudio 3.0 SE (QuickTime 3.0) installation 16. Select the last option to install a shortcut on the desktop and click on ‘Next’. Figure 37 will appear.
-
Page 23: Using The Camera
Do not touch the lens so that you don’t influence the quality of the photo. Menu options The Trust SpyC@m 300 has several options you can program. For programming these options, follow the instructions below. See also Figure 1 for this. -
Page 24: Repeat Function
6.3.5 Viewing photos in the computer The Trust SpyC@m 300 enables you to view the photos you took in the computer. Connect the camera as described in chapter 6.1. The camera is now ready for use. See chapter 7 for loading photos into the computer. -
Page 25: Using The Software
7.1.1 Photos and Soundclips 1. Connect the camera to a free USB port. 2. Start up the ‘SpyC@m Manager’ program (Start -> Programs -> SpyC@m 300 Manager -> SpyC@m 300 Manager). Figure 38 will appear. Figure 38: SpyC@m 300 manager... -
Page 26: Video
Video 1. Connect the camera to a free USB port. 2. Start up the ‘SpyC@m Manager’ program (Start -> Programs -> SpyC@m 300 Manager -> SpyC@m 300 Manager). Figure 38 will appear. 3. Click on ‘Live View’ button (D). Figure 39 will appear. -
Page 27: Using Ulead Photoexpress 3.0 Se
The film that was made will be visible in the Web album after a few seconds. 6. To play the film, click the film twice and it will be played. This was some information about the SpyC@m 300 manager. Continue with chapter 7.2 for use of the SpyC@m 300 in Ulead Photo Express 3.0 SE. - Page 28 Figure 41: main Photo Express screen Select ‘Get’ (A) and then ‘Camera’ (B) in the Photo Express main menu. The ‘Import Module’ screen will appear next to the photo album. At ‘Trust SpyC@m 300’select data source’ (C). Click on ‘Acquire’ F, Figure 42 will appear.
- Page 29 TRUST SPYC@M 300 Photo Photos made are in the camera memory. Table 5: Information about the TWAIN SpyC@m 300 screen Select the photo (G), which must be transferred to Photo Express by clicking on it with the mouse. Figure 43 will appear.
-
Page 30: Live Video Images
TRUST SPYC@M 300 Function Description ‘Express’ button; even more functions you can use for processing the image. ‘Web Studio’ button; Here you can create your own Web Album or Web Show for your internet page. Table 5: Processing a photo in Photo Express 7.2.2... -
Page 31: Using Videolive Mail
Select Source. Figure 47 will appear. Figure 47: selecting a camera 3. Select the ‘Trust SpyC@m 300’ and click on ‘Select’. 4. Now that the correct camera has been installed, the photos can be loaded from the camera memory. For more detailed information about processing photos in Photo Explorer we refer you to the program manual on the CD-ROM: D:\Software\Pex6\C360.pdf... - Page 32 TRUST SPYC@M 300 Press the ‘Yes’ button to continue. Figure 49 will appear. Figure 49: introduction Click on ‘Next’ to continue. Figure 50 will appear.
- Page 33 TRUST SPYC@M 300 Figure 50: user information Enter your first name, last name and e-mail address and click on ‘Next’. Figure 51 will appear. Figure 51: user information Select ‘Built-in Mail Utility’ and enter your ‘Mail Server’ information (information obtained from your ISP) and your ‘account name’.
- Page 34 TRUST SPYC@M 300 Select the (Trust) SpyC@m 300 as ‘Video capture device’ and set the desired frames per second (fps) and click the ‘Test it?’ button to compare images. Press the ‘Stop’ button. Click on ‘Next’. Figure 53 will appear.
- Page 35 TRUST SPYC@M 300 Click on ‘Next’ if in your opinion all settings are set correctly. Click on ‘Next’ to initiate the audio settings. The ‘Audio Configuration 2/3’ window will appear. See Figure Figure 55: audio configuration Click on ‘Press Here to Test Speaker’ to test the output volume of your speakers. Move the slide to adjust the volume.
-
Page 36: Working With Videolive Mail Plus
TRUST SPYC@M 300 7.4.2 Working with VideoLive Mail Plus Start up the program by clicking on the pictogram on your desktop. (If you just ran through the Set-up Wizard for the first time, the program starts up automatically.) Figure 57 will appear on your screen. -
Page 37: Function Key Description
TRUST SPYC@M 300 7.4.3 Function key description A description of the function keys follows. Figure 58: Function description Exit VideoLive Mail Closes VideoLive Mail Minimise Minimises VideoLive Mail Help Menu Activates VideoLive Mail help function Video Mail Wizard Start up Wizard for creating and... -
Page 38: Creating A Videomail
TRUST SPYC@M 300 Figure 59: Function description Start Playback Plays back video Stop Recording/playback Stopping vdeo recording or playback Start Recording Starting recording Pause Pause Table 8: Function description Figure 59 Figure 60: Function description Snapshot to File Taking and filing a snapshot... -
Page 39: Using Ulead Cool 360
TRUST SPYC@M 300 In this window, select the following: ‘Play’ to play the recording, ‘Save’ to save the recording, ‘Mail’ to send the recording by e-mail as an .exe-file. Click on ‘Finish’ to close the Wizard. This program includes many more functions and possibilities. -
Page 40: Troubleshooting
You will be automatically informed of developments to your product and of other Trust products. You will also have the chance to win some spectacular prizes. If you have any problems with the USB connection, we refer you www.trust.com/customercare/help/usb. A number of tips are listed here, which might solve your USB problem. - Page 41 TRUST SPYC@M 300 • Your hardware information. • A good description of what precisely does not work. • A good description of when precisely the problem takes place.
-
Page 42: Specifications
TRUST SPYC@M 300 9. Specifications Screen sensor 1/3 inch Lens F=0.6mm Screen colours 24 bit (16.7 million colours) Resolution 320 x 240 pixels (Low resolutions); 640 x 480 (High resolution). Resolution of 1024 x 768 pixels can be obtained with an image- processing program such as PhotoExpress 3.0 SE. -
Page 43: Trust Customer Care Centres
TRUST SPYC@M 300 10. Trust Customer Care Centres Inhabitants of Great Britain and Ireland should contact: GB Office Internet www.trust.com From: E-mail support.uk@trust.com 9:30 – 17:00 +44-(0)1376-514633 Tel. +44-(0)1376-500000 Inhabitants of Italy should contact: Italian Office From: Internet www.trust.com 9:00 – 13:00 E-mail support.it@trust.com...
Need help?
Do you have a question about the SPYC@M 300 and is the answer not in the manual?
Questions and answers