Table of Contents
Advertisement
© 2018 JVC KENWOOD Corporation
DNX9180DABS
DNX9180S
DNX9180SM
GPS NAVIGATION SYSTEM
INSTRUCTION MANUAL
• Updated information (the latest Instruction Manual, system updates, new
functions, etc.) is available from
<http://www.kenwood.com/cs/ce/>.
• The Instruction manual is subject to change for modification of
specifications and so forth. Be sure to download the latest edition of the
Instruction manual for reference.
<http://manual.kenwood.com/edition/im396/>
B5A-2484-00 (M/M2/X)
Advertisement
Table of Contents

Related Manuals for Kenwood DNX9180DABS


Summary of Contents for Kenwood DNX9180DABS
- Page 1 <http://www.kenwood.com/cs/ce/>. • The Instruction manual is subject to change for modification of specifications and so forth. Be sure to download the latest edition of the Instruction manual for reference. <http://manual.kenwood.com/edition/im396/> © 2018 JVC KENWOOD Corporation B5A-2484-00 (M/M2/X)
-
Page 2: Table Of Contents
Contents Before Use APPS—Android Auto™/ Apple CarPlay Precautions ..............4 Air Mirroring Operation .........28 Safety Precautions and Important Information ....... 5 Apple CarPlay Operation ........29 How to read this manual ......... 6 Android Auto™ Operation ........30 Spotify Operation .............31 Basic Operations Functions of the Buttons on the Front Panel ... - Page 3 Bluetooth Control Remote control Information for using Bluetooth® devices ..46 Battery Installation ...........76 Register the Bluetooth device ......47 Functions of the Remote control Buttons ..76 Bluetooth Setup ............47 Connection/Installation Playing the Bluetooth Audio Device ....49 Using the Hands-Free Unit ........51 Before Installation ............79 Hands-Free Setup .............56 Installing the unit .............81...
-
Page 4: Before Use
If the unit still does not operate • To prevent a short circuit, never put or leave normally after a while, consult your KENWOOD any metallic objects (such as coins or metallic dealer. tools) inside the unit. -
Page 5: Safety Precautions And Important Information
Neither KENWOOD nor Garmin shall be liable for problems or accidents resulting from failure to After the system acquires satellites for the first observe the instructions in this manual. -
Page 6: How To Read This Manual
Before Use # CAUTION How to read this manual Failure to avoid the following potentially • The screens and panels shown in this manual are hazardous situations may result in injury or examples used to provide clear explanations of the property damage. -
Page 7: Basic Operations
– The camera whose view is displayed first changes according to the "Camera Setup" setting and the shift lever position in the shift gate. • Pressing for 1 second turns the screen off. (DNX9180DABS only) • Displays the APP (CarPlay/ Android Auto/ Air Mirroring) screen. -
Page 8: Turning On The Unit
Basic Operations Number Name Motion SD card slot • A slot to insert an SD card. • An SD card slot for upgrading the map. For how to upgrade the map, refer to the instruction manual of the navigation system. * Do not pull out the MAP SD while "Loading Maps"... -
Page 9: Initial Settings
Basic Operations Initial Settings ■ [Camera] Set the parameters for the camera. 1 Touch [Camera]. Initial setup 2 Set each item and touch [ For details of, see Camera Setup (P.57). Perform this setup when you use this unit first time. - Page 10 Basic Operations Calendar/clock settings Touch [Security]. Press the [MENU] button. h Popup menu appears. Touch [SETUP]. h SETUP Menu screen appears. h Security screen appears. Touch [User Interface]. Touch [Security Code Set] on the Security screen. h Security Code Set screen appears. Enter a security code with 4 to 8 digits and touch [Enter].
-
Page 11: Adjusting The Volume
Basic Operations Touch screen operations NOTE • Please set the date and time. If they not set, some To perform operations on the screen, you need functions may not work. to touch, touch and hold, flick or swipe to select an item, display a setting menu screen or change pages. -
Page 12: Home Screen Descriptions
Basic Operations HOME screen descriptions Popup menu Most functions can be performed from the Press the [MENU] button. HOME screen. h Popup menu appears. Touch to display the popup menu. The contents of the menu are as follows. • Widget (P.20) –... -
Page 13: Source Selection Screen Description
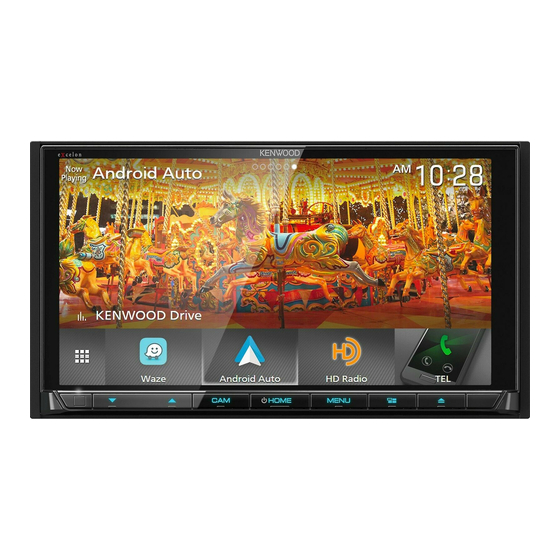
When an Android device compatible with Select the playback source Android Auto is connected, [Android Auto] is displayed. Press the [HOME] button. Only for DNX9180DABS. h HOME screen appears. Touch [ From the screen, you can select the following sources and functions. -
Page 14: Home Screen
Basic Operations Customize Short-cut buttons on To select the playback source on the HOME screen HOME screen You can arrange the positions of the source icons as you like. Press the [HOME] button. h HOME screen appears. Touch [ Touch and hold the icon which you want The 4 items displayed on the source selection to move in the customizing mode. -
Page 15: Source Control Screen Descriptions
Basic Operations Source control screen descriptions • Connected Bluetooth device information. • : Lights up during quick charging of There are some functions which can be the battery of the connected iPod/ iPhone/ performed from most screens. Smartphone. Artwork & information Indicators You can select whether to display an artwork and song information or only song information... -
Page 16: List Screen
Basic Operations List screen Navigation Operation There are some common function keys in the For details on the navigation function, please list screens of most sources. refer to the Navigation Instruction Manual. Display the navigation screen Press the [NAV] button. h The navigation screen appears. - Page 17 3 Touch [Go!]. limit signs and to use safe driving judgment 4 Touch [Add to Active Route] to add this at all times. Garmin and JVC KENWOOD will stop before your final destination. not be responsible for any traffic fines or citations that you may receive for failing to ●...
-
Page 18: Updating Maps
■ Updating maps You can purchase updated map data from Garmin. 1 Go to www.garmin.com/kenwood. 2 From the Map Updates section, select Update 3 Follow the on-screen instructions. Control audio from the navigation Displays the navigation and view camera display. -
Page 19: Navigation Setup
Basic Operations Navigation Setup Inserting the MAP SD Press the [MENU] button. Press the [G] button. h Popup menu appears. Touch [SETUP]. h SETUP Menu screen appears. Touch [OPEN] to the panel fully opens. Touch [Navigation]. Insert the SD card into the slot until it clicks. -
Page 20: Widget
Widget Widget Widget Photo Frame Widget You can display a slideshow of the image Press the [HOME] button. files stored in the USB memory on the Home screen. You can change the widget by flicking left or right on the widget area. Ñ... -
Page 21: Widget Setup
Widget Widget Setup To Photo Frame Setup Make settings related to display of the photo frame widget. Set up the widgets on the Home screen. Touch [Photo Frame SETUP] on the Press the [MENU] button. Widget SETUP screen. h Popup menu appears. Set each item as follows. -
Page 22: Disc
Disc Disc Playing a disc DVD/ VCD Basic Operation Ñ Most functions can be controlled from the Insert a disc source control screen and playback screen. Press the [G] button. NOTE • Set the remote control mode switch to DVD mode before starting operation for DVD and VCD, see Switch the operation mode (P.76). - Page 23 Disc • Linear PCM, etc.: Audio format Indicator Items • OFF/Zoom2 – 4 (DVD)/ Zoom2 (VCD): • [IN]: Disc insertion status. Displays the zoom ratio. White: A Disc is inside the unit. • [Hide]: Hides the control screen. Orange: Disc player failure. •...
-
Page 24: Music Cd/ Disc Media Basic Operation
Disc Music CD/ Disc media Basic Track/ File repeat ( ), Folder repeat ( (Disc media only), Repeat all ( Operation • [ ] : Randomly plays all tracks in current folder/disc. Each time you touch the key, Most functions can be controlled from the random mode switches in the following source control screen and playback screen. -
Page 25: File Search Operation
Disc File search Operation Function panel (Disc media only) (Disc media only) Touch the left side of the screen to display the function panel. Touch again to close the panel. You can search for a file according to hierarchy. • [ ] : Searches for the previous/next folder. -
Page 26: Dvd Disc Menu Operation
Disc DVD Disc Menu Operation To switch among picture angles ■ Touch [Angle]. Each time you touch this key, picture angles are switched. You can set up some functions using the DVD- VIDEO disc menu. * These keys may not function depending on Touch the framed area during playback. -
Page 27: Dvd Setup
Disc DVD Setup [Screen Ratio] ■ Sets the screen display mode. [16:9 ](Default): Displays wide pictures. You can set up the DVD playback functions. [4:3 LB]: Displays wide pictures in the Letter Touch the framed area during playback. Box format (having black stripes at the top and bottom of screen). -
Page 28: Apps-Android Auto™/Apple Carplay
APPS—Android Auto™/Apple CarPlay APPS—Android Auto™/Apple CarPlay Ñ Change the device name Air Mirroring Operation Press the [MENU] button. You can display the same screen of the h Popup menu appears. Android device on the monitor of the unit using the Miracast function of the Android Touch [SETUP]. -
Page 29: Apple Carplay Operation
APPS—Android Auto™/Apple CarPlay Apple CarPlay Operation CarPlay is a smarter, safer way to use your The connection message is displayed for iPhone in the car. CarPlay takes the things about 5 seconds. you want to do with iPhone while driving and NOTE displays them on the screen of the product. -
Page 30: Android Auto™ Operation
APPS—Android Auto™/Apple CarPlay Ñ Use Siri Android Auto™ Operation You can activate Siri. Android Auto enables you to use the functions Press the [ ] button for 1 second. of your Android device convenient for driving. You can easily access route guidance, make calls, listen to music, and access convenient Press for 1 second functions on the Android device while driving. -
Page 31: Spotify Operation
APPS—Android Auto™/Apple CarPlay Spotify Operation You can listen to Spotify on this unit by controlling the application installed in the iPhone or Android. To select the Spotify source, touch [Spotify] icon on the source selection screen. (P.13) Preparation Application/information buttons •... -
Page 32: Selecting A Track
APPS—Android Auto™/Apple CarPlay About Spotify® Operation keys Note • [ ] : Displays the Menu screen • Ensure you are logged in to your smartphone • [ ] : New radio station that relates to the application. If you do not have an Spotify account, artist of the currently being played song is you can create one for free from your smartphone selected and playback starts. -
Page 33: Usb
Connecting a USB device USB Basic Operation Most functions can be controlled from the Connect the USB device with the USB source control screen and playback screen. cable. (P.87) NOTE • Set the remote controller mode switch to AUD mode before starting operation, see Switch the operation mode (P.76). - Page 34 Video screen Track information Displays the information on the current file. Only a file name and a folder name are displayed if there is no tag information. Play mode indicator/ Playing time • D, B, etc.: Current play mode indicator Meanings of individual icons are as follows: D (play), B (fast forward), A (fast backward), H (pause).
-
Page 35: Search Operation
Ñ Search Operation Link search You can search for a file of the same artist/ You can search music or video files by the album/genre as that in the current track. following operations. Touch [Link Search]. Touch [1]. Touch the desired tag type. You can select Touch [S]. -
Page 36: Ipod/Iphone
NOTE and an iPod/iPhone are not connected via USB. • Latest compatible list of iPod/iPhone. For details, see www.kenwood.com/cs/ce/ipod/. ● Select the method of making connections • By connecting your iPod/iPhone to this unit with for outputting sound from the iPod the iPod connection cable KCA-iP103 (optional source. -
Page 37: Ipod/Iphone Basic Operation
iPod/iPhone iPod/iPhone Basic Operation Operation keys • 1] : Searches for a track/file. For details on search operation, see Search Operation NOTE (P.38). • Set the remote controller mode switch to AUD • E] [F] : Searches for the previous/next mode before starting operation, see Switch the operation mode (P.76). -
Page 38: Search Operation
iPod/iPhone Ñ Search Operation Link search You can search for a file of the same artist/ You can search music files by the following album/genre/composer as that in the current operations. track. Touch [1]. Touch [Link Search]. Touch [S]. Touch the desired tag type. You can select from artists, albums, genres and composers. -
Page 39: Radio
Radio Radio Radio Basic Operation Operation keys • [E] [F] : Tunes in a station. The method of Most functions can be controlled from the frequency switching can be changed (see 2 source control screen. in table). To enter Radio source, touch [Radio] icon in •... -
Page 40: Memory Operation
Radio Memory Operation Selecting Operation Ñ Ñ Auto memory Preset select You can store stations with good reception in You can list and select memorized station. memory automatically. Select a station from the list. Touch desired band key. Touch [AME]. Ñ... -
Page 41: Traffic Information
Radio Traffic Information (FM only) Tuner Setup You can listen and watch the traffic You can set tuner related parameters. information automatically when a traffic Touch [ bulletin starts. However, this feature requires a Radio Data System that includes the TI information. -
Page 42: Digital Radio
Digital Radio Digital Radio (DNX9180DABS) Digital Radio Basic Operation Content A: DLS, PTY Genre Content B: Song Title, Artist Name, Ensemble name Most functions can be controlled from the Content C: Now Playing, Next Program, Audio source control screen. Quality... -
Page 43: Storing Service In Preset Memory
Digital Radio Selecting Operation • When touched, switches the artwork to the analog meter. Ñ Function panel Search by program type Touch the left side of the screen to display the You can tune in the station broadcasting the function panel. Touch again to close the panel. specified type of program when listening to •... -
Page 44: Traffic Information
Digital Radio Select the desired content from the list. NOTE • It is necessary to turn on the Traffic Information function in order to allow the Traffic Information screen to appear automatically. • The volume setting made during reception of traffic information is automatically memorized. -
Page 45: Digital Radio Setup
Digital Radio To return to live [Antenna Power] ■ Sets power supply to the Digital Radio Touch [ ] on the left side of the screen. antenna. Set to “ON” when the Digital Radio antenna in use is equipped with a booster. Touch [Live]. -
Page 46: Bluetooth Control
Bluetooth Control Bluetooth Control Ñ Using the Bluetooth function allows you to use About the cell-phone and various functions such as listening to the audio Bluetooth audio player file and making/receiving a call. This unit conforms to the following Bluetooth specifications: Information for using Bluetooth®... -
Page 47: Register The Bluetooth Device
Bluetooth Control Register the Bluetooth device HFP [Hands Free1]/ [Hands Free2]/ [No ■ Connection.] Select the hands-free number to connect. It is necessary to register the Bluetooth audio player or cell-phone in this unit before using A2DP/SPP [Audio/App] ■ the Bluetooth function. Select if you want to use the audio player You can register up to 10 Bluetooth devices. - Page 48 Bluetooth Control Ñ Connect the Bluetooth device To delete the registered Bluetooth device Touch [Select Device] on the Bluetooth Touch [Delete]. SETUP screen. Touch the device name to check. Touch the name of the device you want to connect. [þ All] ■...
-
Page 49: Playing The Bluetooth Audio Device
Bluetooth Control Ñ Change the PIN Code Playing the Bluetooth Audio Device Touch [PIN Code] on the Bluetooth SETUP screen. Most function can be controlled from the h Change PIN Code screen appears. source control screen. To select Bluetooth source, touch [Bluetooth] Touch and hold [ icon on the source selection screen. - Page 50 ] on the left of the Bluetooth audio devices can be switched easily connected device ( ) disconnects to play music. See KENWOOD Music Mix this device. (P.50). * These items appear only when the audio player which supports AVRCP profile is connected.
-
Page 51: Using The Hands-Free Unit
Bluetooth Control Ñ File search Using the Hands-Free Unit Touch [1]. You can use the telephone function by connecting the Bluetooth telephone to this Touch the desired file or folder. unit. NOTE • If you use the hands-free function frequently, move the TEL short-cut button (icon) to the Home screen. - Page 52 Bluetooth Control Select a dialing method. Call using call records Touch [ Select the phone number from the list. • [ ]: Call using call records • [ ]: Call using the phonebook • [ ]: Call using the preset number •...
-
Page 53: Voice Recognition
Bluetooth Control Ñ Voice Recognition Call using the phonebook You can access the voice recognition function Touch [ of the cell-phone connected to this unit. You can search the cell-phone phonebook Touch [ by voice. (The functionality depends on the cell-phone.) Select the initial. -
Page 54: Receive A Call
Bluetooth Control Ñ Receive a call ● Adjust the receiver volume Press the [S] or [R] button. Touch [ ] to answer a phone call or ] to reject an incoming call. ● Mute your voice Touch [ ] to mute or not to mute your voice. ●... -
Page 55: Phone Number Preset
Bluetooth Control Ñ Phone number preset ■ [Delete] To delete a preset number, touch [Delete] You can register frequently used phone and then touch [OK] on the confirmation numbers in this unit. screen. Ñ Touch [ Phonebook transfer Touch [Edit]. You can transfer phonebook data from your Bluetooth smartphone using PBAP. -
Page 56: Hands-Free Setup
Bluetooth Control Hands-Free Setup [Auto Response]* ■ Set the automatic response time to pick-up an incoming call. You can make various settings for the Hands- [OFF ](Default): Turns off the Automatic Free function. response function. Press the [MENU] button. [1]/ [5]/ [10]/ [15]/ [20]/ [25]/ [30]: Sets the h Popup menu appears. -
Page 57: Other External Components
Other External Components Other External Components View Camera *1 When the front camera or dashboard camera, and rear camera are connected with this unit. *2 When CMOS-3xx series is connected with NOTE this unit. • To connect a camera, see P.86. Ñ... - Page 58 Other External Components To adjust the parking guidelines [Front Camera Settings *] ■ Adjusts the CMOS-3xx series with ID 2 ("Front NOTE Camera") set. For details, see the instruction manual of your camera. • Install the rear view camera in the appropriate position according to the instruction manual [Front Camera Interruption] * ■...
-
Page 59: Use Dashboard Camera
Other External Components Ñ Use Dashboard Camera Added function Display the map while playing the A Dashboard Camera, DRV-N520 (optional recorded file accessory), connected to this unit lets you play video-recorded data and so on. Play the recorded file. For details, see the instruction manual of See the instruction manual of the the Dashboard Camera DRV-N520 (optional Dashboard Camera. -
Page 60: External Audio/Video Players (Av-In)
Other External Components External audio/video players TV tuner (AV-IN) You can connect the TV tuner (commercially available) with this unit and watch TV. Connect an external component to the Preparation AV-IN input terminal. (P.86) • When you use TV control function, connect the Select [AV-IN] as the source. -
Page 61: Setup
Setup Setup Monitor Screen Setup System Setup You can adjust the image quality of video, Press the [MENU] button. menu screen, etc. h Popup menu appears. Press the [MENU] button. Touch [SETUP]. h Popup menu appears. Touch [Screen Adjustment]. h Screen Control screen appears. Adjust each setting as follows. -
Page 62: User Interface Setup
Setup User Interface Setup [Travel Prayer for Safe Drive] ■ (DNX9180SM) When this function is set, the prayer for You can setup user interface parameters. driving safety is displayed when the unit is Press the [MENU] button. turned on, then Quran is played. h Popup menu appears. -
Page 63: Special Setup
Setup Adjust the date, then adjust the time. Repeat steps 2 and 3 as necessary. Touch [Set]. Touch [Learning completed]. Ñ NOTE Learning function of steering • When changing the function already learned, remote press and hold the button you want to change in step 2 and then touch to select the changed This function is available only when your function from the function list. -
Page 64: Display Setup
Setup [NAV-SYNC]: Turns the dimmer function on ■ [Initialise] Touch [Initialise] and then touch [Yes] to set or off according to the Navigation Day/ all the settings to the initial default settings. Night display setting. • Audio SETUP Memory is not initialized. [OSD Clock] ■... - Page 65 Setup To register an original color To select wallpaper color You can register your original color. Touch [Wallpaper Colour] on the Background screen. Touch [User] on the Key Color screen. Select a wallpaper color. Touch [Adjust]. Use [−] and [+] to adjust each color value. The color you have selected at [Key Colour] is added on the image.
-
Page 66: Av Setup
Setup h The selected image is loaded and ■ [AV-OUT] the display returns to the Wallpaper You can select an AV source to be output Customize screen. from the AV OUTPUT port. OFF, AV-IN, DISC, USB, SD, or iPod NOTE •... -
Page 67: Controlling Audio
Controlling Audio Controlling Audio You can adjust various settings such as audio 3 way speaker system setup balance or subwoofer level. Select the appropriate crossover network Press the [MENU] button. mode according to the speaker system (2-way h Popup menu appears. speaker system or 3-way speaker system). -
Page 68: Speaker/ X'over Setup
Controlling Audio Speaker/ X’over setup [Tweeter] (Only for Front) ■ You can set up the tweeter when you are selecting front speakers. Press the [MENU] button. None, Small, Medium, Large h Popup menu appears. [X over] ■ Touch [Audio]. Display the speaker crossover setup screen. h Audio screen appears. - Page 69 Controlling Audio Set each parameter as follows. When Speaker network is set to 3 way: [FREQ] (High Pass) [HPF FREQ] ■ ■ High Pass Filter adjustment. High Pass Filter adjustment. (When Front or Rear is selected on the Speaker Select screen) [HPF FREQ], [LPF FREQ] (Band Pass) ■...
-
Page 70: Controlling General Audio
Controlling Audio Controlling General Audio Equalizer Control You can adjust equalizer by selecting the Press the [MENU] button. optimized setting for each category. h Popup menu appears. Press the [MENU] button. Touch [Audio]. h Popup menu appears. h Audio screen appears. Touch [Audio]. -
Page 71: Volume Offset
Controlling Audio Volume Offset [SW Level] ■ Adjust the subwoofer volume. This setting is not available when Subwoofer is set to Finely adjust the volume of the current source “None”. See Speaker/ X’over setup (P.68). to minimize the difference in volume between different sources. -
Page 72: Zone Control
Controlling Audio Zone Control NOTE • When the rear speaker sound is switched, the You can select different sources for front and audio source that is output at the AV OUTPUT rear positions in the vehicle. terminal is also switched to the same source. •... -
Page 73: Listening Position/ Dta
Controlling Audio Listening Position/ DTA ■ [Loudness] Set the amount of boost of low and high tones. Listening Position/DTA allows you to improve “OFF”, “Low”, “High” the sound field depending on the position of the seat you sit. [Drive Equalizer+] ■... - Page 74 Controlling Audio Ñ Position DTA control Front Focus You can fine-adjust your listening position. You can focus the imaginary sound image on the front of the selected seat. Touch [Adjust]. Touch [Front Focus] in the Position/DTA Touch [Delay]. screen. Touch [T] or [U] to adjust the delay time of Select a front focus position.
-
Page 75: Audio Setup Memory
Controlling Audio Ñ Front Focus fine adjustment Audio Setup memory Touch [Adjust]. Audio Control settings can be memorized. The memorized settings can be recalled at any Touch [Delay]. time. Set each parameter as follows. Press the [MENU] button. h Popup menu appears. Touch [Audio]. -
Page 76: Remote Control
Remote control Remote control This unit can be operated using the remote Functions of the Remote control. control Buttons # CAUTION Ñ Switch the operation mode • Put the remote control in a place where it will not move during braking or other operations. The functions operated from the remote A dangerous situation could result, if the control differ depending on the position of the... -
Page 77: Basic Operation
Remote control Ñ Basic Operation ■ Title number/Chapter number VCD 1.X and 2.X (PBC OFF) ■ Track number VCD 2.X (PBC ON) ■ Scene number/Track number Music CD ■ Track number Radio ■ Frequency value Enter the number of the content you want to play using the numeric keypad. - Page 78 Remote control Mode Function Name switch VOICE Displays the control screen of current source. (USB, iPod, DISC) Displays the DVD menu. Turns the playback control on or off while playing VCD. Speaks the voice guidance. VIEW AUD, DVD Switches the AV source to be output. Switches between 2D and 3D map displays.
-
Page 79: Connection/Installation
Connection/Installation Connection/Installation Before Installation ignition key. If you connect the ignition wire to a power source with a constant voltage supply, such as with battery wires, the battery may be Before installation of this unit, please note the drained. following precautions. •... -
Page 80: Installation Procedure
Ñ Supplied accessories for installation (Black 1 m) (Gray 1 m) (3 m) DNX9180DABS only Ñ Installation procedure 1) To prevent a short circuit, remove the key (M5 x 8 mm) from the ignition and disconnect the ¤ terminal of the battery. -
Page 81: Installing The Unit
Connection/Installation Installing the unit Ñ Japanese cars 5 or 6 Car Bracket NOTE • Depending on the type of car, reception of the GPS satellite signals might not be possible with 5 or 6 an inside installation. • Please install this GPS antenna in an area away NOTE from any antennas that are used with CB radios or •... -
Page 82: Installation Overview
The antenna should be installed on the 1) Detach accessory 7 to the unit. passenger side for safety. Ñ Installation the Digital Radio Antenna cable antenna (DNX9180DABS) (3.5 m) #CAUTION ● Determining the antenna installation location • This film antenna is exclusively for use inside the •... - Page 83 Connection/Installation #CAUTION ● Determining the antenna installation location When installing the antenna cable 1) Remove the front pillar cover of your car. inside a front pillar that contains an air Front pillar cover • The front pillar cover is secured with a special clip which may need to be replaced when the front pillar cover is removed.
- Page 84 Connection/Installation 5) Remove the second sheet (tag 2) on the film 7) Remove the film covering the earth sheet and antenna (accessory !) vertically. attach the earth sheet to the metal part of the vehicle. Provide sufficient space for the earth sheet so that it does not obstruct the interior parts (front pillar cover).
-
Page 85: Connecting Wires To Terminals
Connection/Installation Ñ Connecting wires to terminals Fuse (15A) Speaker impedance: 4-8 Ω White To front left speaker White/Black Gray To front right speaker Gray/Black Green To rear left speaker Green/Black Connect to the vehicle’s Accessory 1 parking brake detection switch harness. -
Page 86: External Components
HDMI connector avoid damaging the unit. Preout RCA Cable Accessory @: DAB antenna (Sold separately) (DNX9180DABS only) Power amplifier Speaker (optional accessory) AV Audio output (ø3.5 mini jack) Input FM/AM antenna input... - Page 87 Accessory 4: Bluetooth Microphone USB (Gray) terminal Accessory -: Steering remote harness Connect to vehicle’s steering remote harness. USB (Black) terminal Contact your KENWOOD dealer for details. Rear view camera input (Yellow) Front view camera/ Dashboard camera input (Yellow) Visual Output (Yellow) Ñ...
- Page 88 Connection/Installation Ñ Ñ Connecting an Android Connecting a Dashboard smartphone camera Front view camera/ Android smartphone Dashboard camera input (with Android Auto) DRV-N520 (Yellow) Micro USB to USB cable Accessory 3 (Gray) (1 m) Accessory 2 (Black) (1 m) USB (Gray) terminal USB (Black) terminal Dashboard camera interface Optional accessory...
-
Page 89: Troubleshooting
† Pull out the antenna all the way. † Eject the disc and try inserting it again. Contact the The antenna control wire is not connected. KENWOOD dealer if this indicator continues blinking † Connect the wire correctly. See Connecting the or the disc cannot be ejected. - Page 90 † Turn the power off and on again. If the “Error 07−67” message does not disappear, contact your nearest KENWOOD dealer. No Device (USB device) The USB device is selected as a source although no USB device is connected.
-
Page 91: Appendix
Appendix Appendix Playable Media and Files You can play various kinds of media and files on this unit. Ñ List of playable discs Disc types / Standard Support Remark DVD Video DVD Audio × DVD-VR × DVD-R* • MP3/ WMA/ AAC/ WAV/ FLAC/ Vorbis/ MPEG1/ MPEG2/ MPEG4/ H.264/ WMV/ MKV playback •... - Page 92 Appendix Ñ About files The following audio and video files are supported. ■ Playable Audio files Format Bit rate Sampling frequency Bit count AAC-LC (.m4a) MPEG2/4 AAC LC 8 – 320kbps, VBR 16 – 48 kHz 16 bit HE-AAC(V1,V2) MP3 (.mp3) MPEG 1/2 Audio Layer 3 8 –...
-
Page 93: Region Codes In The World
Appendix Region Codes in the World The DVD players are given a region code according to the country or area it is marketed, as shown in the following map. ■ DVD disc marks ■ Operation regulatory marks With this DVD, some functions of this unit such as the play function may be restricted depending on the location where the DVD is Indicates a region number. -
Page 94: Dvd Language Codes
Appendix DVD Language Codes Code Language Code Language Code Language Afar Interlingua Kirundi Abkhazian Interlingue Romanian Afrikaans Inupiak Russian Amharic Indonesian Kinyarwanda Arabic Icelandic Sanskrit Assamese Italian Sindhi Aymara Japanese Sangho Azerbaijani Javanese Serbo-Croatian Bashkir Georgian Singhalese Byelorussian Kazakh Slovak Bulgarian Greenlandic Slovenian... -
Page 95: Specifications
■ Wi-Fi section : 24/ 32 bit Audio Decoder IEEE Standard : Linear PCM/ Dolby Audio/ MP3/ WMA/ AAC/ WAV/ DNX9180DABS/ DNX9180S: 802.11 a/b/g/n FLAC/ Vorbis DNX9180SM : 802.11 b/g/n Video Decoder Frequency Range : MPEG1/ MPEG2/ MPEG4/ WMV/ H.264/ MKV DNX9180DABS/ DNX9180S : Dual Band ( 2.4GHz / 5GHz ) - Page 96 ■ AM tuner section Frequency Range (step) ■ HDMI section DNX9180S: 531 kHz – 1611 kHz (9 kHz) HDMI DNX9180DABS: 531 kHz – 1701 kHz (9 kHz) : Type-A DNX9180SM: 531 kHz – 1602 kHz (9 kHz) Input Resolution Usable Sensitivity •...
- Page 97 Appendix ■ DSP section ■ Navigation section Graphics equalizer Receiver Band: 13 Band : High-sensitivity GPS receiver Frequency (BAND1 – 13) Reception Frequency : 62.5/ 100/ 160/ 250/ 400/ 630/ 1k/ 1.6k/ 2.5k/ 4k/ : 1575.42 MHz (C/A code) 6.3k/ 10k/ 16k Hz Acquisition Times Gain Cold : 29 seconds (typ)
-
Page 98: About This Unit
• The Bluetooth® word mark and logos are registered trademarks owned by Bluetooth SIG, Inc. and any • This product includes "Ubiquitous QuickBoot use of such marks by JVC KENWOOD Corporation is TM" technology developed by Ubiquitous Corp. under license. Other trademarks and trade names are Ubiquitous QuickBoot TM is a trademark of those of their respective owners. - Page 99 Appendix • libFLAC DIRECT, INDIRECT, INCIDENTAL, SPECIAL, EXEMPLARY, Copyright (C) 2000-2009 Josh Coalson OR CONSEQUENTIAL DAMAGES (INCLUDING, BUT Copyright (C) 2011-2013 Xiph.Org Foundation NOT LIMITED TO, PROCUREMENT OF SUBSTITUTE Redistribution and use in source and binary forms, GOODS OR SERVICES; LOSS OF USE, DATA, OR with or without modification, are permitted provided PROFITS;...
- Page 100 Amsterdamseweg 37, 1422 AC UITHOORN, THE için uygulanabilir) NETHERLANDS English Hereby, JVC KENWOOD declares that the radio equipment DNX9180SM is in compliance with Directive 2014/53/EU. The full text of the EU declaration of conformity is available at the following internet address: Türkçe Burada, JVC KENWOOD DNX9180SM radyo ekipmanının 2014/53/AB...
Need help?
Do you have a question about the DNX9180DABS and is the answer not in the manual?
Questions and answers