Table of Contents
Advertisement
Quick Links
Download this manual
See also:
User Manual
Advertisement
Table of Contents

Related Manuals for DeDietrich AGC 25


Summary of Contents for DeDietrich AGC 25
- Page 1 Modulens Gas fired floor-standing condensing boiler AGC 10/15 AGC 15 AGC 25 AGC 35 Installation and Service Manual 300026081-001-B...
-
Page 2: Declaration Of Conformity
Declaration of conformity The device complies with the standard type described in the EG declaration of conformity. It was manufactured and commissioned in accordance with European directives. The original of the declaration of compliance is available from the manufacturer. -
Page 3: Table Of Contents
Contents Introduction ....................6 Symbols used ............6 1.1.1 Symbols used in the manual ........6 1.1.2 Symbols used on the equipment ......6 Abbreviations ............7 General ..............7 1.3.1 Manufacturer's liability ..........7 1.3.2 Installer's liability .............7 Homologations ............8 1.4.1 Certifications ............8 1.4.2 Gas categories ............8 1.4.3 Additional Directives ..........8 1.4.4... - Page 4 Contents 4.3.4 Main dimensions ...........21 Positioning the appliance ........25 4.4.1 Positioning the boiler on its own ......25 4.4.2 Fitting the boiler to a DHW tank ......27 4.4.3 Positioning the boiler to the left or right of a DHW tank ...............28 4.4.4 Reversing the opening direction of the control panel door ...............28...
- Page 5 5.1.4 Browsing in the menus ..........66 Check points before commissioning ....67 5.2.1 Preparing the boiler for commissioning ....67 5.2.2 Gas circuit .............67 5.2.3 Hydraulic circuit .............69 5.2.4 Electrical connections ...........69 Putting the appliance into operation ....69 Gas settings ............70 5.4.1 Adapting to another gas type ........70 5.4.2 Setting the air/gas ratio (Full load) ......71...
- Page 6 Contents 7.4.3 Checking the ionization current ......100 7.4.4 Checking the tightness of the flue gas evacuation and air inlet connections ..........100 7.4.5 Checking combustion ..........100 7.4.6 Checking and closing the automatic air vent ..101 7.4.7 Checking the safety valve ........101 7.4.8 Checking the siphon ..........101 7.4.9...
- Page 7 20/01/2012 - 300026081-001-B...
-
Page 8: Introduction
1. Introduction AGC 10/15 - AGC 15 - AGC 25 - AGC 35 Introduction Symbols used 1.1.1. Symbols used in the manual In these instructions, various danger levels are employed to draw the user's attention to particular information. In so doing, we wish to safeguard the user's safety, obviate hazards and guarantee correct operation of the appliance. -
Page 9: Abbreviations
AGC 10/15 - AGC 15 - AGC 25 - AGC 35 1. Introduction Abbreviations 4 3CE: Collective conduit for sealed boiler 4 DHW: Domestic hot water 4 Interscenario switch: Home automation switch that can be used to centralise and control several scenarios... -
Page 10: Homologations
1. Introduction AGC 10/15 - AGC 15 - AGC 25 - AGC 35 4 Carry out installation in compliance with the prevailing legislation and standards. 4 Perform the initial start up and carry out any checks necessary. 4 Explain the installation to the user. -
Page 11: Factory Test
AGC 10/15 - AGC 15 - AGC 25 - AGC 35 1. Introduction 1.4.4. Factory test Before leaving the factory, each boiler is set for optimum performance and tested to check the following items: 4 Electrical safety 4 Adjustment (CO... -
Page 12: Safety Instructions And Recommendations
2. Safety instructions and recommendations AGC 10/15 - AGC 15 - AGC 25 - AGC 35 Safety instructions and recommendations Safety instructions DANGER If you smell gas: Do not use a naked flame, do not smoke, do not operate electrical contacts or switches ( doorbell, light, motor, lift, etc..). - Page 13 AGC 10/15 - AGC 15 - AGC 25 - AGC 35 2. Safety instructions and recommendations Only remove the casing for maintenance and repair operations. Put the casing back in place after maintenance and repair operations. Instructions stickers The instructions and warnings affixed to the appliance must never be removed or covered and must remain legible during the entire lifespan of the appliance.
-
Page 14: Technical Description
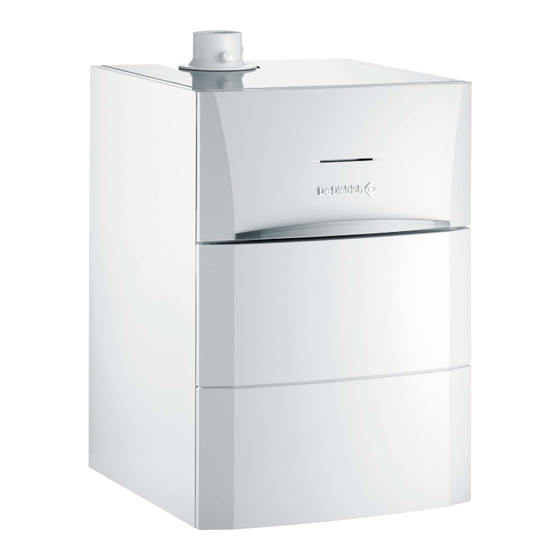
3. Technical description AGC 10/15 - AGC 15 - AGC 25 - AGC 35 Technical description General description Gas fired floor-standing condensing boiler 4 High efficiency heating. 4 Low pollutant emissions. 4 Top of the range electronic DIEMATIC iSystem control panel. -
Page 15: Operating Principle
AGC 10/15 - AGC 15 - AGC 25 - AGC 35 3. Technical description Automatic air vent Operating principle 3.3.1. Skeleton Diagrams n Boiler self-standing Heat exchanger Hydroblock Heating flow Primary DHW tank flow Primary DHW tank return Heating return... - Page 16 3. Technical description AGC 10/15 - AGC 15 - AGC 25 - AGC 35 n Boiler with HL type domestic hot water tank Heat exchanger Hydroblock Heating flow Plate exchanger inlet Plate exchanger outlet Heating return 3-way valve Shunt pump...
-
Page 17: Shunt Pump
AGC 10/15 - AGC 15 - AGC 25 - AGC 35 3. Technical description 3.3.2. Shunt pump AGC 10/15 - 15 - 25 Manometric height available for the heating circuit Water flow Useful output (T 20 K) 10 kW 15 kW... -
Page 18: Sensor Characteristics
3. Technical description AGC 10/15 - AGC 15 - AGC 25 - AGC 35 Boiler type AGC 10/15 AGC 15 AGC 25 AGC 35 Nominal output (Pn) minimum-maximum kW 3,4 - 16,0 3,4 - 16,0 5,6 - 25,9 7,0 - 36.4 Heating System (40/30 °C) - Page 19 AGC 10/15 - AGC 15 - AGC 25 - AGC 35 3. Technical description Outlet sensor circuit B+C Domestic hot water sensor System sensor Flow sensor - Return sensor NTC Temperature in °C 0 Resistance in Ω 32014 19691 12474 10000 8080 5372 3661 2535 1794 1290 941...
-
Page 20: Installation
4. Installation AGC 10/15 - AGC 15 - AGC 25 - AGC 35 Installation Regulations governing installation WARNING Installation of the appliance must be done by a qualified engineer in accordance with prevailing local and national regulations. Package list 4.2.1. -
Page 21: Choice Of The Location
AGC 10/15 - AGC 15 - AGC 25 - AGC 35 4. Installation Control system options Description package RX12 cable AD134 TELCOM 2 voice remote monitoring module AD152 Flow sensor AD199 DHW sensor AD212 Optional PCB for 3-way valve AD249... -
Page 22: Location Of The Appliance
4. Installation AGC 10/15 - AGC 15 - AGC 25 - AGC 35 4.3.2. Location of the appliance 4 Before mounting the boiler, decide on the ideal position for 1 1 0 mounting, bearing the Directives and the dimensions of the appliance in mind. -
Page 23: Ventilation
AGC 10/15 - AGC 15 - AGC 25 - AGC 35 4. Installation 4.3.3. Ventilation If the boiler is installed as B or C , respect the minimum dimensions given in the diagram opposite. Also allow openings to obviate the following hazards:... - Page 24 4. Installation AGC 10/15 - AGC 15 - AGC 25 - AGC 35 n Boiler only 128,5 C003076-C 105,5 121,5 n Boiler with 100HL type domestic hot water tank 1482 128,5 121,5 1408 105,5 M002517-B 20/01/2012 - 300026081-001-B...
- Page 25 AGC 10/15 - AGC 15 - AGC 25 - AGC 35 4. Installation n Boiler with 160SL type domestic hot water tank 1762 128,5 121,5 1688 105,5 1098 1096 70 40 M002518-B 917,5 128,5 105,5 121,5 M002519-D 20/01/2012 - 300026081-001-B...
- Page 26 4. Installation AGC 10/15 - AGC 15 - AGC 25 - AGC 35 n Boiler with 220SHL type domestic hot water tank 2042 128,5 121,5 1968 105,5 1378 1375 1274 1236 1160 1116 M002520-B 10 12 18,5 1160 1116 70 167...
-
Page 27: Positioning The Appliance
AGC 10/15 - AGC 15 - AGC 25 - AGC 35 4. Installation Positioning the appliance CAUTION Have 2 people on hand. Handle the appliance with gloves. 4.4.1. Positioning the boiler on its own 1. Remove the packaging from the boiler but leave the shipping pallet in place. - Page 28 4. Installation AGC 10/15 - AGC 15 - AGC 25 - AGC 35 6. Remove the retaining screws. C003111-C 7. Lift the boiler and position it on the ground C003217-B 20/01/2012 - 300026081-001-B...
-
Page 29: Fitting The Boiler To A Dhw Tank
AGC 10/15 - AGC 15 - AGC 25 - AGC 35 4. Installation 8. Level the appliance using the adjustable feet. (1) Adjustment range: 5.5 to 16 mm 9. Refit the front panel. C003078-B 4.4.2. Fitting the boiler to a DHW tank 1. -
Page 30: Positioning The Boiler To The Left Or Right Of A Dhw Tank
4. Installation AGC 10/15 - AGC 15 - AGC 25 - AGC 35 4. Put the 2 screws in place at the front to attach the boiler to the DHW tank. 4.4.3. Positioning the boiler to the left or right of a DHW tank 1. -
Page 31: Hydraulic Connections
AGC 10/15 - AGC 15 - AGC 25 - AGC 35 4. Installation 5. Unscrew the 4 lateral holding screws. 180° 6. Pivot the holder by 180°. 7. Screw the 4 lateral holding screws back in. 8. Follow in reverse order for re-assembly. -
Page 32: Hydraulic Connection Of The Heating Circuit
4.5.4. Connecting the expansion vessel AGC 15 and AGC 25 boilers are fitted as standard with a 18-litre expansion vessel. The AGC 35 is not fitted with an expansion vessel. Install the expansion vessel on the heating return pipe z. -
Page 33: Connecting The Condensate Discharge Pipe
AGC 10/15 - AGC 15 - AGC 25 - AGC 35 4. Installation On an installation in which the flow can be fully disconnected from the return (e.g. by using thermostatic valves), a bypass should be fitted or an expansion vessel placed on the heating flow pipe. -
Page 34: Filling The Siphon
4. Installation AGC 10/15 - AGC 15 - AGC 25 - AGC 35 4.5.6. Filling the siphon 1. Remove the siphon. 2. Fill the siphon with water. This must be filled up to the level markers. 3. Re-assemble the siphon. -
Page 35: Flue Gas System Connections
AGC 10/15 - AGC 15 - AGC 25 - AGC 35 4. Installation The diameters of the pipes must be defined in accordance with the standards in force in your country. 1. Connect the gas inlet pipe. 2. Fit a gas stop valve to this pipe in such a way that it is visible and easily accessible. -
Page 36: Classification
4. Installation AGC 10/15 - AGC 15 - AGC 25 - AGC 35 4.7.1. Classification Lmax Lmax = L Lmax C 43 C 33 Lmax Lmax Lmax Lmax C 43 C 13 C 33 Lmax Lmax = C 33 C 53... -
Page 37: Lengths Of The Air/Flue Gas Pipes
AGC 10/15 - AGC 15 - AGC 25 - AGC 35 4. Installation Configuration C Air and flue gas connection separated by means of a bi- flow adapter and single pipes (combustive air taken from outside) Configuration B Connection to a chimney using a connection kit... -
Page 38: Installing The Outside Sensor
4. Installation AGC 10/15 - AGC 15 - AGC 25 - AGC 35 Installing the outside sensor 4.8.1. Choice of the location It is important to select a place that allows the sensor to measure the outside conditions correctly and effectively. -
Page 39: Electrical Connections
AGC 10/15 - AGC 15 - AGC 25 - AGC 35 4. Installation Inserts Ø4 wood screw ¼ For the connection of the outside temperature sensor, refer to the chapter "Electrical Connections". 8800N003-C Electrical connections 4.9.1. Control unit The boiler is fully pre-wired. The electricity supply is made via connection cable to the mains (hard mounted). -
Page 40: Recommendations
4. Installation AGC 10/15 - AGC 15 - AGC 25 - AGC 35 4.9.2. Recommendations WARNING Only qualified professionnals may carry out electrical connections, always with the power off. The boiler is entirely pre-wired. Do not modify the connections inside the control panel. -
Page 41: Access To The Connection Terminal
AGC 10/15 - AGC 15 - AGC 25 - AGC 35 4. Installation 4.9.3. Access to the connection terminal 1. Open and remove the control panel door. C003099-D 2. Insert a screwdriver to unclip the springs at both ends. 3. Remove the front panel. -
Page 42: Position Of The Pcbs
4. Installation AGC 10/15 - AGC 15 - AGC 25 - AGC 35 5. Remove the 2 retaining screws. 6. Remove the top panel. C003103-B 7. Remove the 2 retaining screws. 8. Disassemble the protective cover from the flat bars. -
Page 43: Connecting A Direct Heating Circuit
AGC 10/15 - AGC 15 - AGC 25 - AGC 35 4. Installation 4.9.5. Connecting a direct heating circuit C003084-C Do not connect anything to the terminal block. Connect a safety thermostat if the heating circuit is for underfloor heating. -
Page 44: Connecting A Heating Circuit And A Domestic Hot Water Tank
4. Installation AGC 10/15 - AGC 15 - AGC 25 - AGC 35 4.9.6. Connecting a heating circuit and a domestic hot water tank n Connecting a direct heating circuit and a type HL or SHL DHW tank L000155-E Do not connect anything to the terminal block. - Page 45 AGC 10/15 - AGC 15 - AGC 25 - AGC 35 4. Installation Settings to be made for this type of installation Parameters Access Settings to be made See chapter ¼ "Displaying the Installer level INSTALLATION EXTENDED #SYSTEM menu parameters in extended mode", page 74 ¼...
- Page 46 4. Installation AGC 10/15 - AGC 15 - AGC 25 - AGC 35 Connect the DHW tank anode. CAUTION Do not connect anything to the Mr outlet on the terminal block. The reversal valve is connected to the PCU PCB in the boiler.
- Page 47 AGC 10/15 - AGC 15 - AGC 25 - AGC 35 4. Installation Connect the DHW sensor (Package AD212). Connect the outside temperature sensor. Connect the DHW tank anode. CAUTION If the tank is fitted with a Titan Active System® impressed current anode, connect the anode to the inlet (+ on the anode, - on the tank).
-
Page 48: Connecting Two Circuits And A Domestic Hot Water Tank
4. Installation AGC 10/15 - AGC 15 - AGC 25 - AGC 35 4.9.7. Connecting two circuits and a domestic hot water tank C003086-C Do not connect anything to the terminal block. Connect the domestic hot water looping pump to the MA outlet Connect the DHW sensor (Package AD212). -
Page 49: Hot Water Storage Tank Connection
AGC 10/15 - AGC 15 - AGC 25 - AGC 35 4. Installation Connect a safety thermostat if the heating circuit is for underfloor heating. Remove the bridge. Connect the wires from the safety thermostat to the connector. Connecting an additional C circuit to the AD249 option. - Page 50 4. Installation AGC 10/15 - AGC 15 - AGC 25 - AGC 35 Connect the solar station to the solar collectors. Solar sensor probe. Connect the heating pump (Circuit A). Outside sensor. Buffer tank. Connect the sensor from the storage tank (Package AD250).
- Page 51 AGC 10/15 - AGC 15 - AGC 25 - AGC 35 4. Installation C003089-D Do not connect anything to the terminal block. Connect a domestic hot water tank if the storage tank I is only used for heating. Connect the DHW sensor (Package AD212).
- Page 52 4. Installation AGC 10/15 - AGC 15 - AGC 25 - AGC 35 Settings to be made for this type of installation Parameters Access Settings to be made See chapter ¼ "Displaying the parameters in extended mode", page INSTALLATION Installer level...
- Page 53 AGC 10/15 - AGC 15 - AGC 25 - AGC 35 4. Installation Do not connect anything to the terminal block. Connect the heating pump (Circuit A). D.H.W. load pump Hot water storage tank sensor Buffer tank. outside temperature sensor Connect the DHW tank anode.
-
Page 54: Pool Connection
4. Installation AGC 10/15 - AGC 15 - AGC 25 - AGC 35 4.9.9. Pool connection C003091-D Do not connect anything to the terminal block. Connect the secondary swimming pool pump. Connect the swimming pool sensor. Plate heat exchanger. Connect the primary swimming pool pump. -
Page 55: Connecting A Mixed Tank
AGC 10/15 - AGC 15 - AGC 25 - AGC 35 4. Installation n Controlling the pool circuit The control system can be used to manage a swimming pool circuit in both cases: Case 1: The control system regulates the primary circuit (boiler/ exchanger) and the secondary circuit (exchanger/pool). - Page 56 4. Installation AGC 10/15 - AGC 15 - AGC 25 - AGC 35 C003092-C Power control relay to the electrical resistor Connect the outside temperature sensor Connect the DHW sensor (Package AD212). Connect the DHW tank anode. If the tank is not fitted with an impressed current...
-
Page 57: Connecting The Options
AGC 10/15 - AGC 15 - AGC 25 - AGC 35 4. Installation 4.9.11. Connecting the options For example: TELCOM remote vocal monitoring module, remote controls for circuits A and B, second DHW tank MODE TELCOM 2 MODE C003093-C Do not connect anything to the terminal block. -
Page 58: Connection In Cascade
4. Installation AGC 10/15 - AGC 15 - AGC 25 - AGC 35 4.9.12. Connection in cascade n DHW tank after the mixing tank C003094-A Master boiler Secondary boiler Secondary boiler D.H.W. load pump Connect the DHW sensor (Package AD212) - Page 59 AGC 10/15 - AGC 15 - AGC 25 - AGC 35 4. Installation Settings to be made for this type of installation: Follower boilers Parameters Access Settings to be made See chapter ¼ "Displaying the parameters in extended Installer level...
-
Page 60: 4.10 Electrical Diagram
4. Installation AGC 10/15 - AGC 15 - AGC 25 - AGC 35 Settings to be made for this type of installation: Master boiler Parameters Access Settings to be made See chapter ¼ "Displaying the parameters in extended Installer level... -
Page 61: 4.11 Filling The System
AGC 10/15 - AGC 15 - AGC 25 - AGC 35 4. Installation 4.11 Filling the system 4.11.1. Water treatment In most cases, the boiler and the central heating installation can be filled with normal tap water and no water treatment will be necessary. -
Page 62: Filling The System
4. Installation AGC 10/15 - AGC 15 - AGC 25 - AGC 35 4.11.2. Filling the system CAUTION Before filling, open the valves on every radiator in the installation. In order to be able to read off the water pressure from the boiler display, the boiler must be switched on. -
Page 63: Commissioning
AGC 10/15 - AGC 15 - AGC 25 - AGC 35 5. Commissioning Commissioning Control panel 5.1.1. Description of the keys AUTO Temperature setting key (heating, DHW, swimming pool) Operating mode selection key DHW override key Key to access the parameters reserved for the installer... -
Page 64: Description Of The Display
5. Commissioning AGC 10/15 - AGC 15 - AGC 25 - AGC 35 5.1.2. Description of the display n Key functions Access to the various menus > Used to scroll through the menus Used to scroll through the parameters The symbol is displayed when help is available Used to display the curve of the parameter selected <... -
Page 65: Operating Modes
AGC 10/15 - AGC 15 - AGC 25 - AGC 35 5. Commissioning n Solar (If connected) The solar load pump is running The top part of the tank is reheated to the tank set point The entire tank is reheated to the tank set point <... -
Page 66: System Pressure
5. Commissioning AGC 10/15 - AGC 15 - AGC 25 - AGC 35 n System pressure Pressure indicator: The symbol is displayed when a water pressure sensor is connected. Flashing symbol: The water pressure is insufficient. Steady symbol: The water pressure is sufficient. -
Page 67: Access To The Various Browsing Levels
AGC 10/15 - AGC 15 - AGC 25 - AGC 35 5. Commissioning 5.1.3. Access to the various browsing levels n User level The information and settings in the User level can be accessed by everyone. 1. Press the > key. -
Page 68: Browsing In The Menus
5. Commissioning AGC 10/15 - AGC 15 - AGC 25 - AGC 35 5.1.4. Browsing in the menus 1. To select the desired menu, turn the rotary button. 2. To access the menu, press the rotary button. #MEASURES To go back to the previous display, press the key j . -
Page 69: Check Points Before Commissioning
AGC 10/15 - AGC 15 - AGC 25 - AGC 35 5. Commissioning Check points before commissioning 5.2.1. Preparing the boiler for commissioning WARNING Do not put the boiler into operation if the supplied gas is not in accordance with the approved gas types. - Page 70 5. Commissioning AGC 10/15 - AGC 15 - AGC 25 - AGC 35 n Removing the cover from the sealed chamber WARNING Ensure that the boiler is switched off. 1. Open the 2 retaining clips located on the front. 2. Remove the cover from the sealed chamber.
-
Page 71: Hydraulic Circuit
AGC 10/15 - AGC 15 - AGC 25 - AGC 35 5. Commissioning 3. Open the main gas supply. 4. Check the gas supply pressure at the pressure outlet C on the gas valve unit. WARNING ¼ To ascertain the gas types permitted, see chapter: "Gas categories", page 8... -
Page 72: Gas Settings
5. Commissioning AGC 10/15 - AGC 15 - AGC 25 - AGC 35 3. The first time the boiler is powered up, the LANGUAGE menu is displayed. Select the desired language by turning the rotary button. LANGUE FRANCAIS Français - Deutsch - English - Italiano - Espanol - Nederlands 4. -
Page 73: Setting The Air/Gas Ratio (Full Load)
AGC 10/15 - AGC 15 - AGC 25 - AGC 35 5. Commissioning 5.4.2. Setting the air/gas ratio (Full load) 1. Unscrew the plug of the flue gas measurement point. 2. Connect the flue gas analyser. WARNING Ensure that the opening around the sensor is completely sealed when taking measurements. -
Page 74: Setting The Air/Gas Ratio (Part Load)
5. Commissioning AGC 10/15 - AGC 15 - AGC 25 - AGC 35 control and setting values for gas H (G20) at full load Boiler type Setting value Checking value AGC 10/15 5,2 ± 0,4 8,8 ± 0,2 5,2 ± 0,5 8,8 ±... - Page 75 AGC 10/15 - AGC 15 - AGC 25 - AGC 35 5. Commissioning 5. Turn the rotary button until PMIN is displayed. The part load is set. AUTO => PMIN If an automatic vent cycle is running, it is not possible to perform these operations.
-
Page 76: Basic Setting For The Gas/Air Ratio
5. Commissioning AGC 10/15 - AGC 15 - AGC 25 - AGC 35 5.4.4. Basic setting for the gas/air ratio If the gas/air ratio is out of adjustment, the gas valve unit has a basic setting. To do this, proceed as follows: 1. -
Page 77: Setting The Parameters Specific To The Installation
AGC 10/15 - AGC 15 - AGC 25 - AGC 35 5. Commissioning Regardless of what is done to the keys, the regulator switches back to CLASSIC mode after 30 minutes. 5.5.2. Setting the parameters specific to the installation 1. Access the installer level: Press key - for around 5 seconds. - Page 78 5. Commissioning AGC 10/15 - AGC 15 - AGC 25 - AGC 35 Installer level - #SYSTEM menu Parameter Adjustment range Description Factory setting Customer setting The boiler pump runs whenever a secondary circuit BOILER PUMP ALL CIRC. A: is required (A, B, C or DHW) The boiler pump only runs if circuit A is required CIRC.
-
Page 79: Naming The Circuits And Generators
AGC 10/15 - AGC 15 - AGC 25 - AGC 35 5. Commissioning Influence of the parameter setting CT.TEL on the I.TEL contact CT.TEL I.TEL: I.TEL: contact closed I.TEL: contact open The antifreeze mode is active on all boiler circuits. -
Page 80: Setting The Heating Curve
5. Commissioning AGC 10/15 - AGC 15 - AGC 25 - AGC 35 3. Select the circuit or generator you wish to rename. Installer level - Menu #NAMES OF THE CIRCUITS Parameter Description Name given by the customer Circuit A CIRC. - Page 81 AGC 10/15 - AGC 15 - AGC 25 - AGC 35 5. Commissioning 3. Select the parameter CIRC. CURVE ..BUILD.INERTIA CIRC.CURVE B CIRC.CURVE C SCREED DRYING < AUTO C002316-E-04 4. To modify the value directly, turn the rotary button.
-
Page 82: Finalizing Work
5. Commissioning AGC 10/15 - AGC 15 - AGC 25 - AGC 35 n Heating curve with BCT The BCT (Base heat Curve Temperature) allows a minimum operating temperature to be imposed on the heating circuit (this temperature may be constant if the circuit gradient is nil). -
Page 83: Reading Out Measured Values
AGC 10/15 - AGC 15 - AGC 25 - AGC 35 5. Commissioning Reading out measured values The various values measured by the appliance are displayed in the #MEASURES menu. 1. To access user level: Press the > key. 2. Select the menu #MEASURES. -
Page 84: Changing The Settings
5. Commissioning AGC 10/15 - AGC 15 - AGC 25 - AGC 35 User level - #MEASURES menu Parameter Description Unit Control system sequence SEQUENCE Software control number CTRL Present time HOURS Minutes MINUTE Day of the week Date DATE... -
Page 85: Calibrating The Sensors
AGC 10/15 - AGC 15 - AGC 25 - AGC 35 5. Commissioning 5.7.2. Calibrating the sensors 1. To access user level: Press the > key. 2. Select the menu #SETTING. SUNDAY 11:45 Turn the rotary button to scroll through the menus or modify a value. -
Page 86: Professional Settings
5. Commissioning AGC 10/15 - AGC 15 - AGC 25 - AGC 35 User level - Menu #SETTING Parameter Adjustment range Description Factory setting Customer setting Calibration of the room sensor on Room temperature CALIBR. ROOM C circuit C of circuit C... - Page 87 AGC 10/15 - AGC 15 - AGC 25 - AGC 35 5. Commissioning Type of gas used Parameter Unit AGC 10/15 AGC 15 AGC 25 AGC 35 Gas H (G20) rpm 1800 1800 1800 1700 MIN.VENT. rpm 3300 4500 5600 6200 MAX.VENT.BOIL...
- Page 88 5. Commissioning AGC 10/15 - AGC 15 - AGC 25 - AGC 35 Installer level - Menu #PRIMARY INSTAL.P Parameter Adjustment range Description Factory setting Customer setting BURN.MIN.RUN 0 to 180 seconds Setting the burner minimum operation time (In 30 seconds...
- Page 89 AGC 10/15 - AGC 15 - AGC 25 - AGC 35 5. Commissioning Installer level - Menu #SECONDARY INSTAL.P Parameter Adjustment range Description Factory Customer setting setting 0 to 99 NB DAYS DRYING The lower temperature is maintained DEC. DEC.
- Page 90 5. Commissioning AGC 10/15 - AGC 15 - AGC 25 - AGC 35 Installer level - Menu #SECONDARY INSTAL.P Parameter Adjustment range Description Factory Customer setting setting The anti legionella function acts to prevent LEG PROTEC the development of legionella in the dhw tank, these bacteria are responsible for legionellosis.
- Page 91 AGC 10/15 - AGC 15 - AGC 25 - AGC 35 5. Commissioning n CIRC. CURVE ... Heating curve circuit A, B or C Outside temperature (°C) Water flow temperature (°C) Maximum temperature of the circuit B - C M001678-B...
- Page 92 5. Commissioning AGC 10/15 - AGC 15 - AGC 25 - AGC 35 n ROOM S.INFL Used to adjust the influence of the room sensor on the water temperature for the circuit concerned. No influence (remote control fitted in a location with no influence)
-
Page 93: Configuring The Network
AGC 10/15 - AGC 15 - AGC 25 - AGC 35 5. Commissioning If the input voltage is less than VMIN/OFF 0-10V, the boiler is off. The boiler temperature setting corresponds strictly to the 0-10 V input. The secondary boiler circuits continue to operate but have no impact on the water temperature in the boiler. - Page 94 5. Commissioning AGC 10/15 - AGC 15 - AGC 25 - AGC 35 Installer level - Menu #NETWORK Parameter Adjustment range Description Factory setting Customer setting ON / NO ON: System in cascade CASCADE: Specific menu: Enlist VMs in cascade...
- Page 95 AGC 10/15 - AGC 15 - AGC 25 - AGC 35 5. Commissioning 2. Select SYSTEM NETWORK and press the rotary button to go to the specific menu. CASCADE MASTER CONTROLER SYSTEM NETWORK FUNCT TRADITIONAL INTER STAGE TIMER < AUTO C002409-C-04 3.
-
Page 96: Return To The Factory Settings
5. Commissioning AGC 10/15 - AGC 15 - AGC 25 - AGC 35 2. Select VM NETWORK and press the rotary button to go to the specific menu. 3. The screen displayed is used to select the numbers of the slave VMs to be added to the network. - Page 97 AGC 10/15 - AGC 15 - AGC 25 - AGC 35 5. Commissioning After reset (TOTAL RESET and RESET EXCEPT PROG.), the control system goes back to the display of the language choice after a few seconds. LANGUE FRANCAIS Français - Deutsch - English - Italiano - Espanol - Nederlands 1.
-
Page 98: Switching Off The Appliance
6. Switching off the appliance AGC 10/15 - AGC 15 - AGC 25 - AGC 35 Switching off the appliance Installation shutdown CAUTION Do not switch off the mains supply to the appliance. If the central heating system is not used for a long period, we recommend activating the HOLIDAYS mode (to ensure the anti-grip of the heating pump). -
Page 99: Checking And Maintenance
AGC 10/15 - AGC 15 - AGC 25 - AGC 35 7. Checking and maintenance Checking and maintenance General instructions WARNING Maintenance operations must be done by a qualified engineer. An annual inspection is compulsory. Only original spare parts must be used. -
Page 100: Customising Maintenance
7. Checking and maintenance AGC 10/15 - AGC 15 - AGC 25 - AGC 35 Menu #EMISSION MEASUREMENTS Generator Function available Description Values displayed Generator name AUTO normal operation °C BOILER TEMP. µA CURRENT WIND SPEED °C BACK TEMP Operating at minimum output °C... -
Page 101: Contact Details Of The Professional For After Sales Support
AGC 10/15 - AGC 15 - AGC 25 - AGC 35 7. Checking and maintenance After carrying out the maintenance operations, modify the date in the #REVISION menu to clear the message. In the event of maintenance before the maintenance message is... -
Page 102: Checking The Hydraulic Pressure
7. Checking and maintenance AGC 10/15 - AGC 15 - AGC 25 - AGC 35 7.4.1. Checking the hydraulic pressure The hydraulic pressure must reach a minimum of 0,8 bar. If the hydraulic pressure is lower than 0,8 bar, the symbol bar flashes. -
Page 103: Checking And Closing The Automatic Air Vent
AGC 10/15 - AGC 15 - AGC 25 - AGC 35 7. Checking and maintenance 7.4.6. Checking and closing the automatic air vent 1. Switch off the boiler electrical power supply. 2. Close the main gas inlet valve. 3. Remove the front panel. -
Page 104: Checking The Burner And Cleaning The Heat Exchanger
7. Checking and maintenance AGC 10/15 - AGC 15 - AGC 25 - AGC 35 7.4.9. Checking the burner and cleaning the heat exchanger CAUTION During inspection and maintenance operations, always replace all gaskets on the parts removed. 1. Remove the air inlet flue on the venturi. -
Page 105: Troubleshooting
AGC 10/15 - AGC 15 - AGC 25 - AGC 35 8. Troubleshooting Troubleshooting Anti-hunting When the boiler is in Anti-short-cycle operating mode, the symbol ? flashes. 1. Press the "?" key. The message Operation assured when the restart temperature will be reached is displayed. - Page 106 8. Troubleshooting AGC 10/15 - AGC 15 - AGC 25 - AGC 35 Code Messages Description Checking / solution Maximum difference The water flow in the installation is insufficient BL.DT OUTL RET. between the flow and return Check the circulation (direction, pump, valves)
- Page 107 AGC 10/15 - AGC 15 - AGC 25 - AGC 35 8. Troubleshooting Code Messages Description Checking / solution No flame during operation No ionization current BL.FLAME LOS Purge the gas supply to remove air Check that the gas valve is fully opened...
-
Page 108: Message History
8. Troubleshooting AGC 10/15 - AGC 15 - AGC 25 - AGC 35 Message history The menu (#MESSAGE HISTORIC) is used to consult the last 10 messages displayed by the control panel. 1. Access the "After Sales" level: Hold down the - key until #PARAMETERS is displayed. - Page 109 AGC 10/15 - AGC 15 - AGC 25 - AGC 35 8. Troubleshooting 3. Press the ? key. Follow the instructions displayed to solve the problem. 4. Consult the meaning of the codes in the table below: SUNDAY 11:45 TEMP. : 68°...
- Page 110 8. Troubleshooting AGC 10/15 - AGC 15 - AGC 25 - AGC 35 Code Faults Cause Description Checking / solution of the fault Boiler temp too low Bad connection DEF.OUTLET S. Check the wiring between the PCU PCB and the...
- Page 111 AGC 10/15 - AGC 15 - AGC 25 - AGC 35 8. Troubleshooting Code Faults Cause Description Checking / solution of the fault Return temperature too low Bad connection BACK S.FAILURE Check the wiring between the PCU PCB and the...
- Page 112 8. Troubleshooting AGC 10/15 - AGC 15 - AGC 25 - AGC 35 Code Faults Cause Description Checking / solution of the fault Difference between the flow Sensor fault DEP-RET>MAX and return temperatures too Check the Ohmic value of the sensor...
- Page 113 AGC 10/15 - AGC 15 - AGC 25 - AGC 35 8. Troubleshooting Code Faults Cause Description Checking / solution of the fault Detection of a parasite flame Ionization current present when there should not be a PARASIT FLAME flame...
- Page 114 8. Troubleshooting AGC 10/15 - AGC 15 - AGC 25 - AGC 35 Code Faults Cause Description Checking / solution of the fault The BL inlet opened for a short Bad connection BL OPEN FAIL time Check the wiring External cause...
- Page 115 AGC 10/15 - AGC 15 - AGC 25 - AGC 35 8. Troubleshooting Code Faults Cause Description Checking / solution of the fault Auxiliary sensor fault Bad connection AUX.SENS.FAIL. ¼ Check whether the sensor is connected: See chapter: "Deletion of sensors from the memory in the PCB", page 115...
- Page 116 8. Troubleshooting AGC 10/15 - AGC 15 - AGC 25 - AGC 35 Code Faults Cause Description Checking / solution of the fault Swimming pool sensor fault Bad connection SWIM.P.B. S.FAIL circuit B SWIM.P.C. S.FAIL ¼ Check whether the sensor is connected: Swimming pool sensor fault See chapter: "Deletion of sensors from the...
-
Page 117: Deletion Of Sensors From The Memory In The Pcb
AGC 10/15 - AGC 15 - AGC 25 - AGC 35 8. Troubleshooting Code Faults Cause Description Checking / solution of the fault The Titan Active System® is short-circuited TA-S SHORT-CIR Check that the connection cable between the SCU PCB and the anode is not short-... -
Page 118: Failure History
8. Troubleshooting AGC 10/15 - AGC 15 - AGC 25 - AGC 35 Failure history The menu #DEFAULT HISTORIC is used to consult the last 10 faults displayed by the control panel. 1. Access the "After Sales" level: Hold down the - key until #PARAMETERS is displayed. - Page 119 AGC 10/15 - AGC 15 - AGC 25 - AGC 35 8. Troubleshooting After Sales level - Menu #PARAMETERS Parameter Description Master boiler active PERMUT Number of boilers requesting heating STAGE Number of boilers recognised in the cascade NB.CASC.: Number of DIEMATIC VM control systems recognised in the cascade NB.
- Page 120 8. Troubleshooting AGC 10/15 - AGC 15 - AGC 25 - AGC 35 After Sales level - Menu #TEST OUTPUTS Parameter Adjustment range Description Stop/start pump circuit A P. CIRC. A ON / NO Stop/start pump circuit B ON / NO P.
-
Page 121: Control System Sequence
AGC 10/15 - AGC 15 - AGC 25 - AGC 35 8. Troubleshooting After Sales level - Menu INFORMATION Parameter Description Serial number of the SCU board S/N SCU Software version of the SCU board CTRL Serial number of the PCU board... - Page 122 8. Troubleshooting AGC 10/15 - AGC 15 - AGC 25 - AGC 35 Control system sequence Status Sub-status Operation Post-operation of the boiler pump Stop boiler pump Reversal valve closure Start anti short cycle Stand-by Anti-short cycle activated Blockage: The sub-status shows the error value...
-
Page 123: Spare Parts
AGC 10/15 - AGC 15 - AGC 25 - AGC 35 9. Spare parts Spare parts General When it is observed subsequent to inspection or maintenance work that a component in the appliance needs to be replaced, use only original spare parts or recommended spare parts and equipment. -
Page 124: Casing
9. Spare parts AGC 10/15 - AGC 15 - AGC 25 - AGC 35 9.2.1. Casing 1003 1005 1021 1007 1006 1019 1014 1023 1024 1011 1020 1018 1013 1015 1010 1012 1008 1004 1022 1017 1025 1016 1026 1009... -
Page 125: Water Unit
AGC 10/15 - AGC 15 - AGC 25 - AGC 35 9. Spare parts 9.2.2. Water unit 2029 2001 2004 2005 2008 2026 2030 2007 2010 2031 2032 2006 2028 2025 2024 2013 2014 2022 2034 2015 2003 2018 2027... -
Page 126: Control Panel
9. Spare parts AGC 10/15 - AGC 15 - AGC 25 - AGC 35 9.2.3. Control panel 3008 3020 3011 3021 3018 3016 3013 3010 3012 3037 3014 3009 3015 3007 3017 3001 3004 3022-37 3005 3003 3019 3002 L000207-B 3006 9.2.4. -
Page 127: Spare Parts List
AGC 10/15 - AGC 15 - AGC 25 - AGC 35 9. Spare parts 9.2.5. Spare parts list Markers Code no. Description Exchanger - Casing 1001 200018958 Complete base frame 1002 300024451 Adjustable foot M8-45 Casing 1003 200018959 Leak proof box 10/15 - 15 - 25 kW - Nozzle 60/100... - Page 128 9. Spare parts AGC 10/15 - AGC 15 - AGC 25 - AGC 35 Markers Code no. Description 2009 S59597 18x2.8 O-ring (10x) 2010 300024413 Gas inlet pipe G1/2" 2011 300024447 Pump bracket 2012 S59141 Screw M5x18 (15x) 2013 S100822...
- Page 129 AGC 10/15 - AGC 15 - AGC 25 - AGC 35 9. Spare parts Markers Code no. Description 3022 300009074 3-pin A.VS connector 3022 300009081 5-pin TS connector + Pump 3022 300009071 2-pin connector 0-10 V 3022 300009102 4-pin connector telephone relay...
- Page 130 9. Spare parts AGC 10/15 - AGC 15 - AGC 25 - AGC 35 20/01/2012 - 300026081-001-B...
- Page 132 Зубарев переулок, д. 15/1 Бизнес-центр «Чайка Плаза», офис 309 +7 (495) 221-31-51 DUEDI S.r.l. DE DIETRICH THERMIQUE Iberia S.L.U. www.duediclima.it www.dedietrich-calefaccion.es Distributore Ufficiale Esclusivo Av. Princep d’Astúries 43-45 De Dietrich-Thermique Italia 08012 BARCELONA Via Passatore, 12 - 12010 +34 932 920 520...
Need help?
Do you have a question about the AGC 25 and is the answer not in the manual?
Questions and answers