Table of Contents
Advertisement
Advertisement
Table of Contents

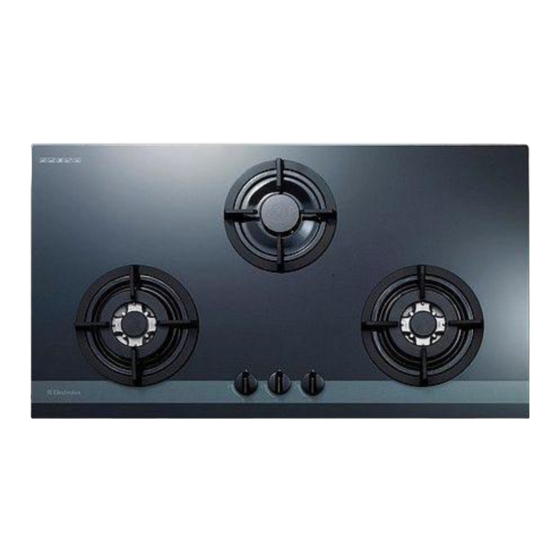
Summary of Contents for Electrolux EGT 9425K
- Page 1 SERVICE MANUAL...
-
Page 2: Table Of Contents
C O N T E N T S 1. GENERAL NOTES 2. HOW DOES GAS BURNER OPERATE 3. COMPONENTS SPECIFICATION 4. TOOLS 5. REPAIR PROCESS Remove the dirty oil from nozzle Remove the gas valve 6. WIRING DIAGRAM 7. CONVERSION DETAILS 8. -
Page 3: General Notes
1. GENERAL NOTES 2. WARNING: For models which connect to mains electrical power, before exposing any of the internal electrical wiring the appliance must be disconnected from electrical power by unplugging the service cord from the electrical outlet. For models which connect to battery power, before exposing any of the internal electrical wiring the appliance must be remove the battery also. -
Page 4: How Does Gas Burner Operate
HOW DOES GAS BURNER OPERATE 1. Gas tank 2. Low pressure regulator (Safety warning: Do not use high pressure regulator) 3. Flexible rubber hose or copper tube 4. Elbow coupling gas with fibre washer (Warning: Do not use regular rubber washer) 5. -
Page 5: Components Specification
safety valve (5) counter-clockwise simultaneously. This opens up the valve, letting the gas to the nozzle of the burner (6), and turns the ignition switch to on (7) at the same time. The electrical current is automatically supplied from the battery to spark plug generator (8), and then to the pin heads (9), causing the ignition (10). - Page 6 Citi Gas Accessories -Shutter Aeration (Semi Papid) (TH-0003/ZA) -Shutter Altration ( Triple Crown) (TH-0003/ZB) - Injector 2.1 (Semi Rapid) (TH-0003/CD) - Injector 4.0 (Triple Crown) (TH-0003/ZA) - Screw, M4x0.7x10 IP - Screw, M4x0.7x18 H - Screw, M3x12T + B stainless - Screw, #6/32 x 9 PPZF - Screw, #8 x ½...
-
Page 7: Tools
4. TOOLS - Nut spinner No. 7 - Philip / Flat screw driver - Spanner No. 15 - Nozzle cleaner - Gas leak detector 5. REPAIR PROCESS 5.1 Remove out the dirty oil from nozzle 1. Clean the head of nozzle with the cloth 2. - Page 8 6. The hob may now be lifted away from the appliance. By removing the hob the following parts are accessible for service or replacement. • Burner mounting cups. • Burner supply tubes. Note: When fitting the burner tubes to the valves and burner mounting cups the nuts should be fastened with a torque of 10-12Nm.
-
Page 9: Wiring Diagram
6. WIRING DIAGRAM... -
Page 10: Conversion Details
7. CONVERSION DETAILS The appliance is convertible between Natural Gas & LP. Procedure 1. Turn off gas supply to appliance. 2. Disconnect appliance from electrical power. 3. Remove the trivets and the burner caps & distributors. 4. Remove the existing injectors and replace with the injectors shown in the table below. 5. - Page 11 Take care of glass top Persistent stains may require vigorous rubbing with nylon scourer or creamed powers cleansers. Household enamel cleaners are available. Following the instruction in their use. Harsh abrasive cleaner ,powder cleaner steel wool or wax polishes should not be used. Advise end user do not use glass as per working top.
-
Page 12: Spare Parts
8. SPARE PARTS... - Page 13 MODEL - ELECTROLUX EGT 9425K LPG -ETU 90CM PARTS LIST UNIT CODE NO PART NAME (PCS) TH-0008/MD K/STAND- CAST IRON. (R)BH POWER TH-0008/MB K/STAND-CAST IRON (R)BL-POWER T/CROW TH-0009/DI ENAMEL TRAY T/CROW SAFETY - REFRESH TH-0011/AF SILICONE RUBBER TUBING-D:200MM TH-0005/CF THERMOCOUPLE (NICKY TRIPLE FLAME)
- Page 14 EPS FRONT / BACK , KATA & NICOLE TH-0027/FW PACKING STICKER-EGG9425K(LPG) TH-0027/GW RATING LABEL-EGG9425K(LPG) TH-0028/AA GAS TYPE LABEL(LPG) ZANUSSI/ RH-0019/CA MIRAMET SHEET 600 X 1000MM RH-0013/AA ELBOW (376003300) H2-0202/CD GUARANTEE CARD : ELECTROLUX CITY GAS ACCESSORIES TH-0003/CC INJECTOR 4.0 (TRIPLE CROWN) TH-0003/ZB SHUTTER AERATION (TRIPLE CROWN)
- Page 16 MODEL - ELECTROLUX EGT 9435K LPG -ETU 90CM PARTS LIST UNIT CODE NO PART NAME (PCS) TH-0008/MB K/STAND-CAST IRON (R)BL-POWER T/CROW TH-0008/MC K/STAND-CAST IRON (R)SL-SEMI RAPID TH-0008/MD K/STAND- CAST IRON. (R)BH POWER TH-0009/DI ENAMEL TRAY –T/C - SAFETY TH-0009/DK ENAMEL TRAY S/R – SAFETY POWER...
- Page 17 TH-0027/FY PACKING STICKER – EGT 9435K TH-0027/GY RATING LABEL – EGT 9435K TH-0028/AA GAS TYPE LABEL ( LPG) H2-0202/CD GUARANTEE CARD : ELECTROLUX RH-0019/CA MIRAMET SHEET 600 X 1000MM CITY GAS ACCESORRIES TH-0003/CC INJECTOR 4.0(TRIPLE CROWN) TH-0003/CD INJECTOR 2.1(SEMI RAPID)
-
Page 18: Trouble Shooting
9. TROUBLE SHOOTING Fault Possible cause Remedy Burner will not light even -Gas supply valve turned off -Turn on gas supply to appliance though the spark plug is -Control knob not on -Turn knob on working -Wrong knob turned -Ensure the knob you are turning correspond to the burner you want to light -Port blockage in ignition...


Need help?
Do you have a question about the EGT 9425K and is the answer not in the manual?
Questions and answers