Table of Contents
Advertisement
Available languages
Available languages
induction cooKtoP inStALLAtion inStRuctionS
United States
INSTALLATION AND SERVICE MUST BE PERFORMED BY A QUALIFIED INSTALLER.
IMPORTANT: SAVE FOR LOCAL ELECTRICAL INSPECTOR'S USE.
READ AND SAVE THESE INSTRUCTIONS FOR FUTURE REFERENCE.
flammable vapors and liquids in the vicinity of this or any other appliance.
iMPoRtAnt inStALLAtion inFoRMAtion
• All electric cooktops run off a single phase, three-wire or four-wire cable, 240/208 volt, 60 hertz, AC only
electrical supply with ground.
• Minimum distance between cooktop and overhead cabinetry is 30" (76.2 cm).
* 30" (76.2 cm) min. for
unprotected cabinet and
24" (61 cm) min. for
cabinet with protected
bottom surface.
** Do not obstruct these
areas.
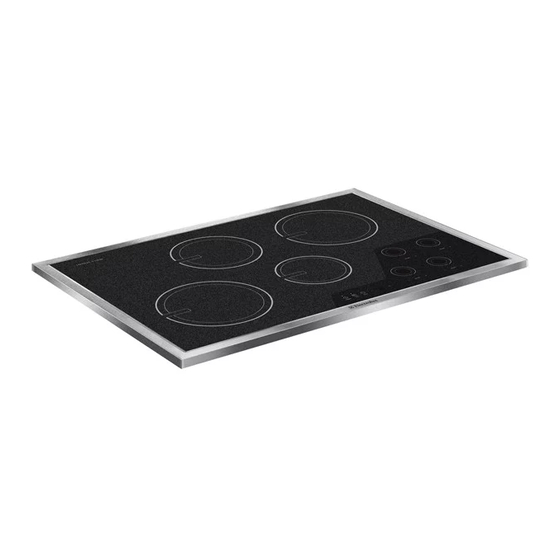
Cooktop Dimensions
Cooktop Cutout
Dimensions
COOKTOP DIMENSIONS
A. WIDTH
B. DEPTH
30¾ (78.1)
21½ (54.6)
36¾ (93.3)
21½ (54.6)
All dimensions are stated in inches and (cm).
Allow 2" (5 cm) space below the armored cable opening to clear the electric cable and
allow space for installation of the junction box on the wall at the back of the cooktop.
Printed in United States
FOR YOUR SAFETY: Do not store or use gasoline or other
30" Min. *
(76.2 cm)
A
D
F
G
H
HEIGHT
E. WIDTH
C
D
3 (7.6)
4
/
(11.1)
28
/
(73.3)
3
7
8
8
3 (7.6)
4
/
(11.1)
35¼ (89.5)
3
8
B
E
I
4" X 8" (10.2 cm x 20.3 cm)
opening to route armored cable
Figure 1
F. DEPTH
G. WIDTH
Min.
Max.
20 (50.8)
29
/
(75.2) 29¾ (75.6) 20
5
8
20 (50.8)
35
/
(91.1)
36 (91.4)
7
8
1
do not apply any sealant
along the perimeter. the
cooktop must breath freely.
C
if a panel is present
CUTOUT DIMENSIONS
H. DEPTH
Min.
Max.
/
(51.8) 20½ (52.1)
3
8
20
/
(51.8) 20½ (52.1)
3
8
P/n 318205412 (0907) Rev. A
English – pages 1-8
Español – paginas 9-16
Français – pages 17-24
Canada
I. HEIGHT
4½ (11.4)
4½ (11.4)
Advertisement
Table of Contents

Related Manuals for Electrolux EW30IC60I


Summary of Contents for Electrolux EW30IC60I
-
Page 1: Important Installation Information
induction cooKtoP inStALLAtion inStRuctionS United States INSTALLATION AND SERVICE MUST BE PERFORMED BY A QUALIFIED INSTALLER. IMPORTANT: SAVE FOR LOCAL ELECTRICAL INSPECTOR'S USE. READ AND SAVE THESE INSTRUCTIONS FOR FUTURE REFERENCE. FOR YOUR SAFETY: Do not store or use gasoline or other flammable vapors and liquids in the vicinity of this or any other appliance. -
Page 2: Model And Serial Number Location
If cabinet storage is provided, risk can be reduced by installing a range hood that projects horizontally a minimum of 5" (12.7 cm) beyond the bottom of the cabinets. Model and Serial number Location the serial plate is located under the cooktop. -
Page 3: Important Safety
induction cooKtoP inStALLAtion inStRuctionS important notes to the installer 1. Read all instructions contained in these installation instructions before installing the cooktop. 2. Remove all packing material before connecting the electrical supply to the cooktop. 3. observe all governing codes and ordinances. 4. - Page 4 induction cooKtoP inStALLAtion inStRuctionS if the cable from appliance is equipped with 3 wires: Where local codes permit connecting the appliance-grounding conductor to the neutral (white) wire (see figure 3): 1. Disconnect the power supply. 2. In the circuit breaker, fuse box or junction box, connect appliance and power supply cable wires as shown in figure 3.
- Page 5 induction cooKtoP inStALLAtion inStRuctionS if the cable from appliance is equipped with 4 wires: Where local codes permit connecting the appliance-grounding conductor (wire) to the neutral (white) wire (see figure 5): 1. Disconnect the power supply. 2. In the circuit breaker, fuse box or junction box, connect appliance and power supply cable wires as shown in figure 5.
-
Page 6: Cooktop Installation
induction cooKtoP inStALLAtion inStRuctionS cooktop installation 1. Visually inspect the cooktop for damage. Also make sure all cooktop screws are tight (see Figure 7). Screws Figure 7 2. Install the retainer brackets. See Figure 8. the retainer brackets MuSt be installed, to meet local codes or, in their absence, with the national Electrical code AnSi/nFPA no. - Page 7 induction cooKtoP inStALLAtion inStRuctionS For typical under counter installation of an electric built-in oven see Figure below. Only certain cooktop models may be installed over certain built-in electric oven models. Approved cooktops and built-in ovens are listed by the MFG ID number and product code (see the insert sheet included in the literature package and cooktop installation instructions for dimensions).
- Page 8 induction cooKtoP inStALLAtion inStRuctionS notES...
- Page 9 INSTRUCCIONES DE INSTALACIÓN PARA LA CUBIERTA DE INDUCCIÓN LA INSTALACIÓN Y EL SERVICIO DEBEN SER EFECTUADOS POR UN INSTALADOR CALIFICADO. Estados Unidos IMPORTANTE: GUARDE ESTAS INSTRUCCIONES PARA USO DEL INSPECTOR LOCAL DE ELECTRICIDAD. LEA Y GUARDE ESTAS INSTRUCCIONES PARA REFERENCIA FUTURA. PARA SU SEGURIDAD: No almanece ni utilice gasolina u otros vapores y líquidos inflamables en la proximidad de este o de cualquier otro artefacto.
- Page 10 INSTRUCCIONES DE INSTALACIÓN PARA LA CUBIERTA DE INDUCCIÓN El armario superior no debe sobrepasar una profundidad máxima de 13" (33 cm) 30" (76.2 cm) min. de espacio entre la parte superior de cubierta y la parte inferior de un armario de madera o metal sin protección.
-
Page 11: Instrucciones Importantes De Seguridad
INSTRUCCIONES DE INSTALACIÓN PARA LA CUBIERTA DE INDUCCIÓN Notas importantes para el instalador 1. Lea todas las instrucciones contenidas en este manual antes de instalar la estufa. 2. Retire todo el material usado en el empaque de la estufa antes de conectar el suministro eléctrico a la estufa. 3. - Page 12 INSTRUCCIONES DE INSTALACIÓN PARA LA CUBIERTA DE INDUCCIÓN Si el cable de la unidad es equipada con 3 alambres: Donde los códigos locales permitan conectar el conductor de puesta a tierra del eléctrodoméstico al neutral (blanco) (ver figura 3): Desconecte el suministro eléctrico. En el interruptor automático, caja de fusibles o caja de juntas: conectar el aparato y los cables residenciales como se muestra en la figura 3.
- Page 13 INSTRUCCIONES DE INSTALACIÓN PARA LA CUBIERTA DE INDUCCIÓN Si el cable de la unidad es equipada con 4 alambres: Donde los códigos locales permitan conectar el conductor de puesta a tierra del eléctrodoméstico al neutral (blanco) (ver figura 5): Desconecte el suministro eléctrico. En el interruptor automático, caja de fusibles o caja de juntas: conectar el aparato y los cables residen- ciales como se muestra en la figura 5.
-
Page 14: Instalación De La Estufa
INSTRUCCIONES DE INSTALACIÓN PARA LA CUBIERTA DE INDUCCIÓN Instalación de la estufa 1.Visualmente inspeccione la estufa para daños. Verifique además que todos los tornillos de la estufa estén bien ajustados (Figura 7). Tornillos Figura 7 2. Instale las ménsulas de sostén. Ver Figura 8. Las ménsulas de sostén TIENEN QUE instalarse, a satisfacción de los códigos locales o, en su ausencia, con el Código Eléctrico Nacional ANSI/... - Page 15 INSTRUCCIONES DE INSTALACIÓN PARA LA CUBIERTA DE INDUCCIÓN Instalación típica para una estufa eléctrica encima de un horno de pared instalado debajo del mostrador Sólo ciertos modelos de tapas de cocina se pueden instalar sobre ciertos modelos de hornos eléctricos em- potrados.
- Page 16 INSTRUCCIONES DE INSTALACIÓN PARA LA CUBIERTA DE INDUCCIÓN NOTAS...
- Page 17 INSTRUCTIONS D'INSTALLATION POUR TABLE DE CUISSON À INDUCTION UN INSTALLATEUR QUALIFIÉ DOIT EFFECTUER L’INSTALLATION ET LE SERVICE. États-Unis IMPORTANT: CONSERVEZ CES INSTRUCTIONS POUR LES INSPECTEURS LOCAUX. LISEZ CES INSTRUCTIONS ET CONSERVEZ‑LES POUR RÉFÉRENCES ULTÉRIEURES. d’essence ou d’autres produits inflammables à proximité de cet appareil ou de tout autre appareil.
-
Page 18: Emplacement Des Numéros De Modèle Et De Série
INSTRUCTIONS D'INSTALLATION POUR TABLE DE CUISSON À INDUCTION l’armoire supérieure ne doit pas excéder une profondeur maximale de 13" (33 cm). Dégagement minimal de 30" (76.2 cm) entre le haut de la surface de cuisson et la base de l’armoire en bois ou en métal non protégée. -
Page 19: Directives Importantes De Sécurité
INSTRUCTIONS D'INSTALLATION POUR TABLE DE CUISSON À INDUCTION Notes importantes pour l'installateur 1. lisez toutes ces instructions avant de procéder à l’installation de la table de cuisson. 2. Enlevez tout le matériel d’emballage avant de procéder au raccordement électrique. 3. Observez tous les codes et règlements applicables. 4. - Page 20 INSTRUCTIONS D'INSTALLATION POUR TABLE DE CUISSON À INDUCTION Si le câble de l'appareil est muni de 3 fils: Où les codes locaux permettent de brancher le conducteur de mise à la terre de l’appareil au fil neutre (blanc) (voir la figure 3): 1.
- Page 21 INSTRUCTIONS D'INSTALLATION POUR TABLE DE CUISSON À INDUCTION Si le câble de l'appareil est muni de 4 fils: Si les codes locaux permettent la connexion du fil de mise à la terre du châssis au neutre (blanc) (aux États- Unis seulement) (voir figure 5): Coupez l’alimentation à...
-
Page 22: Installation De La Table De Cuisson
INSTRUCTIONS D'INSTALLATION POUR TABLE DE CUISSON À INDUCTION Installation de la table de cuisson 1.Vérifiez si la table de cuisson est endommagée. Veillez également à ce que toutes les vis de la table de cuisson soient bien serrées (Figure 7). Figure 7 2.Installez les supports de fixation (voir figure 8) Les supports de fixation DOIVENT être installés... - Page 23 INSTRUCTIONS D'INSTALLATION POUR TABLE DE CUISSON À INDUCTION l'installation typique d'un four encastré électrique sous le comptoir est présentée à la figure. Seulement certains modèles de tables de cuisson peuvent être installés au-dessus de certains modèles de fours encastrés. les modèles approuvés pour être combinés sont identifiés à...
- Page 24 NOTES INSTRUCTIONS D'INSTALLATION POUR TABLE DE CUISSON À INDUCTION...
Need help?
Do you have a question about the EW30IC60I and is the answer not in the manual?
Questions and answers