Table of Contents
Advertisement
Distributed by:
Air-Met Scientific Pty Ltd
Air-Met Sales/Service
P: 1800 000 744
F: 1800 000 774
E: sales@airmet.com.au
Work with Confidence
USER MANUAL
P/N: 77036007-1
Revision: 6.2
Reference Firmware: 3.01 (wired rev. 3.2)
Reference Firmware: 3.09 (wireless rev. 1.3)
Reference Firmware: 3.09 (wireless rev. 2.4)
Air-Met Rental
P: 1300 137 067
E: hire@airmet.com.au
W: www.airmet.com.au
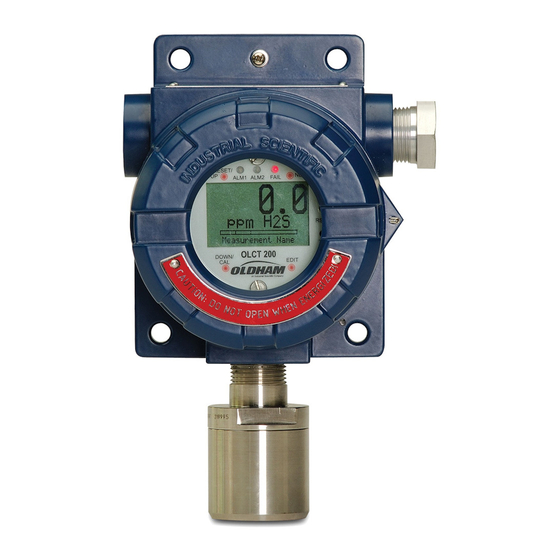
OLCT 200
Gas Detection
Transmitter
The Fixed Gas Detection Experts
Advertisement
Table of Contents

Related Manuals for Oldham OLCT 200

Summary of Contents for Oldham OLCT 200
- Page 1 P: 1800 000 744 P: 1300 137 067 F: 1800 000 774 E: hire@airmet.com.au E: sales@airmet.com.au W: www.airmet.com.au Work with Confidence OLCT 200 USER MANUAL Gas Detection Transmitter P/N: 77036007-1 Revision: 6.2 Reference Firmware: 3.01 (wired rev. 3.2) Reference Firmware: 3.09 (wireless rev. 1.3) Reference Firmware: 3.09 (wireless rev.
- Page 2 Copyright Feb-2015 by Oldham S.A.S. All rights reserved. No reproduction of all or part of this document, in any form, is permitted without the written consent of Oldham S.A.S. All of the information that is provided in this document is accurate to the best of our knowledge.
- Page 3 OLCT 200 unit, injuries, loss of time, financial, or material loss, or any direct or indirect consequence of loss occurring in the context of the use or impossibility of use of the product, even in the event that Oldham has been informed of such damage.
- Page 4 OLCT 200 User Manual | 4...
-
Page 5: Table Of Contents
Alarms / RS-485 Modbus 10-0234 Option Installation ........25 Isolated 4-20mA Output 10-0250 Option ............26 HART Communication 10-0351 Option ............27 2.10 Sensor Installation ................... 30 “Sensor Type” and OLCT 200 Signal Conditioning.......... 31 2.11 SECTION 3 - INITIAL START-UP ............... 33 “Transmitter Configuration” Menu ..............33 Initial Bridge Sensor Monitor Start-Up ............. - Page 6 OLCT 200 Radio Status (RS) Icons Zzz’s, ......55 RF Comm Cycle and Power Consumption ............56 #10-0299 OLCT 200 Battery I/O PCB with Power Switch ....... 57 WIRELESS COMMUNICATION SETUP ............57 SECTION 7 - TECHNICIANS ONLY MENUS ..........63 Introduction ......................
-
Page 7: Section 1 - Safety Information
Users should have a detailed understanding of OLCT 200 operating and maintenance instructions. Use the OLCT 200 only as specified in this manual or detection of gases and the resulting protection provided may be impaired. Read the following WARNINGS prior to use. - Page 8 Further, Oldham recommends prudent testing including calibration after a gas alarm. All calibration service to sensors should be recorded and accessible. CAUTION: FOR SAFETY REASONS THIS EQUIPMENT MUST BE OPERATED AND SERVICED BY QUALIFIED PERSONNEL ONLY. READ AND UNDERSTAND INSTRUCTION MANUAL COMPLETELY BEFORE OPERATING OR SERVICING.
-
Page 9: Section 2 - Installation Instructions
Important: This manual describes the 2-Wire 4-20mA , the 3-Wire 4-20mA and the wireless versions of the OLCT 200. 2-Wire versions are only possible if the 10-0232 Display PCB IS THE ONLY PCB IN THE ENCLOSURE. If the 10-0233 I/O Power Supply is installed it is a 3-Wire version. - Page 10 Modular design affords efficient installation and plug in sensors allow changing target gases after installation New smart sensors are recognized by the OLCT 200 and prompts users to either upload new configuration data or continue with data from the previous smart sensor. ...
-
Page 11: Ratings And Certifications
“line of sight” access to the controller’s base station antenna. If a good “line of sight” angle is not possible the OLCT 200 will usually still function properly at ranges up to 1500 feet but obstructions should be kept to a minimum. - Page 12 2 Places .25" Dia. 2 Places Universal Sensor Head Figure 2-2a: OLCT 200 Explosion-Proof Housing 0010-1200 “Y” Fitting not available on ATEX compliant model Figure 2-2b: OLCT 200 Explosion-Proof Housing with Dual Sensor Head Adaptor OLCT 200 User Manual | 12...
- Page 13 Do not aim the sensor pointing upward. Install the OLCT 200 to a wall or bracket using the predrilled mounting flanges with I.D. 0.25 on 5.5 inch centers (Figure 2-2). If conduit is rigid and able to support the weight of the OLCT 200, the mounting bolts may be omitted.
- Page 14 Figure 2-3a: Outline Drawing – OLCT 200 Wired Models OLCT 200 User Manual | 14...
- Page 15 Figure 2-3b: Outline Drawing – OLCT 200 Battery Powered Wireless Models Figure 2-3c: Outline Drawing – OLCT 200 10-3VDC Powered Wireless Models OLCT 200 User Manual | 15...
-
Page 16: System Design Specifications
Loop Resistance at nominal 24 VDC power: 2 Wire Model 3 Wire Model 10-30VDC Wireless Battery Powered Model Wireless Model 650 ohms 750 ohms Memory: Non-volatile E2 memory retains configuration values in the event of power outages. OLCT 200 User Manual | 16... -
Page 17: Field Wiring Installation
OLCT 200’s equipped with 10-0247 sensor heads are NRTL (Nationally Recognized Testing Lab) certified as suitable for both intrinsically safe and explosion proof installations. OLCT 200’s equipped with 10-0247IS sensor heads (XP flame arrestor is not installed to allow monitoring of highly reactive gases such as Hydrogen Chloride or Ammonia) are NRTL certified as suitable for intrinsically safe installations. - Page 18 2 position TB1 is located. Route the receiver wires through the conduit entry and connect to TB1. Steering diodes in the OLCT 200 2-wire 4-20mA output automatically correct for polarity so positive and negative are interchangeable.
- Page 19 2.6.2 Installation Drawing # 11-0100 OLCT 200 User Manual | 19...
- Page 20 24 VDC from its input terminal. When the OLCT 200 is equipped with the bottom 10-0233 I/O Power Supply board shown in Figure 2-5, the 2- wire 4-20mA output is disabled and one of the 10-0233’s 3-wire outputs must be used.
- Page 21 2.6.4.1 OLCT 200 RF Modules and Wiring The OLCT 200’s radio module mounts “piggy back” to the back of the Display assembly as shown in Figure 2-6. The module’s MMCX RF connector connects to the antenna fitting’s pigtail coax cable. OLCT 200 wireless 10-30VDC models have a ribbon cable connecting to the 10-0233 I/O PCB.
- Page 22 200 if polarity of the power supply is reversed but it will not operate. Reassemble the OLCT 200. Follow the procedures and recommendations in the receiver and power supply manuals to complete the installation. Be sure the OLCT 200 enclosure and conduit are properly grounded. Apply power and the OLCT 200 should function.
- Page 23 6 foot riser to increase the height of the antenna 6 feet above the OLCT 200. Extreme cases may require special order of directional antennas mounted in such a way to allow aiming towards the base station antenna. Minimize obstructions between the OLCT 200 and the base station antenna.
- Page 24 2.6.4.5 System Grounding Direct grounding of the OLCT 200 enclosure via a good electrical connection to a well- designed grounding system is essential. This will protect your system, reduce the damage that can occur during lightning strikes and reduce noise.
-
Page 25: Alarms / Rs-485 Modbus 10-0234 Option Installation
Figure 2-10: 10-0234 Alarm Relays / Modbus Option Instructions: Unscrew the cover on the OLCT 200 explosion-proof enclosure. Loosen the two thumbscrews holding the display assembly in place and remove it. A small ribbon cable is attached with sufficient length to access the back of the Display assembly where the Alarms/RS-485 Modbus board option is located. -
Page 26: Isolated 4-20Ma Output 10-0250 Option
RS-485 Modbus networks should be wired as shown in Figure 2-11. Each OLCT 200 connected represents an RTU and must have a unique RTU address. RTU addresses are assigned in the Modbus setup menu described in section 4.10. Cabling must be a “daisy chain”... -
Page 27: Hart Communication 10-0351 Option
The optional 10-0351 HART modem board, figure 2-13, supplies ability to access and alter process variables of the OLCT 200 using a HART handheld device. This board is stacked behind the 10-0232 Display Assembly. Addition of this option requires 3-wire mode 4-20mA operation and thereby requires the 10-0233 I/O Power Supply board. - Page 28 Typically the process variables are accessed either at the transmitter or at the controller. At the transmitter end of the 4-20 mA loop unscrew the cover on the OLCRT 200 explosion-proof enclosure. Find the two HART connection points located next to TB1 OLCT 200 User Manual | 28...
- Page 29 Connection Points for Connecting HART Handheld Figure 2-14: Top View of OLCT 200 showing HART connection terminals At the controller end, connect the HART handheld directly across the signal and common wires coming from the HART modem. In applications that utilize WX series controllers, the terminals are labeled HI and LO with HI being the signal and LO being common.
-
Page 30: Sensor Installation
The OLCT 200 Smart Sensor interface uses proven sensor technology but has taken this technology a step further. A tiny memory IC is incorporated into OLCT 200 factory supplied Smart sensors allowing them to contain the entire database of OLCT 200 parameters onboard the replaceable Smart Sensor assembly (Figure 2-16). -
Page 31: Sensor Type" And Olct 200 Signal Conditioning
The block / wiring diagram in Figure 2-18 illustrates how OLCT 200’s are able to accept many sensor types without the need of manual potentiometers or jumpers. Smart Sensors carry this setup information with each sensor. - Page 32 OLCT 200 User Manual | 32...
-
Page 33: Section 3 - Initial Start-Up
4.00mA. Next, enter the correct OUTPUT SPAN TRIM menu and use the UP/DOWN keys to trim the milliamp value to 20.00mA. Press the NEXT key to exit this menu. The OLCT 200 stores these new D2A values and uses them as the 0 & 100% of full-scale endpoints. -
Page 34: Initial Bridge Sensor Monitor Start-Up
3.1.3 Model Name When power is applied to the OLCT 200 it will briefly show a 10 digit ASCII model name or company name as it starts up. The name can be edited in the Transmitter Configuration menu by editing the Model field. -
Page 35: Initial Toxic / Oxygen Sensor Monitor Start-Up
3.3 Initial Toxic / Oxygen Sensor Monitor Start-Up OLCT 200 Toxic / Oxygen Monitors, factory equipped with Smart electrochemical sensors, rarely require adjustments (other than routine calibrations) to provide accurate readings. However, after installation the following checks should be performed to insure proper operation. - Page 36 OLCT 200 User Manual | 36...
-
Page 37: Operating Instructions
2/3 wire models transmit 4mA during the subsequent CAL PURGE delay to prevent external alarms during calibration. Wireless models transmit 200 counts (884 counts for oxygen) during CAL PURGE. Local OLCT 200 alarm relays (if equipped) are inhibited during CAL MODE. CAL MODE automatically exits if no keystrokes are detected after 5 minutes. - Page 38 Figure 4-1: Calibration Gas Input OLCT 200 User Manual | 38...
- Page 39 WARNING: The SPAN gas used must match the value specified since this is what the OLCT 200 will indicate after a successful SPAN calibration. The Cal Span Value may be edited if it becomes necessary to apply a different gas concentration (see Cal Span Value in section 5.3).
-
Page 40: Alarm Operation
Figure 4-2: Cal-Mode Flow Chart and Menus 4.2 ALARM OPERATION OLCT 200’s have front panel LED indicators for Alarm 1, Alarm 2 and Alarm 3. An optional 10-0234 Relay/Modbus board adds K1, K2 & K3 relays for these alarms. CAUTION: OLCT 200 Alarm LED indicators function even without the presence of the 10-0234 Relay option. -
Page 41: Section 5 - Setup Menu Configuration
Upon installation, many menu items will contain default values from the factory and require changes to better match a user’s particular application. OLCT 200 menus may be conFigured from the magnetic keypad in just a few minutes per transmitter. The OLCT 200’s configuration menus are shown in Figure 5-1. -
Page 42: Configuration Using The Magnetic Wand
NEXT to move the cursor, then press EDIT again to load the new item and remove the cursor. Press NEXT to reverse out of the sub-menu. To view SETUP PAGE 2, press the DOWN key with the pointer aimed at the bottom item on PAGE 1. OLCT 200 User Manual | 42... -
Page 43: System Configuration Menus
Figure 5-3: System Config. Menus Measurement Name may be edited to contain virtually any 16-character ASCII field. It is typically used to describe the monitored point by user tag # or other familiar terminology. OLCT 200 User Manual | 43... - Page 44 Linearization Data allows nonlinear signals to be linearized by entering the correct curve into the OLCT 200 (Figure 5-4). If Linearize is set for NO, the CURVE POINTS menu data is not used and no linearization is applied. When YES, the CURVE POINT entries are used and a straight-line approximation is calculated between each of the 9 entries.
- Page 45 4mA equal to 0% sensor life and 5mA equal to 100% sensor life (see Figure 5-5). The output then returns to 4mA for the remainder of the CAL PURGE delay. For example, if after a calibration sensor life is 75%, the OLCT 200 transmits 4.75mA during the 5- second interval.
-
Page 46: Alarm Settings
This is useful for continuing an alarm function, such as operation of an exhaust fan, for a period of time after the alarm condition clears. Low Trip set to YES causes the alarm to trip as the value falls below the set point. OLCT 200 User Manual | 46... -
Page 47: Sensor Information
K1 / K2 Failsafe set for YES means the relay de-energizes during alarm and energizes with no alarm. This is useful for also signaling alarm when OLCT 200 power is lost. K3 is a FAULT alarm and is always failsafe. -
Page 48: Clock/Delay Setup
There are five Input Type possibilities consisting of bridge, EC negative, EC positive, 4-20mA and Smart. Smart sensors upload sensor type and other data to the OLCT 200 and may be viewed on the SMART SENSOR information screen. -
Page 49: Lcd Contrast Adj
5.8 HELP Screen The HELP screen contains several pages of information describing how to operate the OLCT 200. This is the bottom menu on page 1 of the SETUP screen. 5.9 Diagnostics IMPORTANT: Gas monitoring and alarm processing are not performed while using the Diagnostics menus. -
Page 50: Rs-485 / Modbus Setup
5.10 RS-485 / MODBUS SETUP The RS-485 MODBUS SETUP menu allows setting the RTU address (if RS-485 equipped) for each OLCT 200 on the RS-485 network. Each OLCT 200 must have a different RTU address when communicating on the same 2-wire cable. Baud rate, Parity and Stop Bit are fixed at industry standard values of 9600, none ,1. - Page 51 Calibrated 10 bit value representing the D2A value of 0 to 1023 for -25 to 105 %FS (200=0% & 1000=100%). IMPORTANT: READ REGISTERS 31001 / 31002 TO CREATE READINGS THAT MATCH OLCT 200 DISPLAY VALUES! THESE SHOULD ALSO BE READ BY THE WX16 MODBUS MASTERS. A2D Raw Chan 1...
- Page 52 16 ASCII characters (2 per register) assigned to the unit identifier read as bytes. Chan 1 ASCII Reading 40417-40419 Chan 2 ASCII Reading 40420-40422 6 ASCII characters (2 per register) reflecting the display readout. VARIABLE ALIAS READ FUNCTION CODE WRITE FUNCTION CODE OLCT 200 User Manual | 52...
- Page 53 41025 Chan 2 Zero Devisor 41026 Chan 2 Span Real 41027 Chan 2 Span Devisor 41028 Chan 2 Fault Real 41029 Chan 2 Fault Devisor 41030 VARIABLE ALIAS READ FUNCTION CODE WRITE FUNCTION CODE OLCT 200 User Manual | 53...
-
Page 54: System Security
S e c u r e L e v e l L OW P a s s C o d e U n l o c k e d Figure 5-13: System Security Menu OLCT 200 User Manual | 54... -
Page 55: Section 6 - Wireless Communication
Server. OLCT 200’s are often powered by a battery so care is taken to reduce power consuming RF transmissions to a minimum. OLCT 200’s are never used for Server operation and are always Clients. -
Page 56: Rf Comm Cycle And Power Consumption
6 seconds and tries again, then waits 6 seconds and tries once more. If the third attempt fails the “Out of ” icon appears and OLCT 200 returns to its Comm cycle. Out of range will Range also be logged into the Event Log. -
Page 57: 10-0299 Olct 200 Battery I/O Pcb With Power Switch
IMPORTANT: Do not turn SW1 ON until the controller designated as Server is fully operational and ready to communicate to the OLCT 200. Battery life is reduced if the OLCT 200 is on for long periods while unable to communicate to the Server controller. - Page 58 Since ON creates an “acknowledge” hand shake returned from the receiver, only one receiver is allowed to avoid data collisions of the “acknowledge” signal. If an “acknowledge” is not received by the OLCT 200 it transmits repeatedly up to 16 times.
- Page 59 WX16 channel. The OLCT 200 counts value equals 75 counts, or -15.6%, during CAL MODE. Enabling the WX16’s “INPUT MARKER” menu as shown on the right menu in Figure 6-3 causes the WX16 to indicate IN CAL when the OLCT 200 has its CAL MODE activated.
- Page 60 OLCT 200 providing data to this WX4 channel. Voltage level of the 3.6 volt lithium battery in this OLCT 200 is also displayed on this screen. The most recent A/D Counts value is displayed at bottom of the screen.
- Page 61 Figure 6-5 OLCT 200 User Manual | 61...
- Page 62 OLCT 200 User Manual | 62...
-
Page 63: Section 7 - Technicians Only Menus
Restore is required later (see section 5.3). The TECHNICIAN ONLY menu group contains items that are factory configured depending upon the type sensor and input connected to the OLCT 200. They should not be tampered with after installation. If configured incorrectly, some items will prevent monitoring of target gases. -
Page 64: Set Balance / Set Sensor Voltage (Technicians Only!)
200 bridge sensors may be from 2 to 6 volts excitation voltage at the sensor. This means if the sensor is mounted a long distance away the voltage at the OLCT 200 may have to be higher to compensate for losses in field wiring. Be careful not to exceed correct sensor volts at the sensor’s A and R terminals. -
Page 65: Set Gain To Unity (Technicians Only!)
Figure 7-3: Set UNITY GAIN Menu 7.4 PreAmp Gain Adjust (Technicians only!) Depending upon Input Type, OLCT 200 inputs range from a few micro amps to hundreds of micro amps. PreAmp Gain Set is the adjustment that matches the input signal range to the OLCT 200 input signal conditioning circuits. -
Page 66: Zero Cal Value (Technicians Only!)
For example, for wired models, if instead of a standard 4-20mA input 8-18mA must be accepted by the OLCT 200. Set RAW MIN COUNTS to match the 8mA input counts value and RAW MAX COUNTS to match the 18mA input counts value. -
Page 67: Section 8 - Arctic Configurations
ARCTIC sensor temperature controllers have a unique address that is automatically detected by the OLCT 200. This activates the Sensor Temp menu on page 2 of the channel’s main menu as shown below in Figure 8-1. Selecting Sensor Temp and pressing EDIT opens a window displaying the sensor’s current temperature and the 1-... - Page 68 TXD LED (see Figure 2-1) to also illuminate when the Marker is detected. Important: Optional 10-0234 RS-485 modbus port will not function if “Marker TX LED” menu must = YES. OLCT 200 User Manual | 68...
-
Page 69: Section 9 - Sensors
1.0% Vol 0-100% Methane, LEL 1% LEL 50% LEL 10% LEL 20% LEL 0-100% Propane, LEL 1% LEL 25% LEL 10% LEL 20% LEL 0-100% Ethylene, LEL 1% LEL 50% LEL 10% LEL 20% LEL OLCT 200 User Manual | 69... - Page 70 10% from the orignial pressure. Do not expose the sensor to corrosive gases such as Hydrogen Sulphide. Do not allow condenseation to occur inside the sensor. OLCT 200 User Manual | 70...
- Page 71 Propane-IR sensor WILL respond to other combustible gases and is not Propane specific. Figure 9-2 Cross-sensitivity chart for OLCT 200 Propane IR Sensor. The output of the IR sensor can be disrupted by sudden changes in temperature. If there is an excessive change in the ambient temperature, gas sample temperature or flow rate, then the output signal will be monmentarily frozen.
-
Page 72: Photoionization Detection (Pid) Sensors
Compounds ! Caution ! Note on Silicones: PIDs are not permanently damaged by Silicones but they can potentially harm the windows of the lamps and reduce response to some gases. This can usually be OLCT 200 User Manual | 72... - Page 73 However, if you are measuring high VOC concentrations and particulates are present in high concentration then check calibration frequently and when the PID has lost sensitivity or error state shows, change the stack as explained below. OLCT 200 User Manual | 73...
- Page 74 Cleaning the Lamp Use of PID lamp cleaning P/N 78105025 1. Open the container of alumina polishing compound. 2. With a clean cotton bud, collect a small amount of the powder. OLCT 200 User Manual | 74...
- Page 75 3. Refit the sensor into the sensing equipment. 4. Re-calibrate the OLCT200 PID Replacement Parts 78105024 – Service Kit (Includes electrode stack, 10.6eV bulb, bulb spring, and extraction tool.) 78105025 – Cleaning Kit (Includes lamp cleaning kit and extraction tool.) OLCT 200 User Manual | 75...
-
Page 76: Electrochemical Sensors
25ppm 25ppm 50ppm Ammonia (NH3) 0-500ppm 1ppm 50ppm 25ppm 50ppm Nitrogen Dioxide (NO2) 0-30ppm 0.1ppm 5ppm 1.0ppm 2.0ppm Oxygen (O2) 0-30%vol 0.1% Vol 20.9% 19.5% 23.5% Sulfur Dioxide (SO2) 0-30ppm 0.1ppm 5ppm 2.0ppm 4.0ppm OLCT 200 User Manual | 76... -
Page 77: Spare Sensors
9.5 Spare Sensors OLCT 200 Replacement Sensors (without Arctic Heater) Part Number Description 78105008-10A 10 = LEL 0-100% (Catalytic Bead) (Methane Cal) 78105008-11A 11 = LEL 0-100% (Catalytic Bead) (Pentane Cal) 78105008-12A 12 = LEL 0-100% (Catalytic Bead) (Hydrogen Cal) - Page 78 OLCT 200 Replacement Sensors (with Arctic Heater) Part Number Description 78105007-20B 20 = Carbon Dioxide 0 - 5% Vol (IR) 78105007-21B 21 = Methane 0 -100% LEL (IR) 78105007-22B 22 = Propane 0 -100% LEL (IR) 78105007-26B 26 = Ethylene 0 -100% LEL (IR)
- Page 79 OLCT 200 User Manual | 79...
- Page 80 The Fixed Gas Detection Experts EUROPEAN PLANT AND OFFICES Z.I. Est – rue Orfila CS 20417 – 62027 Arras Cedex FRANCE Tél: +33 (0)3 21 60 80 80 – Fax: +33 (0)3 21 60 80 00 Website: http://www. .com oldhamgas AMERICAS ASIA PACIFIC EUROPE...
Need help?
Do you have a question about the OLCT 200 and is the answer not in the manual?
Questions and answers