Advertisement
Quick Links
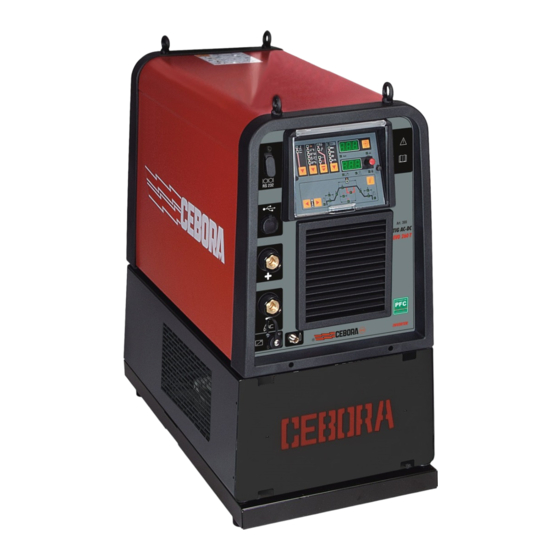
INSTRUCTION MANUAL FOR ARC WELDING MACHINE
IMPORTANT:
BEFORE STARTING THE EQUIPMENT,
READ THE CONTENTS OF THIS MANUAL, WHICH
MUST BE STORED IN A PLACE FAMILIAR TO ALL US-
ERS FOR THE ENTIRE OPERATIVE LIFE-SPAN OF THE
MACHINE.
THIS EQUIPMENT MUST BE USED SOLELY FOR WELD-
ING OPERATIONS.
1 SAFETY PRECAUTIONS
WELDING AND ARC CUTTING CAN BE HARM-
FUL TO YOURSELF AND OTHERS. The user
must therefore be educated against the hazards, sum-
marized below, deriving from welding operations. For
more detailed information, order the manual code
3.300.758
ELECTRIC AND MAGNETIC FIELDS - May be dangerous.
· Electric current following through any con-
ductor causes localized Electric and Mag-
netic Fields (EMF). Welding/cutting current
creates EMF fields around cables and pow-
er sources.
The magnetic fields created b high currents ma affect
the operation of pacemakers. Wearers of vital electronic
equipment (pacemakers) shall consult their physician be-
fore beginning any arc welding, cutting, gouging or spot
welding operations.
Exposure to EMF fields in welding/cutting ma have oth-
er health effects which are now not known.
· All operators should use the followingprocedures in or-
der to minimize exposure to EMF fields from the welding/
cutting circuit:
- Route the electrode and work cables together
- Secure them with tape when possible.
- Never coil the electrode/torch lead around your body.
- Do not place your body between the electrode/torch
lead and work cables. If the electrode/torch lead
cable is on your right side, the work cable should also
be on your right side.
- Connect the work cable to the workpiece as close as
possible to the area being welded/cut.
- Do not work next to welding/cutting power source.
EXPLOSIONS
· Do not weld in the vicinity of containers under
pressure, or in the presence of explosive dust,
gases or fumes. · All cylinders and pressure reg-
ulators used in welding operations should be handled
with care.
ELECTROMAGNETIC COMPATIBILITY.
This machine is manufactured in compliance with the in-
structions contained in the standard IEC 60974-10 (CL.
A), and must be used solely for professional purposes
in an industrial environment. There may be potential
difficulties in ensuring electromagnetic compatibilit in
non-industrial environments.
DISPOSAL OF ELECTRICAL AND ELECTRONIC
EQUIPMENT.
Do not dispose of electrical equipment togeth-
er with normal waste!In observance of European
Directive 2002/96/EC on Waste Electrical and Electron-
ic Equipment and its implementation in accordance with
national law, electrical equipment that has reached the
end of its life must be collected separately and returned
to an environmentally compatible recycling facility. As the
owner of the equipment, you should get information on
approved collection systems from our local representa-
tive. By applying this European Directive you will improve
the environment and human health!
IN CASE OF MALFUNCTIONS, REQUEST ASSISTANCE
FROM QUALIFIED PERSONNEL.
1.1 WARNING LABEL
The following numbered text corresponds to the label
numbered boxes.
B. Drive rolls can injure fingers.
C. Welding wire and drive parts are at welding voltage dur-
ing operation — keep hands and metal objects away.
1
Electric shock from welding electrode or wiring can kill.
1.1 Wear dry insulating gloves. Do not touch electrode
with bare hand. Do not wear wet or damaged gloves.
1.2 Protect yourself from electric shock by insulating
yourself from work and ground.
1.3 Disconnect input plug or power before working on
machine.
15
Advertisement

Related Manuals for Cebora EVO 260 T


Summary of Contents for Cebora EVO 260 T
- Page 1 INSTRUCTION MANUAL FOR ARC WELDING MACHINE IMPORTANT: BEFORE STARTING THE EQUIPMENT, DISPOSAL OF ELECTRICAL AND ELECTRONIC READ THE CONTENTS OF THIS MANUAL, WHICH EQUIPMENT. MUST BE STORED IN A PLACE FAMILIAR TO ALL US- Do not dispose of electrical equipment togeth- ERS FOR THE ENTIRE OPERATIVE LIFE-SPAN OF THE er with normal waste!In observance of European MACHINE.
-
Page 2: Description Of Protection Devices
Breathing welding fumes can be hazardous to your rent absorbed, considering the duty cycle. health. This value usually corresponds to the capacity 2.1 Keep your head out of fumes. of the fuse (delayed type) to be used as a pro- 2.2 Use forced ventilation or local exhaust to remove fumes. - Page 3 Fig. 1 Art. 369 Fig. 1 Art. 370...
-
Page 4: General Notes
Fig. 1 Art. 371 lent to the current I1max. absorbed by the machine. BD) Fitting (1/4 gas) Used to connect TIG welding torch gas hose . 3.1. GENERAL NOTES. BE) Main switch. BF) Tank cap. BG) Power cable Only skilled personnel should install the machine. All connections must be carried out according to regulations BH) Gas suppl fitting . - Page 5 3.3 CONTROL PANEL DESCRIPTION (Fig. 2). the arc lights and shuts off automatically after the pre-set spot welding time. In order to weld the following spot, it is T1 process key. necessary to release the torch trigger and press it again. With a long pressure of this key, LEDs L1 or L2 are Range from 0.1 to 30 s.
- Page 6 third current LED L31 where it stays for the time regulated changing the welding material or working position, moving and displayed by the LED L33. from horizontal to upright, etc.), press and immediately In this position the pedal control accessory ART. 193 can release the torch trigger, the current reaches the second be connected.
- Page 7 3. Additionally, with LED L17 (Hold) lit, it displays the last LED L14: Welding position. The abbreviations that appear on the display D1 welding voltage. 4. The numerical value of the magnitudes selected with meets ISO 6947 standards and correspond to the welding keys T7 or T8.
- Page 8 LEDS THAT MAY BE SELECTED ONLY IN TIG DC LED L26. (DIRECT CURRENT) OR TIG AC (ALTERNATING Adjusts percentage CURRENT) WELDING: ratio between the peak current time L28 and the LED L22 - Pre-gas time. frequency L27. Gas delivery time before Pre-set adjustment is 50 %.
- Page 9 13 = square - delta 23 = sine - delta 1. Better welding penetration 21 = sine - square 32 = delta - sine 2. Fewer deformations. 31 = delta - square. 3. Quicker creation of the weld pool. Default = square - sine (12). 4.
-
Page 10: Tig Welding
Connect the fitting of the torch gas hose to the BD 1. Fit a USB flash drive containing the file with extension “fwu” relating to the Cebora firmware of the welding machine connector and the gas hose coming from the machine to be updated into the BS connector. - Page 11 1. Select the TIG Process. to shape the tungsten electrode and wear protections for 2. Press at the same time keys T7 and T8 and hold both face, hands and body. down until the display D1 shows the abbreviation H2O. •...
-
Page 12: Remote Controls
2. Confirm s nerg b pressing ke T4 for more than 1.5 At this point it is possible: seconds. At this point all synergy functions are set and, • to overwrite present position: press key T5 till LED L18 if selected using the key T8, the display D2 shows the stops flashing. -
Page 13: Maintenance - Power Source
6 MAINTENANCE maintenance jobs must performed professional personnel according to the IEC 26-29 (IEC 60974-4) standard. 6.1 MAINTENANCE - POWER SOURCE In case of maintenance inside the appliance, make sure the switch BE is in “O” position and that the power supply cable is disconnected from the mains. - Page 14 QUESTA PARTE È DESTINATA ESCLUSIVAMENTE AL PERSONALE QUALIFICATO. THIS PART IS INTENDED SOLELY FOR QUALIFIED PERSONNEL. DIESER TEIL IST AUSSCHLIEßLICH FÜR DAS FACHPERSONAL BESTIMMT. CETTE PARTIE EST DESTINEE EXCLUSIVEMENT AU PERSONNEL QUALIFIE. ESTA PARTE ESTÁ DESTINADA EXCLUSIVAMENTE AL PERSONAL CUALIFICADO. ESTA PARTE È...
- Page 15 ART. 369...
- Page 16 ART. 370...
- Page 17 ART. 371...
- Page 18 CODIFICA COLORI WIRING DIAGRAM CODIFICA COLORI WIRING DIAGRAM CABLAGGIO ELETTRICO COLOUR CODE CABLAGGIO ELETTRICO COLOUR CODE NERO BLACK NROSA-NERO PINK-BLACK ROSSO GRIGIO-VIOLA GREY-PURPLE GRIGIO GREY BIANCO-VIOLA WHITE-PURPLE BIANCO WHITE BIANCO-NERO WHITE-BLACK VERDE GREEN GRIGIO-BLU GREY-BLUE VIOLA PURPLE BIANCO-ROSSO WHITE-RED GIALLO YELLOW GRIGIO-ROSSO GREY-RED...
- Page 19 ART. 369.00 - 369.55 POS DESCRIZIONE DESCRIPTION POS DESCRIZIONE DESCRIPTION LATERALE FISSO FIXED PANEL ISOLAMENTO INSULATION COPERCHIO COVER KIT I.G.B.T. I.G.B.T KIT PIANO INTERMEDIO INSIDE BAFFLE SUPPORTO CAVALLOTTI JUMPERS SUPPORT CIRCUITO DI MISURA MEASURE CIRCUIT CIRCUITO DRIVER DRIVER CIRCUIT AUTOTRASFORMATORE AUTOTRANSFORMER ISOLAMENTO INSULATION...
- Page 20 ART. 369.00 - 369.55...
- Page 21 ART. 369.00 - 369.55 POS DESCRIZIONE DESCRIPTION POS DESCRIZIONE DESCRIPTION CINGHIA BELT SUPPORTO BOMBOLA GAS CYLINDER SUPPORT APPOGGIO BOMBOLA GAS CYLINDER SUPPORT FONDO BOTTOM SUPPORTO CAVI CABLES SUPPORT ASSALE AXLE RUOTA FISSA FIXED WHEEL SUPPORTO ASSALE AXLE SUPPORT SUPPORTO RUOTE WHEELS SUPPORT TAPPO RUOTA PIROETTANTE...
- Page 22 ART. 370.00 - 370.55 POS DESCRIZIONE DESCRIPTION POS DESCRIZIONE DESCRIPTION CINGHIA BELT ATTACCO SUPP. BOMBOLA SUPPORT CONNECTOR APPOGGIO BOMBOLA GAS CYLINDER SUPPORT SUPPORTO BOMBOLA GAS CYLINDER SUPPORT SUPPORTO CAVI CABLES SUPPORT FONDO BOTTOM RUOTA FISSA FIXED WHEEL ASSALE AXLE TAPPO SUPPORTO ASSALE AXLE SUPPORT RUOTA PIROETTANTE...
- Page 23 ART. 370.00 - 370.55 POS DESCRIZIONE DESCRIPTION POS DESCRIZIONE DESCRIPTION LATERALE FISSO FIXED PANEL TAPPO COPERCHIO COVER PRESA GIFAS GIFAS SOCKET PIANO INTERMEDIO INSIDE BAFFLE PROTEZIONE PROTECTION CIRCUITO DI MISURA MEASURE CIRCUIT CAVALLOTTO JUMPER AUTOTRASFORMATORE AUTOTRANSFORMER GOLFARA EYEBOLTS CIRCUITO ALIMENTAZIONE SUPPLY CIRCUIT CIRCUITO SERIALE SERIAL CIRCUIT...
- Page 24 ART. 370.00 - 370.55 La richiesta di pezzi di ricambio deve indicare sempre: When ordering spare parts please always state the numero di articolo, matricola e data di acquisto della machine item and serial number and its purchase data, macchina, posizione e quantità del ricambio. the spare part position and the quantity.
- Page 25 ART. 371.00 - 371.55 POS DESCRIZIONE DESCRIPTION POS DESCRIZIONE DESCRIPTION LATERALE FISSO FIXED PANEL PRESA GIFAS GIFAS SOCKET COPERCHIO COVER TAPPO PIANO INTERMEDIO INSIDE BAFFLE RACCORDO FITTING CIRCUITO DI MISURA MEASURE CIRCUIT RACCORDO FITTING AUTOTRASFORMATORE AUTOTRANSFORMER CIRCUITO CONNETTORE CONNECTOR CIRCUIT CIRCUITO DI ALIMENTAZIONE SUPPLY CIRCUIT PANNELLO ANTERIORE...
- Page 26 ART. 371.00 - 371.55 La richiesta di pezzi di ricambio deve indicare sempre: When ordering spare parts please always state the numero di articolo, matricola e data di acquisto della machine item and serial number and its purchase data, macchina, posizione e quantità del ricambio. the spare part position and the quantity.
- Page 27 ART. 371.00 POS DESCRIZIONE DESCRIPTION POS DESCRIZIONE DESCRIPTION CINGHIA BELT ATTACCO SUPP. BOMBOLA SUPPORT CONNECTOR APPOGGIO BOMBOLA GAS CYLINDER SUPPORT SUPPORTO BOMBOLA GAS CYLINDER SUPPORT SUPPORTO CAVI CABLES SUPPORT FONDO BOTTOM RUOTA FISSA FIXED WHEEL ASSALE AXLE TAPPO SUPPORTO ASSALE AXLE SUPPORT RUOTA PIROETTANTE SWIVELING WHEEL...
- Page 28 ART. 371.55 POS DESCRIZIONE DESCRIPTION POS DESCRIZIONE DESCRIPTION CINGHIA BELT SUPPORTO BOMBOLA GAS CYLINDER SUPPORT APPOGGIO BOMBOLA GAS CYLINDER SUPPORT FONDO BOTTOM SUPPORTO CAVI CABLES SUPPORT ASSALE AXLE RUOTA FISSA FIXED WHEEL SUPPORTO ASSALE AXLE SUPPORT TAPPO SUPPORTO RUOTE WHEELS SUPPORT RUOTA PIROETTANTE SWIVELING WHEEL SUPPORTO GENERATORE...
- Page 29 CEBORA S.p.A - Via Andrea Costa, 24 - 40057 Cadriano di Granarolo - BOLOGNA - Italy Tel. +39.051.765.000 - Fax. +39.051.765.222 www.cebora.it - e-mail: cebora@cebora.it...
Need help?
Do you have a question about the EVO 260 T and is the answer not in the manual?
Questions and answers