Table of Contents
Advertisement
Advertisement
Table of Contents

Subscribe to Our Youtube Channel
Related Manuals for thomann STAIRVILLE B1R Beam


Summary of Contents for thomann STAIRVILLE B1R Beam
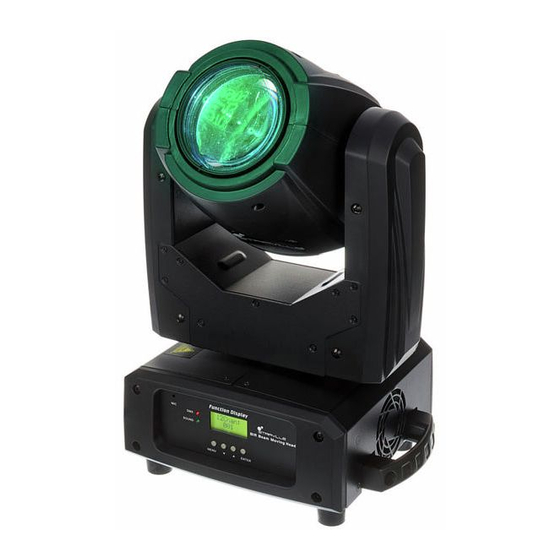
- Page 1 B1R Beam moving head user manual...
- Page 2 Musikhaus Thomann Thomann GmbH Hans-Thomann-Straße 1 96138 Burgebrach Germany Telephone: +49 (0) 9546 9223-0 E-mail: info@thomann.de Internet: www.thomann.de 10.10.2017, ID: 420576...
-
Page 3: Table Of Contents
Table of contents Table of contents General notes..........................4 1.1 Further information......................4 1.2 Notational conventions....................4 1.3 Symbols and signal words................... 5 Safety instructions......................... 6 Features............................9 Installation..........................10 Starting up..........................12 Connections and controls....................13 Operating..........................15 7.1 Starting the device....................... 15 7.2 Operating modes...................... -
Page 4: General Notes
Our products are subject to a process of continuous development. Thus, they are subject to change. 1.1 Further information On our website (www.thomann.de) you will find lots of further information and details on the following points: Download This manual is also available as PDF file for you to download. -
Page 5: Symbols And Signal Words
General notes 1.3 Symbols and signal words In this section you will find an overview of the meaning of symbols and signal words that are used in this manual. Signal word Meaning DANGER! This combination of symbol and signal word indicates an immediate dangerous situation that will result in death or serious injury if it is not avoided. -
Page 6: Safety Instructions
Safety instructions Safety instructions Intended use This device is intended to be used as moving-head spotlight. The device is designed for professional use and is not suitable for use in households. Use the device only as described in this user manual. Any other use or use under other operating conditions is considered to be improper and may result in personal injury or property damage. - Page 7 Safety instructions WARNING! Risk of epileptic shock Strobe lighting can trigger seizures in photosensitive epilepsy. Sensitive persons should avoid looking at strobe lights. WARNING! Risk of injury caused by falling objects Make sure that the installation complies with the standards and rules that apply in your country.
- Page 8 Safety instructions NOTICE! Operating conditions This device has been designed for indoor use only. To prevent damage, never expose the device to any liquid or moisture. Avoid direct sunlight, heavy dirt, and strong vibrations. The device must not be moved while it is in use. NOTICE! Power supply Before connecting the device, ensure that the input voltage (AC outlet)
-
Page 9: Features
Features Features The moving head is particularly suitable for professional lighting tasks, for example at events, on rock stages, in theatres and musicals or in night clubs. Special features of the device: Extremely sharp and narrow beam of light Beam angle: 3° Control via DMX (12 channels) and via buttons and display on the unit Operating modes: Stand-alone, sound-control, master / slave, DMX Rotation (pan): 540°... -
Page 10: Installation
Installation Installation Unpack and carefully check that there is no transportation damage before using the unit. Keep the equipment packaging. To fully protect the device against vibration, dust and moisture during transportation or storage use the original packaging or your own packaging material suitable for transport or storage, respectively. Lift the device only at the base. - Page 11 Installation NOTICE! Fire and overheating hazard The distance between the light source and flammable materials must be greater than 12 m. The distance to non-inflammable materials must be greater than 2 m. Always ensure sufficient ventilation. The ambient temperature must always be below 40 °C (104 °F). NOTICE! Possible damage caused by movements of the device Always ensure that enough space is free around the device for the...
-
Page 12: Starting Up
Starting up Starting up Create all connections while the device is off. Use the shortest possible high-quality cables for all connections. Take care when running the cables to prevent tripping hazards. Connections in DMX mode Connect the DMX input of the device to the DMX output of a DMX controller or another DMX device. -
Page 13: Connections And Controls
Connections and controls Connections and controls 1 Light aperture 2 Carrying handles. 3 Display [MIC] Built-in microphone for sound-control. [DMX] Indicator LED. This LED lights up on incoming signal. [SOUND] Indicator LED. This LED is lit when the sound-controlled operation is activated. [MENU] Activates the main menu and toggles between menu items. - Page 14 Connections and controls 5 [POWER IN] Lockable Power Twist input socket for power supply. [POWER OUT] Lockable Power Twist output socket to supply further devices. 6 [DMX IN] DMX input to control the device via DMX. [DMX OUT] DMX output for connecting additional DMX units in a DMX universe. moving head...
-
Page 15: Operating
Operating Operating 7.1 Starting the device CAUTION! Risk of injury due to movements of the device The head of the device can move quickly (pan, tilt) and can produce very bright light. This is also valid immediately after you turn on the device, when the device operates in automatic mode or under remote control and when you turn off a DMX controller that is connected to the device. -
Page 16: System Settings
Operating Operating mode SLAVE Press [MENU] to open the main menu. Use to select the menu item ‘Slave Mode’ and confirm with [ENTER]. to select one of the available options ‘Master’ (master operation), ‘Slave 1’ (normal slave function) or ‘Slave 2’ (slave function with its own show). Confirm with [ENTER] to save the settings. - Page 17 Operating Tilt inversion Press [MENU] to open the main menu. Use to select the menu item ‘Tilt Inverse’ and confirm with [ENTER]. to select one of the available options ‘Yes’ (reversed direction of rotation) or ‘No’ (normal direction of rotation). Confirm with [ENTER] to save the settings.
-
Page 18: Device Info, Reset
Operating 7.4 Device info, reset Operating hours device Press [MENU] to open the main menu. Use to select the menu item ‘Fixture Time’ and confirm with [ENTER]. The display now shows the number of operating hours of the device. Press [MENU] briefly to return to the main menu. Keep [MENU] pressed for one second to exit the main menu. -
Page 19: Default Settings
Operating 7.5 Default settings The basic settings of the device motors can be adjusted in this menu. To open the menu, firstly press and hold the [MENU] button for 3 seconds. Then keep the [ENTER] button pressed for 5 seconds. Then use to select the desired menu item. -
Page 20: Menu Overview
Operating 7.6 Menu overview Main menu Basic Settings menu 7.7 Functions in 12-channel DMX mode Channel Value Function 0…255 Rotation (pan) 0…255 Fine adjustment rotation (pan) moving head... - Page 21 Operating Channel Value Function 0…255 Inclination (tilt) 0…255 Fine adjustment inclination (tilt) 0…255 Rotation and inclination speed 0…255 Dimmer (0 … 100 %) Strobe effect 0…7 Stand-by 8…15 Open 16…131 Strobe effect, increasing speed 132…139 Open 140…181 Strobe effect, quickly close, slowly open 182…189 Open 190…231...
- Page 22 Operating Channel Value Function 190…193 Stop colour wheel 194…255 Colour wheel rotation, increasing speed Gobos 0…3 Open gobo 4…7 Gobo 1 8…11 Gobo 2 12…15 Gobo 3 16…19 Gobo 4 20…23 Gobo 5 24…27 Gobo 6 28…31 Gobo 7 32…35 Gobo 8 36…39 Gobo 9...
- Page 23 Operating Channel Value Function 116…119 Gobo 2 shake 120…123 Gobo 1 shake 124…127 Gobo open shake 128…189 Gobo wheel rotation, decreasing speed 190…193 Stop gobo wheel 194…255 Gobo wheel rotation, increasing speed Prism 0…7 Prism off 8…255 Prism on Prism rotation 0…127 Index 0 …...
-
Page 24: Maintenance
Maintenance Maintenance 8.1 Installing / replacing the illuminant DANGER! Electric shock caused by high voltages inside Within the device there are areas where high voltages may be present. Completely disconnect the device from the power supply before you open or remove covers. Mount all covers and attach them firmly before connecting the device again. - Page 25 Maintenance WARNING! Danger of burns and eye injuries caused by high light intensity The light source used in this device produces visible and invisible light beams of high intensity. Never look directly into the light source. Do not use the device when covers, shieldings, lenses or other optical components are missing or damaged.
- Page 26 Maintenance Requirements Make sure that the device is turned off, disconnected from the mains and completely cooled down. moving head...
- Page 27 Maintenance Procedure Remove one of the covers from the head of the unit. To do this, loosen the four cross-head screws using a suitable screwdriver. Then carefully remove the cover from the unit. Tilt the head to the opposite side. Loosen the four Phillips screws and remove this cover also.
- Page 28 Maintenance Align the head of the unit so that the metal brackets of the illuminant are aligned as shown in the figure. Carefully press down on the illuminant from above, so that the retainers slightly bend back. Tilt the illuminant slightly towards you to release it from the bracket.
- Page 29 Maintenance Fasten the small metal plate with the two screws on the back. Close the housing with the two covers and secure them with four cross-head screws each. B1R Beam...
-
Page 30: Technical Specifications
Technical specifications Technical specifications Number of DMX channels Illuminant Discharge lamp type Osram Sirius HRI 100 W Beam angle 3° Maximum rotation angle (pan) 540° Maximum inclination angle 220° (tilt) Dimmer 0 … 100 %, linear Shutter 0.5 … 9 Hz Operating supply voltage AC 100 –... -
Page 31: Plug And Connection Assignment
Plug and connection assignment Plug and connection assignment Introduction This chapter will help you select the right cables and plugs to connect your valuable equipment so that a perfect light experience is guaranteed. Please take our tips, because especially in ‘Sound & Light’ caution is indicated: Even if a plug fits into a socket, the result of an incorrect connection may be a destroyed DMX controller, a short circuit or ‘just’... -
Page 32: Troubleshooting
4. Check whether the DMX cables run near or par‐ allel to high-voltage cables that may cause damage or interference to a DMX interface circuit. If the procedures recommended above do not succeed, please contact our Service Center. You can find the contact information at www.thomann.de. moving head... -
Page 33: List Of Device Error Messages
Troubleshooting 11.1 List of device error messages Error messages Meaning ‘Lamp Startup Fail’ No illuminant inserted or wire Insert lamp of check for wire breakage. breakage. ‘Temperature Sense Error’ Temperature sensor defective. Check temperature sensor and replace if nec‐ essary. ‘Lamp Too Hot Power Off’... -
Page 34: Cleaning
Cleaning Cleaning Optical lenses Clean the optical lenses, that are accessible from the outside, regularly in order to optimize the light output. The frequency of cleaning depends on the operating envi‐ ronment: wet, smoky or particularly dirty surroundings can cause more accumulation of dirt on the optics of the device. -
Page 35: Protecting The Environment
Protecting the environment Protecting the environment Disposal of the packaging material For the packaging, environmentally friendly materials have been chosen that can be supplied to normal recycling. Ensure that plastic bags, packaging, etc. are properly disposed of. Do not just dispose of these materials with your normal household waste, but make sure that they are collected for recycling. - Page 36 Notes moving head...
- Page 37 Notes B1R Beam...
- Page 38 Notes moving head...
- Page 40 Musikhaus Thomann · Hans-Thomann-Straße 1 · 96138 Burgebrach · Germany · www.thomann.de...
Need help?
Do you have a question about the STAIRVILLE B1R Beam and is the answer not in the manual?
Questions and answers