Table of Contents
Advertisement
Quick Links
Advertisement
Table of Contents

Related Manuals for Abocom WR5201


Summary of Contents for Abocom WR5201
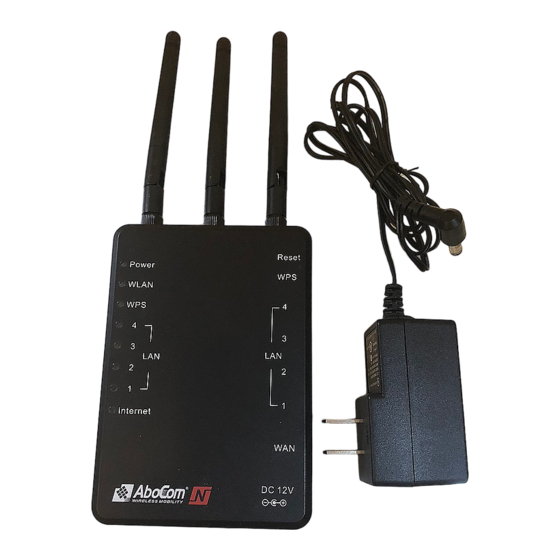
- Page 1 802.11n/b/g Wireless Broadband Router User’s Guide...
-
Page 2: Table Of Contents
Table of Content CHAPTER 1: INTRODUCTION .................... 4 Features ..........................4 CHAPTER 2: ABOUT THE OPERATION MODES............5 Access Point Mode......................5 Gateway Mode ........................5 CHAPTER 3: CONFIGURATION ..................6 Login........................... 6 Common Connection Types ..................7 Setup Wizard ........................9 Configuration via Web...................... - Page 3 General Problems ......................42 Internet Access......................... 42 Wireless Access ........................ 43 APPENDIX B: ABOUT WIRELESS LANS................ 44 BSS............................ 44 Channels........................... 44 Security..........................44 Wireless LAN Configuration..................45 Regulatory Approvals ..................... 46...
-
Page 4: Chapter 1: Introduction
Chapter 1: Introduction The 802.11n/b/g Wireless Broadband Router is a draft 802.11n/b/g compliant Wireless Broadband Router with 4-port Fast Ethernet Switch. With the advanced MIMO technology, it can support the data transmission rate 6 times more (up to 300Mbps) and the coverage 3 times more than IEEE 802.11b/g devices. -
Page 5: Chapter 2: About The Operation Modes
Chapter 2: About the Operation Modes This device provides operational applications with AP and Gateway modes, which are mutually exclusive. If you want to change the settings in order to perform more advanced configuration or even change the mode of operation, you can use the web-based utility provided by the manufacturer as described in the following sections. -
Page 6: Chapter 3: Configuration
Chapter 3: Configuration Login Start your computer. Connect an Ethernet cable between your computer and the Wireless Router. Make sure your wired station is set to the same subnet as the Wireless Router, i.e. 10.10.10.254 Start your WEB browser. In the Address box, enter the following: http://10.10.10.254 Please enter the username “admin”... -
Page 7: Common Connection Types
Common Connection Types Cable Modems Type Details ISP Data required Dynamic IP Your IP Address is Usually, none. Address allocated automatically, when you connect to you However, some ISP's may ISP. require you to use a particular Hostname, Domain name, or MAC (physical) address. - Page 8 • PPTP Mainly used in Europe. PPTP Server IP Address. • User name and password. • IP Address allocated to You connect to the ISP only you, if Static (Fixed). when required. The IP address is usually allocated automatically, but may be Static (Fixed).
-
Page 9: Setup Wizard
Setup Wizard The Setup Wizard provides brief and basic configuration of this device, you may enter each screen to change the default settings. For more detailed settings, you may refer to the “Configuration via Web” section. 1. View the listed configuration items and click Next to continue. Configuration via Web Operation Mode Select an operation mode and then click Apply to enable the mode you preferred. -
Page 10: Internet Settings
network adapter) to a wired network. All stations can have the Internet access if only the Access Point has the Internet connection. Select GW will enter the gateway mode. This means that the wireless connection will Gateway be set up from a point-to-point wireless LAN into a point-to-... - Page 11 Static Mode Enter the WAN IP address provided by your ISP in this column. IP Address Subnet Mask Enter the Subnet Mask in this column. Enter the default gateway IP provided by your ISP in this column. Default Gateway Primary and The DNS should be set to the address provided by your ISP.
- Page 12 Server Clone PC’s MAC Check to enable this function. Address Your ISP may require a particular MAC address in order for you to Clone MAC connect to the Internet. This MAC address is the PC’s MAC address Address that your ISP had originally connected your Internet connection to. Type in this Clone MAC address in this section to replace the WAN MAC address with the MAC address of that PC.
- Page 13 Clone PC’s MAC Check to enable this function. Address Your ISP may require a particular MAC address in order for you to Clone MAC connect to the Internet. This MAC address is the PC’s MAC address Address that your ISP had originally connected your Internet connection to. Type in this Clone MAC address in this section to replace the WAN MAC address with the MAC address of that PC.
- Page 14 When the authentication type has been set to be MSCHAP-v1, MPPE MSCHAP-v2 or Auto, here can select None, 40 bits, 56bits, 128bits Encryption Level or Auto form the pull-down menu. L2TP IP Select Dynamic or Static for the pull-down menu. Address Mode Physical IP Select Dynamic or Static for the pull-down menu.
-
Page 15: Lan (Local Area Network) Settings
Click the pull-down menu to select the most appropriate MTU MTU (Maximum (Maximum Transmission Unit, namely the maximum packet size, Transmission the default value is 1400) for your application. Reducing the packet Unit) size can help connecting to certain web sites or speeding up packet transfer rate. -
Page 16: Dhcp Clients
LAN Interface Setup Shows the IP address of the router. IP Address The subnet mask of the router. Subnet Mask Disable: Select to disable this Router to distribute IP addresses. DHCP Type Server: Select to enable this Router to distribute IP Addresses (DHCP Server). -
Page 17: Basic
Basic Wireless Network Click Radio OFF button to turn off the radio. Radio On/Off Select 11 b/g mixed mode, 11b only, 11g only or 11 b/g/n mixed Network Mode mode from the pull-down menu. Default is 11 b/g/n mixed mode. A SSID is referred to a network name because essentially it is a Network name that identifies a wireless network. - Page 18 A multiple SSID is referred to a network name because Multiple SSID 1~6 essentially it is a name that identifies a wireless network. This wireless AP will broadcast its SSID to stations. Broadcast Network Enable This wireless AP will not broadcast its SSID to stations. Name(SSID) Disable If stations want to connect to this wireless AP, this AP’s SSID...
-
Page 19: Advanced
Advanced Advanced Wireless BG Protection Select Auto, On or Off from the pull-down menu. Mode By default, the unit adaptively selects the highest possible rate for Basic Data Rates transmission. Select the basic rates to be used among the following options: 1-2Mbps, Default (1-2-5.5-11Mbps), or All(1-2-5,5-6-11-12- 24Mbps) Beacon Interval is the amount of time between beacon transmissions. -
Page 20: Security
specify the packet size. The RTS mechanism will be activated if the data size exceeds the value you set.. The default value is 2347. Warning: Enabling RTS Threshold will cause redundant network overhead that could negatively affect the throughput performance instead of providing a remedy. - Page 21 wireless adapter will need to be set to the same authentication type. • Shared: Shared key is when both the sender and the recipient share a secret key. • WPA, WPA-PSK, WPA2, WPA2-PSK, WPA-PSK/WPA2- : WPA-PSK offers two encryption methods, PSK, and WPA1/WPA2 TKIP and AES.
-
Page 22: Wps
WPS Configuration Select Enable or Disable from the pull-down menu. Click to save and apply the current settings. Apply Here shows the WPS function status. WPS Summary Click the button to reset the settings. Reset OOB WPS Process Select PCB or PIN WPS mode. WPS mode Enter the PIN code form the registrar or enrollee. -
Page 23: Station List
Station List Here shows the information of stations that connected with the AP. Firewall MAC Filtering MAC Filtering Settings Select Disable, enable –Rules for DROP, or enable –Rules for MAC Filtering ACCEPT form the pull-down menu. Enter the client MAC address. MAC Address You may key in a description for the MAC address. -
Page 24: Access Control
Click to delete all the MAC addresses in the table. Delete All Click to clear the current settings. Reset Access Control Basic Settings Select Disable or Enable from the pull-down menu. Access Control Default Policy -- The packet that Select Accepted or Dropped from the pull-down menu. don't match with any rules would be:... -
Page 25: Url Filtering
Source IP Enter the client IP address. Address Enter the destined IP address. Dest IP Address Select the protocol (TCP, UDP or TCP&UDP) used to the remote Protocol system or service. Select Drop or Accept from the pull-down menu. Action You may key in a description for the local IP address Comment Click to save and apply the current settings. -
Page 26: Port Trigger
Select the unwanted URL addresses and then click the Delete Delete Selected Selected button to eliminate them. Click to delete all the URL addresses in the table. Delete All Click to clear the current settings. Reset Port Trigger Port Trigger Settings Select Disable or Enable from the pull-down menu. -
Page 27: Virtual Servers
Trigger list Select the unwanted URL addresses and then click the Delete Delete Selected Selected button to eliminate them. Click to delete all the URL addresses in the table. Delete All Click to clear the current settings. Reset Virtual Servers Virtual Server Settings Virtual Server Select Enable or Disable from the pull-down menu. -
Page 28: Dmz
DMZ Settings If the DMZ Host Function is enabled, it means that you set up DMZ DMZ Settings host at a particular computer to be exposed to the Internet so that some applications/software, especially Internet / online game can have two-way connections. Select Enable or Disable from the pull- down menu. -
Page 29: Administration
Denial of Service Settings DoS (Denial of Service) attacks can flood your Internet connection Enable DoS with invalid packets and connection requests, using so much Prevention bandwidth and so many resources that Internet access becomes unavailable. The Wireless Router incorporates protection against DoS attacks. -
Page 30: Time Zone Setting
Time Zone Setting Time Zone Management Here shows the current time information. Current Time Enable NTP Check the box to enable below time zone settings. Client Select the preferred time zone from the pull-down menu. Time Zone Select Auto Selection: Select Auto Selection to select the server automatically. NTP Servers Manual IP: Enter an IP address of a specific server. -
Page 31: System Log
System Log System Log Management Check the box to enable this function. Enable Click this button to save the settings. Apply Changes Click to renew the current log message. Refresh Click to remove current log message. Clear DDNS DDNS Settings Dynamic DNS •... -
Page 32: Upload Firmware
• Details of your DDNS account (Name, password, Domain name) must then be entered and saved on this screen. • This device will then automatically ensure that your current IP Address is recorded by the DDNS Service Provider. • From the Internet, users will now be able to connect to your Virtual Servers (or DMZ PC) using your Domain name. -
Page 33: Settings Management
Settings Management Export Settings Click the Export button to export the device settings. Export Button Import Settings Click the Browse button, find and open the file that has been saved Settings file before. (The browser will display to correct file path). location Click the Import button to import the device settings. -
Page 34: Statistics
Statistics This screen displays the transmission and reception statistics on your current networks. -
Page 35: Chapter 4: Pc Configuration
Chapter 4: PC Configuration Overview For each PC, the following may need to be configured: • TCP/IP network settings • Internet Access configuration • Wireless configuration Windows Clients • This section describes how to configure Windows clients for Internet access via the Wireless Router. -
Page 36: Checking Tcp/Ip Settings - Windows 2000
Checking TCP/IP Settings - Windows 2000 Select Control Panel - Network and Dial-up Connection. Right - click the Local Area Connection icon and select Properties. You should see a screen like the following: Select the TCP/IP protocol for your network card. Click on the Properties button. -
Page 37: Checking Tcp/Ip Settings - Windows Xp
Using DHCP • To use DHCP, select the radio button Obtain an IP Address automatically. This is the default Windows setting. Using this is recommended. By default, the Wireless Router will act as a DHCP Server. • Restart your PC to ensure it obtains an IP Address from the Wireless Router. Using a fixed IP Address ("Use the following IP Address") If your PC is already configured, check with your network administrator before making the following changes. -
Page 38: Internet Access
Ensure your TCP/IP settings are correct. Using DHCP • To use DHCP, select Obtain an IP Address automatically. This is the default Windows setting. Using this is recommended. By default, the Wireless Router will act as a DHCP Server. • Restart your PC to ensure it obtains an IP Address from the Wireless Router. -
Page 39: For Windows 2000
For Windows 2000 Select Start Menu - Settings - Control Panel - Internet Options. Select the Connection tab, and click the Setup button. Select "I want to set up my Internet connection manually, or I want to connect through a local area network (LAN)"... -
Page 40: Macintosh Clients
Macintosh Clients From your Macintosh, you can access the Internet via the Wireless Router. The procedure is as follows. Open the TCP/IP Control Panel. Select Ethernet from the Connect via pop-up menu. Select Using DHCP Server from the Configure pop-up menu. The DHCP Client ID field can be left blank. -
Page 41: Wireless Station Configuration
Wireless Station Configuration • This section applies to all Wireless stations wishing to use the Wireless Router's Access Point, regardless of the operating system that is used on the client. • To use the Wireless Station with Wireless Router, each Wireless Station must have compatible settings, as follows: The mode must be set to Infrastructure. -
Page 42: Appendix A: Troubleshooting
Appendix A: Troubleshooting Overview This chapter covers some common problems that may be encountered while using the Wireless Router and some possible solutions to them. If you follow the suggested steps and the Wireless Router still does not function properly, contact your dealer for further advice. General Problems Can't connect to the Wireless Router to configure it. -
Page 43: Wireless Access
• Only one (1) PC can use this feature. Wireless Access Problem 1: My PC can't locate the Wireless Router. Check the following: Solution 1: • Your PC is set to Infrastructure Mode. (Access Points are always in Infrastructure Mode.) •... -
Page 44: Appendix B: About Wireless Lans
Appendix B: About Wireless LANs A group of Wireless Stations and a single Access Point, all using the same ID (SSID), form a Basic Service Set (BSS). Using the same SSID is essential. Devices with different SSIDs are unable to communicate with each other. -
Page 45: Wireless Lan Configuration
Off, 64 Bit, 128 Bit. For 64 Bit encryption, the Key value must match. For 128 Bit encryption, the Key value must match. Open System or Shared Key. WEP Authentication WPA/WPA2 WPA/WPA2 (Wi-Fi Protected Access) is more secure than WEP. It uses a “Shared Key” which allows the encryption keys to be regenerated at a specified interval. -
Page 46: Regulatory Approvals
This equipment should be installed and operated with minimum distance 20cm between the radiator & your body. CE Statement: Hereby, AboCom, declares that this device is in compliance with the essential requirement and other relevant provisions of the R&TTE Driective 1999/5/EC. CE Standards... - Page 47 • EN300328-2 • EN301489-1/-17 • EN60950 CE Marking Warning This is a Class B product. In a domestic environment this product may cause radio interference in which case the user may be required to take adequate measures.
Need help?
Do you have a question about the WR5201 and is the answer not in the manual?
Questions and answers