Table of Contents
Advertisement
Advertisement
Table of Contents
Troubleshooting

Related Manuals for Network Instruments GigaStor

Summary of Contents for Network Instruments GigaStor
- Page 1 GigaStor™ User Guide...
-
Page 2: Table Of Contents
Analyzing data with filters from the GigaStor Control Panel...................... 36 Analyzing data by combining GigaStor Control Panel and Observer filters................37 Analyzing multiple GigaStor probe instances from one GigaStor Control Panel..............37 Chapter 7: Stream Reconstruction..........................39 Reconstructing streams of HTTP, VoIP, and more..........................39 Defining what can be recreated in Stream Reconstruction......................39... - Page 3 How to extract VoIP and video calls from your GigaStor......................40 How to analyze 4G LTE traffic from your GigaStor..........................41 Analyzing 4G LTE traffic..................................... 42 Chapter 8: Forensic Analysis............................44 Examining your network traffic with forensic analysis........................44 Importing Snort rules....................................44 Analyzing packets using Snort rules..............................
- Page 4 Troubleshooting your GigaStor configuration............................91 GigaStor Control Panel option is grayed out............................ 91 GigaStor is full or does not have the history you expect......................91 TCP applications are not appearing in the GigaStor Control Panel..................91 Loading decodes in the Observer analyzer is slow.........................91 A RAID array drive is failing or has failed............................91...
- Page 5 GigaStor Upgradeable...
-
Page 6: Chapter 1: Getting Started
Follow these steps to get started with your GigaStor. The installation happens in two main parts. The first part is at the GigaStor probe in the server room. The second part continues at a desk using the Observer analyzer to connect to the GigaStor probe. -
Page 7: What Is The Gigastor
7. Set the adapter speed for the active instance. See . 8. The purpose of a GigaStor probe is to capture and store large amounts of data. By default the GigaStor is not set to capture any data. It must be enabled. To do that, you must have the GigaStor capture running. See Configuring probes to collect data even when not connected to an analyzer. -
Page 8: Using The Gigastor Control Panel
Connection Dynamics. After the GigaStor probe is up and running on the network, you can use an Observer analyzer to view captures from the probe. In the Observeryou use a special section of the analyzer called the GigaStor Control Panel. The... -
Page 9: Non-Gigastor-Specific Settings
Analysis and decode tools focused on just your area of interest. Non-GigaStor-specific settings The GigaStor Control Panel is a portion of the Observer analyzer. Some settings in the Observer analyzer affect the GigaStor. Some things you may want to configure in Observer include: Discovering host names so that GigaStor resolves and uses host names. -
Page 10: Setting Gigastor's Basic Options
Discovery section in the Observer User Guide. The default settings for the Observer analyzer is to not be aware of TCP connections that were opened after the GigaStor or packet capture started. You can change this default setting. Mine some data from the GigaStor. See Analyzing data without any filters (page 35). - Page 11 MAC Stations, IP Pairs, IP Addresses, TCP Applications, UDP Applications, VLANs, MPLS, and Physical Ports. These options are for controlling statistical display only. All packets that the GigaStor sees are written to disk and is available for analyzing using the “Analyze” button.
-
Page 12: Gigastor Reports
GigaStor reports Tip! The reports in the GigaStor Control Panel share the many of the same options and configurations as reports available in Observer Suite. There are several default reports available for you. 1. Choose Capture > GigaStor Control Panel. -
Page 13: Understanding Gigastor Protocol And Port Settings
Otherwise the conversation is not listed. If you try to analyze data prior to the time that this option was enabled, you will not see this data. Data must be collected with this option enabled for GigaStor reports to present the data correctly using the update reports button. -
Page 14: Chapter 2: Hardware Settings
3. Click the Subnet tab. 4. Use the Add, Delete, Modify, and Delete All buttons to configure the subnet settings for the GigaStor. When you define subnets in the GigaStor Control Panel, the Observer analyzer adds that subnet information to its index files. -
Page 15: Configuring The Packet Capture And Gigastor Buffer Size
Inadequate memory allocation to GigaStor collection can affect performance and result in dropped packets during high load periods. A GigaStor Instance can be as large as the physical memory installed on your system after subtracting the memory dedicated to Windows and other probe instances. - Page 16 Observer analyzer displays captured NetFlow records and what the NetFlow templates format is for that record. See the Cisco documentation for details about the NetFlow records, templates, and formats. Figure 3: NetFlow template and records 16 | GigaStor™ (pub. 25.Apr.2014)
-
Page 17: Chapter 3: About Probe Instances
A probe is a hardware device on your network running Network Instruments probe instance software. Each hardware probe has at least one probe instance that captures packets from your network to analyze. The probe hardware device could be an appliance purchased from Network Instruments or you could install the probe software on your own hardware. -
Page 18: What Is A Probe Instance
What is a probe instance? Observer has only one kind of probe instance: the probe instance. If you have a GigaStor then you have two special probe instance types available to you: the active probe instance and the passive probe instance. - Page 19 You can reserve more memory for passive probe instances if you wish. With a GigaStor you have the option of which NIC to bind the passive probe instance. Do not bind any passive probe instances to the Gen2 adapter if at all possible. A copy of all packets is sent from the adapter to every passive probe instance attached to it.
-
Page 20: Which Software Probe Is Right For You
SPAN/mirror port on a switch. The Observer software can handle fast network speeds (including 40 Gigabit), but it is the network adapter that is the bottleneck on home-grown systems. Network Instruments uses a custom-designed network adapter removing the bottleneck in our probes. These levels of software probes are available: Single probe—Single probes have only one probe instance and it is not user-configurable. - Page 21 Expert probe—Expert probes are the same as a Multi probe except that they have local expert analysis and decode capabilities in the probe that allows for remote decoding and expert analysis in real time. The Expert probe software comes pre-installed on most hardware probes from Network Instruments. Hardware >...
-
Page 22: How Probes Work With Switches
3) Only available on hardware probes from Network Instruments. 4) Decoding and expert analysis are performed by the probe and a summary is sent to the Observer analyzer reducing network bandwidth use. 5) Application Performance Analysis and Application Transaction Analysis. Applications are generally OSI Layer7 applications like HTTP, FTP, RTSP, SMB, and so on. -
Page 23: Chapter 4: Deploying Probes In Your Network
Chapter 4: Deploying Probes in your Network Deploying probes in your network You need visibility into every corner of the network, from the edge to the core. A distributed analysis solution can provide the coverage you need, but where should you deploy probes for maximum visibility at minimum cost? Because every network is different, the examples shown may not look like your network, but the concepts demonstrated will be applicable to most situations. -
Page 24: Monitoring Wireless Traffic
It would require placing a TAP on every link to each switch. Fortunately, you need only place probes where the traffic is significant enough to warrant the expense, and a lot of traffic is not that critical. 24 | GigaStor™ (pub. 25.Apr.2014) - Page 25 Ultimately, where to deploy probes depends on the design of your particular network and where you require visibility. A probe only shows your analyzer the data that is visible to that probe. An Ethernet Probe's visibility, for example, is limited to what a particular switch's SPAN/mirror port can deliver. A specialized hardware probe connected through a TAP sees only the traffic traversing that link.
-
Page 26: Ports Used By Network Instruments Products
Ports used by Network Instruments products Firewalls are necessary for any network. These specific ports must be open to allow Network Instruments products can communicate with each other. Network Instruments generally recommends that you open inbound and outbound TCP/UDP 25901 through 25905 on your firewalls for its products. -
Page 27: Chapter 5: Packet Captures
GigaStor probe indexes the data. You use theGigaStor Control Panel within the Observer analyzer to manage the capture, indexing, and storage of large numbers of packets over long periods of time. While the GigaStor Control Panel is active, standard packet captures are unavailable for that probe instance. You cannot run the two types of captures simultaneously. -
Page 28: Trimming Data From Your Captures For Space Or Privacy
Multiple time intervals are configurable, per day, if the times do not conflict. 5. In the Reserve scheduling for section, select GigaStor and click OK. You may receive a notice about scheduling reservation. If you do, click Yes to change the scheduling. -
Page 29: Password Protecting The Ability To Change Partial Packet Capture Size
If, for example, you have the ratio set to 1, you are telling the GigaStor to sample every single packet that it sees. This has a potential negative side effect—especially in very high traffic conditions—because there could be a significant impact on... - Page 30 Indexing is an important part of how the GigaStor is able to be as efficient as it is. A brief synopsis of indexing in the GigaStor is this: All captured packets are written to disk. None of the settings in the GigaStor Control Panel control what is written to disk in any way.
-
Page 31: Exporting Gigastor Data For Archiving
If a packet is being analyzed by Network Trending at the time the GigaStor wants to analyze the packet, the GigaStor skips the packet and goes to the next packet. The packet is written to disk, it is just not indexed. -
Page 32: Chapter 6: Mining Data
Mining data from your GigaStor Retrieving data from GigaStor and analyzing it is a primary function of the GigaStor Control Panel. You can use the information in the packet capture to identify numerous network conditions. By using filters and a specific analysis type, you can hone in on the exact information you want. - Page 33 This option… Allow you to do this… IP Stations, IP Pairs or any of the other tabs in the GigaStor Control Panel. See Analyzing data by combining GigaStor Control Panel and Observer filters (page 4G LTE Device by IMSI Takes all packets in the selected time from on the Detail Chart and allows you to choose the Device IMSI and whether control plane and user plane packets are included in the analysis.
- Page 34 Analyzes the selected time frame for any microbursts (as defined in the Microburst Analysis Settings dialog) and displays the results in the Microburst Analysis tab of the GigaStor Control Panel. This is an easier way to find microbursts across a much longer time frame than using the Detail Chart where the longest time frame that can be analyzed is 15 minutes.
-
Page 35: Selecting A Time Frame To Analyze
Selecting a time frame to analyze The GigaStor Control Panel has two graphs along the top: a Detail Chart and below it a Outline Chart. The Detail chart shows a shorter time frame. The Outline Chart shows a longer time frame with the Detail Chart being a portion of time from within Outline Chart. -
Page 36: Analyzing Data With Filters From The Observer Filter Editor
You may want to filter the data that is shown on the Detail Graph. You can do so with the filters section of the GigaStor Control Panel. You can filter data from MAC Stations tab, IP Stations tab, IP Pairs tab, and more. -
Page 37: Analyzing Data By Combining Gigastor Control Panel And Observer Filters
Analyzing data by combining GigaStor Control Panel and Observer filters If you chose “Create analysis filter using checked GigaStor entries” and do not have any data or do not have the data you expected, it may be because you applied too many filters. Try the “Analyze all traffic in the analysis interval”... - Page 38 3. Click Select GigaStors for Combined Indexing. 4. Choose two or more probe instances and click Apply. If a particular GigaStor probe instance is not listed, ensure the GigaStor Control Panel for that instance is open and try again. 5. Click Update Reports to start combining index data.
-
Page 39: Chapter 7: Stream Reconstruction
Stream reconstruction (including VoIP) is illegal in some jurisdictions and may be disabled by Network Instrumentsto comply with those laws. For security or privacy reasons or because of company policy, you may need to limit what the GigaStor probe can recreate through its stream reconstruction feature. -
Page 40: How To Extract Voip And Video Calls From Your Gigastor
5. Choose whether to limit stream reconstruction by specific subnets. How to extract VoIP and video calls from your GigaStor VoIP and videoconferencing calls can be extracted from a GigaStor if you know the approximate time the events occurred. Prerequisite(s): ... -
Page 41: How To Analyze 4G Lte Traffic From Your Gigastor
Your LTE environment likely has hundreds or thousands of matrix switches. It is impractical to monitor all of them simultaneously. Most likely, you are likely using the GigaStor as a reactive tool to subscriber complaints. After connecting the matrix switch to the GigaStor and collecting LTE traffic, you can analyze it to determine the problem. -
Page 42: Analyzing 4G Lte Traffic
Adds the date to the analysis output. 6. Click OK to save your settings. 7. Click OK to search the GigaStor for the 4G LTE traffic. Analyzing 4G LTE traffic By viewing the link between signaling and sessions on the data and user planes or by viewing detailed information on each session, including subscriber, service area, cell site, network element, handset type, error codes and session status, you will have excellent insight into your LTE network status. - Page 43 Figure 8: Basic LTE infrastructure A GigaStor probe can capture and track all of a device's network traffic in your LTE environment after the device connects to an eNodeB. You can get comprehensive subscriber analysis as well as have a logical workflow for problem resolution.
-
Page 44: Chapter 8: Forensic Analysis
Network forensics is the idea of being able to resolve network problems through captured network traffic. Previous methods of network forensics required you to be able to recreate the problem. Using the GigaStor you do not have to recreate the problem — you already have the captured packets. Instead of reacting to a problem, you can use network forensics to proactively solve problems. -
Page 45: Analyzing Packets Using Snort Rules
(page 44). 1. In Observer, choose Capture > GigaStor Control Panel > Forensic Analysis. 2. Right-click anywhere on the Forensic Analysis tab and choose Analyze from the menu. applies the rules and filters to the capture data and displays the results in the Forensics Summary tab. A new tab is also opened that contains the decode. - Page 46 Forensic Analysis Summary window. If logging is enabled, all reassembly activity is displayed in the Forensics Log (but not displayed in the Forensic Analysis Summary). 1. In Observer, choose Capture > GigaStor Control Panel > Forensic Analysis tab. 2. Right-click anywhere on the Forensic Analysis tab and choose Forensic Settings from the menu. The Select Forensic Analysis Profile window opens.
- Page 47 Field Description BSD=AIX, FreeBSD, HP-UX B.10.20, IRIX, IRIX64, NCD Thin Clients, OpenVMS, OS/2, OSF1, SunOS 4.1.4, Tru64 Unix, VAX/VMS Last data in=Cisco IOS BSD-right=HP JetDirect (printer) First data in=HP-UX 11.00, MacOS, SunOS 5.5.1 through 5.8 Linux=Linux, OpenBSD Solaris=Solaris Windows=Windows (95/98/NT4/W2K/XP) Refer to http://www.snort.org for more detailed version-specific information.
- Page 48 (and a common hacker trick), logging occurrences of this is recommended. Normalize UTF-8 encodings—Convert UTF-8 encoded characters to standard format. The second check box allows you to enable logging when such encoding 48 | GigaStor™ (pub. 25.Apr.2014)
- Page 49 Field Description is encountered during preprocessing. Because Apache uses this standard, enable this option when monitoring Apache servers. Although you might be interested in logging UTF-8 encoded URIs, doing so can result in a lot of noise because this type of encoding is common. Lookup Unicode in code page—Enables Unicode codepoint mapping during pre- processing to handle non-ASCII codepoints that the IIS server accepts.
-
Page 50: Using Network Forensics To Track A Security Breach
1. Isolate the time frame over the weekend where you noticed the attacks against your DMZ. Collect all of the internal activity over the next few days. Select the time in the Detail Chart of the GigaStor Control Panel from where you noticed the attacks and the next few days. - Page 51 5. Analyze the data using one of the options described in Mining data from your GigaStor. This opens your data in the Decode tab in the Observer analyzer. 6. Assuming the data is HTTP, select a packet in the Decode tab and right-click. Choose TCP Dump (HTTP) from the menu.
-
Page 52: Chapter 9: Microbursts
(perhaps millisecond). Adding additional switches or load-balancers to your network are a couple of possible solutions. This way the link will never be 1) Information Week, April 21, 2007. 52 | GigaStor™ (pub. 25.Apr.2014) -
Page 53: Using The Microburst Analysis Tab In The Gigastor Control Panel
1. Select the probe instance and then choose Capture > GigaStor Control Panel. 2. Click the Microburst Analysis tab. 3. Highlight the data in the Detail Chart you want to analyze for microbursts and click Analyze. The GigaStor Analysis Options screen opens. -
Page 54: Using The Detail Chart Only
5. Define what a microburst is for your network and click OK. The results appear in the Microburst Analysis tab. For details, see Duration, Utilization threshold, and Full duplex. It may take a moment for the GigaStor Control Panel to process the data and display the results. - Page 55 many chunks of time are theoretically possible. See Table 5 (page 56) for examples of how changing the interval may affect the Detail Chart. Duration: The duration is length of time over which the burst is calculated. It must contain two or more packets (or partial packets) to be counted as a microburst.
- Page 56 Frame size is 1514, Frame bits are 12,304, Capture adapter speed is 1 Gb, and Network utilization is 50%. 2) Duration is 1 millisecond. 3) Microburst Utilization threshold is 50%. 4) Interval is 10 milliseconds. 5) Microburst Utilization. 56 | GigaStor™ (pub. 25.Apr.2014)
-
Page 57: Chapter 10: Charts, Graphs, And Reports
GigaStor Outline This tab lets you choose the appearance, colors, and scale of the Outline Chart. The Outline chart is the bottom graph in the upper portion of the GigaStor Control Panel. 1. Choose Capture > GigaStor Control Panel. 2. Click the Settings button. -
Page 58: Statistics Lists Tab
Observer tracks and makes many statistics available to you. You can control how those statistics are displayed for your GigaStor. This tab lets you customize how MAC address, IP address, IP Pair, and port information are displayed in the various constraint tab statistical listings. -
Page 59: Chapter 11: Gigastor In A Financial Firm
Chapter 11: GigaStor in a Financial Firm Using Observer in financial firms In an environment where even nanoseconds matter, a GigaStor allows you to identify when an anomaly in your network occurs and alerts you to it so that you can resolve it quickly. -
Page 60: Analyzing Fix Transactions
The GigaStor probe provides you access to it. Use the FIX Analysis tab in the GigaStor Control Panel to highlight only FIX data and to select of the timeframe in question. The capability to filter on a trade by order ID for further analysis or to validate a specific transaction can be accomplished from this point. -
Page 61: Configuring A Fix Profile
Figure 10: FIX Analysis Outside of the GigaStor Control Panel, these other areas may be valuable for you when you are analyzing FIX transactions: Decode and Analysis in Observer—Allows you to decode and analyze the raw FIX information and presents it in an easy to read format. In the Decode and Analysis tab you can use filters and do post- capture analysis on specific FIX transactions that have issues. - Page 62 Use this button to rename, add a new, or delete a profile. If you have numerous GigaStor probes where you want to use the same FIX analysis options, modify or create the profiles on one system, export them, and import them into the other GigaStor probes.
-
Page 63: Chapter 12: Gigastor Raid Maintenance
There is very little that must be done with the RAID other than to install the drives and, if you wish, monitor the drives in the RAID array. Note: If your GigaStor RAID has more than 256 TB, see for information about improving the performance of the array. To maintain your GigaStor, you may want to Get e-mail notifications if a drive in the RAID array is failing. - Page 64 4. Along the left, click System Controls to expand the list and click Alert By Mail Config. This opens the page for you to add your contact information. 5. Complete the page with the details for your SMTP server and users to be notified. 64 | GigaStor™ (pub. 25.Apr.2014)
-
Page 65: Cleaning The Disk To Maintain Write Performance
As the GigaStor RAID array is filled and refilled, disk fragmentation can occur over time. Rather than running a time-consuming system-level disk fragmentation utility, you can automatically delete all of the data files that store probe instance data. - Page 66 To clean the GigaStor RAID array: 1. Select the active probe instance and then choose Capture > GigaStor Control Panel. You cannot clean the array from a passive probe instance. 2. Choose Tools > Delete All Instance Capture Data. Figure 13: Delete All Instance Capture Data...
-
Page 67: Chapter 13: Understanding How A Probe Uses Ram
Chapter 13: Understanding how a Probe Uses RAM How a probe uses RAM A Windows computer uses Random Access Memory (RAM) as a form of temporary data storage. Windows separates all available memory into three sections: protected memory, user memory, and reserved memory. An Observer probe, depending on how it is configured, uses these types of memory differently. -
Page 68: Packet Capture Buffer And Statistics Buffer
There are two kinds of buffers that a probe uses to store data in real-time: capture buffers and statistical buffers. The capture buffer stores the raw data captured from the network while the statistical buffer stores data entries that are snapshots of a given statistical data point. 68 | GigaStor™ (pub. 25.Apr.2014) -
Page 69: Running Observer Without Reserved Memory
RAM to reserve for the probe instance when doing a packet capture. (This formula does not apply when doing a GigaStor capture to disk. It is only for probe instances doing packet captures.) - Page 70 Observer to be configured for your system. This section does not apply to the GigaStor or other hardware products from Network Instruments. They are properly configured at the factory.
-
Page 71: Running Observer With Reserved Memory
Caution! Never change the reserved memory settings of Network Instruments hardware unless Network Instruments instructs you do so. Reserved memory settings should only be modified on non-Network Instruments hardware, such as a desktop computer running an Observer analyzer. Although your requirements are unique, there are some general recommendations where the system is dedicated to Observer :For 64-bit, reserve all memory above 4 GB for Observer and for 32-bit, reserve all memory above 400 MB for Observer. -
Page 72: How Packet Capture Affects Ram
If a packet must be written to disk for either a GigaStor capture or a Packet Capture, it is copied from the RAM and written to the disk. -
Page 73: How To Allocate The Reserved Ram
The Network Trending Files receive data from the statistics queue buffer through the NI trending service, where they are written to disk. The following steps occur only if you are writing the data to disk through a packet capture to disk or a GigaStor capture. -
Page 74: Recommendations For The Gen2 Capture Cards
These are just recommendations and may be changed or modified for your circumstances. If you are using a GigaStor, read this section, but also be sure to consider the information Recommendations for the Gen2 capture cards (page 74). -
Page 75: Tweaking The Statistics Memory Configuration
Tweaking the statistics memory configuration There are two kinds of buffers that a probe instance uses to store data in real-time: a capture buffer and a statistical buffer. The capture buffer stores raw data captured from the network; the statistical buffer stores statistical entries and nothing more. -
Page 76: Chapter 14: Gen2 Capture Card
Gen2 capture card The Gen2 card is designed and manufactured by Network Instruments and is optimized for the GigaStor probe. The Gen2 card comes in two, four, eight, and twelve port models for 1 Gb and 10 Gb speeds. The 40 Gb Gen2... -
Page 77: Installing The Gen2 Card's Sfp, Qsfp Or Xfp Interfaces
Note: All packets captured by the probe are time stamped immediately as it is seen by the capture card interface and then passed to the capture buffer. This ensures the most accurate timestamp. Installing the Gen2 card’s SFP, QSFP or XFP interfaces To connect the probe to a monitoring interface (TAP or SPAN/mirror) different from that shipped with the unit, simply obtain the necessary SFP for your application, remove the installed SFPs, and insert the desired interface. - Page 78 1. Right-click the Gen2-equipped probe from Observer’s probe list and choose Probe or Device Properties from the menu. You can tell the probe is a GigaStor probe because (Gigabit) appears after the probe name. 2. Click the Virtual Adapters tab and click Edit Adapter. By default all of the ports are assigned to the adapter.
-
Page 79: Viewing The Gen2 Card's Properties And Finding The Board's Id
(such as SFP activity, link spee, autonegotiation) actually is happening. To retrieve the board’s ID or view the Gen2 card’s properties: 1. On the GigaStor system, choose Start > All Programs > Accessories > Windows Explorer. Choose My Computer and right-click and choose Manage. The Computer Management window opens. -
Page 80: Setting The Cable Length For The Gps System
Setting the cable length for the GPS System For GigaStor probes with the Gen2 card, you must define the length of cable between the GPS System and the GigaStor probe. Adjustments are made to the timings based on cable length. -
Page 81: Configuring The 10 Gb Gen2 Card With A Span Port
8. Click the Advanced Settings tab. Select your GPS Cable Length. This is the cable length from the GPS Synchronization System to your GigaStor probe. It is not the cable length for the GPS antenna. Click OK. Your GigaStor probe will now use GPS accurate timing for its captures. - Page 82 Figure 22: 10 Gb Gen2 Advanced Properties 82 | GigaStor™ (pub. 25.Apr.2014)
-
Page 83: Chapter 15: Gps
Chapter 15: GPS GPS | 83... -
Page 84: Chapter 16: Troubleshooting
Observer on a different system and see if you experience the same problem. This does not mean that you will not be able to use Observer on the desired system. It may give you some insight into the problem that you are having. 84 | GigaStor™ (pub. 25.Apr.2014) -
Page 85: Troubleshooting A Slow Probe System
Ports firewall and the traffic is actually passing through it. Observer uses these ports to communicate with the probe. See Ports used by Network Instruments products (page 26). Check any local system firewall as well as any network firewall. See also the information in Suspected NAT or VPN issues (page 89). -
Page 86: No Network Adapter Available
Causes: Default driver settings for the card are incorrect. You must update the driver and then disable the “Offload Transmit TCP Checksum” option. Solutions: Upgrade the driver for the integrated network adapter to the Network Instruments/Intel Pro 1000 adapter driver. This driver is located in the:\<Observer installation directory>\Drivers \IntelPro1000 directory. -
Page 87: No Vlan" Shown While Using A Gigabit Nic
“No VLAN” shown while using a Gigabit NIC Symptoms: “No VLAN” is displayed in VLAN Statistics and/or no 802.1Q tag information is shown in your decode. The network adapter you use to capture traffic is a Gigabit NIC. Causes: Observer is not seeing the 802.1Q tag on packets being captured. This is sometimes caused by your switch not sending tagged packets to Observer. -
Page 88: Using Discover Network Names On A Layer 3 Switch That Uses Vlans
“SwitchPort1.“ The IP based statistical modes (Internet Observer, Top Talkers – IP (by IP Address) still show you statistics calculated from individual stations by their IP address. But MAC-based statistical modes (Pairs Statistics Matrix, 88 | GigaStor™ (pub. 25.Apr.2014) -
Page 89: Suspected Nat Or Vpn Issues
If you use network address translation (NAT) in your environment, you must make some configuration changes in Observer. Using the TCP/IP port information in Ports used by Network Instruments products (page 26), you should be able to set up the NAT properly. -
Page 90: Cisco Catos Switches
Console(config-if)# no speed nonegotiate Ports used by Network Instruments products Firewalls are necessary for any network. These specific ports must be open to allow Network Instruments products can communicate with each other. Network Instruments generally recommends that you open inbound and outbound TCP/UDP 25901 through 25905 on your firewalls for its products. -
Page 91: Troubleshooting Your Gigastor Configuration
TCP applications are not appearing in the GigaStor Control Panel If the GigaStor Control Panel is not displaying all of the applications you expect to see, ensure the “Limit to ports defined in Protocol Definitions” in Settings >General is unchecked. - Page 92 If a second drive fails during the rebuild, the array is broken and must be recreated. Your packet captures are available on a GigaStor running in a degraded mode, but are lost on a GigaStor with two bad drives at the same time (and also if the second drive fails during the time the first drive is rebuilding).
-
Page 93: Chapter 17: Backups And Restoring
Use this button to rename, add a new, or delete a profile. If you have numerous GigaStor probes where you want to use the same FIX analysis options, modify or create the profiles on one system, export them, and import them into the other GigaStor probes. -
Page 94: Exporting Gigastor Data For Archiving
Observer to export the data. Part of what makes the GigaStor searches so quick is that the data is indexed. Any data that is exported to a file is saved, but unindexed. The data remains in the indexed GigaStor file until it is overwritten. The exported data is always available and means you will still have access to the saved packet data, but you must load the capture file into the analyzer before you can search it. -
Page 95: How To Restore A Gigastor Probe To Factory Settings
How to restore a GigaStor probe to factory settings Restoring a GigaStor to factory settings is usually a last resort when all other methods to correct the issue have failed and should only be done under the direction of Network Instruments Technical Support. - Page 96 GigaStor Restore USB drive to the serial number of the GigaStor. You can locate a GigaStor serial number on the back of each unit or on the door. If you have more than one GigaStor, you must ensure each GigaStor is restored only with the GigaStor Restore USB drive having a matching serial number for that GigaStor.
- Page 97 The system restore is complete. Both the GigaStor probe software and Window operating system are already licensed. That information was included on the USB drive. You can begin using the probe. Type your login credentials after the system boots. The default password is admin.
-
Page 98: Chapter 18: Installation
1. Take the probe and all other components out of their packing materials. 2. Install the rail kits. See How to install the Network Instruments rail kits. 3. Attach the rail to the rack in your cabinet. Instructions for installing the rail kits are provided in the rail kit box. - Page 99 6. Install the drives into your GigaStor Upgradeable 5U probe. The RAID is pre-built and each drive must be installed in a very specific location. To install a drive, slide the drive in until it clicks firmly in place. See Installing the drives in your GigaStor for details.
-
Page 100: How To Install The Network Instruments Rail Kits
6. Insert the empty appliance, then install any hard drives. Caution! GigaStor appliances can be very heavy (up to 120 pounds/55 kg)! For your safety, do not install a fully loaded GigaStor system into your cabinet. Instead, install the appliance in the rails while it is empty and then insert any RAID hard drives. - Page 101 Caution! Do not lean or put any extra weight on a GigaStor while it is in the cabinet! There are locking mechanisms along both sides of the appliance that prevent it from inadvertantly sliding out. Pull the appliance towards you, then press down on each locking mechanism to release. Be very careful! ...
-
Page 102: Installing The Drives In Your Gigastor
Stickers on each drive identify which slot it should be installed in. The drive labeled A1 must be installed in the upper left slot of the GigaStor. 1. Make sure that the GigaStor is turned off. 2. Locate the drives that comprise the array. The drives are labeled to show you where they should be installed in the drive cage. -
Page 103: How To Handle Hard Drives Properly
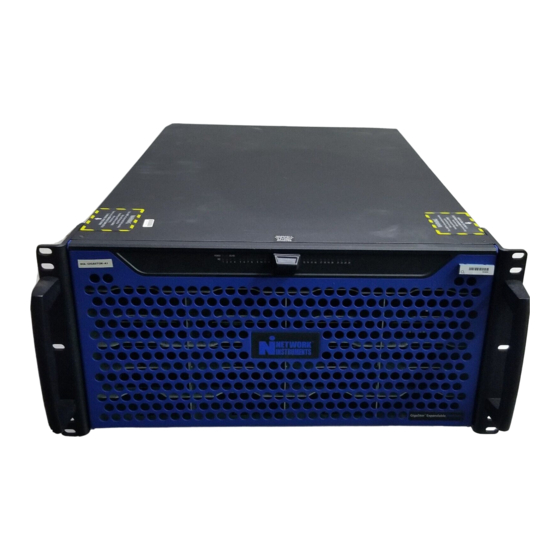
Figure 27: GigaStor 5U front 3. To install a drive, slide the drive in until it clicks firmly in place. Repeat until all of the drives are firmly installed as labeled. To install the bottom row of drives, the door may need be hanging down or completely level. -
Page 104: Setting The Probe's Ip Address
IP address is 192.168.1.10. 2. Turn on the system. For some probes, such as the GigaStor Upgradeable 5U, you may need to ensure the power switch is in the “on” position on the back of the probe. Then on the front of the probe, press the power button until the system starts to turn on. - Page 105 Figure 28: Default TCP/IP settings 6. Set the IP address, subnet mask, gateway, and DNS server for your environment and click OK. Click OK again to close the Local Area Connection Properties dialog. Close the Network Connections window. 7. Right-click the Probe Service Configuration Applet in the system tray and choose Open Probe Configuration. Figure 29: Probe Service Configuration Applet 8.
-
Page 106: Configuring The Lights Out Management Port For Your Gigastor
1. Ensure the Lights out Management port is connected to your network using a straight-through Ethernet cable. A crossover cable will not work. 2. When starting your probe, press Delete during POST to enter the BIOS setup. If you are using a GigaStor, wait for the RAID to initialize, which may take a moment. -
Page 107: Chapter 19: Technical Specifications
Lockable security panel that prevents access to the media drives and system controls. Two keys are provided. Contact Network Instruments for additional keys, which are available for a small charge. Front panel LED Temperature alarms that warn you when temperatures inside the case are reaching levels that may damage the probe hardware. - Page 108 USB slot for USB key (dongle). Operating System Drive Removable hard drive with the operating system. Power, OS, and drive The Power light is on whenever the GigaStor unit is on. lights The operating system light blinks whenever there is activity on the OS drive.
- Page 109 Web-based management Graceful power shutdown, startup, and reboot Pager and email alerts Lights Out Capability Manage, monitor and control the GigaStor remotely using an intuitive web-based interface via the IPMI (Intelligent Platform Management Interface) v1.5 / 2.0 with KVM support. Dimensions 5U 19-inch rack-mountable appliance 16.84 in (W) x 8.72 in (H) x 26.08 in (mounting depth)
-
Page 110: Supported Qsfp/Sfp/Sfp+ Media Types
Supported QSFP/SFP/SFP+ media types Some products require an SFP module. These are the supported media types. 40 Gb QSFP Transceivers 40GBASE-SR4 10 Gb Ethernet SFP+ Transceivers 10GBASE-SR 10GBASE-LR 10GBASE-ER 1 Gb Ethernet SFP Transceivers 1000BASE-SX 1000BASE-LX 1000BASE-TX 110 | GigaStor™ (pub. 25.Apr.2014) -
Page 111: Index
Index Numerics 10 Gigabit 80, 80 cable length 80 25901 (port) 26, 26, 85, 90, 90 cables 98 25903 (port) 26, 85, 90 capture buffer 32-bit 71, 71 32-bit Windows 68 64-bit 71, 71 64-bit Windows 68 64-bit, RAM 71 FIFO 10 802.11 ... - Page 112 Ethernet Physical Port 36 traffic generation 89 Ethernet Physical Port filter 36 write performance 65 expansion units 98, 104 GigaStor capture 18, 20 Expert Probe 20, 20, 20 GigaStor Control Panel expert summary 20 analyzing data 35, 36, 40, 40 archiving data ...
- Page 113 68 macro graph, see Outline Chart 35 daylight savings time 89 matching between probe and analyzer 85 decoding 20, 27 Max Buffer Size 68 GigaStor Portable 89 megabytes 18 high-volume 44 memory 69, 69 memory 69 memory management 68...
- Page 114 SNORT 94 buffer size 18 Snort rules 44, 45, 45 effects of packet capture 72 software probes 20 formula 68 software, versions 20 GigaStor 73 SPAN 77, 77 limitations 68 auto-negotiation 81 packet capture 18, 68 using 24 probe instance 35...
- Page 115 sampling divider 85 VLAN 87, 87 statistics buffer 68, 68 "No VLAN" 87, 87 statistics queue buffer 67, 69, 71, 72, 72, 73, 74 VLAN access 85 stream reconstruction 39, 39 VLAN Statistics 87 subnets 14 VLAN Statistics tool 87, 87 swapping SFP or XFP 77 VLAN visibility 88 switching to analyzer 20...
Need help?
Do you have a question about the GigaStor and is the answer not in the manual?
Questions and answers