Table of Contents
Advertisement
Quick Links
Advertisement
Table of Contents

Related Manuals for Sper scientific 850071


Summary of Contents for Sper scientific 850071
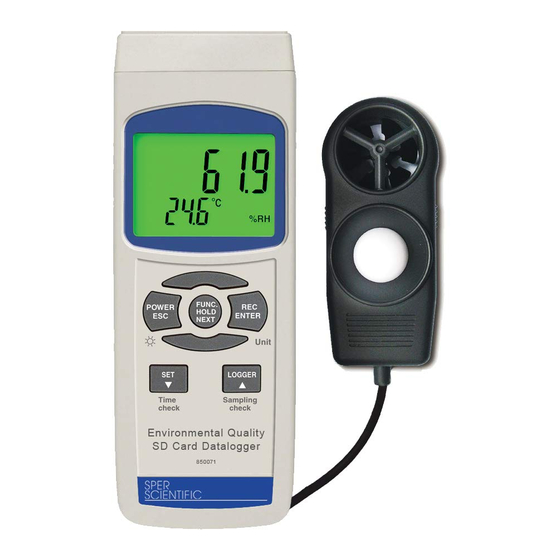
- Page 1 Environmental Quality SD Card Logger 850071 Insruction Manual...
- Page 2 Environmental Quality SD Card Logger 850071 Copyright ©2013 by Sper Scientific ALL RIGHTS RESERVED Printed in the USA The contents of this manual may not be reproduced or transmitted in any form or by any means electronic, mechanical, or other means that do not yet exist or...
-
Page 3: Table Of Contents
TABLE OF CONTENTS Materials Supplied ....6 Power Supply ..... 7 Meter Components . - Page 4 INTRODUCTION This Sper Scientific Environmental Meter with SD Card Datalogger (Model 850071) is an extremely fast and accurate meter with multiple functions. The meter reads humidity, air temperature, air velocity, and measures light in Lux or Ft-cd. Optional Type K/J thermocouple probes available.
- Page 5 FEATURES • Functions as a light meter, anemometer, and humidity/ temperature meter. Optional adapter enables Type K/J thermometer. • Measures humidity in both %RH and temperature • Displays air velocity in five units of measure • Lux or Foot Candles unit selection •...
-
Page 6: Materials Supplied
MATERIALS SUPPLIED • Meter • Sensor • SD Card • 6 AA Batteries • Instruction Manual • Hard Carrying Case OPTIONAL ACCESSORIES 840058 USB Power Cable 840097 AC Adapter 840059 SD Card 840093 Field Tripod 840090 Water Resistant Instrument Pouch... -
Page 7: Power Supply
POWER SUPPLY This meter can be powered by six AA (1.5V, UM3) batteries or an optional 9 Volt DC adapter. See p. for battery replacement instructions. Plug the adapter into the power port labeled “DC 9V,” located on the side of the meter. Note…... -
Page 8: Meter Components
METER COMPONENTS Keypad 1. LCD Display 2. POWER/ESC 3. FUNCTION /HOLD/ NEXT 4. REC/ENTER 5. SET/▼ (TIME CHECK) 6. LOGGER/▲ (SAMPLING TIME CHECK) Side of Meter 7. RESET 8. DC9V Power Adapter Input Socket Back of Meter 9. Battery Cover Screws 10. - Page 9 Top of Meter 12. Type K/J Thermometer Socket 13. Probe Input Socket Bottom of Meter 14. SD Card Socket Sensor Probe 15. Anemometer Vane 16. Humidity/ Temperature Sensor 17. Light Sensor...
-
Page 10: Setup Mode
SETUP MODE The advanced Setup Mode allows you to customize the following meter preferences and defaults: • Real Time Clock • Decimal Type • Auto Power Off • Touch-Tone • Thermometer Type K/J • Temperature Units • Sampling Time • SD Memory Card Format Note…... - Page 11 Entering Setup Mode 1. Press POWER to turn the meter on. 2. Press and hold SET for at least 2 seconds to enter Setup Mode. 3. Press NEXT to cycle through the setup functions. Note… Press ESC to exit Setup Mode. The meter will return to Normal Mode.
- Page 12 Decimal Type Although the decimal is commonly expressed as the “.” symbol (i.e., 20.6 or 1000.53), some European countries use a “,” symbol to represent the decimal (i.e., 20,6 or 1000,53). The meter defaults to the period symbol. To adjust: 1.
-
Page 13: Temperature Units
2. Press ▲or ▼ to select yes (touch-tone enabled) or no (touch-tone disabled). Press ENTER to save the selection. Thermometer Type K/J 1. Enter the thermometer type function from Setup Mode (see page 11). “tYPE” appears on the LCD. 2. Press ▲or ▼ to select K or J. Press ENTER to save the selection. - Page 14 SD Memory Card Format This function will format the SD memory card to work specifically with your meter. New SD cards should always be formatted before first use. Formatting the SD card will erase any previous memory on the card. 1.
-
Page 15: Measurement Procedures
MEASUREMENT PROCEDURES Turning the Unit On/Off 1. Press POWER to turn the meter on. 2. Press and hold POWER for ≥2 seconds to turn the meter off. Selecting the Function Press and hold FUNC to cycle through the options listed below. Release FUNC when you reach the desired function. - Page 16 Air Velocity and Air Temperature 1. Plug the anemometer probe plug into the probe input socket. 2. Press POWER to turn the meter on. 3. Press and hold FUNC to cycle through the options until “An” appears on the LCD. Release the FUNC button.
- Page 17 Humidity and Temperature 1. Plug the probe plug into the probe input socket. 2. Press POWER to turn the meter on. 3. Press and hold FUNC to cycle through the options until “rH” appears on the LCD. Release the FUNC button. 4.
- Page 18 4. “K” or “J” appears on the LCD to indicate the type of thermometer. Notes… When using the meter for the first time, the meter will default to K type thermocouple. See page 13 for instructions on selecting the thermocouple type. To change the temperature unit, see page 13.
-
Page 19: Zero Adjustment
Zero Adjustment During light measurement, if the display does not show a value of 0 when the light sensor is completely covered, zero adjustment is needed. 1. With the sensor covered, press LOGGER for >3 seconds. “0” appears on the LCD. 2. -
Page 20: Hold Function
Hold Function 1. When measuring any parameter, press HOLD to freeze the reading on the display. “HOLD” will appear on the LCD. 2. Press HOLD again to release the hold function. “Hold” will disappear from the LCD. Maximum and Minimum To record maximum and minimum readings: 1. - Page 21 Note… The meter cannot be turned off from the memory record function. Exit the function, then press and hold POWER to turn the meter off. Backlight The backlight turns on automatically when the meter is turned on. 1. Press POWER once to turn the backlight off. 2.
-
Page 22: Datalogger
DATALOGGER Preparing the Datalogger 1. Insert the SD card into the SD card socket on the bottom of the meter, ensuring that the front of the SD card faces the back of the meter. 2. Format the SD card as needed (see page 14). 3. - Page 23 Note… To enable/disable the touch-tone feature, see page 12. Manual Datalogging 1. Set the sampling time to 0 seconds (see page 13). 2. Press REC. “REC” will appear on the LCD. 3. Press LOGGER. “REC” will flash on the LCD. The tone will sound as the measurement data and time information are saved to memory.
- Page 24 SD Card Data Structure • The first time a SD card is used in this meter, a folder EMA01 will be generated. • If the datalogger is being used for the first time, a new file EMA01001.XLS will be generated under the route EMA01\.
-
Page 25: Battery Replacement
BATTERY REPLACEMENT This meter uses six AA (1.5V, UM3) batteries. When the low battery indicator appears on the LCD, battery replacement is needed. After the icon appears on the LCD, in-spec measurement can still be made for several hours before becoming inaccurate. 1. -
Page 26: Specifications
SPECIFICATIONS Circuit Custom one-chip of microprocessor LSI circuit Display LCD size: 52 mm x 38 mm LCD with green backlight (ON/OFF) Measurement Unit • Type K/J thermometer • Humidity/Temp. meter • Anemometer with Temp. • Light Meter • Sound level meter (optional adaptor) Datalogger Auto 1 second to 3600 seconds... - Page 27 Advanced setting • Set clock time (Year/Month/Date/Hour/ Minute/Second) • Decimal point of SD card setting • Auto power OFF management • Set beep Sound ON/OFF • Set thermometer type to Type K or Type J • Set temperature unit to C or F •...
- Page 28 Power Supply • Alkaline or heavy duty DC 1.5 V battery (UM3, AA) x 6 PCs, or equivalent • DC 9V adapter input (AC/DC power adapter is optional) Power Current Normal operation (w/o SD card save data and LCD Backlight if OFF): Appox. DC 15 mA.
- Page 29 Anemometer A. Air Velocity Meas. Range Resolution Accuracy 0.4 ~ 25.0 m/S 0.1 m/S ± (2% + 0.2 m/S) km/h 1.4 ~ 90.0 km/h 0.4 kn/h ± (2% + 0.8 km/h) 0.9 ~ 55.9 mile/h 0.1 mile/h ± (2% + 0.4 mile/h) knot 0.8 ~ 48.6 knots 0.1 knots...
- Page 30 Humidity/Temp. Meter A. Humidity Measuring Range 0% to 95% RH Resolution 0.1 %R.H. Accuracy ≥ 70% RH: ± (3% reading + 1% RH) < 70% RH: ± 3% RH B. Temperature Measuring Range 32 ~ 122 F (0 ~ 50 C) Resolution 0.1 C / 0.1 F Accuracy...
- Page 31 Type K/J Thermometer Sensor Type Range Accuracy Type K 0.1 C -50.0 ~ 1300.0 C ± (0.4% + 0.8 C) -50.1 ~ 100.0 C ± (0.4% + 1 C) 0.1 F -58.0 ~ 2372.0 F ± (0.4% + 1.5 F) -58.1 ~ 148.0 F ±...
-
Page 32: Warranty
WARRANTY Sper Scientific warrants this product against defects in materials and workmanship for a period of five (5) years from the date of purchase, and agrees to repair or replace any defective unit without charge. If your model has since been discontinued, an equivalent Sper Scientific product will be substituted if available.
Need help?
Do you have a question about the 850071 and is the answer not in the manual?
Questions and answers