Table of Contents
Advertisement
Quick Links
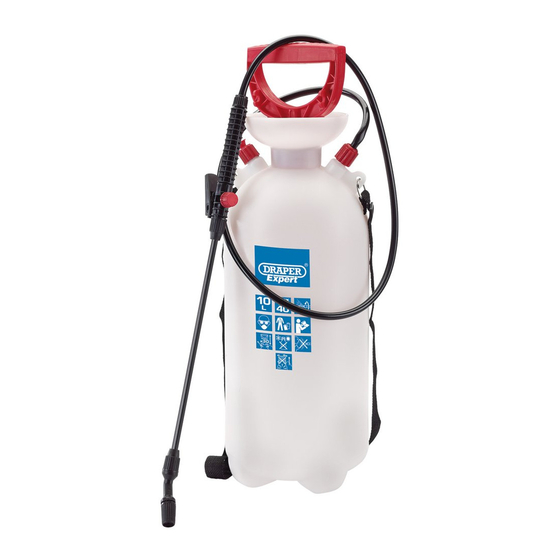
10/15L EPDM
PRESSURE
SPRAYERS
82460, 82583
Stock No.82460
These instructions accompanying the product are the original instructions. This document is part of the product,
keep it for the life of the product passing it on to any subsequent holder of the product. Read all these
instructions before assembling, operating or maintaining this product.
This manual has been compiled by Draper Tools describing the purpose for which the product has been
designed, and contains all the necessary information to ensure its correct and safe use. By following all the
general safety instructions contained in this manual, it will ensure both product and operator safety, together
with longer life of the product itself.
AlI photographs and drawings in this manual are supplied by Draper Tools to help illustrate the operation of the
product.
Whilst every effort has been made to ensure the accuracy of information contained in this manual, the Draper
Tools policy of continuous improvement determines the right to make modifications without prior warning.
Stock No.82583
Advertisement
Table of Contents

Summary of Contents for Draper 82460
- Page 1 AlI photographs and drawings in this manual are supplied by Draper Tools to help illustrate the operation of the product.
-
Page 2: Title Page
Commercial copying, redistribution, hiring or lending is prohibited. No part of this publication may be stored in a retrieval system or transmitted in any other form or means without written permission from Draper Tools Limited. In all cases this copyright notice must remain intact. -
Page 3: Table Of Contents
2. CONTENTS 2.1 CONTENTS 1. TITLE PAGE 1.1 INTRODUCTION ......................... 1 1.2 REVISION HISTORY ......................2 1.3 UNDERSTANDING THIS MANUAL..................2 1.4 COPYRIGHT NOTICE......................2 2. CONTENTS 2.1 CONTENTS ......................... 3 3. GUARANTEE 3.1 GUARANTEE ........................4 4. INTRODUCTION 4.1 SCOPE ..........................5 4.2 SPECIFICATION ......................... -
Page 4: Guarantee
This guarantee applies in lieu of any other guarantee expressed or implied and variations of its terms are not authorised. Your Draper guarantee is not effective unless you can produce upon request a dated receipt or invoice to verify your proof of purchase within the guarantee period. -
Page 5: Introduction
Special EPDM seals and gaskets material allows for use with high temperature water, glycol, detergents, acid, organic and inorganic bleaching agents and hydraulic oils. 4.2 SPECIFICATION Stock No’s ............82460 .............. 82583 Part No’s..........EWS-10-EPDM/B........EWS-12-EPDM Bottle capacity........... 10L ..............15L Working capacity .......... -
Page 6: Health And Safety Information
5. HEALTH AND SAFETY INFORMATION 5.1 GENERAL SAFETY INSTRUCTIONS WARNING: READ and UNDERSTAND this instruction booklet completely before using these sprayers. The user must always ask the dealer for the safety card of the chemical product to be used, also for disposal of the residual liquid. The use of substances not in conformity with the current regulations is at the user’s risk and peril. -
Page 7: Technical Description
Stock No.82583 Pump handle. Fill inlet. Safety valve. Trigger assembly. Wheel.* Hose. Wheel cover.* Foam handle grip.* Spray bottle. Handle.* Nozzle. Lance holder.* *Applicable to Stock No.82583 only. Ɨ Lance. Carry strap. Ɨ Applicable to Stock No.82460 only. - 7 -... -
Page 8: Unpacking And Checking
Lay the contents out and check them against the parts shown below. If any part is damaged or missing; please contact the Draper Helpline (the telephone number appears on the Title page) and do not attempt to use the product. -
Page 9: Assembly
8. ASSEMBLY 8.1 WHEEL ASSEMBLY (82583 only) – FIGS. 1 – 4 – Slide the wheel axle through both of the axle mounting brackets located on the bottom of the spray bottle FIG.1 – Slide one of the wheels onto the axle. FIG.2 –... -
Page 10: Handle Assembly
8. ASSEMBLY 8.2 HANDLE ASSEMBLY (82583 only) – FIGS. 5 – 8 – Slide the 2 handle fixings over the handle section FIG.5 – Slide the 2 shafts of the handle over the handle mounting sections moulded into the spray bottle FIG.6 –... -
Page 11: Lance Assembly
8. ASSEMBLY 8.3 LANCE ASSEMBLY – FIGS. 9 – 10 – If not already in place, make sure the rubber gasket and compression fittings are arranged onto the lance the correct order, as shown in FIG.9. – Slide the the end of the lance into the trigger assembly FIG.9 –... -
Page 12: Operation And Use
9. OPERATION AND USE 9.1 FILLING THE SPRAY BOTTLE – FIGS. 13 – 15 – Unscrew the pump handle anti-clockwise to loosen and remove from the pump handle/assembly from the fill inlet FIG.13 – Fill the spray bottle with your chosen liquid to the desired level through the fill inlet Note: Whilst the fill inlet incorporates a flanged rim to help avoid spillages, the additional use of... -
Page 13: Safety Pressure Valve
Note: Stock No.82460 incorporates a slightly different mechanism in it’s trigger assembly. 9.5 FLOW RATE – FIG. 19 The force of the spray can be regulated using... -
Page 14: Maintenance
10. MAINTENANCE AND TROUBLESHOOTING 10.1 MAINTENANCE – After use, rinse the container then operate the pump with clean water to completely empty the container and piston. – At least once a year clean pump thoroughly, re-grease or lubricate all moving parts. Warning: When assembling and servicing, carefully insert the pump piston without forcing, so as not to damage the gasket. -
Page 15: Disposal
11. DISPOSAL 11.1 DISPOSAL – At the end of the product’s working life, or when it can no longer be repaired, ensure that it is disposed of according to national regulations. – Contact your local authority for details of collection schemes in your area. In all circumstances: •... - Page 16 ©Published by Draper Tools Limited. No part of this publication may be reproduced, stored in a retrieval system or transmitted in any form or by any means, electronic, mechanical photocopying, recording or otherwise without prior permission in writing from Draper Tools Ltd.


Need help?
Do you have a question about the 82460 and is the answer not in the manual?
Questions and answers