Axis 213 PTZ User Manual
Axis user's manual network camera 213 ptz
Hide thumbs
Also See for 213 PTZ:
- User manual (70 pages) ,
- Installation manual (44 pages) ,
- Brochure (3 pages)
Table of Contents
Advertisement
Advertisement
Table of Contents

Related Manuals for Axis 213 PTZ


Summary of Contents for Axis 213 PTZ
- Page 1 AXIS 213 PTZ Network Camera User’s Manual...
-
Page 2: About This Document
About This Document This manual is intended for administrators and users of the AXIS 213 PTZ Network Camera, and is applicable for software release 4.00. Previous experience of networking will be of use when installing and using this product. Some knowledge of UNIX or Linux-based systems would also be beneficial, for developing shell scripts and applications. -
Page 3: Table Of Contents
AXIS 213 PTZ Network Camera ........ - Page 4 AXIS 213 Ports & devices - I/O Ports ........40 Maintenance.
-
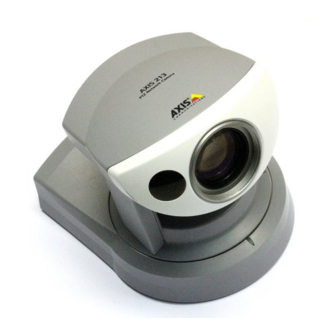
Page 5: Product Description
Product Description The AXIS 213 is a full-featured PTZ Network Camera for security surveillance and remote monitoring needs. It has the ability to make real time full frame rate Motion JPEG video available on the network. The AXIS 213 can optionally be equipped with a connection module with 2 inputs and 3 outputs, which can be connected to external devices, e.g. -
Page 6: Axis 213 Ptz Network Camera
AXIS 213 - Product Description AXIS 213 PTZ Network Camera IR Light - infrared light for night vision. Activated from the AXIS 213 web page. Network Indicator - the multi-colored network indicator flashes as follows: • Amber - flashes for activity on a 10 Mbit/s network •... - Page 7 Optional Accessory: Connection Module - The connection module provides the physical interface to 3 relay outputs, 2 digital inputs, audio in/out, video in/out and the RS-232C Serial port. See Connection Module, on page 43 for more information. RS 232C Audio In/Out 3 Relay Outputs 2 Digital Inputs Video In/Out...
-
Page 8: Installing The Axis 213
1 below until the installation is completely verified. The AXIS 213 PTZ Network Camera is supplied with a bracket for ceiling mounting. 1. Drill two holes in the ceiling and secure the bracket with the appropriate screws according to the ceiling material. -
Page 9: Installing On A Network
Installing on a Network The AXIS 213 is designed for installation on an Ethernet network. This involves assigning an IP address to the PTZ camera, either manually or via an automated network service (DHCP). Select one of the following procedures depending on your network: Available procedures: Manual Installation using AXIS IP Utility (Windows) -
Page 10: Manual Installation Using Axis Ip Utility
AXIS 213 - Installing the AXIS 213 Manual Installation using AXIS IP Utility AXIS IP Utility is a Windows software application that installs the AXIS 213 to your local network using a static IP address. • Download the AXIS IP Utility software to your computer, free of charge from the Support pages at http://www.axis.com/techsup/software •... -
Page 11: Manual Installation Using Arp And Ping In Windows
Manual Installation using ARP and Ping in Windows Follow these instructions to assign a unique IP address to your product from a computer on your network: 1. Acquire an unused IP address for the AXIS 213 from your network administrator. 2. -
Page 12: Manual Installation Using Arp And Ping In Unix/Linux
AXIS 213 - Installing the AXIS 213 Manual Installation using ARP and Ping in UNIX/Linux Assign your product with a unique IP address from a computer on your network, as follows: 1. Acquire an unused IP address for the AXIS 213 from your network administrator. -
Page 13: Axis Internet Dynamic Dns Service
AXIS Internet Dynamic DNS Service AXIS Internet Dynamic DNS Service provides a one-click procedure that makes the AXIS 213 available on your local network and over the Internet. On installation, the AXIS 213 will receive a URL (web address), which can then be used to access it. The PTZ Network Camera can be unregistered from the service at any time. -
Page 14: Using The Ptz Network Camera
AXIS 213 - Using the PTZ Network Camera Using the PTZ Network Camera The AXIS 213 can be used with most standard operating systems and supports Microsoft Internet Explorer 5.x or later, Netscape 7.x or later and Mozilla 1.4 or later. Note: To be able to view streaming video in Microsoft Internet Explorer, you must set your Web browser to allow ActiveX controls and also allow that AXIS Media control (AMC) is installed on your worksta-... -
Page 15: Live View
Live View The following provides an overview of each button on the Live View page. If the AXIS 213 has been customized, the buttons will be displayed accordingly: To resize the displayed image, click the View Size buttons: half-size (x resolution of the image (not available in Sequence Mode). - Page 16 AXIS 213 - Using the PTZ Network Camera Click the Mute /Microphone buttons to switch the sound off and on. Only available if Audio is enabled and the Connection Module with a loudspeaker/microphone is connected. Use the volume sliders to control the volume on the speakers and microphone and to set the available bandwidth speed.
- Page 17 AXIS 213 - Using the PTZ Network Camera Pan/Tilt/Zoom Control Queue This means that the time the user is in control of the PTZ settings is limited and that a queue of users has been set up. Use the buttons to request or release control of the Pan/Tilt/Zoom controls.
-
Page 18: Configuring The Ptz Network Camera
AXIS 213 - Configuring the PTZ Network Camera Configuring the PTZ Network Camera This section describes how to configure the AXIS 213 and is intended for the administrator who has unrestricted access to all Setup tools and Operator who has access to Video &... -
Page 19: Overview Of The Setup Tools
Default Viewer: set your preferred method of viewing moving images. HTML Examples Add live video from your AXIS 213 PTZ Network Camera to your own Web site or save an HTML page on your local hard disk to display live images from the AXIS 213. - Page 20 AXIS 213 - Configuring the PTZ Network Camera Event Configuration (Administrator/Operator) Tools Settings / Options / Description Instructions General Instructions Event Servers Specify destinations for uploaded image files and/or notification messages from the PTZ Network Cam- era. FTP servers and HTTP servers are intended for saving image files and HTTP servers and TCP servers are intended for receiving notification messages.
-
Page 21: Using The Setup Tools
Using the Setup Tools The following descriptions offer examples of the available features in the AXIS 213. For details of each setting, please refer to the online help files which are available from each page. Click Video & Image To optimize the video images according to your requirements, modify the following settings under Image Appearance: •... -
Page 22: Overlay Image Settings
AXIS 213 - Configuring the PTZ Network Camera Video Stream Define the maximum video stream time per session in seconds, minutes or hours. When the set time has expired, a new stream can be started by refreshing the page in the Web browser. - Page 23 Overlay image limitations: • If the image overlay and text overlay are larger than the video image, no overlay will be displayed. When also using a text overlay, this will occupy 16 pixels in height and as many in width as the video image. Please consider this when configuring the overlay image.
- Page 24 AXIS 213 - Configuring the PTZ Network Camera Image Settings • Auto focus enabled (default setting) • Noise reduction - sets the level of noise reduction in the image. i.e. sharpens the image. Setting the noise reduction to ‘high’ will cause a drop in frame rate (fps) Image Offset To eliminate a black border or black lines on the image on the live view page, change...
- Page 25 AXIS 213 - Configuring the PTZ Network Camera When using Half-Duplex mode, the Push-To-Talk button will be visible. Select the mode to use for this button. Selecting Toggle means that when the button is pushed it will remain so until pushed a second time. Instant means that the button will remain active (pushed) until released.
-
Page 26: Custom Settings
AXIS 213 - Configuring the PTZ Network Camera Live View Config - Live View Layout Select Use Axis look to customize the features on the AXIS 213 Live View page to suit your requirements. The following settings can be customized: •... - Page 27 1. Click the Upload/Remove button. 2. Enter the path to the file, e.g. a file located on your workstation or click Browse. 3. Select the user level for the uploaded file. Setting the user access level means that you have complete control over which pages can be viewed by which users. 4.
-
Page 28: Html Examples
AXIS 213 - Configuring the PTZ Network Camera 4. Check Show Custom Link 2. 5. Enter a descriptive name, e.g. CAM STOP. 6. Select the Use as cgi link radio button and enter the cgi link in the field: http://192.168.0.125/axis-cgi/com/ptz.cgi?continuouspantiltmove=0,0 7. - Page 29 AXIS 213 - Configuring the PTZ Network Camera Enter the Image Type, Image size and Optional settings to suit your Web page and click Update. Copy the source code as displayed on the HTML examples page and paste it into your own Web page code.
-
Page 30: Sequence Mode
AXIS 213 - Configuring the PTZ Network Camera PTZ Configuration - Preset Positions A preset position is a pre-defined camera view than can quickly and easily be viewed. From Preset Position Setup, use the Pan, Tilt and Zoom (PTZ) controls to steer the camera to the required position. - Page 31 AXIS 213 - Configuring the PTZ Network Camera Move speed sets the speed of the camera's Pan/Tilt movements. The default setting is maximum speed. Advanced PTZ Control Queue - The administrator can set up a queue for the PTZ controls. Once set up, the PTZ Control Queue buttons will appear on the Live View page offering one viewer exclusive control for a limited amount of time.
-
Page 32: Event Configuration
AXIS 213 - Event Configuration Event Configuration This section describes how to configure the AXIS 213 for alarm and event handling. The AXIS 213 can be configured to perform certain actions when certain types of events occur. Event Type A set of parameters describing how and when the PTZ Network Camera is to perform certain actions Triggered Event page 33 the circumstances that start an event... -
Page 33: Event Types
Event Types An Event Type is a set of parameters describing how and when the PTZ Network Camera is to perform certain actions. Example: If somebody passes the connected camera, and an event has been configured to act on this, the PTZ Network Camera can e.g. - Page 34 AXIS 213 - Event Configuration 7. Click OK to save the Event in the Event Types list. Please use the online help files Pre-trigger and Post-trigger buffers This function is very useful when checking to see what happened immediately before and after a trigger, e.g.
-
Page 35: Port Status
Scheduled Event A Scheduled event can be activated at pre-set times, in a repeating pattern on selected weekdays. How to set up a scheduled event This example describes how to set the PTZ Network Camera to send an email notification with saved images from a set time: 1. -
Page 36: System Options
AXIS 213 - System Options System Options Security User access control is enabled by default, the administrator sets the root password on first access. Other users are authorized with user names and passwords, or the administrator can choose to allow anonymous viewer login to the Live View page, as described below: Users - the user list displays the authorized users and access levels: Viewer... -
Page 37: Date & Time
Date & Time Current Server Time - displays the current date and time (24h clock). If this has not been configured, the time displayed is the default setting. The time can be displayed in 12h clock format in the Overlay Images (see below). New Server Time - Select your time zone from the drop-down list and check the daylight saving time changes, if desired. - Page 38 Network Camera is changed automatically, e.g. by DHCP, you can choose to be notified. Click Settings... and enter the required information. AXIS Internet Dynamic DNS Service - If the AXIS 213 PTZ Network Camera has been registered with the Axis Internet Dynamic DNS service and the IP address for the product changes, the service is updated to reflect the change.
-
Page 39: Network - Socks
AXIS 213 - System Options The domain name currently registered at the Axis Internet Dynamic DNS service for your product can at any time be removed. To do this click Settings... and follow the instructions. For more information, please refer to the online help files HTTP The default HTTP port number (port 80) can be changed to any port within the range 1024-65535. -
Page 40: Ports & Devices - I/O Ports
AXIS 213 - System Options Note: UPnP must be installed on your workstation. To do this, open the Control Panel from the Start Menu and select Add/Remove Programs. Select Add/Remove Windows Components and open the Net- working Services section. Click Details and then select UPnP as the service to add. Ports &... -
Page 41: Support
Support The support overview page provides valuable information on troubleshooting and contact information, should you require technical assistance. Logs & Reports - when contacting Axis support, please be sure to provide a valid Server Report with your query. View Information - The Log report and the Parameter List also provide valuable information for troubleshooting and when contacting Axis’... -
Page 42: Resetting To Factory Default Settings
AXIS 213 - System Options Caution! Improper use may cause unexpected behavior or even cause loss of contact with the unit. If a script does cause problems, reset the unit to its factory default settings (in which case, a backup file may be of use to return the unit to its latest configuration). Axis strongly recommends that you do not use this function unless you fully understand the consequences. -
Page 43: Connection Module
Connection Module The connection module connects to the camera and is configured and controlled via the camera’s user interface. The Connection module is an optional accessory providing the following: • audio in / out • 3 relay outputs • 2 digital inputs Installing the audio equipment 1. -
Page 44: Schematic Diagram - Connection Module
AXIS 213 - Connection Module Schematic Diagram - Connection Module... -
Page 45: Troubleshooting
• Pre-configured and customized settings will be retained for use when the new firmware is running (providing that the features are available in the new firmware) although this is not guaranteed by Axis Communications. • After starting the process, you should always wait at least 20 minutes before restarting the AXIS 213, even if you suspect the procedure has failed. -
Page 46: Support
AXIS 213 - Troubleshooting Support If you contact the Axis support desk, please help us help you resolve your problems expediently by providing a server report, log file and a brief description of the problem. Server Report - go to Setup | System Options | Support Overview. The server report contains important information about the server and its software, as well as a list of the current parameters. - Page 47 Symptoms, Possible Causes and Remedial Actions Problems setting the IP address Using ARP Ping The IP address must be set within two minutes after the power has been applied to the AXIS 213, restart the server and try again. Also, make sure the ping length is set to 408. The AXIS 213 is located on a If the IP address intended for the AXIS 213 and the IP address of your computer are different subnet...
- Page 48 AXIS 213 - Troubleshooting Installation of additional ActiveX component restricted or prohibited Video Image Problems Image too dark or too light. Black borders around the video image Problems uploading own files Missing images in uploads Slow image update Slow performance Bad snapshot images Display incorrectly configured on your workstation...
-
Page 49: Technical Specifications
Technical Specifications Detail Specification System Requirements Standard Internet TCP/IP suite of protocols: Supported Web Browsers Windows - Microsoft Internet Explorer 5.x or later and Mozilla 1.4 or later Linux - Mozilla 1.4 or later Mac OSX - Netscape 7.x or later or Mozilla 1.4 or later. Audio Windows - Microsoft Internet Explorer 5.x or later. - Page 50 AXIS 213 - Technical Specifications Detail Image Mechanisms Power Complimentary Software Axis Chipset Technology Specification Image Chip (CCD): Total number of pixels: Horizontal Resolution: Vertical Resolution: S/N Ratio: Shutter speed: White balance: Digital video resolutions: Minimum illumination: Night mode Infrared lighting: Infrared cut filter: Pan: Tilt:...
- Page 51 Detail Specification Connection Module Full-duplex audio. Audio data encoded in: (optional accessory) Data sent using HTTP. Microphone Input - 1-40mVpp. PC type. Line Out - Unbalanced, max. 2.6Vpp. Maximum number of users (audio) - 10 (on local area network). RS-232C - 9-pin D-SUB serial connector. Composite video in/out.
-
Page 52: Index
AXIS 213 - Index Index About 20 Action 32 Action Buttons 15, 28 Active/Inactive 15, 28 ActiveX Controls 14 Administrator 18, 36 Alarm 20, 32, 43 AMC 9, 14, 15, 50 ARP and Ping 11, 12 Audio 19, 43 Audio Settings 19 AXIS Internet Dynamic DNS Service 13 AXIS IP Utility 10 AXIS Media Control 9... - Page 53 Logs & Reports 20, 41 Maintenance 20 Network 20, 37 Network Connector 6 Network Indicator 6 New Server Time 37 NTP Server 37 Operator 36 Output Buttons 15, 28 Overlay Image 19, 22 Overlay Settings 21 Own Home Page 27 Pan/Tilt/Zoom Control Queue 17 Pan/Tilt/Zoom Controls 16 PHP 41...
- Page 54 AXIS 213 User’s Manual Part No. 22582...
Need help?
Do you have a question about the 213 PTZ and is the answer not in the manual?
Questions and answers