Table of Contents
Advertisement
Quick Links
Advertisement
Table of Contents

Related Manuals for NewTek 3Play 3P1


Summary of Contents for NewTek 3Play 3P1
- Page 2 TriCaster 300, TriCaster TCXD300, TCXD300, TriCaster PRO, TriCaster STUDIO, TriCaster BROADCAST, TriCaster DUO, MediaDS, MDS1, 3PLAY, 3Play, 3Play 3P1, 3Play 4800, 3PXD4800, 3Play 440, 3PXD440, 3Play Mini, 3Play 820, 3PXD820, 3Play 425, 3PXD425 3Play 330, 3PXD330, TalkShow, TalkShow VS 4000, TalkShow VS100, Network Device...
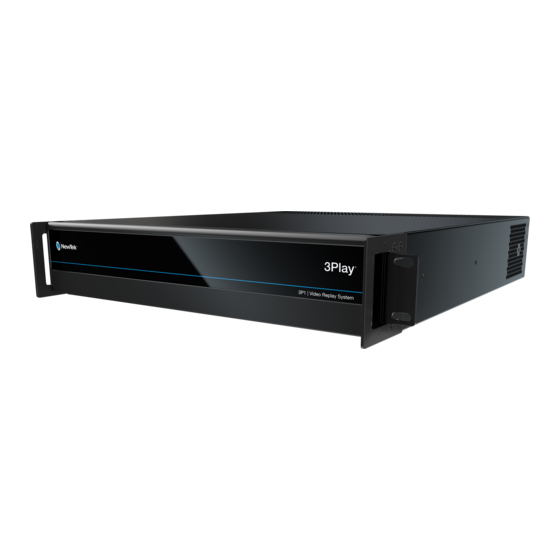
- Page 3 3Play™...
-
Page 5: Table Of Contents
About This Manual ........................3 Introduction ..........................5 Overview ............................5 Recording, Marking and Events ...................... 6 2.2.1 What is an Event? ........................6 NewTek 3Play Control Surface ......................6 Startup Screen ..........................7 Replay Desktop ..........................8 Features ............................9 2.6.1 Physical ..........................10 2.6.2... - Page 6 Output Connections ........................20 3.4.1 A/V Output ..........................20 3.4.2 Connecting Devices ....................... 21 Starting a Session ......................... 21 3.5.1 The Home Page ........................22 3.5.2 The Session Page ........................23 3.5.3 The Replay Desktop ....................... 24 Configure Video Outputs ......................24 3.6.1 Aux ............................
- Page 7 PART II (Reference) .......................... 43 The Startup Screen ........................45 Introduction to Sessions........................ 45 The Home Page ..........................46 5.2.1 New (Session) ........................47 5.2.2 Open (Session)........................50 5.2.3 Shutdown ..........................51 5.2.4 Utilities ..........................51 5.2.5 Help ............................53 5.2.6 Add-Ons ..........................
- Page 8 Dual Channel Replay ........................77 8.1.1 Channel Delegates ......................... 78 Transitions (TAKE | AUTO) ......................79 Source Delegates .......................... 79 8.3.1 CLIP LIST ..........................80 8.3.2 PLAY LIST ..........................80 8.3.3 LIVE ............................80 Independent States ........................81 8.4.1 LINK ............................81 RECORD............................
- Page 9 Input Monitors ..........................92 9.2.1 Titlebar Features ........................92 Channel Monitors (A, B) ........................ 93 9.3.1 Channel Info .......................... 94 Recording and Storage ......................95 10.1 Record Configuration ........................ 95 10.2 Storage Volumes ........................95 10.3 Recording and the Desktop ....................... 96 10.3.1 Record On/Off ........................
- Page 10 12.3 PLAY LIST Preparation ......................112 12.3.1 Clip Selection ........................112 12.3.2 Changing a Clip ........................113 12.3.3 Memo ..........................113 12.3.4 Audio 1, 2 – 3, 4 ........................113 12.3.5 In and Out Points (Trimming Clips) ..................114 12.3.6 Speed ...........................
- Page 11 DSKs (Overlays) ........................137 15.1 Overview ..........................137 15.1.1 Overlay Output A or B ......................137 15.1.2 Overlay Graphics and Telestration ..................138 15.1.3 Officiating and Overlays ...................... 138 15.2 Source Options ........................138 15.2.1 Cameras ..........................139 15.2.2 Clip List Preview ........................139 15.2.3 Buffers ..........................
- Page 12 17.8.1 Configuration........................164 17.8.2 Listening for GPI Triggers ....................164 17.8.3 Sending GPI Commands ...................... 165 17.9 Editing Macros ........................165 17.10 Automation and Integration ....................166 PART III (Appendices) ........................167 Appendix A How Do I … ? ......................169 Connections ..........................
- Page 13 Install My Favorite Software (or Codec)? ................178 A.5.6 Restore the System to Original ‘As-Shipped’ Condition? ............ 179 Registration And Tech Support ....................180 A.6.1 Register the NewTek 3Play system? ................... 180 A.6.2 Contact Technical Support? ....................180 A.6.3 Find Hardware/Firmware Revision Numbers? ..............181 Miscellaneous ..........................
-
Page 15: Part I (Getting Started)
PART I (GETTING STARTED) Introducing NewTek 3Play 3P1™ – connections and registration, a top-level overview of primary features, and a hands-on tour to get you started. Page | 1... -
Page 17: About This Manual
Part I – Getting Started: introduction to NewTek 3Play 3P1 – connecting devices (cameras, monitors, etc.) and registration, ending up with the Live Production Walkthrough – a brisk jog through fundamentals, about 16 pages (if you’re a quick study, this may provide all you need). -
Page 19: Introduction
INTRODUCTION Thank you for purchasing this NewTek 3Play®. This system is a member of the NewTek family of live video production systems and software, and enjoys a proud heritage. A bona fide video pioneer, NewTek is justifiably proud of its record of innovation, ongoing commitment to excellence and superb product support. -
Page 20: Recording, Marking And Events
RECORDING, MARKING AND EVENTS Recording is intrinsic to NewTek 3Play. Pressing REC on the Control Surface (or clicking the Record button in the titlebar on the Replay Desktop) activates continuous capture of all configured sources. Typically, each recorded stream comprises output from a different camera angle. (Input sources not configured for recording can be viewed as reference and output live, but are not available for replay.) -
Page 21: Startup Screen
Note: If the Control Surface is not available for any reason, its core functions can be accessed using keyboard shortcuts. STARTUP SCREEN The Startup Screen appears when you power up your NewTek 3Play. This area offers initial configuration options along with system management tools. Figure 2 The Home page of the Startup Screen (Figure 2 allows you to define and open sessions, essentially custom presets for individual productions or other purposes. -
Page 22: Replay Desktop
REPLAY DESKTOP 3Play’s live production features are all available from its unique Replay Desktop. The various features, controls and modules on the Replay Desktop are essentially laid out in horizontal bands, as seen below. Titlebar Monitoring & Control Clip List List Play Tags... -
Page 23: Features
Figure 5 o Some very important features occupy prime visual real estate in small panes just beneath the Channel Info displays. A large, high-visibility field at left in this zone is referred to as the FastClip toolbar (Figure 5). o Selecting a data field in the CLIP LIST or PLAY LIST snaps its content (whether a Memo entry, Event ID, or time value) into the dataview window in this pane. -
Page 24: Physical
Play list module supports inserting pre-recorded video, sound and imagery into your live productions. Send both primary outputs (A and B) across your network to any NewTek or other production system, software or device supporting NDI, leaving the SDI outputs free for other purposes. Page | 10... -
Page 25: Monitoring
Use one SDI output for program output, another as preview, and switch sources with colorful Animation Store transitions. Display highlight reels with colorful transitions, bumpers and audio bed using either output channel. Send supplemental video output to projection systems or secondary monitors at session resolutions up to 1920x1080/p60. -
Page 26: Video Processing
The Record button is located in the titlebar above the output monitors. Valuable information about the recording and remaining space is displayed nearby. Recording can also be enabled from the NewTek 3Play Control Surface. Page | 12... -
Page 27: Bookmarks
2.6.7 BOOKMARKS 3Play’s timecode bookmark system is almost too easy to use. There are a maximum of ten bookmarks. Simply press BOOK MARK on the CS to set bookmarks in your footage (REC must be enabled). Press SHIFT + BOOK MARK repeatedly to jump sequentially back through the markers you’ve set (3Play will switch to Delayed playback mode). -
Page 28: The Play List
Figure 13 The ‘angle’ columns beneath are actually Memo columns, and allow you to enter comments, tags, and other metadata that, with the Search feature, can help you quickly locate specific views for playback, inclusion in playlists, etc. The CLIP LIST offers an unlimited number of tabbed pages to help you manage your recorded content. In addition, the CLIP LIST supports the import of media clips as well as still images for various purposes (the PLAY LIST also supports imported files). -
Page 29: Text, Tags And More
3Play output can employ spectacular high-end transitions, including Animation Store effects that include full color embedded overlays, in several ways. PLAY LIST compositions, such as highlight reels, support transitions between clips, each with adjustable timing and even accompanying transitional audio effects. Unlike many replay systems, 3Play does not tie up two different outputs Figure 16 to do this. -
Page 30: Publish
2.6.12 PUBLISH Though a relative newcomer, social media has carved an important niche for itself in the realms of video production and broadcasting. 3Play can publish both still images and trimmed, commented clips from CLIP LIST or PLAY LIST pages to popular public sites, along with traditional production storage. Media can even be published while events are still underway, while live capture continues uninterrupted. -
Page 31: Setting Up
SETTING UP This chapter explains how to properly connect power, external control devices, monitors and audio visual sources to your NewTek 3Play® system. It also reviews registration for warranty purposes and technical support. After completing this short section, you’ll be all set to continue into the Walkthrough chapter that follows it. -
Page 32: Registration
Figure 19 3.2.1 ONLINE REGISTRATION If you have connected your 3Play to the Internet, simply click the button under Step 3 in the registration dialog. This will take you to NewTek’s website, where you will find further directions. Page | 18... -
Page 33: Registering By Telephone
Internet. 3.2.2 REGISTERING BY TELEPHONE NewTek’s Customer Support desk can also handle registration requests by telephone, if that is more convenient (when opportunity permits, you should still visit the website as discussed above, in order to gain access to software updates). -
Page 34: Genlock Connection
Analog audio inputs: 1-4 Analog audio outputs: A, B, and *Phones jack SDI Video Inputs 1-4 and Genlock input. SDI Video Outputs 1-4 and Tally connector Note: The Phones output signal follows Aux, the active control channel delegate – A or B. As desired, connect any local SDI video sources to one of the BNC connectors in the SDI IN section. -
Page 35: Connecting Devices
Notes: Multiview options and layouts are found in the Workspaces menu (located in the Dashboard). For best results, configure the Multiview Output to the native resolution of the external display (monitor or projector) connected to it. 3.4.2 CONNECTING DEVICES As mentioned earlier, the VIDEO OUT section on 3Play’s backplate provides four BNC connectors. These represent: 1. -
Page 36: The Home Page
RECORD MODE (4RU 3PLAY) Figure 22 For the 4RU 3Play 3P1 model only, continue with session creation by selecting a Record Mode (see Section 5.2.1 for an explanation of these options). Then assign drives to pairs of cameras you intend to recording controls in the Storage Volumes control group below. -
Page 37: The Session Page
The hard drives assigned here can be thought of as comprising a ‘drive set’ for the session. The Session Volume menu allows you to designate the primary member of the session drive set (see Section 5.2.1 for more detail). Figure 23 Tip: The Storage Volume configuration tools are designed to encourage you to record no more than two live inputs to any single volume. -
Page 38: The Replay Desktop
3.5.3 THE REPLAY DESKTOP Figure 24 Initially, as you have yet to configure input devices or add content, the Replay Desktop will look a bit barren (Figure 24). We had a brief glimpse at the Replay Desktop back in section 2.5 (and we’ll examine it more closely in Chapter 4, Live Production Walkthrough), but after a quick look around let’s continue to configure your input and output connections. -
Page 39: Aux
Genlock & Failsafe. (See Section 7.1 for more detail on the Output Configuration panel.) 3.6.1 AUX 3Play 3P1 has an additional output, not shown in the Output configuration panel. The Aux output displays the video source designated by the Channel Delegate active on the Control Surface at the moment. -
Page 40: Configure Video Input
Again, ideally the cameras themselves as well as 3Play should be genlocked. If cameras are not genlocked to the same reference signal as 3Play, a TBC (Time Base Correction) operation is automatically applied. Time base correction may drop or insert frames as necessary to maintain sync, a less desirable approach. Note: For a deeper explanation of genlocking, please see Section 7.1.2. -
Page 41: Configure Audio
CONFIGURE AUDIO The Audio control group in the lower part of the Configuration panel has Input Type and Gain control features for the external audio source in the same input group as the current video input. Figure 29 The upper menu permits you to choose a different audio input to be captured with the video clip for this camera. - Page 42 8. Click the Change button, and enter the name of your local workgroup, as provided by your system administrator. 9. Close the OK button. 10. Close the System control panel. 11. At this point, the network connection should be functional. If further help connecting is required, please consult your system administrator.
-
Page 43: Live Production Walkthrough
LIVE PRODUCTION WALKTHROUGH This chapter provides a quick hands-on tour of the major components and functions of your NewTek 3Play®. In a very short time, these basics will be second nature to you. More detailed reference material on all aspects of 3Play follows in Part II (Reference). - Page 44 Figure 31 – 3RU model shown Note: For the 3RU model 3Play 3P1, we recommend the “Redundant (4 Channel)” Record Mode for most purposes. 2. As part of the session setup process, assign different camera pairs to individual drives, under Storage Volumes.
-
Page 45: The Replay Desktop
THE REPLAY DESKTOP Figure 33 5. At this point, you should see the (unpopulated) Replay Desktop – see Figure 33. 6. We discussed configuring input and output connections and devices for new sessions back in sections: 3.3 (Input Connections) ... -
Page 46: Record
10. Push B on the Control Surface to change the Channel Delegate to B. 11. Press LIVE again, to set the Source Delegate for Channel B – note that outputs have independent Source Delegates. 12. Hold down ANGLE again and push 1 to delegate input 1 to Channel B. RECORD 13. -
Page 47: Marking Events
18. Press the T-Bar to the top (100%) setting. Notice that the ‘behind live’ time display locks, since output (though Delayed, not LIVE) is no longer falling further behind. MARKING EVENTS With recording enabled, continuous capture of inputs configured for recording when creating the session (in Startup) is taking place. -
Page 48: List Navigation
24. Wait for a few more seconds to elapse, and then press OUT only – without pressing IN first. 25. Repeat this step several times, allowing a few moments to pass between repetitions. Notice that – even though you haven’t pressed IN first – new ‘complete’ events have been added to the CLIP LIST. -
Page 49: Memos And Tagging
The playhead jumped back to the first frame of the current clip Playback resumed Tip: Simply tapping the | (Previous) button during play in this manner provides a very useful ‘Let’s see that again’ function. Keep an eye on the CLIP LIST for this next bit: 33. - Page 50 38. Use the keyboard to type “touchdown” (without quotes). Observe that your text entries appear immediately in the FastClip dataview (Section 2.6.4), but are not immediately added to the selected Memo cell (Section 2.6.8). 39. Press the ENTER key on the Control Surface (or keyboard). Note that this pushes your input (touchdown) into the currently highlighted Memo field.
-
Page 51: Tagging Clips
In this case, rather than merely updating the Memo field with its own existing value, pressing ENTER did something special in this case. The text entry cursor in the dataview automatically jumped exactly one space to the right of the current Memo field value (Figure 36). This is the perfect place for it to go when you want to quickly append something to the existing entry –... - Page 52 49. Click cell just to the right of the SKIP entry. Type “home” (without quotes) on the keyboard 50. Press ENTER – the cursor will automatically advance to the next cell and await further input. 51. Type “visitors”. At this point, the entries in your first TAGS tab should resemble Figure 37. Let’s add some entries to the other default tab, and then stop to review what we’ve accomplished.
-
Page 53: Search And Go To
Let’s add some more metadata to complete our Memo entry for this clip. 63. Enter “03” using the number pad – again, do not press ENTER. 64. Now enter “02”, using the number pad. The dataview should now show the value “home smith foul”. By entering just 5 digits, we have formed a little metadata ‘sentence’. -
Page 54: Trimming Events
70. Search for “smith” (without quotes). All three events with the entries above in their Memo cells will appear in Search Results. 71. TAB back to the original CLIPS LIST tab, and use the keyboard to replace the current dataview value with “smith foul”... -
Page 55: Managing Events
4.10 MANAGING EVENTS 77. With the mouse, drag either the Event ID column entry or the Memo field for any clip in an event up or down and release it, to re-order the events in the CLIP LIST. 78. Test the use of COPY, SHIFT + COPY (PASTE) and PUBLISH to remove events or PLAY LIST clips, or move them between tabbed panes. -
Page 56: Speed Control
85. Roll the Jog Wheel to move through the PLAY LIST sequence, and watch the output monitor. As play moves from the Out Point of one clip to the In Point of the next, note that the red ‘currently playing’ highlight in the Clip ID column at left tracks the current playback position. 86. -
Page 57: Part Ii (Reference)
PART II (REFERENCE) A thorough examination of the various aspects of your NewTek 3Play 3P1™; every button, menu item, feature and control is considered in this section so you can take full advantage of your system. Page | 43... -
Page 59: The Startup Screen
We’ll discuss each of these in the pages that follow, but first – a review of the concept of sessions. The Startup Screen appears whenever you launch NewTek 3Play®. From here, you create, configure, manage and launch 3Play sessions by making selections from the icon ring. -
Page 60: The Home Page
How are cameras connected (are you using component or SDI connections, or a combination of several types)? As you continue, you may make other adjustments relevant to your current production requirements: You might calibrate your cameras individually using the Proc Amp settings in the Input Configuration panels. -
Page 61: New (Session)
This is the first thing you encounter on launching 3Play. Figure 40 shows the Home page menu. When you click a link in the menu (such as New or Open), the right-hand pane of the Home page updates to provide options related to your selection. For example, the first thing you will generally do is create a session. - Page 62 RECORD MODE Figure 43 For 3RU models, two optional session modes offer either Redundant (4-channel) recording or Standard (8 Channel) working modes. Generally, hard drives can capture input from two live sources), while keeping up with concurrent playback demands. REDUNDANT (4-CHANNEL) In this mode, data for each input channel is mirrored to a second drive, providing failsafe storage and convenient sharing options for your critical footage.
- Page 63 Suitable hard drives added to a removable drive bay or otherwise connected are listed in the Drives column. 3Play attempts to make an appropriate initial guess at how best to distribute the drives it detects, but you can manually select drives as well. Note: In Standard (8 Channel) session mode, the Backup column in this area is not used.
-
Page 64: Open (Session)
Figure 46 3Play also provides Video Standard options, allowing you to choose between NTSC or PAL for your session, according to your local regional requirements. The Resolution radio button groups allow you to further configure the recording and output format for the new session. Note: See Section 7.1 for more information on Video Output configurations. -
Page 65: Shutdown
Figure 48 Note: Media configured as Read-only is not shown for the New or Open (session) features, since they cannot be used for sessions. However, Read-only media can be used for import purposes. CONTEXT MENU Right-click a session name to open a context menu with two items listed in it: Rename and Delete. The Delete function should be used thoughtfully, as it cannot be undone. - Page 66 If the system is connected to the internet, clicking Update 3Play will walk you through the process of checking for new software patches provided by NewTek. This way you can be sure the very latest version of the software for your system is installed.
-
Page 67: Help
time locating and assembling its sections before you can read it. How much better it would be to slide the remaining books closer together, combining all the free space first. Unfortunately, computers are ‘foolish librarians’. They tend to want to fill in all the gaps in their storage areas, even if it means literally shredding your ‘book’... -
Page 68: File Management
5.3.1 FILE MANAGEMENT Figure 53 At times you may find it useful to be able to quickly access the various files associated with the current session. The links at right on the Session page under the heading Browse provide access to default session folders. - Page 69 Figure 54 Some highly compressed video files may not be well suited to live playback. Enable switches in the Transcode column for files you wish to convert to a friendlier format on import. Files can be re-ordered by dragging their entries up or down with the mouse, or removed from the list by highlighting them and clicking Remove.
-
Page 71: The Replay Desktop
THE REPLAY DESKTOP The Replay Desktop serves as your production control center. It provides control over input and output configuration, recording, clip marking, PLAY LIST preparation and playback, and much more. This chapter provides a top-level view of the Replay Desktop, with more detailed information following in subsequent chapters. -
Page 72: A Few Hints
1 - Dashboard •Menus (settings and options), quick access to Grab, Record, and timecode are shown when the mouse pointer is moved over this area of the screen. 2 - Monitoring • Input Monitors - monitor all active inputs for the session •... -
Page 73: Customizing The Replay Desktop
Control Type Type Examples Usage Numeric field Point, Drag in line with the control Point, Duration, orientation to raise or lower Crossfade, etc. the current value. Or select and type, and then press Enter. (Esc cancel changes.) Numeric Audio Gain, Proc Drag in line with the control’s slider Amp controls,... -
Page 74: Multiple Displays And Monitoring
Figure 57 To do so, click the Configuration button (gear icon) at right in the monitor titlebar for a given input. The Input Configuration panels have editable Name text fields for each source. 6.3.2 MULTIPLE DISPLAYS AND MONITORING The Replay Desktop monitor tabs and Multiview options can be flexibly combined to show what you want to see, where you want to see it. -
Page 75: Status Messages
Time Recorded and Left on Disk (estimate of room available at current recording rates on the ‘most full’ session volume) Grab tool and configuration controls Record (toggle) and time elapsed since the current recording began Time (from external timecode input or system clock)and Timecode Configuration ... - Page 76 OPTIONS One Button Marking – Section 8.10.1 discusses methods you will use to mark (define the in and out points for) CLIP LIST events. The “one button marking” method requires only that you press the OUT button; an In point is set automatically at a pre-defined earlier time. This menu items lets you choose the offset used for the automatic In point.
-
Page 77: Grab & Record
The layouts for all Multiview monitors is governed by Workspace presets. Roll the mouse over the Dashboard to reveal the Workspaces menu, and click it. Then select a preset for either any Multiview using this menu as shown (Figure 62). Viewports also have further custom options, such as the display of VU meter overlays. -
Page 79: O Configuration
I/O CONFIGURATION NewTek 3Play® provides extensive control over your video signal at both input and output stages. In addition to basic format connection options for both audio and video inputs, each video source has its own realtime Proc Amp. Other important options include support for supplemental Multiview monitors, external timecode support, and genlock configuration. -
Page 80: Genlock & Failsafe
The Output Configuration panel (Figure 66) has several tabbed panes. The first two are labeled Output A and B, and contain controls discussed momentarily. The Genlock & Failsafe tab is home to important video timing calibration controls. We’ll review it shortly, as well.) The video format sent to 3Play’s video outputs (SDI or NDI) always matches the session format, which you choose in the Startup screen when first creating the session. - Page 81 Figure 67 This allows 3Play output to be synchronized to other external equipment that is locked to the same reference. Genlocking is not an absolute requirement in most cases, but is recommended whenever you have the capability. Tip: “Genlock” refers to “generator locking”. Professional video devices often provide a “genlock input”, which allows an external reference signal (often referred to as ‘house sync’) to control its video timing.
- Page 82 Even so, problems result if one soldier leads with the left foot while others are on the right. Or perhaps everyone is evenly spaced and perfectly aligned but for one misfit who ‘tailgates’ the soldier ahead of him and keeps stepping on his heels. This is essentially why the Genlock tab provides several settings.
-
Page 83: Multiview
FAILSAFE Figure 70 3Play’s multi-tiered ‘Always on Air’ hardware and software failsafe systems (see Section 2.6.2) provide confidence that short of a complete power failure the show will go on. In some settings, however, more elaborate hardware failsafe systems may be in use. Typically, such systems take over broadcast duties whenever the output signal fails. -
Page 84: Input Settings
7.2.1 INPUT SETTINGS VIDEO SOURCE AND FORMAT Figure 72 The Input Settings tab in the Input Configuration panel features a Connection Type menu at the top. The available sources listing leads off with Local options, representing the hardware SDI input connections on 3Play’s backplane. - Page 85 720/50p 720/25p 576i (16:9) 576i (4:3) NAME The Name field (next to Connection Type) is editable, allowing you to enter a custom name for each input. The name supplied will appear elsewhere in the user interface, including in the HUD (Heads-Up Display). AUDIO SETTINGS Figure 73 Section 3.9 detailed Input Configuration panel controls devoted to Audio setup.
-
Page 86: Color Balance
7.2.2 COLOR BALANCE AUTO COLOR Figure 74 Lighting conditions can change dramatically during many live events, especially those held outdoors. Adding to this problem, production usually involves multiple cameras and, all too often, these may not have uniform color characteristics. Ensuring consistent color when switching from one angle to another, avoiding unwelcome brightness or color shifts as evening falls or when a cloud obscures the sun briefly can be troublesome, and expensive. - Page 87 LISTEN ONLY The Listen Only switch allows you to include a source in the Multicam group without adding its own feed to the group evaluation. Thus a camera trained on Fenway Park’s giant ‘Green Monster’ left-field wall can be automatically corrected without disproportionately biasing the group evaluation and consequent Auto Color correction.
-
Page 88: Timecode Configuration
Expand the Advanced control group to access more elaborate color controls for individual color channels. TIMECODE CONFIGURATION NewTek 3Play can supply timecode from its internal system clock, or can refer to an external LTC (Linear Timecode) source supplied to 3Play inputs (see Section 3.3.3). This timecode is embedded in video files captured during the session. -
Page 89: Production Time Display
7.3.1 PRODUCTION TIME DISPLAY The control group labeled Production Time Display allows you to enter time values that are specific to the current event. When the Start switch is lit, the time you set in the numeric field at right is used to supply the Production Start time display in Multiview screen layouts that include clocks). -
Page 91: The Control Surface
DUAL CHANNEL REPLAY In many ways, it would not be incorrect to think of your NewTek 3Play system as not just one, but two conjoined ‘playout’ devices. The system features two fully independent audio/video busses and outputs, referred to as Channel A and Channel B. -
Page 92: Channel Delegates
Each output channel can function completely independently of the other; either can be directed at any time to transmit any The color in the Channel Info available audio/video source, whether live or recorded. area indicates the source Physically, these two channels are individually supplied to type sent to the channel: connectors on the system’s backplate for output to downstream blue for the CLIP LIST, gold... -
Page 93: Transitions (Take | Auto)
(and control). That’s where the Source Delegate comes into play. Your NewTek 3Play can deliver audio/video output from one of three possible sources: CLIP LIST – the currently selected clip (angle) in the CLIP LIST ... -
Page 94: Clip List
Figure 83 Naturally only one Source Delegate can be active for a given channel at any time. Note that your Source Delegate selection determines not only the source on the delegated channel, but also the source other controls affect – whether LIVE (video from an input), the CLIPS LIST or PLAY LIST. Tip: Another way to change the Source Delegate is to click the mouse in the CLIP LIST, PLAY LIST. -
Page 95: Independent States
INDEPENDENT STATES 3Play stores the Control and Output Delegate states for Channel A and B independently, along with other important parameters – including the current CLIP LIST or PLAY LIST selection state, playhead position, and so on. Consider an example: •... -
Page 96: Record
RECORD The REC (Record) button activates capture of a/v data to file(s) on assigned storage volumes on or off. (The specific sources that are recorded are configured in Startup when creating the session; see Section 10.1, and also 10.3.1). Note that simply pushing REC again does not disable recording. To prevent accidental interruptions in capture of important events, you must Figure 86 hold down SHIFT before pressing REC when you wish to stop recording. -
Page 97: Play
8.6.3 PLAY Pushing PLAY initiates playback of the currently selected source – whether a clip in the CLIP LIST or PLAY LIST, or a Delayed video source. Pressing PLAY when a clip has stopped its last frame replays it from the beginning. -
Page 98: Play Speed (T-Bar Section)
PLAY SPEED (T-BAR SECTION) This group contains just two controls, an illuminated T-Bar, and a button labeled +/-. Adjustments to T-Bar position progressively modify playback speed, and can also automatically engage playback when not already in progress. Since, at a given moment, Channel A and B may well be set to different playback speeds, the T-Bar position may not initially reflect the correct speed when you change which channel is Figure 88... -
Page 99: Shift
ANGLE button – see Section 8.11.) 8.10 SET | IN/OUT Marking events is, of course, the core business of NewTek 3Play. These two simple buttons will see a lot of use. Their roles are not complicated, but it would be good to review them anyway. -
Page 100: Set | Out
8.10.2 SET | OUT Naturally, if you have pressed the IN button to create a new event, setting an In Point, you realize that you can complete this operation by pressing the OUT button. In this case you set the event’s Out Point to the current timecode value, and as a natural consequence, establish the Duration for the event. -
Page 101: Book Mark
The ANGLE button thus also lets you revise the angle for a clip you have added to the PLAY LIST. 8.12 BOOK MARK Bookmarks are timecode references that are independent of marked In or Out points you may set for events. This is a very useful feature, enabling you to quickly skip through your recorded video to specific points. -
Page 102: Publish
Note: The Control Surface CUT/COPY/PASTE features operate on clips and events in the list panes. Similar operations in the dataview depend on standard keyboard shortcuts or context menu functions. 8.13.2 PUBLISH This button sends selected items to the Publish Queue (discussed in Chapter 15), from whence it can be further distributed to various destinations, including online streaming and social media sites, as well as local or ftp storage targets. -
Page 103: The Number Pad
The first digit for GO TO operations is treated as the tab number (superfluous leading zeros are ignored). This means that if you have 10 or less CLIP LIST tabs, entering a single digit and pressing GO TO jumps to the corresponding CLIP LIST tab. ... -
Page 105: Monitoring
3Play’s ample monitoring features are described in this chapter. Fittingly, NewTek 3Play provides monitoring features that are just what you need to prepare and control video replays in your productions. -
Page 106: Input Monitors
INPUT MONITORS Figure 98 Live input monitors for all sources configured for recording in the session are shown at left near the top of the screen. These previews are often referred to as ISO, or Isolation monitors. Tip: Depending on your choice when creating the session, you may see either four or eight input monitors. -
Page 107: Channel Monitors (A, B)
CHANNEL MONITORS (A, B) Figure 100 NewTek 3Play supports two fully independent video and audio output sections, referred to as Channel A and Channel B. The corresponding output monitors could hardly be more important, since, they show what you are currently sending to downstream devices and viewers. -
Page 108: Channel Info
9.3.1 CHANNEL INFO Figure 101 The Channel Info area below each output monitor provides a wealth of useful information about the video stream currently assigned to the channel. It may include any of the following: Name – the output channel name, as set in Output Configuration (see Section 7.1.1). Delegated channel –... -
Page 109: Recording And Storage
10 RECORDING AND STORAGE Recording audio and video from its inputs for review, instant replay or other purposes is the core function of your NewTek 3Play® system. This section provides helpful information about recording and storage volumes, as well as explaining how recording is enabled and disabled. -
Page 110: Recording And The Desktop
Note that drives may be shown that are unsuited for capture purposes because of low transfer or disk speed, or perhaps for other reasons. It is up to you when configuring external drives to ensure that the drive (and the connection method it relies on) is suitable for capture. Note: Simply configuring inputs for capture in the Startup Screen does not engage recording. -
Page 111: Grab
Note: For any single session, recording stops and restarts automatically after 24 hours, to create a new sequential file. A few frames may be dropped during the interval between ending and resumption of capture. (Timecode dropouts can also result in a break in the recorded files.) INFORMATION DISPLAYS The Replay Desktop version of the Record button is accompanied by two useful data displays, Time Recorded and Left On Disk. - Page 112 A default Base Name for the files is supplied, or you can supply a name of your own choosing. The name will be numerically incremented as required. Enable De-Interlace if you wish to avoid a ‘comb’ effect caused by inter-frame motion in fielded sessions. Enable the Add to Clip List switch to automatically include newly captured clips at the end of the current CLIP LIST tab, ready for immediate playback during the live production.
-
Page 113: The Clip List
11 THE CLIP LIST The core functionality of your NewTek 3Play® is to capture multiple views of live events, and allow you to quickly recall and display any portion of that recorded footage with ease and accuracy. The CLIP LIST is repository for newly created events, and also serves as the library where production assets are organized and managed. -
Page 114: Tab Menu
Tip: On smaller screens, use the < and > buttons at either end of the titlebar tab row to access tabs at that have scrolled out of view. Newly marked events (and newly added media files) are added below existing rows on the current page. 11.1.2 TAB MENU Right-clicking a tab displays a context menu holding just one item –... - Page 115 Figure 111 An Add (Media) button sits at left below the first CLIP LIST tab (Figure 111). Click the button to open 3Play’s custom Media Browser, which can be used to add video clips or still images to the current CLIP LIST page.
- Page 116 LOCATION LIST The Location List is a column of favorite “locations”, grouped under the headings Clips, Stills, and My Media Locations. A list of sub-headings corresponding to named sessions or other content locations (discussed momentarily) can appear under these main headings. Media files that were imported from the Startup Screen will be shown in the File Pane at right when you select a Location sub-heading under Clips or Stills.
- Page 117 Figure 114 Filenames for media added to the CLIP LIST are initially shown in the Memo field columns for all camera angles. (Since the Memo field is editable, you can modify these entries without breaking the link to the file. This allows the Memo entry to serve as an alias if so desired). The In Point for a video file is initially 00:00:00.00, unless the file has embedded timecode (in which case the clip’s start timecode serves as for the In Point).
-
Page 118: Media Asset Management Systems
11.2 MEDIA ASSET MANAGEMENT SYSTEMS The integrated Media Browser native to NewTek live production systems is a competent asset management system, enabling to quickly locate and work with files related to your sessions, or external files. Of course, more extensive media asset management systems provided by leading industry providers are also available within the NewTek ecosystem. -
Page 119: Event Id
Tip: Camera columns can display custom labels when one is supplied in the Name field of the Input Configuration panel for the corresponding source. 11.3.1 EVENT ID The Event ID column shows a unique identifier based on the CLIP LIST tab number and event row number, separated by a hyphen. -
Page 120: Memo Fields
Or navigate to the field using arrow keys, etc. (snapping the current timecode value into the FastClip dataview beneath the Output A monitor), then edit the existing value using the keyboard and press ENTER. Another approach to trimming is to Jog (using the Control Surface) to a different timecode position, and then hold down SHIFT while pressing IN or OUT to update the current In Point or Out Point respectively. -
Page 121: Playing Clips
Cut, Copy and Paste functions using the Control Surface or keyboard shortcuts (Ctrl + x, Ctrl + c, and Ctrl + v) work just as you would expect, and this offers another way to move events into other tabs. Alternatively, you can access these features from a context menu opened by right-clicking. (This menu also provides Audio Level settings for the recorded events.) See Section 11.1.3 for more. -
Page 122: Add To Play List
using the arrow keys or Previous/Next buttons results in the clip viewed being the one from the first camera in the CLIP LIST table. It is different when a clip is already playing. In this case, the new selection does not usurp the currently delegated channel’s output display. -
Page 123: The Play List
12 THE PLAY LIST At times you will likely wish to assemble and play a compilation of clips forming a highlight reel, or prepare such a sequence for other purposes. The PLAY LIST module supports these special playback features and more. Multiple PLAY LIST tabs let you organize and switch from one compilation to another with alacrity. -
Page 124: Add Media & Export To Clip List
Note: The number of tabs in the PLAY LIST is not limited to ten. You can add new tabs easily by clicking the + button at right, next to the last tab. On smaller screens, use the < and > buttons at either end of the titlebar tab row to access tabs at that have scrolled out of view. -
Page 125: The Play List Table
MUSIC CONFIGURATION Figure 122 More elaborate controls are located in the Music Configuration dialog (Figure 122). To open the Music Configuration panel, click the configuration button (gear) located to the right of the Music Track menu. The panel contains two controls as follows: ... -
Page 126: Play List Preparation
Figure 124 The columns, from left to right (Figure 123 and Figure 124), are labeled as follows: Clip ID – a non-editable display showing the numeric clip identifier. The hyphenated digit identifies the source angle for the clip. Note: The PLAY LIST Clip ID is based on the ID of the source added to the PLAY LIST. However, PLAY LIST clips are independent entities. -
Page 127: Changing A Clip
Hold down SHIFT while navigating (by any means) to another clip to select both clips and all others between them. Select the Memo cell for a clip, then press and hold Ctrl on the keyboard while clicking another cell to multi-select clips that are not near one another. -
Page 128: In And Out Points (Trimming Clips)
Tip: Multiple selections are supported for toggling sound on and off, as well as for direct keyboard level adjustments. 12.3.5 IN AND OUT POINTS (TRIMMING CLIPS) To change the timing of clips in the PLAY LIST, you can use the same methods described earlier for the CLIP LIST –... -
Page 129: Clip Context Menu
Tip: Multiple selections are supported for toggling the effect on and off, as well as for direct keyboard effect duration adjustments (remember to press Enter to conclude edits). The default transition is CUT. Click the cell to show a transition palette allowing quick selection of a different effect (Figure 125). -
Page 130: Play List Edls
Figure 127 See Section 12.3.6 regarding the Speed adjustments during playback. 12.6 PLAY LIST EDLS On exiting a session, 3Play® creates an EDL (Edit Decision List) file for each existing playlist. These files can be used to reconstitute a playlist in NLE (non-linear editing) applications with EDL file import support. 3Play’s EDL files are created on the master Session Drive for the session, in a folder located at drivename:\Media\EDL\session name\. -
Page 131: Tags, Search, & More
13 TAGS, SEARCH, & MORE “Instant replay” – just two words, but fraught with deep implications. Consider the word “replay”: As a minimum, this requires a powerful audio and video recording and playout system. But “instant” demands even more – not merely storage and playback technology, but a critical need to identify and recall key clips, and do so very, very quickly indeed. -
Page 132: The Tags Button
Figure 128 Figure 129 No matter what the content of a given tag cell might be, the cell itself is easily identified by its spreadsheet-style coordinates – that is, its row and column number. For example, in Figure 128, the tag cell at row 0 and column 2 has the text value “Visitors”. -
Page 133: Titlebar Tools
13.3.1 TITLEBAR TOOLS In a brand new session, the TAGS pane initially appears in the form of an innocuous bar (imaginatively labeled TAGS) across the bottom of the Replay Desktop. This is a drag bar, and also provides several added convenience features related to viewing or hiding the TAGS pane. -
Page 134: A Tagging Example
TAB MENU Right-click a tab to show a context menu holding two items: Rename – Give each tab a unique name to suit your needs. Delete – Tabs can be deleted at any time. Note: The number of tabs is not limited to ten. You can add new tabs easily by clicking the + button at right, next to the last tab. - Page 135 PLAYER SKIP Allan Squires Andrews Kane Allard Pope Price Kennedy Perry Duke Finch Berry Briggs ACTION SKIP bsk intfernc carry foul screen 3sec 5sec dbl-d pers foul flop The TAG button is lit on the Control Surface Auto Advance is enabled in the TAGS pane titlebar. As play proceeds, a player commits a foul, and you press (Mark) OUT to add the event to the CLIP LIST.
-
Page 136: Skip
The next entry (02) identified the second tag in the top row (Squires), and appended it to the dataview. Auto Advance kicked in again, moving us to the ACTION tab, where entering 03 added “foul” to the dataview content. ... -
Page 137: Search
13.4 SEARCH Searching for something … your glasses, car keys, your spouse (!) … can be oh-so tedious. It’s hard to beat the joy and relief when the search is successful, however – and sooner is always better than later. In an instant replay setting, too, there is no time to waste (if you can’t find just the right clip faster than your director can blink, you may just find yourself looking for a new job.) In recognition of the vital importance of this matter, fast, innovative search-related functions are intimately integrated throughout... -
Page 138: Finding Matches
TAGS feature lets you quickly populate the dataview with multiple terms perfectly suited to many searches. TAGS AS CRITERIA Earlier in the chapter (Section 13.2), we detailed various aspects of the TAGS feature, showing how it can quickly be used to build (simple or more) complex Memo entries. Figure 139 The TAGS feature can also be used to quickly add simple or more elaborate search criteria to the dataview. - Page 139 Figure 140 The table below illustrates which events will be added to the Search Results tab for a SEARCH operation based on the criteria shown at left: Search Criteria Search Result(s) a. home b. hom d. visitors 22 e. “visitors 22” First, we can see that a ‘perfect match’...
-
Page 140: Go To
13.4.3 GO TO Figure 141 As discussed in Chapter 8 (The Control Surface), the GO TO button has several functions. Pressed alone, GO TO takes an Event ID number as input, and takes you to the matching event row in the CLIP LIST when successful. -
Page 141: Import Tags
Tip: A red border is drawn around the dataview window when an entry is deemed to be inappropriate for the SEARCH or GO TO operation you choose. Naturally, you can also select cells in the Search Results tab to snap their values into the dataview, and then use the value for other purposes. -
Page 142: Csv Example
13.5.1 CSV EXAMPLE Prepare the CSV file on a single sheet in your spreadsheet software of choice. Identify each tabbed TAGS page by an entry in the first column. The example below illustrates the correct format for a table with two tabs named “Home”... - Page 143 22 Jones 03 Wade 15 Chalmers 08 Beasley 0 Douglas Notes: Row and column numbers for each tabbed list must be entered as shown. Any entry made in the ‘Skip” cells will be ignored. Page | 129...
-
Page 145: Transitions
14 TRANSITIONS 3Play’s powerful transitions deliver sophisticated style and state of the art capabilities to your replay output. They can even include custom graphics and audio, adding powerful emotional impact. This section explains the selection and use of appropriate transition effect, various transition workflows that 3Play offers, and the included graphics tools enabling you to author custom transitions. -
Page 146: Program Out
To distinguish this workflow from PLAY LIST usage, we borrow ‘program-preview’ terminology from the traditional video switcher realm, which employs a very similar approach. 14.2.1 ‘PROGRAM OUT’ In this workflow, one output is assigned ‘program out’ duties. The ‘program output’ comprises the signal path for principal replay output (i.e., the a/v stream selected on the ‘program bus’) to downstream devices, whether for direct display or further processes such as switching, recording, etc. - Page 147 Figure 145 In many cases, these transitions involve a blending of colors that follows some sort of pattern (Figure 145) – whether a simple ‘full-screen’ fade, an animated ‘radar’ or ‘blinds’ pattern, or something more elaborate. This said, some wipes in this class also perform translation (i.e., shifting of the imagery on x and y axes during the effect) and even stretching, compression, and rotation effects.
-
Page 148: Effect Settings
Store Creator add-on application. You can employ your own custom graphics, such as team logos, and more elaborate overlay animations along and embedded audio. Note: Audio embedded in Animation Store effects is not currently supported for the program-preview transitions, but can be heard in PLAY LIST effects. ANIMATION STORE CREATOR The Animation Store Creator application is launched from 3Play’s Startup>Home page. - Page 149 Transition timing for the current effect is set using the menu located just to the right of the effect icon. You can choose S(slow), M(medium) or F(fast) effect speed presets using the menu. Note that the default preset times is automatically adjusted for certain effects, and will also update depending on which effect type you choose.
-
Page 151: Dsks (Overlays)
15 DSKS (OVERLAYS) 3Play offers two fully independent DSK (Downstream Keyer) overlay channels – one for each primary output. Both provide integral alpha channel support and independent Positioner controls (including edge cropping). Video and graphics overlays can be scaled and cropped, and placed anywhere within the video frame. -
Page 152: Overlay Graphics And Telestration
Use DSK position tools to create a ‘squeeze-back’ of the assigned source. You can cover two independent events simultaneously in this manner; show live gameplay while playing a highlight reel, or a commentator during an instant replay, and much more. Note: When working with a Program-Preview transition workflow (See Chapter 14), the DSK channels swap each time a Take or Auto is performed. -
Page 153: Cameras
The various alternatives are accessed via drop- down menus supplied for each DSK, and include the following: Cameras – any connected live video source Clip List Preview – a selected angle from the current CLIPS LIST selection (not available in 3Play Mini) ... - Page 154 Using a buffer as a DSK source also eliminates the risk of accidentally displaying the wrong graphic (as might otherwise happen if the current CLIPS LIST selection was not the one intended). SELECTING AND MANAGING BUFFERS When you move the mouse over a Buffer entry in the source menu (e.g., Buffer 1) a gear gadget appears next to its label.
-
Page 155: Ndi® Sources
Consider just a few of these: Use NewTek’s LiveText™ titling application to supply graphics and titles to 3Play. Many third party products, too, can send and update scoring, timing, statistics, and similar displays to 3Play’s network input. - Page 156 Figure 155 selector menus for network inputs as “3Play(A)” and “3Play(B),” where “3Play” is the network name for the system. 3Play 3P1 also supplies ‘clean’ versions of the A and B outputs over NDI – free of overlays. This means that a video feed from another 3Play (or TriCaster) on the network can be utilized in a DSK channel without tying up one of the main video inputs.
- Page 157 NDI Telestrator Pro on a suitable external host, expand the video source control at upper-right and choose one of the two ‘clean’ NDI output from a 3Play 3P1 system. The application will automatically connect to the 3P1 system and assign the “Clean Out” 1 and 2 outputs as background sources to Telestrator Pro’s A and B drawing canvasses.
- Page 158 Figure 159 The drawing tools palette and color wells at left in the Telestrator provide many different brush types, including support for animated gifs (Figure 159). The most recent brush choices are represented by preset icons in the upper row of the toolset. Click the stamp button (Figure 160) at lower-left to work with bitmap images, or the drawing tool button above to reveal freehand and shape drawing tools (Figure 162).
- Page 159 REVERSE KEYING Figure 163 3P1’s Reverse Key feature is found in the Output A and Output B tabs. Let’s talk about the underlying technology of this feature, which is generically called “chromakeying”, or simply “keying”. Keying has become an essential tool in video and film production. Typically, foreground footage is shot in front of a blue or green screen, and then that background color –...
- Page 160 COLOR The key (background) color is chosen using the Color button. Click the Color sample box and keep the mouse button depressed. Drag the eyedropper tool over one of the video monitors to choose the color you wish to remove and then release it. The neighboring ‘color well’ is updated to show the color selected. Hint: Enable the Lumakey switch to disregard hue, and base the effect solely on luminance.
-
Page 161: Configuration
Hint: It can be useful to zoom in using Position controls when fine tuning LiveMatte. THIRD-PARTY APPLICATIONS DEVELOPER NETWORK The NewTek Developer Network comprises a large and ever-growing ecosystem of companies and products. Many world-class organizations have developed applications and systems with support for NewTek’s live production systems. -
Page 162: Position
The Fade control group allows you to enable or disable a crossfade transition effect that is optionally used to show or hide the DSK display. The nearby menu allows you to set the duration of the crossfade. Naturally, when the fade is disabled, the operation of displaying or hiding the DSK occurs as a cut. -
Page 163: Export Media
16 EXPORT MEDIA The Export feature provided in 3Play’s Replay Desktop allows the operator to selectively publish clips and still images to local or networked storage, and upload directly to popular social media sites, on the fly. This process can be performed even while the action and replay marking continue. Networks, corporate users and others with sophisticated website and distribution needs can deliver all the action moments after it occurs, with valuable benefits. - Page 164 Figure 167 Tip: Remember that you can Add and even upload files while recording is underway. All of the entries you add appear in the export queue at right. Information about the clips and stills is displayed in columns, including Duration, a Title, Comment, and export Preset.
-
Page 165: Social Media Sites
16.2.1 SOCIAL MEDIA SITES The Export feature can upload media to numerous social media sites, including Facebook®, Twitter®, Vimeo®, YouTube® and more. Other connections may be supported as it becomes possible to do so. Selecting a social media service from the options shown when you choose New Preset will open a dialog that allows you to configure the settings and credentials required by that service. - Page 166 PUBLISHING A GRAB The Grab feature makes it even child’s play to publish still images. You can grab every active live source and both outputs with just one click. When Add to Export Media is enabled in the Grab Still Configuration panel (see Section Grab), the grab from the currently delegated channel (A or B) is added to the export queue each time you grab a still.
-
Page 167: Macros And Automation
17 MACROS AND AUTOMATION Macro capabilities smooth out your workflow, reducing complex operations to a single button press, and make it easy to produce sophisticated programs. Macros provide many opportunities for both workflow streamlining and creative applications. (As well, macros can reduce or eliminate embarrassing operator errors.) Keeping up with the action, having just the right angles on tap with little or no notice, preparing media for highlight reels and post production all calls for near superhuman performance from instant replay... -
Page 168: Session Macros
Figure 172 The System Commands folder includes commands identical to those actually called by the user interface and Control Surface to operate your 3Play – specifically those commands which have default shortcut keystrokes assigned to them. Expand this entry by clicking the triangle at left to see these items. Hint: Notice that keystroke shortcuts for macro entries are shown at right. -
Page 169: Macro Playback Speed
Continue to define the macro by clicking the nearby Record button. Then just go ahead and perform the sequence of operations you wish to include in the macro. You can use mouse, keyboard, and Control Surface operations when doing so. When finished, click the Stop button to complete recording. -
Page 170: Shortcuts And Triggers
For this reason, we encourage you to use the Export feature to prepare a backup archive of your painstakingly designed macros. (This is quite easy to do, since Export of entire folders is supported, as is multi-selection.) 17.4 SHORTCUTS AND TRIGGERS Macros may be executed by menu, keystroke shortcuts, MIDI controller or GPI trigger. -
Page 171: Conflicted Shortcuts
17.4.1 CONFLICTED SHORTCUTS Figure 176 By the way, assigning identical shortcut combinations to multiple macros is supported, and deliberately so. Still, as you may wish to avoid conflicts, a yellow triangular gadget referred to as a ‘bang’ (or, if you are in a certain mood, a ‘conflict nacho’) is shown in this case. -
Page 172: Midi Controllers
Note: Many MIDI devices provide ‘plug-and-play’ convenience. Some, though, require non-standard device drivers. Generally, adding device drivers to NewTek products is discouraged, since these may not have been prepared with the rigorous demands of live production in mind. -
Page 173: Example - Controlling 3Play
For example, connecting one of 3P1’s NDI outputs to a TriCaster® input provides the necessary link to send shortcut commands to the 3Play, or trigger 3Play macros from the TriCaster. 17.6.1 EXAMPLE – CONTROLLING 3PLAY Let’s consider a simple example taking advantage of the potential this ability offers. Using TriCaster’s Macro system, it is easy to send instructions from TriCaster to 3Play systems whose NDI outputs are connected to the Switcher. -
Page 174: Remote Commands
As mentioned earlier, the macro shortcut entry “net1” addresses a controllable network source connected to the first network input on a NewTek live production system. A second NDI connected to input 7 would be addressed using the shortcut entry “net7”. - Page 175 The clip previously indexed as “AAA1” (using clip_store) is restored on the source system output channel connected to network input designated. The playhead is set to the beginning of the clip. (If the indexed clip is not located, nothing occurs.) CLIP_ SELECT Delay (ms) Shortcut...
-
Page 176: Amp Control
CLIP_ PLAY Delay (ms) Shortcut Value Key 1 Value 1 Key 2 Value 2 (time) net# clip_ play speed position You can specify “speed”, “position” or both keys (the order of keys is not important). When “position” is not specified, play begins at the current frame. The value for position is specified in seconds, while speed is expressed as a playback rate value (1.0 = 100%). -
Page 177: Configuring Amp
3Play responds to a number of AMP of commands received across a network connection from external devices. 17.7.1 CONFIGURING AMP 3Play’s AMP support is not unlike the macro implementation just described, but AMP does not enjoy the same ‘auto-magic’ communication configuration advantages. Thus you will generally need to configure the external controller to communicate with 3Play by providing its IP address (which you can locate, for example, by exiting to Windows and using the system Network and Sharing Center). -
Page 178: Gpi Controllers
17.8.1 CONFIGURATION For an external GPI device to communicate with a NewTek live production system, it must be manually defined by text entries in the file named gpi_setup.xml. This file can be located in the directory at C:\3Play\Configuration\. The entry for a given GPI control device must contain an IP address and port, password, and custom name, entered as follows: <... -
Page 179: Sending Gpi Commands
17.8.3 SENDING GPI COMMANDS A special macro command allows you to send GPI signals to external devices and systems via network- connected GPI interface devices (such as the eBOX™ from JLCooper Electronics). GPI macro entries are formatted as shown below: Delay (ms) Shortcut Value... -
Page 180: Automation And Integration
Hint: Use the Record button in the footer of the Editor to insert newly recorded entries into the current at the selected line. 17.10 AUTOMATION AND INTEGRATION More advanced 3Play control methods, including TCP/IP are discussed in the comprehensive Automation and Integration Guide, which can be found at https://www.newtek.com/downloads/. Page | 166... -
Page 181: Part Iii (Appendices)
PART III (APPENDICES) A time-saving question and answer section, followed by an extensive listing of Shortcut Keys and keyword index … Page | 167... -
Page 183: Appendix A How Do I
If you’ve largely mastered your NewTek 3Play® system, but have a specific question, this may be the best place to look first. The headings that follow list related questions and answers together, along with cross- references and other helpful remarks. -
Page 184: Connections
A.1.1 CONNECT CAMERAS? 1. Connect traditional SDI video sources to the appropriately labeled BNC input connectors on the NewTek 3Play backplate – see Section 3.3. Or simply connect NDI video sources to the network your 3Play is connected to. 2. Open a 3Play session (or create a new one) from the 3Play Startup Screen, and launch the Replay Desktop. -
Page 185: Color Correct Mismatched Cameras
SD camera during an HD session, for example. The official broadcast standard for SD video is Rec. 601, but HD video conforms to Rec. 709 – and NewTek 3Play output color space is governed by the session format. -
Page 186: Improve The Quality Of Multiview Output
2. See Section 3.7 for details on configuring Genlock settings. A.1.6 CONNECT THE 3PLAY CONTROL SURFACE? Connect the USB cable from the Control Surface to one of your NewTek 3Play’s USB ports. Do not extend the supplied cable if possible. -
Page 187: Connect An External Hard Drive
Please refer to Section 3.10. A.1.9 ENABLE TERMINATION FOR VIDEO INPUTS? NewTek 3Play provides full-time video termination. If you need to loop through (or t-off from) upstream video devices (such as an external monitor) in your video pipeline, you should ensure termination is turned OFF for earlier devices. -
Page 188: Manage Selected Content Inside A Session
2. Return to the Home page. 3. Right-click the name of the session you want to rename in the list shown at right to open the context menu. 4. Choose Rename from the menu that appears. A.2.4 MANAGE SELECTED CONTENT INSIDE A SESSION? 1. -
Page 189: Play A Clip
2. This creates a new event in the CLIP LIST, setting an Out Point at the current timecode, and an In Point as required to fulfill the default duration set in the Options menu (see Section 6.4.2). Of course, you can trim the event afterward any time you wish. TWO-BUTTON METHOD 1. -
Page 190: Select A Different Play List Clip For The Same Time Period
5. (Optional) Enable the Music Track switch in the PLAY LIST titlebar and load a music file using the nearby menu (see Section 12.1.4). Adjust its level by clicking the Music Configuration button (gear) at right. A.3.6 SELECT A DIFFERENT PLAY LIST CLIP FOR THE SAME TIME PERIOD? 1. -
Page 191: Export Files To An External Drive
Alternatively, you might install NewTek’s free Quicktime™ codecs (available on the ‘Product Updates and Downloads’ page on the NewTek website), with a view to rendering to one of these directly on your FCP system. Actually, FCP does not natively provide broad Quicktime export options, but Compressor™ does; and FCP can use the latter as its encoder. -
Page 192: Resolve Serious Instability Or Dropped Frames
Restore function to completely rehabilitate your system. A.5.5 INSTALL MY FAVORITE SOFTWARE (OR CODEC)? NewTek 3Play is not a ‘general purpose’ computer. The installed software suite is finely tuned to provide reliable performance and amazing features. Anything you install apart from official updates places these important goals at risk. -
Page 193: Restore The System To Original 'As-Shipped' Condition
Regarding codecs, NewTek 3Play supports many popular image, audio, and video formats for playback. That said, hardly a day passes without another new one appearing on the scene. If a file you would like to use does not play back well (or at all), consider converting it to a friendlier format. The Import Media module makes this very easy to do. -
Page 194: Registration And Tech Support
Please refer to Section 3.2, Registration. A.6.2 CONTACT TECHNICAL SUPPORT? Visit the NewTek Website, at www.newtek.com and select Support from the main menu at the top of the page. This page always contains the latest support information for your NewTek products, including FAQs and documentation. -
Page 195: Find Hardware/Firmware Revision Numbers
Attempts to run screen sharing or remote desktop software on 3P are strongly discouraged (this includes NewTek’s own iVGA client). Applications of this type require significant system resources. At the same time, 3P ’s primary functions require unhindered CPU and GPU access. Adding the resource... -
Page 197: Appendix B Keystroke Shortcuts
APPENDIX B KEYSTROKE SHORTCUTS B.1 T ABLES AND AVIGATION Toggle CLIP LIST Angle Previews (Redundant sessions Ctrl + m only) Previous row Up arrow Next row Down arrow Previous cell Left arrow Next cell Right arrow One page up Page Up One page down Page Down First cell in row... -
Page 198: Marking
B.3 M ARKING Mark In Alt + i Mark Out Alt + o Reset In Point Alt + Shift + i Reset Out Point Alt + Shift + o Bookmark (set) Ctrl + b Bookmark (jump to previous) Ctrl + Shift + b B.4 S EARCHING Execute Search... -
Page 199: Appendix C Reliability Testing
We know our products play vital roles in the productions of our customers. Durability and consistent, robust performance are much more than just adjectives for your business and ours. For this reason, all NewTek products undergo rigorous reliability testing to ensure they meet our exacting test standards. For NewTek 3Play, the following standards are applicable:... -
Page 201: Index
INDEX Transport, 107 Trimming, 105 Codecs, 178 3Play Connect the Genlock source, 172 Register, 18, 180 Connections Cameras, 19, 69, 170, 171 Control Surface, 172 Apple® Final Cut Pro, 176 External Drive, 173 Asset Management (third party), 101 Genlock, 20 Audio LTC Timecode, 20 CLIP LIST menu, 107... - Page 202 Import, 54, 176 LiveText, 142 Final Cut Pro, 176 Loop, 83 LTC. See Connections Genlock Configure. See I/O Configuration Macros, 153 Connect. See Connections Conflicts, deliberate, 157 Macro Configuration pane, 157 Configuring devices, 164 Resolving conflicts, 157 Receive, 164 Sending GPI commands, 165 Send, 165 Triggering GPI, 164...
- Page 203 Power conditioning, 18 Shutdown, 51 Proc Amp. See I/O Configuration Exit to Windows, 51 Production Time, 75 System Utilities Publish, 16, 41, 61, 63, 88, 115, 149 Restore 3Play, 179 Utilities Defragment, 52, 177 Update 3Play, 178 Record, 6, 12, 32, 48, 95 Storage (external), 173 Register.
-
Page 205: Credits
Inno Setup is distributed WITHOUT ANY WARRANTY; without even the implied warranty of MERCHANTABILITY of FITNESS FOR A PARTICULAR PURPOSE. All other software with the 3Play not expressly noted as free is proprietary and subject to NewTek's copyright rights or those of its licensors. - Page 206 Copyright © 2018 NewTek Inc. All rights reserved.
Need help?
Do you have a question about the 3Play 3P1 and is the answer not in the manual?
Questions and answers