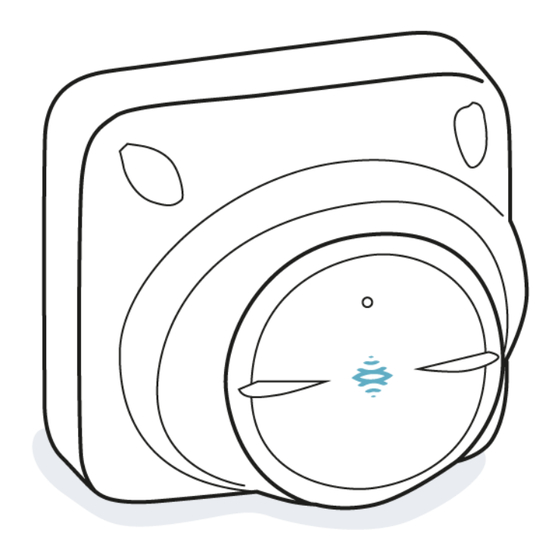
Inxpect MSK-101 Installation Instructions Manual
Intelligent motion sensor
Hide thumbs
Also See for MSK-101:
- Advanced configuration manual (36 pages) ,
- Advanced configuration manual (34 pages)
Table of Contents
Advertisement
Quick Links
Advertisement
Table of Contents

Summary of Contents for Inxpect MSK-101
-
Page 1: Installation Instructions
MSK-101 Intelligent motion sensor Installation instructions v1.0 - EN Carefully read this manual in its entirety. You will find useful information to take full advantage of the product's potential, use it safely and obtain the best results. Exclusive distributor for Europe... - Page 2 Transferring the document on websites or other electronic systems. Copying contents without any modification and stating Inxpect SpA as copyright owner. Inxpect SpA reserves the right to make modifications or improvements to the relative documentation without prior notice. Requests for authorization, additional copies of this manual or technical...
-
Page 3: Table Of Contents
Download Provided documentation Document Code Date Distribution format FEB 2018 PDF online Installation instructions (this manual) msk-101_instructions_en_wo v1.0 Advanced configuration manual msk-101_advanced-config_en_wo v1.2 FEB 2018 online manual PDF online MSK-101 | Installation instructions v1.0 FEB 2018 | msk-101_instructions_en_wo v1.0 | © 2017-2018 Inxpect SpA... -
Page 4: Get To Know Msk-101
Note: the container-base along a wall or gate (vertical direction). fastening screw is not a part of the sensor anti-removal and anti-tear system. MSK-101 | Installation instructions v1.0 FEB 2018 | msk-101_instructions_en_wo v1.0 | © 2017-2018 Inxpect SpA... -
Page 5: Barrier Configuration
- Example of installation with MSK-101-BM adapter. Sensor direction The MSK-101-BM adapter, according to the installation method, allows directing the sensor to the right or the left. Figure 3 - Sensor directed towards the right. MSK-101 | Installation instructions v1.0 FEB 2018 | msk-101_instructions_en_wo v1.0 | © 2017-2018 Inxpect SpA... -
Page 6: Field Of Vision
1.5 4.9 0° configuration. -15° Note: only some heights are reported, but every -30° 52.5 intermediate value is allowed and guarantees optimum performance. 2.5 8.2 -15° MSK-101 | Installation instructions v1.0 FEB 2018 | msk-101_instructions_en_wo v1.0 | © 2017-2018 Inxpect SpA... -
Page 7: Interferences
"Field of vision" on the previous page. NOTICE: other combinations are possible, but their performance must be validated in the field. Figure 7 - Front-front combination Figure 8 - Front-back combination MSK-101 | Installation instructions v1.0 FEB 2018 | msk-101_instructions_en_wo v1.0 | © 2017-2018 Inxpect SpA... -
Page 8: Installation And Use Procedures
"Assemble the cases sensor" below 2. "Connect the sensor to the alarm control unit" on page 11. 3. "Direct and configure the sensor" on page 11. 4. "Fasten the sensor" on page 13. MSK-101 | Installation instructions v1.0 FEB 2018 | msk-101_instructions_en_wo v1.0 | © 2017-2018 Inxpect SpA... - Page 9 1. Using the prepared holes, direct the base of the sensor as shown in the figure and fasten it to the wall or to the junction box with two screws (not provided). MSK-101 | Installation instructions v1.0 FEB 2018 | msk-101_instructions_en_wo v1.0 | © 2017-2018 Inxpect SpA...
- Page 10 (not provided). 5. Tighten the screws. 2. Assemble the adapter to the base, passing the cable with the wires coming out of the alarm control unit into the adapter. MSK-101 | Installation instructions v1.0 FEB 2018 | msk-101_instructions_en_wo v1.0 | © 2017-2018 Inxpect SpA...
- Page 11 8. Assemble the sensor housing to the adapter. leaving the connector in sight. Connect the sensor to the alarm control unit 1. Remove the sheath and the hose by at least 5 cm (2 in). MSK-101 | Installation instructions v1.0 FEB 2018 | msk-101_instructions_en_wo v1.0 | © 2017-2018 Inxpect SpA...
- Page 12 "45° downward inclination" on the facing page It can be fastened to the right or left of the sensor. 4. Tilt down the adjustable support to reach the desired sensor inclination. MSK-101 | Installation instructions v1.0 FEB 2018 | msk-101_instructions_en_wo v1.0 | © 2017-2018 Inxpect SpA...
- Page 13 Fasten the sensor 1. Tighten the screws to fasten the adjustable support. Check in the application that the adjustable support has not moved. 4. Insert the provided caps. MSK-101 | Installation instructions v1.0 FEB 2018 | msk-101_instructions_en_wo v1.0 | © 2017-2018 Inxpect SpA...
-
Page 14: Appendix
IV grade 3 and UL639 of conformity text is available on the following website: www.inxpect.com/security/documents. Note *: the device has been designed to be supplied by an external power supply unit for MSK-101 | Installation instructions v1.0 FEB 2018 | msk-101_instructions_en_wo v1.0 | © 2017-2018 Inxpect SpA... -
Page 15: Service And Warranty
How to return the product If necessary, pay to ship the product in its original packaging to the area distributor, or directly to the exclusive distributor. MSK-101 | Installation instructions v1.0 FEB 2018 | msk-101_instructions_en_wo v1.0 | © 2017-2018 Inxpect SpA... - Page 16 25081 Bedizzole (BS) Italy www.tsec.it info@tsec.it +39 030 57 85 302 Manufacturer: Inxpect SpA Via del Serpente, 89 MSK-101 25131 Brescia (BS) Installation instructions v1.0 Italy FEB 2018 www.inxpect.com msk-101_instructions_en_wo v1.0 security@inxpect.com Copyright © 2017-2018 Inxpect SpA +39 030 254 0300...


Need help?
Do you have a question about the MSK-101 and is the answer not in the manual?
Questions and answers