Yamaha TF5 Service Manual
Hide thumbs
Also See for TF5:
- Service manual (372 pages) ,
- Reference manual (91 pages) ,
- User manual (75 pages)
Advertisement
Quick Links
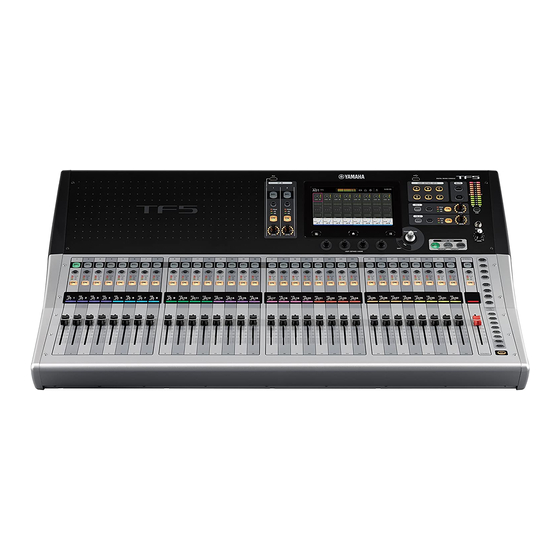
TF5/TF3/TF1
1.
Side Pad R Assembly, Side Pad L
Assembly
(Time required: About 1 minute each)
1-1
Side Pad R Assembly :
1-1-1
Remove the two (2) screws marked [80A]. The side
pad R assembly can then be removed. (Fig. 1)
1-2
Side Pad L Assembly :
1-2-1
Remove the two (2) screws marked [80B]. The side
pad L assembly can then be removed. (Fig. 1)
*
Remove the side pad R assembly and side pad L
assembly in the direction of the arrow in Fig. 1.
2.
Control Panel Assembly 24
(Time required: About 5 minutes)
2-1
Remove the side pad R assembly and side pad L
assembly. (See Procedure 1)
2-2
Remove the seven (7) screws marked [30], seven (7)
screws marked [40] and twelve (12) screws marked
[50]. (Fig. 1)
2-3
Open the control panel assembly 24 in the direction
of the arrow in Fig. 2, and fi x it with the panel stay.
(Fig. 2)
*
When opening the control panel assembly 24,
check that there are no screws or tools in area A of
Photo 3. Loose items may damage the exterior.
*
When you open the control panel assembly 24,
connector or connector assembly to prevent
damage, to be careful not too open the control
panel assembly 24.
2-4
Remove the control panel assembly 24 in the
direction of the arrow in Fig. 3.
*
When installing control panel assembly 24, see Fig. 4.
Be careful not to tuck connector cables inside.
*
When installing the control panel assembly 24,
tighten the screws in the order [30] → [40] → [50].
In each case, tighten screw a before tightening
other screws. (Fig. 1)
Precaution in handling the control panel assembly 24.
When placing the assembly with its panel face facing
down, be careful so that the control knobs do not contact
the fl oor.
46
1.
サイドパッド R アッセンブリ、 サイドパッ
ド L アッセンブリ
1-1
サイドパッド R アッセンブリ:
1-1-1
[80A] のネジ 2 本を外して、サイドパッド R アッ
センブリを外します。 (図 1)
1-2
サイドパッドLアッセンブリ:
1-2-1
[80B] のネジ 2 本を外して、サイドパッド L アッ
センブリを外します。 (図 1)
※
サイドパッド R アッセンブリとサイドパッドLアッセ
ンブリを取り外す際は、図 1 で示す矢印の方向へ外し
ます。
2.
コンパネ Ass'y 24
2-1
サイドパッドRアッセンブリとサイドパッドL
アッセンブリを外します。 (1 項参照)
2-2
[30] のネジ 7 本と [40] のネジ 7 本と [50] のネジ
12 本を外します。 (図 1)
2-3
図 2 の矢印の方向にコンパネ Ass'y 24 を開き、
パネルステーで固定します。 (図 2)
※
コンパネ Ass'y 24 を開く時は、写真 3 の A の箇所に、
ネジや工具などが置かれていないことを確認してくだ
さい。外装が傷つく可能性があります。
※
コンパネ Ass'y 24 を開く時は、束線やコネクタが破損
しないように、コンパネ Ass'y 24 を開きすぎないよう
に注意してください。
2-4
コンパネ Ass'y 24 を取り外す際は、図 3 で示す
矢印の方向へ外します。
※
コンパネ Ass'y 24 を取り付ける時は、図 4 を参照して
ください。また束線を挟み込まないように注意してく
ださい。
※
コンパネ Ass'y 24 を取り付ける時は、 [30] → [40] → [50]
の順にネジを締めてください。
各ネジはそれぞれ、 a のネジを先に締めてから他のネ
ジを締めてください。 (図 1)
コンパネ Ass'y 24 の設置注意
●
パネル面を下にして置く時は、ノブ等が床に当たり、
変形したり傷が付かないように置いてください。
(所要時間:各約 1 分)
(所要時間:約 5 分)
Advertisement

Subscribe to Our Youtube Channel
Related Manuals for Yamaha TF5


Summary of Contents for Yamaha TF5
- Page 1 TF5/TF3/TF1 Side Pad R Assembly, Side Pad L サイドパッド R アッセンブリ、 サイドパッ Assembly ド L アッセンブリ (所要時間:各約 1 分) (Time required: About 1 minute each) サイドパッド R アッセンブリ: Side Pad R Assembly : 1-1-1 [80A] のネジ 2 本を外して、サイドパッド R アッ...
-
Page 2: Lithium Battery
TF5/TF3/TF1 CONTROL PANEL ASSEMBLY 24 (コンパネ Ass'y 24) [30] SIDE PAD L ASSEMBLY (サイドパッド Lアッセンブリ) [80B] [50] [40] [50] BOTTOM ASSEMBLY 24 (ボトム Ass'y 24) LITHIUM BATTERY (リチウム電池) [80A] SIDE PAD R ASSEMBLY (サイドパッド Rアッセンブリ) (サイドパッド Rアッセンブリとサイドパッド Lアッセンブリの外し方) * This figure is the SIDE PAD R ASSEMBLY. - Page 3 TF5/TF3/TF1 • Installing the Panel Stay(パネルステーの取り付け方) CONTROL PANEL ASSEMBLY 24 CONTROL PANEL ASSEMBLY 24 (コンパネ Ass'y 24) (コンパネ Ass'y 24) BOTTOM ASSEMBLY 24 BOTTOM ASSEMBLY 24 (ボトム Ass'y 24) (ボトム Ass'y 24) CONTROL PANEL ASSEMBLY 24 (コンパネ Ass'y 24) PANEL STAY (パネルステー)...
- Page 4 TF5/TF3/TF1 • Installing the Control Panel Assembly 24( の取り付け方) コンパネ Ass'y 24 CONTROL PANEL ASSEMBLY 24 BOTTOM ASSEMBLY 24 (コンパネ Ass'y 24) (ボトム Ass'y 24) CONTROL PANEL ASSEMBLY 24 CONTROL PANEL ASSEMBLY 24 (コンパネ Ass'y 24) (コンパネ Ass'y 24) Notch (切欠き)...
- Page 5 TF5/TF3/TF1 Disassembly Procedure of Bottom ボトム Ass'y 24 の分解 Assembly 24 A-1. DA2 シート (所要時間:約 9 分) A-1. DA2 Circuit Board A-1-1 サイドパッド R アッセンブリとサイドパッドL (Time required: About 9 minutes) アッセンブリを外します。 (1 項参照) A-1-1 Remove the side pad R assembly and side pad L A-1-2 コンパネ...
- Page 6 TF5/TF3/TF1 A-2. DA1 Circuit Board A-2. DA1 シート (所要時間:約 12 分) (Time required: About 12 minutes) A-2-1 サイドパッドRアッセンブリとサイドパッドL A-2-1 Remove the side pad R assembly and side pad L アッセンブリを外します。 (1 項参照) assembly. (See Procedure 1) A-2-2 コンパネ Ass'y 24 を固定します。 (2 項参照)...
- Page 7 TF5/TF3/TF1 A-4. BRDG Circuit Board, MAIN Circuit Board A-4. BRDG シート、MAIN シート (Time required: About 15 minutes) (所要時間:約 15 分) A-4-1 Remove the side pad R assembly and side pad L A-4-1 サイドパッド R アッセンブリとサイドパッド L assembly. (See Procedure 1) アッセンブリを外します。...
- Page 8 TF5/TF3/TF1 Remove the SHIELD PS ASSEMBLY. (シールド PSアッセンブリの外し方) <Top view (上面) > SILICON PLATE B [346] [240] (珪素鋼板プレート B) [390] BOTTOM ASSEMBLY 24 (ボトム Ass'y 24) SUPPORT ANGLE SHIELD PS ASSEMBLY (サポートアングル) (シールド PS アッセンブリ) <Rear view (背面) > [230]...
- Page 9 TF5/TF3/TF1 <Top view (上面) > [320] [310] [200] MAIN BOTTOM ASSEMBLY 24 (ボトム Ass'y 24) LITHIUM BATTERY (リチウム電池) <Rear view (背面) > [290] [295] BOTTOM ASSEMBLY 24 MAIN (ボトム Ass'y 24) Fig. 8 (図 8) OPT ANGLE ( OPT アングル)...
- Page 10 TF5/TF3/TF1 A-5. PS Circuit Board A-5. PS シート (所要時間:約 17 分) (Time required: About 17 minutes) A-5-1 サイドパッドRアッセンブリとサイドパッドL A-5-1 Remove the side pad R assembly and side pad L アッセンブリを外します。 (1 項参照) assembly. (See Procedure 1) A-5-2 コンパネ Ass'y 24 を固定します。 (2 項参照)...
- Page 11 TF5/TF3/TF1 A-6. DC Fan Motor A-6. DC ファンモーター (所要時間:約 17 分) (Time required: About 17 minutes) A-6-1 サイドパッドRアッセンブリとサイドパッドL A-6-1 Remove the side pad R assembly and side pad L アッセンブリを外します。 (1 項参照) assembly. (See Procedure 1) A-6-2 コンパネ Ass'y 24 を固定します。 (2 項参照)...
- Page 12 TF5/TF3/TF1 (上面) > ACIN CONNECTOR ASSEMBLY DC FAN MOTOR (DCファンモーター) (ACIN束線) [182] ACIN CONNECTOR ASSEMBLY (ACIN束線) (A視図) [140] [140] [140] Earth terminal (アース端子) Earth terminal (アース端子) Install the earth terminal of ACIN connector assembly in the direction shown in the drawing.
- Page 13 TF5/TF3/TF1 Disassembly Procedure of Control コンパネ Ass'y 24 の分解 Panel Assembly 24 B-1. LCDC シート (所要時間:約 6 分) B-1. LCDC Circuit Board B-1-1 サイドパッド R アッセンブリとサイドパッド L (Time required: About 6 minutes) アッセンブリを外します。 (1 項参照) B-1-1 Remove the side pad R assembly and side pad L B-1-2 コンパネ...
- Page 14 TF5/TF3/TF1 B-2. Crystal Display B-2. 液晶ディスプレイ (所要時間:約 6 分) (Time required: About 6 minutes) B-2-1 サイドパッド R アッセンブリとサイドパッド L B-2-1 Remove the side pad R assembly and side pad L アッセンブリを外します。 (1 項参照) assembly. (See Procedure 1) B-2-2 コンパネ Ass'y 24 を外します。 (2 項参照)...
- Page 15 TF5/TF3/TF1 B-3. PHN Circuit Board B-3. PHN シート (所要時間:約 6 分) (Time required: About 6 minutes) B-3-1 サイドパッド R アッセンブリとサイドパッド L B-3-1 Remove the side pad R assembly and side pad L アッセンブリを外します。 (1 項参照) assembly. (See Procedure 1) B-3-2 コンパネ...
- Page 16 TF5/TF3/TF1 B-5. PNC Circuit Board B-5. PNC シート (所要時間:約 11 分) (Time required: About 11 minutes) B-5-1 サイドパッド R アッセンブリとサイドパッド L B-5-1 Remove the side pad R assembly and side pad L アッセンブリを外します。 (1 項参照) assembly. (See Procedure 1) B-5-2 コンパネ...
- Page 17 TF5/TF3/TF1 B-6. PNL Circuit Board B-6. PNL シート (所要時間:約 7 分) (Time required: About 7 minutes) B-6-1 サイドパッド R アッセンブリとサイドパッド L B-6-1 Remove the side pad R assembly and side pad L アッセンブリを外します。 (1 項参照) assembly. (See Procedure 1) B-6-2 コンパネ...
- Page 18 TF5/TF3/TF1 B-8. FDPS (1–3) Circuit Board B-8. FDPS (1 ∼ 3) シート (所要時間 : 各約 6 分) (Time required: About 6 minutes each) B-8-1 サイドパッド R アッセンブリとサイドパッド L B-8-1 Remove the side pad R assembly and side pad L アッセンブリを外します。 (1 項参照)...
- Page 19 TF5/TF3/TF1 B-9. PNFD8 (1–3) Circuit Board, B-9. PNFD8 ( 1 ∼ 3) シート、 OLED ケースアッ OLED Case Assembly セイ B-9-1 Remove the side pad R assembly and side pad L B-9-1 サイドパッド R アッセンブリとサイドパッド L assembly. (See Procedure 1) アッセンブリを外します。 (1 項参照)...
- Page 20 TF5/TF3/TF1 B-10. PNFD1 Circuit Board B-10. PNFD1 シート (所要時間:約 6 分) B-10-1 サイドパッド R アッセンブリとサイドパッド L (Time required: About 6 minutes) B-10-1 Remove the side pad R assembly and side pad L アッセンブリを外します。 (1 項参照) assembly. (See Procedure 1) B-10-2 コンパネ Ass'y 24 を外します。 (2 項参照)...
- Page 21 TF5/TF3/TF1 B-11. PNF Circuit Board B-11. PNF シート (所要時間:約 6 分) (Time required: About 6 minutes) B-11-1 サイドパッド R アッセンブリとサイドパッド L B-11-1 Remove the side pad R assembly and side pad L アッセンブリを外します。 (1 項参照) assembly. (See Procedure 1) B-11-2 コンパネ Ass'y 24 を外します。 (2 項参照)...
-
Page 22: Tf1 Disassembly Procedure(Tf1 分解手順
TF5/TF3/TF1 TF1 DISASSEMBLY PROCEDURE(TF1 分解手順) Precautions (注意事項) Take care not to trap your fingers. 作業中は指を挟まない様に注意してください。 * Install the filament tape and the harness clamp in the same ※ フィラメントテープ、束線止めは、取り外す前と同じよ way as they were before removal. うに取り付けてください。 * Notes on Flat Cable ※... - Page 23 TF5/TF3/TF1 Side Pad R Assembly, Side Pad L Assembly (サイドパッドRアッセンブリ、サイドパッドLアッセンブリ) ..69 Control Panel Assembly 16 (コンパネ Ass'y 16) ....................... 69 Lithium Battery (リチウム電池) ..........................72 Disassembly Procedure of Bottom Assembly 16 (ボトム Ass'y 16 の分解) ............73 A-1. DA2 Circuit Board (DA2 シート) ..........................73 A-2.
- Page 24 TF5/TF3/TF1 Side Pad R Assembly, Side Pad L サイドパッド R アッセンブリ、 サイドパッ Assembly ド L アッセンブリ (所要時間:各約 1 分) (Time required: About 1 minute each) サイドパッド R アッセンブリ: Side Pad R Assembly : 1-1-1 [80A] のネジ 2 本を外して、サイドパッド R アッ...
-
Page 25: Lithium Battery
TF5/TF3/TF1 CONTROL PANEL ASSEMBLY 16 (コンパネ Ass'y 16) [30] SIDE PAD L ASSEMBLY (サイドパッド Lアッセンブリ) [80B] [50] [40] [50] BOTTOM ASSEMBLY 16 (ボトム Ass'y 16) LITHIUM BATTERY (リチウム電池) [80A] SIDE PAD R ASSEMBLY (サイドパッド Rアッセンブリ) (サイドパッド Rアッセンブリとサイドパッド Lアッセンブリの外し方) * This figure is the SIDE PAD R ASSEMBLY. - Page 26 TF5/TF3/TF1 • Installing the Panel Stay(パネルステーの取り付け方) CONTROL PANEL ASSEMBLY 16 CONTROL PANEL ASSEMBLY 16 (コンパネ Ass'y 16) (コンパネ Ass'y 16) BOTTOM ASSEMBLY 16 BOTTOM ASSEMBLY 16 (ボトム Ass'y 16) (ボトム Ass'y 16) CONTROL PANEL ASSEMBLY 16 (コンパネ Ass'y 16) PANEL STAY (パネルステー)...
- Page 27 TF5/TF3/TF1 • Installing the Control Panel Assembly 16( の取り付け方) コンパネ Ass'y 16 CONTROL PANEL ASSEMBLY 16 BOTTOM ASSEMBLY 16 (コンパネ Ass'y 16) (ボトム Ass'y 16) CONTROL PANEL ASSEMBLY 16 CONTROL PANEL ASSEMBLY 16 (コンパネ Ass'y 16) (コンパネ Ass'y 16) Notch (切欠き)...
- Page 28 TF5/TF3/TF1 Disassembly Procedure of Bottom ボトム Ass'y 16 の分解 Assembly 16 A-1. DA2 シート (所要時間:約 8 分) A-1. DA2 Circuit Board A-1-1 サイドパッド R アッセンブリとサイドパッドL (Time required: About 8 minutes) アッセンブリを外します。 (1 項参照) A-1-1 Remove the side pad R assembly and side pad L A-1-2 コンパネ...
- Page 29 TF5/TF3/TF1 A-2. DA1 Circuit Board A-2. DA1 シート (所要時間:約 11 分) (Time required: About 11 minutes) A-2-1 サイドパッドRアッセンブリとサイドパッドL A-2-1 Remove the side pad R assembly and side pad L アッセンブリを外します。 (1 項参照) assembly. (See Procedure 1) A-2-2 コンパネ Ass'y 16 を固定します。 (2 項参照)...
- Page 30 TF5/TF3/TF1 A-4. MAIN Circuit Board A-4. MAIN シート (所要時間:約 17 分) (Time required: About 17 minutes) A-4-1 サイドパッド R アッセンブリとサイドパッド L A-4-1 Remove the side pad R assembly and side pad L アッセンブリを外します。 (1 項参照) assembly. (See Procedure 1) A-4-2 コンパネ...
- Page 31 TF5/TF3/TF1 Remove the SHIELD PS ASSEMBLY. (シールド PSアッセンブリの外し方) <Top view (上面) > SILICON PLATE B [346] (珪素鋼板プレート B) [240] [390] BOTTOM ASSEMBLY 16 (ボトム Ass'y 16) SUPPORT ANGLE SHIELD PS ASSEMBLY (サポートアングル) (シールド PS アッセンブリ) <Rear view (背面) > BOTTOM ASSEMBLY 16 (ボトム...
- Page 32 TF5/TF3/TF1 <Top view (上面) > [310] [320] [200] MAIN BOTTOM ASSEMBLY 16 (ボトム Ass'y 16) LITHIUM BATTERY (リチウム電池) <Rear view (背面) > [290] BOTTOM ASSEMBLY 16 (ボトム Ass'y 16) [295] MAIN Fig. 8 (図 8) OPT ANGLE ( OPT アングル)...
- Page 33 TF5/TF3/TF1 A-5. PS Circuit Board A-5. PS シート (所要時間:約 17 分) (Time required: About 17 minutes) A-5-1 サイドパッドRアッセンブリとサイドパッドL A-5-1 Remove the side pad R assembly and side pad L アッセンブリを外します。 (1 項参照) assembly. (See Procedure 1) A-5-2 コンパネ Ass'y 16 を固定します。 (2 項参照)...
- Page 34 TF5/TF3/TF1 A-6. DC Fan Motor A-6. DC ファンモーター (所要時間:約 16 分) (Time required: About 16 minutes) A-6-1 サイドパッドRアッセンブリとサイドパッドL A-6-1 Remove the side pad R assembly and side pad L アッセンブリを外します。 (1 項参照) assembly. (See Procedure 1) A-6-2 コンパネ Ass'y 16 を固定します。 (2 項参照)...
- Page 35 TF5/TF3/TF1 (上面) > ACIN CONNECTOR ASSEMBLY DC FAN MOTOR (DCファンモーター) (ACIN束線) [182] ACIN CONNECTOR ASSEMBLY (ACIN束線) (A視図) [140] [140] [140] Earth terminal (アース端子) Earth terminal (アース端子) Install the earth terminal of ACIN connector assembly in the direction shown in the drawing.
- Page 36 TF5/TF3/TF1 Disassembly Procedure of Control コンパネ Ass'y 16 の分解 Panel Assembly 16 B-1. LCDC シート (所要時間:約 6 分) B-1. LCDC Circuit Board B-1-1 サイドパッド R アッセンブリとサイドパッド L (Time required: About 6 minutes) アッセンブリを外します。 (1 項参照) B-1-1 Remove the side pad R assembly and side pad L B-1-2 コンパネ...
- Page 37 TF5/TF3/TF1 B-2. Crystal Display B-2. 液晶ディスプレイ (所要時間:約 5 分) (Time required: About 5 minutes) B-2-1 サイドパッド R アッセンブリとサイドパッド L B-2-1 Remove the side pad R assembly and side pad L アッセンブリを外します。 (1 項参照) assembly. (See Procedure 1) B-2-2 コンパネ Ass'y 16 を外します。 (2 項参照)...
- Page 38 TF5/TF3/TF1 B-3. PHN Circuit Board B-3. PHN シート (所要時間:約 5 分) (Time required: About 5 minutes) B-3-1 サイドパッド R アッセンブリとサイドパッド L B-3-1 Remove the side pad R assembly and side pad L アッセンブリを外します。 (1 項参照) assembly. (See Procedure 1) B-3-2 コンパネ...
- Page 39 TF5/TF3/TF1 B-5. PNC Circuit Board B-5. PNC シート (所要時間:約 10 分) (Time required: About 10 minutes) B-5-1 サイドパッド R アッセンブリとサイドパッド L B-5-1 Remove the side pad R assembly and side pad L アッセンブリを外します。 (1 項参照) assembly. (See Procedure 1) B-5-2 コンパネ...
- Page 40 TF5/TF3/TF1 B-6. PNL Circuit Board B-6. PNL シート (所要時間:約 6 分) (Time required: About 6 minutes) B-6-1 サイドパッド R アッセンブリとサイドパッド L B-6-1 Remove the side pad R assembly and side pad L アッセンブリを外します。 (1 項参照) assembly. (See Procedure 1) B-6-2 コンパネ...
- Page 41 TF5/TF3/TF1 B-8. FDPS (1–2) Circuit Board B-8. FDPS (1 ∼ 2) シート (所要時間 : 各約 5 分) (Time required: About 5 minutes each) B-8-1 サイドパッド R アッセンブリとサイドパッド L B-8-1 Remove the side pad R assembly and side pad L アッセンブリを外します。 (1 項参照)...
- Page 42 TF5/TF3/TF1 B-9. PNFD8 (1–2) Circuit Board, B-9. PNFD8 ( 1 ∼ 2) シート、 OLED ケースアッ OLED Case Assembly セイ B-9-1 Remove the side pad R assembly and side pad L B-9-1 サイドパッド R アッセンブリとサイドパッド L assembly. (See Procedure 1) アッセンブリを外します。 (1 項参照)...
- Page 43 TF5/TF3/TF1 B-10. PNFD1 Circuit Board B-10. PNFD1 シート (所要時間:約 6 分) B-10-1 サイドパッド R アッセンブリとサイドパッド L (Time required: About 6 minutes) B-10-1 Remove the side pad R assembly and side pad L アッセンブリを外します。 (1 項参照) assembly. (See Procedure 1) B-10-2 コンパネ Ass'y 16 を外します。 (2 項参照)...
- Page 44 TF5/TF3/TF1 B-11. PNF Circuit Board B-11. PNF シート (所要時間:約 6 分) (Time required: About 6 minutes) B-11-1 サイドパッド R アッセンブリとサイドパッド L B-11-1 Remove the side pad R assembly and side pad L アッセンブリを外します。 (1 項参照) assembly. (See Procedure 1) B-11-2 コンパネ Ass'y 16 を外します。 (2 項参照)...
-
Page 45: Lsi Pin Description(Lsi 端子機能表
TF5/TF3/TF1 LSI PIN DESCRIPTION(LSI 端子機能表) AK4396VF-E2 (X8324A00) DAC (Digital to Analog Converter) ............91 AM3352BZCZ60 (YF449B00) MICROPROCESSOR (MPU) ............92-93 CS4385A-DQZR (YF811A00) DAC (Digital to Analog Converter) ............95 CS5368-CQZR (X8488A00) ADC (Analog to Digital Converter) ............91 GL852G-MNG03 (YC486A00) USB 2.0 MTT HUB CONTROLLER ............97 LAN8720A-CP-TR (YF905A00) ETHERNET TRANSCEIVER (PHY)..........
Need help?
Do you have a question about the TF5 and is the answer not in the manual?
Questions and answers