Dell Latitude D800 User Manual
Hide thumbs
Also See for Latitude D800:
- System information manual (198 pages) ,
- Service manual (79 pages) ,
- Setup and features information (8 pages)
Table of Contents
Advertisement
Quick Links
Dell™ Latitude™ D800 User's Guide
Dell™ Latitude™ D800 User's Guide
Click the links to the left for information on the features and operation of your computer. For information on
other documentation included with your computer, see "
CAUTION:
Follow the safety instructions in the System Information Guide to help protect
computer from damage and ensure your own personal safety.
Notes, Notices, and Cautions
NOTE:
A NOTE indicates important information that helps you make better use of your
NOTICE:
A NOTICE indicates either potential damage to hardware or loss of data and tells you how to
avoid the problem.
CAUTION:
A CAUTION indicates a potential for property damage, personal injury, or
Abbreviations and Acronyms
For a complete list of abbreviations and acronyms, see the Glossary.
If you purchased a Dell™ n Series computer, any references in this document to Microsoft® Windows®
operating systems are not applicable.
Information in this document is subject to change without notice.
© 2003 Dell Computer Corporation. All rights reserved.
Reproduction in any manner whatsoever without the written permission of Dell Computer Corporation is strictly forbidden.
Trademarks used in this text: Dell, the DELL logo, Inspiron, Dell Precision, Dell TravelLite, Dimension, OptiPlex, Latitude, and
are trademarks of Dell Computer Corporation; Intel and Pentium are registered trademarks and Intel SpeedStep and Centrino are
trademarks of Intel Corporation; Microsoft, Windows, Windows NT, and MS-DOS are registered trademarks of Microsoft
Bluetooth is a trademark owned by Bluetooth SIG, Inc. and is used by Dell Computer Corporation under license; ENERGY STAR is a
registered trademark of the U.S. Environmental Protection Agency. As an ENERGY STAR Partner, Dell Computer Corporation has
determined that this product meets the ENERGY STAR guidelines for energy efficiency.
Other trademarks and trade names may be used in this document to refer to either the entities claiming the marks and names or
products. Dell Computer Corporation disclaims any proprietary interest in trademarks and trade names other than its own.
Model PP02X
February 2003
P/N 4Y332
file://C:\temp\~hhE8F0.htm
Rev. A00
Finding
Information."
Page 1 of 1
2/27/2003
Advertisement
Table of Contents

Related Manuals for Dell Latitude D800


Summary of Contents for Dell Latitude D800
- Page 1 Intel Corporation; Microsoft, Windows, Windows NT, and MS-DOS are registered trademarks of Microsoft Bluetooth is a trademark owned by Bluetooth SIG, Inc. and is used by Dell Computer Corporation under license; ENERGY STAR is a registered trademark of the U.S. Environmental Protection Agency. As an ENERGY STAR Partner, Dell Computer Corporation has determined that this product meets the ENERGY STAR guidelines for energy efficiency.
-
Page 2: Finding Information
Page 1 of 2 Finding Information Safety Instructions Documentation Updates Using Microsoft® Windows® Using Devices Using the Dell™ Drivers and Utilities CD Fixing Problems Installing Parts Safety Instructions CAUTION: For precautions on safely handling and using your computer and preventing electrostatic discharge, see the safety instructions in the System Information Guide. -
Page 3: Dell Support
Using the Dell™ Drivers and Utilities CD The Drivers and Utilities CD contains drivers and utilities, the Dell Diagnostics, and user's guides for your computer and optional devices. Dell ships your computer to you with required drivers and utilities already installed—no further installation or configuration is needed. -
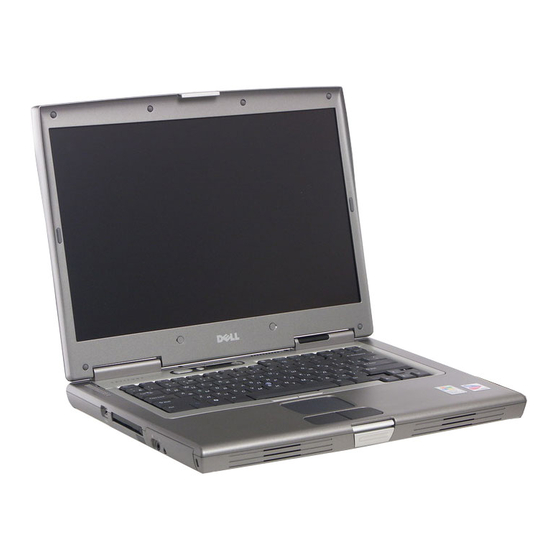
Page 4: About Your Computer
About Your Computer Page 1 of 11 About Your Computer Front View Left View Right View Back View Bottom View Front View display latch speakers display track stick/touch pad buttons power button track stick device status lights volume control buttons keyboard mute button touch pad... - Page 5 About Your Computer Page 2 of 11 display — For more information about your display, see "Using the Display." power button — Press the power button to turn on the computer or to enter or exit a power management mode. NOTICE: To avoid losing data, turn off your computer by performing a Microsoft®...
- Page 6 About Your Computer Page 3 of 11 Solid green: The battery is charging. Flashing green: The battery is almost fully charged. If the computer is running on a battery, the light operates as follows: Off: The battery is adequately charged, the computer is turned off, or the battery is not installed the computer.
-
Page 7: Left View
About Your Computer Page 4 of 11 Turns on when the numeric keypad is enabled. Turns on when the uppercase letter function is enabled. Turns on when the scroll lock function is enabled. Left View air vents infrared sensor IEEE 1394 connector (4-pin) audio connectors PC Card slot hard drive... -
Page 8: Right View
About Your Computer Page 5 of 11 When you receive your computer, the sensor is disabled. You can use the system setup program to enable the sensor. For information on transferring data, see Windows Help (Windows 2000), the Windows Help and Center (Windows XP), or the documentation that came with your infrared-compatible device. - Page 9 Before you buy an antitheft device, ensure that it will work with the security cable module bay — You can install devices such as an optical drive or Dell TravelLite™ module in the module bay. For more information, see "...
-
Page 10: Back View
About Your Computer Page 7 of 11 Connects the Dell D/Bay, which is an external media bay that accommodates an optical drive, floppy drive, or second hard drive. Back View S-video TV-out connector parallel connector USB connectors (2) serial connector... - Page 11 About Your Computer Page 8 of 11 network connector (RJ-45) NOTICE: The network connector is slightly larger than the modem connector. To avoid damaging the computer, do not plug a telephone line in to the network connector. Connects the computer to a network. The green and yellow lights next to the connector indicate activity for both wired and wireless network communications.
-
Page 12: Bottom View
About Your Computer Page 9 of 11 serial connector Connects serial devices, such as a mouse or handheld AC adapter connector — Attach an AC adapter to the computer. The AC adapter converts AC power to the DC power required by the computer. You can connect the AC with your computer turned either on or off. - Page 13 About Your Computer Page 10 of 11 hard drive battery charge gauge Mini PCI card/modem docking device slot battery-bay latch release memory module battery hard drive — Stores software and data. Mini PCI card/modem cover — Covers the compartment that contains the optional modem and optional PCI card.
- Page 14 About Your Computer Page 11 of 11 store your computer in a low-airflow environment, such as a closed briefcase, while it is running. Restricting the airflow can damage the computer or cause a fire. 2/27/2003 file://C:\temp\~hhE7D6.htm...
-
Page 15: Help And Support Center
Using Microsoft® Windows® XP Page 1 of 4 Using Microsoft® Windows® XP Help and Support Center Switching to Classic View Desktop Cleanup Wizard User Accounts and Fast User Switching Files and Settings Transfer Wizard Program Compatibility Wizard Home and Small Office Networking Internet Connection Firewall Help and Support Center The Help and Support Center provides help with the Windows XP operating system and other support and... -
Page 16: Desktop Cleanup Wizard
Using Microsoft® Windows® XP Page 2 of 4 2. Click the Appearance tab. 3. From the Windows and buttons drop-down menu, select Windows Classic style. 4. To customize color, font, and other classic desktop options, click Advanced. 5. When you have completed your appearance selections, click OK. Desktop Cleanup Wizard By default, the Desktop Cleanup Wizard moves program icons that you don't frequently use from your desktop to a designated folder 7 days after you first start your computer and every 60 days after that. -
Page 17: Fast User Switching
Using Microsoft® Windows® XP Page 3 of 4 3. Under Pick a task, click Create a new account. 4. Under Name the new account, type the name of the new user and click Next. 5. Under Pick an account type, click one of the following options: Computer administrator —... -
Page 18: Internet Connection Firewall
Using Microsoft® Windows® XP Page 4 of 4 If you experience problems with your operating system or other programs after performing an installation, system restore feature to return your computer to a previous stable condition. can use the For more information, see the Windows Help and Support Center. -
Page 19: Clicking The Quickset Icon
Dell™ QuickSet Features Clicking the QuickSet Icon Double-Clicking the QuickSet Icon Right-Clicking the QuickSet Icon Dell™ QuickSet runs from the icon located in the taskbar and functions differently when you click, click, or right-click the icon. Clicking the QuickSet Icon... -
Page 20: Using The Keyboard And Touch Pad
Using the Keyboard and Touch Pad Page 1 of 5 Using the Keyboard and Touch Pad Numeric Keypad Keyboard Shortcuts Touch Pad Customizing the Touch Pad and Track Stick Numeric Keypad The keypad numbers and symbols are marked in blue on the right of the keypad keys. To type a number or symbol, ensure that the keypad is enabled and press and the desired key. -
Page 21: Display Functions
Using the Keyboard and Touch Pad Page 2 of 5 Battery Displays the Dell™ QuickSet Battery CD or DVD Tray Requires Dell QuickSet to function. Ejects the tray out of the Display Functions Switches the video image to the next display in the following sequence: the integrated display... -
Page 22: Touch Pad
Using the Keyboard and Touch Pad Page 3 of 5 Microsoft® Windows® Logo Key Functions Minimizes all open windows Maximizes all windows Runs Windows Explorer Opens the Run dialog box Opens the Search Results dialog box Opens the Search Results-Computer dialog box (if the computer is connected to a network) Opens the System Properties dialog box To adjust keyboard operation, such as the character repeat rate, open the Control Panel, and click Printers... -
Page 23: Customizing The Touch Pad And Track Stick
Using the Keyboard and Touch Pad Page 4 of 5 touch pad track stick track stick buttons touch pad buttons To move the cursor, lightly slide your finger over the touch pad. To select an object, lightly tap once on the surface of the touch pad or use your thumb to press the left touch-pad button. -
Page 24: Changing The Track Stick Cap
Your computer came with an additional track stick cap. You can purchase additional caps by visiting the Dell website at www.dell.com. You may need to change the track stick cap if it wears down from prolonged use. 1. Pull the cap off the track stick. -
Page 25: Using The Display
Adjusting Brightness Switching the Video Image Setting Display Resolution Adjusting Brightness When the Dell™ computer is running on battery power, you can conserve power by setting the brightness to keyboard shortcuts for the display. lowest comfortable setting using the appropriate The Dell QuickSet Brightness Meter shows the current brightness setting for the display. -
Page 26: Setting Display Resolution
Before you change any of the default display settings, make a note of the default settings for future NOTE: Use only the Dell-installed video drivers, which are designed to offer the best performance with your Dell-installed operating system. If you choose a resolution or color palette that is higher than the display supports, the settings adjust automatically to the closest possible setting. -
Page 27: About The Module Bay
Dell D/Bay. Your Dell™ computer ships with an optical drive installed in the module bay. However, the device screw is not installed in the optical drive but packaged separately. When you install your device in the module bay, you can install the device screw. -
Page 28: Removing And Installing Devices While The Computer Is Turned Off
Using the Module Bay Page 2 of 12 1 status button on the charge gauge 2 second battery (top) Removing and Installing Devices While the Computer Is Turned Off NOTE: If the device screw is not installed, you can remove and install devices while the computer is running and connected to a docking device (docked). - Page 29 Using the Module Bay Page 3 of 12 device latch release 2. Pull the device out of the module bay. 3. Insert the new device into the bay, and push the device until you feel a click. If the Device Screw Is Installed 1.
- Page 30 Using the Module Bay Page 4 of 12 3. Close the display and turn the computer over. 4. Use a #1 Phillips screwdriver to remove the device screw from the bottom of the computer. 5. Press the device latch release. device latch release 6.
- Page 31 Using the Module Bay Page 5 of 12 9. Turn on the computer. Removing and Installing Devices While the Computer Is Running NOTE: If the device screw is not installed, you can remove and install devices while the computer is running and connected to a docking device (docked).
- Page 32 Using the Module Bay Page 6 of 12 4. Pull the device out of the module bay. 5. Insert the new device into the bay, and push the device until you feel a click. Windows XP automatically recognizes the new device. 6.
- Page 33 Using the Module Bay Page 7 of 12 4. Pull the device out of the bay. 5. Insert the new device into the bay, and push the device until you feel a click. 6. When the operating system recognizes the new device, click Close. If the Device Screw Is Installed Windows XP 1.
- Page 34 Using the Module Bay Page 8 of 12 device latch release 6. Pull the device out of the module bay. 7. Insert the new device into the bay, push the device until you feel a click, and replace the screw. Windows XP automatically recognizes the new device.
- Page 35 Using the Module Bay Page 9 of 12 4. Press the device latch release. device latch release 5. Pull the device out of the module bay. 6. Insert the new device into the bay, push the device until you feel a click, and then replace the screw. 7.
-
Page 36: Adjusting The Volume
Using the Module Bay Page 10 of 12 NOTICE: Do not press down on the drive tray when opening or closing it. Keep the tray closed when are not using the drive. NOTICE: Do not move the computer while playing CDs or 1. -
Page 37: Adjusting The Picture
Using the Module Bay Page 11 of 12 1. Click the Start button, point to All Programs→ Accessories→ Entertainment (or Multimedia), and then click Volume Control. 2. In the Volume Control window, click and drag the bar in the Volume Control column and slide the up or down to increase or decrease the volume. - Page 38 Using the Module Bay Page 12 of 12 1. Click the Start button and click Control Panel. 2. Under Pick a category, click Appearance and Themes. 3. Under Pick a task..., click Change the screen resolution. 4. In the Display Properties window, click and drag the bar in Screen resolution to change the setting 1280 by 800 pixels.
-
Page 39: Using A Battery
"Using the Module Bay." NOTE: The module bay in your computer supports a second battery. The Dell D/Bay does not support a second battery. Operating time is significantly reduced when you perform operations including, but not limited to, the NOTE:... -
Page 40: Checking The Battery Charge
Damaged batteries may leak and cause personal injury or equipment damage. Checking the Battery Charge The Dell QuickSet battery meter, the Microsoft® Windows® power meter window and icon, the battery charge gauge and health gauge, and the low-battery warning provide information on the battery charge. -
Page 41: Charge Gauge
Using a Battery Page 3 of 4 Charge Gauge Before you insert a battery, press the status button on the battery charge gauge to illuminate the charge-level lights. Each light represents approximately 20 percent of the total battery charge. For example, if the has 80 percent of its charge remaining, four of the lights are on. -
Page 42: Removing A Battery
Using a Battery Page 4 of 4 Removing a Battery For more information about removing the second battery, see " Using the Module Bay." CAUTION: Before performing these procedures, turn off the computer, disconnect it from the electrical outlet, and disconnect the modem from the telephone wall jack. NOTICE: If you choose to replace the battery with the computer in standby mode, you have up to 90 seconds to complete the battery replacement before the computer shuts down and loses any unsaved... -
Page 43: Power Management Tips
Power Management Page 1 of 6 Power Management Power Management Tips Power Management Wizard Power Management Modes Power Options Properties Power Management Tips NOTE: "Using a Battery" for more information on conserving battery Connect the computer to an electrical outlet when possible because battery life is largely determined by the number of times the battery is charged. -
Page 44: Selecting A Power Scheme
QuickSet (not Microsoft® Windows®) for Network Disabled to work. The screen allows you to select, create, and edit power scheme settings. In addition, you can delete power schemes that you create, but you cannot delete Dell™ QuickSet predefined power schemes (Maximum Battery, Maximum Performance, Presentation, and Network Disabled). -
Page 45: Setting Battery Alarms And Actions
Power Management Page 3 of 6 NOTE: Brightness shortcut keys only affect the display on your portable computer, not monitors that attach to your portable computer or docking device. If your computer is in CRT only mode and you change the brightness level, the Brightness Meter appears, but the brightness level on the monitor not change. -
Page 46: Hibernate Mode
Power Management Page 4 of 6 Depending on how you set the power management options on the Advanced tab in the Power Properties window, use one of the following methods: Close the display. Press To exit standby mode, press the power button or open the display depending on how you set the options on Advanced tab. -
Page 47: Power Schemes Tab
Power Management Page 5 of 6 The Power Options Properties window helps you to manage power consumption and monitor battery status. To access the Microsoft Windows Power Options Properties window: In Windows XP, click the Start button, click Control Panel, click Performance and Maintenance, then click Power Options. - Page 48 Power Management Page 6 of 6 The Hibernate tab lets you enable hibernate mode by clicking the Enable hibernate support check box. Intel SpeedStep™ Technology Tab NOTE: Windows XP controls the performance level of the processor depending on the power scheme you select.
-
Page 49: Using Pc Cards
Using PC Cards Page 1 of 3 Using PC Cards PC Card Types PC Card Blanks Extended PC Cards Installing a PC Card Removing a PC Card or Blank PC Card Types See " Specifications" for information on supported PC Cards. NOTE: A PC Card is not a bootable device. -
Page 50: Removing A Pc Card Or Blank
Using PC Cards Page 2 of 3 the card. PC Cards are generally marked with a symbol (such as a triangle or an arrow) to indicate which end to insert into the slot. The cards are keyed to prevent incorrect insertion. If card orientation is not clear, see the documentation that came with the card. - Page 51 Using PC Cards Page 3 of 3 2/27/2003 file://C:\temp\~hh736E.htm...
-
Page 52: Using Smart Cards
Using Smart Cards Page 1 of 2 Using Smart Cards About Smart Cards Installing a Smart Card About Smart Cards Smart cards are small portable credit-card shaped devices with internal integrated circuits. Smart cards come in two varieties: memory and microprocessor. Memory smart cards store data but cannot process information. Microprocessor smart cards can add, delete, and manipulate information in the card memory. - Page 53 Using Smart Cards Page 2 of 2 gold contact pad smart card (top) 3. Slide the smart card into the smart card slot until the card is completely seated in its connector. The smart card will protrude approximately 1.27 cm (0.5 inch) from the slot. The smart card slot is located below the PC Card slot.
-
Page 54: Traveling With Your Computer
Write down your service tag and store it in a safe place away from the computer or carrying case. Use the service tag if you need to report a loss or theft to law enforcement officials and to Dell. Create a file on the Microsoft® Windows® desktop called if_found. Place information such as your name, address, and telephone number in this file. -
Page 55: Travel Tips
Traveling With Your Computer Page 2 of 3 temperature for 1 hour before turning it on. Pack the computer so that it does not slide around in the trunk of your car or in an overhead storage compartment. NOTICE: Do not check the computer as Travel Tips NOTICE: Do not move the computer while using the optical drive. - Page 56 The representative will attempt to get the phone number and address of the caller. Dell will then contact the law enforcement agency to which you made the report of the missing computer.
-
Page 57: About Passwords
PC Cards with encryption features. If you forget any of your passwords, contact your system administrator or call Dell. For your protection, Dell technical support staff will ask you for proof of your identity to ensure that only an authorized person can use the computer. -
Page 58: Using An Administrator Password
If you forget the primary password and do not have an administrator password assigned, or if you have primary and an administrator password assigned but forget them both, contact your system administrator contact Dell. NOTICE: If you disable the administrator password, the primary password is also Using a Hard Drive Password The hard drive password helps protect the data on your hard drive from unauthorized access. - Page 59 1. Save and close any open files and exit any open programs. 2. Connect the Dell™ D/Bay with a floppy drive to the Dell D/Bay connector on the right side of the computer, or connect a USB floppy drive to one of the two USB connectors on the back of the 3.
- Page 60 Passwords Page 4 of 5 b. Press immediately after the DELL™ logo appears. If the operating system logo appears, wait until you see the Windows desktop, and then shut the computer and try again. c. Press the arrow keys to select Diskette Drive and press 9.
Need help?
Do you have a question about the Latitude D800 and is the answer not in the manual?
Questions and answers