Table of Contents
Advertisement
Advertisement
Table of Contents

Related Manuals for Currys Essentials CFSEWH17

Summary of Contents for Currys Essentials CFSEWH17
-
Page 1: Single Oven
INSTRUCTION MANUAL SINgLe OveN CFSeWH17/CFSeSv17... -
Page 3: Table Of Contents
Contents Safety Warnings ..........................4 Unpacking ............................. 7 Product Overview ......................... 8 Front View ...................................8 Control Panel ................................8 Before Using the Cooker ......................9 Using the Hotplates ........................9 First Time Use of the Hotplates ..........................9 Controlling the Hotplates ............................9 Choosing the Right Cookware ..........................9 Shelf Positions................................. -
Page 4: Safety Warnings
Safety Warnings IMPORTANT SAFETY INSTRUCTIONS READ CAREFULLY AND KEEP FOR FUTURE REFERENCE • It is recommended that this appliance is installed by a qualified electrical engineer. The manufacturer is not responsible for any damage caused by incorrect installation. • Check whether there is any damage to the appliance after you have unpacked it. - Page 5 • Children should be supervised to ensure that they do not play with the appliance. • During use the appliance becomes hot. Care should be taken to avoid touching the heating elements inside the oven or the hotplates. • The appliance and its accessible parts become hot during use. Young children should be kept away.
- Page 6 • This appliance is not designed to be used with hob guards. Use of inappropriate hob guards can cause accidents. • To prevent the appliance tipping, the stabilizing bracket must be installed.
-
Page 7: Unpacking
Unpacking Remove all packaging from the unit. Retain the packaging. If you dispose of it please do so according to local regulations. The following items are included: Grill Pan x 1 Grill Rack x 1 Grill Pan Handle x 1 Wire Shelf x 2 The Main Unit Stability Device... -
Page 8: Product Overview
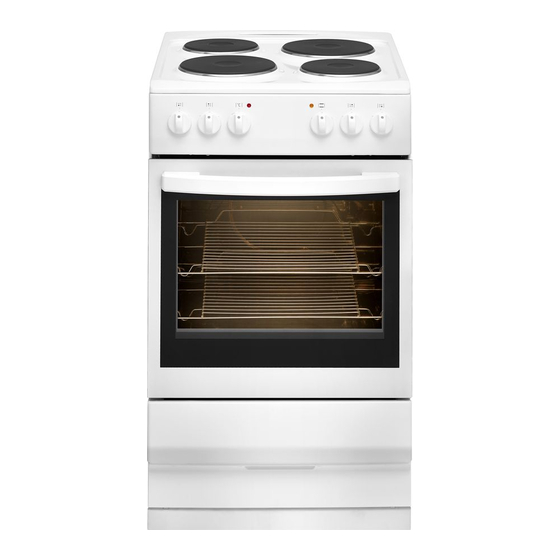
Product Overview Front View Hot plates Control panel Oven shelf Front flap Oven door Levelling feet Control Panel Thermostat lamp Temperature control Oven/hob active lamp Oven function selector Front left hot plate control Rear right hot plate control Rear left hot plate control Front right hot plate control * All images are for indication only;... -
Page 9: Before Using The Cooker
Before Using the Cooker Before using your new cooker, please: • Make sure all the controls are turned off. • Read this Instruction/Installation Manual, taking special note of the “Safety Warnings” section. • Turn the mains power on. This appliance is for cooking purposes only. It must not be used for other purposes, for example room heating. -
Page 10: Shelf Positions
Using the Oven First Time Use of the Oven • Ensure that nothing has been left in the oven. Remove any insert cards, packaging, labels or plastic bags and the grill pan handle. • Before connecting the power, carefully wipe the inner cavity wall and housing with a damp cloth and hot water containing a little washing-up liquid. - Page 11 Rest point recess Rest point • Insert the shelf with the back stop to the back as show. Make sure it is pointing upwards. This will prevent dishes falling off the back of the shelf. • You will notice that about half way along each shelf, it has a curve on each side. This is the rest position of the shelf when pulling the shelf out of the oven.
-
Page 12: Oven Function Selector Control
Oven Function Selector Control This control is used to select the cooking functions. Turn the control clockwise or anti-clockwise to select the required function. Turn the control to the required setting. The yellow operation light will illuminate. To switch off the oven, turn the control anti-clockwise to the ”O“ position. The operation light will go out. Switches on the oven lamp independently of all other functions. -
Page 13: Using The Grill
Using the Grill First Time Use of the Grill • Ensure that nothing has been left in the oven. Remove any insert cards, packaging, labels or plastic bags and the grill pan handle. • Before connecting the power, carefully wipe the inner cavity wall and housing with a damp cloth and hot water containing a little washing-up liquid. -
Page 14: Cleaning Instructions
Cleaning Instructions Before you start cleaning your cooker, please: Read the cleaning instructions and the ‘Safety Warnings’ sections. Turn the cooker off at the wall. Allow the cooker to cool fully before cleaning. Do not use a steam cleaner. • Wipe the oven clean after every use. • Wipe up spills. -
Page 15: Removing The Oven Door
Removing the Oven Door The oven door can easily be removed as follows: Open the door completely. The swivel retainers of the right hand and left hand hinges are hooked onto the metal bar above them. Lift the retainers as shown. Close the oven door gently until it meets the open retainer. -
Page 16: Removing The Oven Door Glass For Easier Cleaning
Removing the Oven Door Glass for Easier Cleaning Remove the oven door. Use a flat headed screwdriver to remove the plastic vent panel from the top edge of the door. Gently insert the screwdriver into the side of the strip and prise it out. Lift the glass out of the frame, noting which side of the glass faces outwards (the outer side should have a shiny surface). -
Page 17: Installation
Installation • The cooker must be installed by a competent person, if in doubt consult a qualified technician, and in compliance with local electrical, safety and building regulation standards. • If the cooker is installed adjacent to furniture which is higher than the hob, a gap of at least 100 mm must be left between the side of the cooker and the furniture unless non-combustible materials (ceramic tiles, metal splashback, etc.) are used which then allows this distance to be reduced to 20 mm. -
Page 18: Adjusting The Feet
Adjusting the Feet Your oven has 2 adjustable feet at the front and 2 at the back. When the oven is placed where it will be used, check if the oven is level. If it is not level, you can adjust the feet by turning the feet if required. It is possible to raise the appliance a maximum of 10 mm using the feet. -
Page 19: Electrical Connection
Electrical Connection Your cooker is designed to operate on an electricity supply which conforms to the electrical data shown on the Rating Plate. The cooker can be connected to the mains only after you complete the connections in the terminal box. The following installation procedure must be carried out by a competent person. -
Page 20: Energy Saving Tips And Energy Label
Energy Saving Tips and Energy Label Main Oven • Cook the meals together, if possible. • Keep the pre-heating time short. • Do not elongate cooking time. • Do not forget to turn off the oven at the end of cooking. • Do not open the oven door during cooking. -
Page 21: Product Fiche And Specifications
Product Fiche and Specifications Brand Essentials Model CFSEWH17/CFSESV17 Type of Oven Electric Mass 40 Kg Energy Efficiency Index - Conventional 106.0 Energy Class Energy Consumption (electricity) - Conventional 0.88 kWh/cycle Heat Source Electric Volume 67 litres Number of cavities This product complies with EN 60350-1 Overall Dimension (WxDxH) 500(W) x 600(D) x 900(H) mm... - Page 24 For general information about this appliance and handy hints and tips, please visit www.knowhow.com/knowledgebank or call 0344 5611234. Visit Partmaster.co.uk today for the easiest way to buy electrical spares and accessories. With over 1 million spares and accessories available we can deliver direct to your door the very next day. Visit www.partmaster.co.uk or call 0344 800 3456 (UK customers only).
Need help?
Do you have a question about the Essentials CFSEWH17 and is the answer not in the manual?
Questions and answers