Table of Contents
Advertisement
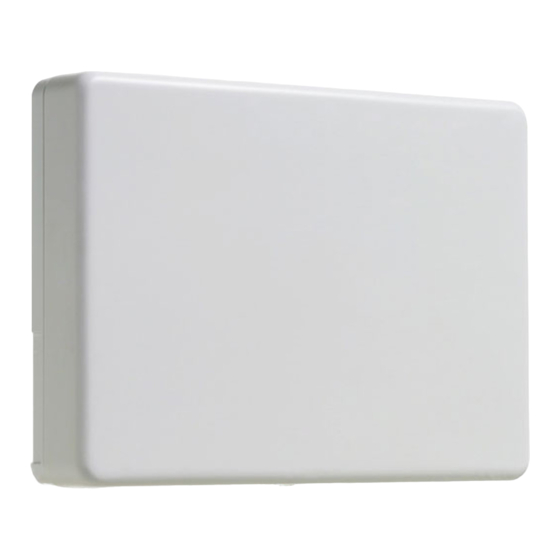
TR5164
Installation Instructions, Instructions d'installation, Instrucciones de
Instalación, Manuale d'installazione, Installatie handleiding
TR5164-433
Version 1.0
Warning – This manual contains information on limitations regarding product use and function and
information on the limitations as to liability of the manufacturer.
Attention – Ce manuel contient des informations sur les restrictions concernant le fonctionnement et
l'utilisation du produit et des informations sur les restrictions en ce qui concerne la responsabilité du
fabricant. La totalité du manuel doit être lu attentivement.
Advertencia – Por favor consulte el Manual de Instrucciones del Sistema para más información
acerca de las limitaciones conrelación al uso y funcionamiento del producto e información acerca de
las limitaciones como la responsabilidad del fabricante.
Importante – Questo manuale contiene informazioni sulle limitazioni riguardanti l'uso e la funzione
del prodotto, ed informazioni circa i limiti di responsabilità del produttore. Si consiglia di leggere
attentamente l'intero manuale.
WAARSCHUWING – Deze handleiding bevat informatie over de beperkingen in verband met het
gebruik en de functies van het product en over de beperkingen van de verplichtingen van de fabrikant.
Advertisement
Table of Contents

Related Manuals for DSC TR5164-433


Summary of Contents for DSC TR5164-433
- Page 1 TR5164 Installation Instructions, Instructions d’installation, Instrucciones de Instalación, Manuale d'installazione, Installatie handleiding TR5164-433 Version 1.0 Warning – This manual contains information on limitations regarding product use and function and information on the limitations as to liability of the manufacturer. Attention – Ce manuel contient des informations sur les restrictions concernant le fonctionnement et l’utilisation du produit et des informations sur les restrictions en ce qui concerne la responsabilité...
- Page 2 Warning Please Read Carefully Note to Installers This warning contains vital information. As the only individual in contact with system users, it is your responsibility to bring each item in this warning to the attention of the users of this system. System Failures This system has been carefully designed to be as effective as possible.
- Page 3 Access cards or tags returned for replacement under warranty will be credited or replaced at DSC's option. Products not covered by this warranty, or otherwise out of warranty due to age, misuse, or damage shall be evaluated, and a repair estimate shall be provided.
-
Page 4: Table Of Contents
6. ARBITRATION - All disputes arising in connection with this Agreement shall be determined by final DSC is unwilling to license the SOFTWARE PRODUCT to You, and You have no right to use it. and binding arbitration in accordance with the Arbitration Act, and the parties agree to be bound by the SOFTWARE PRODUCT LICENSE arbitrator’s decision. -
Page 5: Section 1: Introduction
Section 1: Introduction This manual describes how to install, program and maintain the TR5164. Before installing the TR5164 module, complete the following steps: 1. Plan the placement and wiring of the security system (see the system Installation Manual). 2. Install the control panel, then install and enroll at least one keypad to use for programming. 3. -
Page 6: Compatible Wireless Devices
WS4945CB (commercial burg applications only), WLS912L-433, WS4939, WS4928 (Commercial burg applications only), EV-DW4927SS (residential burg applications only). TR5164-433 is UL listed for Residential Fire, Residential Burglary and Commercial Burglary applications in accordance with the following standards: UL985 Household Fire Warning System Units... -
Page 7: Section 2: Tr5164 Set Up & Wiring
Section 2: TR5164 Set Up & Wiring This section describes how to set up and wire the TR5164 module. 2.1 Unpack the TR5164 Check that the following parts are in the package: • TR5164 PCB • Hardware for mounting the cabinet •... -
Page 8: Section 3: Receiver Programming
Section 3: Receiver Programming Enrollment consists of programming the device’s Electronic Serial Number (ESN) into the TR5164 so that it can be identified when an event is communicated. The ESN is located on the back of each wireless device. NOTE: When programming via hardwired keypad, wireless key programming sections 001-064 and 101-116 only accept 6 digits. - Page 9 4. After successful confirmation of the ESN, the system prompts for the zone/slot number. • The next available slot for the device type is displayed. Press [ ] to accept or enter the slot number. • To re-enroll a wireless key press simultaneously for approximately 3 seconds. 3.4 Manually Enroll Wireless Devices/Keypads To manually enroll a 2-way wireless device: 1.
-
Page 10: Section 4: Other Programming
Section 4: Other Programming 4.1 Program Zones and Partitions Once all wireless devices are enrolled, complete zone programming on the system. Although the exact programming required varies depending on which control panel the TR5164 is connected to, ensure that the following programming options are completed correctly for each wireless zone: •... -
Page 11: Supervision Of Wireless Zones
4.3 Enable Supervision of Wireless Zones Each wireless device (excluding wireless keys) sends a supervisory signal periodically. If the receiver does not receive a signal within the time programmed for the Wireless Supervisory Window, it generates a supervisory fault. NOTE: For wireless supervision to work, enable the wireless zone attribute on all wireless zones (sections [101] to [164], option [8] ON). -
Page 12: Tr5164 Software Default
3. Enter programming section [141] to [156] for wireless keys 1-16. 4. For each of the available buttons on the wireless key, enter the 2-digit number corresponding to the selected function. See “Wireless Key Function Key Options” on page 17 for a list of function key options. -
Page 13: Section 5: Testing & Mounting
Section 5: Testing & Mounting 5.1 Test the Reception of Wireless Devices Testing the proposed placement of each wireless device before it is mounted is very important. Following these steps tests the signal strength between the TR5164 and the wireless devices. All wireless devices can be tested together (global placement testing) or individually. -
Page 14: Mounting
Testing Individual Wireless Keys Do not use the individual device test described above to test wireless keys. To ensure that the TR5164 is receiving transmissions from these devices, use the function keys on the wireless keys at several different points throughout the installation. NOTE: Two-way wireless keys must be activated by pressing any key before they become functional. -
Page 15: Section 6: Additional Notes
Section 6: Additional Notes 6.1 Trouble Conditions The control panel constantly monitors for possible trouble conditions. If a trouble condition is detected, the keypad beeps and the “Trouble” light turns on. Press [ ][2] to display trouble conditions. The following trouble conditions apply to the TR5164 and/or any enrolled devices. •... -
Page 16: Section 7: Troubleshooting
Section 7: Troubleshooting 1. When I enter the 3-digit zone number for adding a wireless device, the keypad gives me a long beep. ESNs can be entered only when a TR5164 wireless receiver is connected to the Keybus. See Section 2.3, page 5 for instructions on setting up and wiring the TR5164 module. 2. -
Page 17: Section 8: Programming Worksheets
Section 8: Programming Worksheets TR5164 Wireless Programming Use the following worksheets to record wireless device programming options for future reference. [804] Zone Serial Numbers (for wireless devices, repeaters and keypads) Wireless keypads 1-4 must be enrolled into zones 29-32 respectively. All other wireless devices may be enrolled into any of the remaining 60 zones. - Page 18 [804][081] Wireless Supervisory Window (Default = 96) The window is programmed in 15 minute increments. The default programming is: • 96 (x15minutes), which is equal to 24 hours (NA), or • 8 (x15minutes), which is equal to 2 hours (EU). Valid entries are (004) to (096), equal to 1 to 24 hours.
- Page 19 [804][101]-[116] Wireless Key Serial Numbers [101] [109] [102] [110] [103] [111] [104] [112] [105] [113] [106] [114] [107] [115] [108] [116] Wireless Key Function Key Options Entry Key Description Entry Key Description Null Key [,][1] Activate Stay/Away 01-02 For Future Use Global Away Arm Stay Arm [,][7][3] Command Output #3...
- Page 20 [804][141]-[156] Wireless Function Key Options Function 1 Function 2 Function 3 Function 4 Function 5 Function 6 Default 03 Default 04 Default 27 Default 30 Default 13 Default 14 [141] Key 1 [142] Key 2 [143] Key 3 [144] Key 4 [145] Key 5 [146] Key 6 [147] Key 7...
- Page 21 [804][181]-[182] Enable/Disable 2-Way Wireless Keys 1-16 Def. Def. Key 1 is 2-way Key 1 is 1-way Key 9 is 2-way Key 9 is 1-way Key 2 is 2-way Key 2 is 1-way Key 10 is 2-way Key 10 is 1-way ...
- Page 22 [804][900] General Wireless Options Future Use Future Use Wall Tamper Disabled Wall Tamper Enabled Case Tamper Disabled Case Tamper Enabled Wireless Delinquency Disabled Wireless Delinquency Enabled Future Use ...
-
Page 23: Section 9: Français
© 2011 Tyco International Ltd. en de Respective bedrijven. Alle rechten voorbehouden. © 2012 Tyco International Ltd. and its Respective Companies. All Rights Reserved. Toronto, Canada • www.dsc.com Tech. Support/Centre d’aide technique/Líneas Tech: 1-800-387-3630 (Can- ada, US), 905-760-3000 Printed in Canada / Imprimé au Canada / Impreso en Canadá / Stampato nel...
Need help?
Do you have a question about the TR5164-433 and is the answer not in the manual?
Questions and answers