Hytera PD98X User Manual
Digital trunking portable radio
Hide thumbs
Also See for PD98X:
- User manual (42 pages) ,
- Manual (17 pages) ,
- Quick reference manual (8 pages)
Table of Contents
Advertisement
Quick Links
Preface
Thanks for your favor in our product. This manual provides guidance for you to quickly know how to use
the product. For detailed features and operations, see the DMR Trunking Radio Feature Description and
Operation Manual along with the product.
To avoid bodily injury or property loss caused by misoperations, please carefully read the Safety
Information Booklet before using the product.
This manual is applicable to the following product:
PD98X/PD98XG Digital Trunking Portable Radio (X may represent 2, 5, 6 or 8)
Advertisement
Table of Contents

Related Manuals for Hytera PD98X


Summary of Contents for Hytera PD98X
- Page 1 To avoid bodily injury or property loss caused by misoperations, please carefully read the Safety Information Booklet before using the product. This manual is applicable to the following product: PD98X/PD98XG Digital Trunking Portable Radio (X may represent 2, 5, 6 or 8)
-
Page 2: Fcc Regulations
Copyright Information Hytera is the trademark or registered trademark of Hytera Communications Corporation Limited (the Company) in PRC and/or other countries or areas. The Company retains the ownership of its trademarks and product names. All other trademarks and/or product names that may be used in this manual are properties of their respective owners. - Page 3 As certified by the qualified laboratory, the product is in compliance with the essential requirements and other relevant provisions of the following directives: 1999/5/EC or 2014/53/EU 2006/66/EC 2011/65/EU 2012/19/EU Please note that the above information is applicable to EU countries only.
-
Page 4: Fcc Statement
Antenna should be kept away from eyes. • When worn on the body, always place the radio in a Hytera’s approved clip, holder, holster, case, or body harness for this product. Using approved body-worn accessories is important because the use of Hytera’s or other manufacturer’s non-approved accessories... - Page 5 • Use only manufacturer’s name approved supplied or replacement antennas, batteries, and accessories. Use of non-manufactur er-name approved antennas, batteries, and accessories may exceed the FCC RF exposure guidelines. IC statement The device has been tested and compliance with SAR limits, users can obtain Canadian information on RF exposure and compliance Après examen de ce matériel aux conformité...
-
Page 6: Table Of Contents
Contents 1. Items in the Package .......................... 1 2. Product Overview ..........................2 2.1 Product Controls ..........................2 2.2 LCD Icon ............................3 2.3 LED Indicator ..........................5 3. Before Use ............................6 3.1 Attaching the Antenna ........................6 3.2 Installing the TF Card ........................6 3.3 Attaching the Battery ........................ -
Page 7: Items In The Package
1. Items in the Package Please unpack carefully and check if all items listed below are received. If any item is missing or damaged, please contact your dealer. Radio Battery Charger Power Adapter Antenna Belt Clip Strap Documentation Kit Note The pictures in this manual are for reference only. -
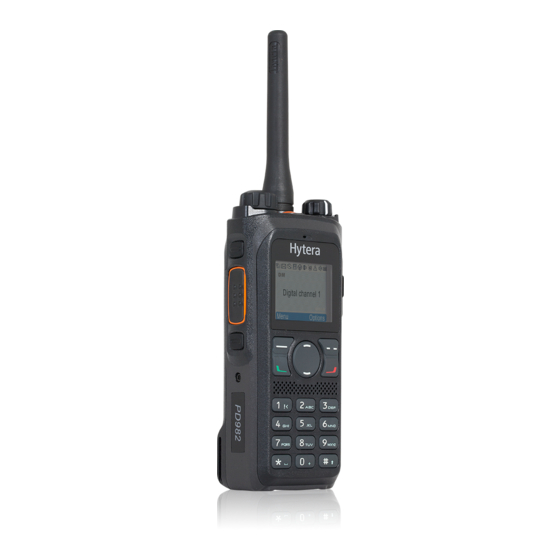
Page 8: Product Overview
2. Product Overview Product Controls Part Name Part Name Side Key 1 (SK1) LED Indicator Push-to-Talk (PTT) Key Antenna Side Key 2 (SK2) On-Off/Volume Control Knob Top Key (TK) Accessory Connector Group Selector Knob Back/Subgroup Key Microphone P2 Key LCD Display Up Key... -
Page 9: Lcd Icon
Part Name Part Name OK/Menu Key Down Key P1 Key Battery Latch Speaker Belt Clip Numeric Keypad Battery Note For enhanced convenience, you may request your dealer to program the TK, SK1, and SK2 as shortcuts to radio features. For the detailed introduction, see the DMR Trunking Radio Feature Description and Operation Manual along with the product. - Page 10 The Inbox is full. There is/are unread status message(s) There is no signal in TM-DW mode. The number of bars (1–4) indicates the radio signal strength in TM-DW mode. There is no signal in TM-DL mode. The number of bars (1–4) indicates the radio signal strength in TM-DL mode.
-
Page 11: Led Indicator
An all call is in progress. An include call is in progress. LED Indicator LED Indication Radio Status Flashes green Being turned on. Flashes green slowly Standby. Glows green Receiving. Glows red Transmitting. Flashes Establishing a call. calling radio) Flashes orange rapidly Establishing a Full Off Air Call Set-Up (FOACSU) private call. -
Page 12: Before Use
3. Before Use Attaching the Antenna Caution Do not hold the radio by its antenna; otherwise, the radio performance may be reduced and the life span of the antenna may be shortened. Installing the TF Card Install the TF card as follows if required: Step 1 Loosen the screw fixing the TF card cover, remove the cover, and then place the card in the holder properly as shown below. -
Page 13: Attaching The Battery
Attaching the Battery Note To remove the battery, make sure that the radio is turned off, and then slide the battery latch upwards to unlock the battery. Attaching the Belt Clip Step 1 Unfasten the two screws on the back of the radio. Step 2 Align the screw holes on the belt clip with those on the back of the radio, as shown below. -
Page 14: Charging The Battery
Do not scrape the silicone waterproof pad surrounding the screw hold of the accessory connector. Do close the accessory connector cover and fasten the screw after removing the accessory. Step 1 Loosen the screw fixing the accessory connector cover, and open the cover as shown below. Step 2 Align the accessory (such as an audio accessory or a programming cable) plug with the accessory connector. - Page 15 recommended that your radio remain powered off during charging. The LED indicator on the charger shows the charging status. For details, see the following table. LED Indication Charging Status Flashes red slowly The battery is inserted incorrectly. Glows red The battery is charging. Glows orange The battery is charged to 90% or more.
-
Page 16: Basic Operations
4. Basic Operations Turning On/Off the Radio Note Upon power-on, the radio automatically checks whether the battery is approved by the Company. If yes, "Certificated Battery" (for an anti-fake battery) or "Smart Battery" (for a smart battery) appears on the screen; if no, "Not Certificated Battery" appears. Checking the Battery Using a battery not approved by the Company makes the battery power indication inaccurate and reduces the radio performance. -
Page 17: Registering With Bs
LED Indication/Tone Icon replace the battery for proper radio operation. Registering with BS Upon power-on, the radio automatically hunts the control channels to find an available BS for registration. During hunting, the radio displays "Out of Range" with the icon , the LED indicator flashes orange slowly, and the radio emits the hunt tone. -
Page 18: Selecting A Subgroup
To enable or disable this feature, go to "Menu -> Settings -> Radio Set -> Keypad Lock", and then select "Enable" or "Disable". Manually lock or unlock the keypad To manually lock or unlock the keypad, do one of the following on the home screen: Press the Keypad Lock key programmed by your dealer. -
Page 19: Call Services
5. Call Services After the radio is turned on and registered, you can make and receive calls. To ensure optimal voice quality of the receiving radio, keep the microphone about 2.5 to 5 centimeters away from your mouth when the radio is transmitting. Note If the radio does not register successfully or an empty group is selected by the Group Selector knob, the radio cannot initiate any call. -
Page 20: Private Call
radio emits a tone and displays on the screen. 5.1.3 Ending/Exiting a Group Call You can press to end an outgoing group call or exit an incoming group call. For other situations in which a group call is terminated, see the DMR Trunking Radio Feature Description and Operation Manual along with the product. -
Page 21: Emergency Call
OACSU You can answer a private call without any operation. The call is established automatically, and the radio displays on the screen. 5.2.3 Ending a Private Call You can press to end a private call. For other situations in which a private call is terminated, see the DMR Trunking Radio Feature Description and Operation Manual along with the product. -
Page 22: Message Services
6. Message Services Message services allow you to edit a new message and send it directly or save it to the Drafts, directly send a quick text message, and forward the messages saved in the Inbox and Outbox. New Message New Message allows you to create a message. -
Page 23: Troubleshooting
7. Troubleshooting Phenomena Analysis Solution The battery may be installed Remove and reattach the battery. improperly. The battery power may run Recharge or replace the battery. The radio cannot out. be turned on. The battery may suffer from poor contact caused Clean the battery contacts or replace the dirtied or damaged battery... - Page 24 Phenomena Analysis Solution improperly antenna. installed. speaker Clean the surface of the speaker. blocked. cannot communicate with Make sure you and the group members are The signal may be weak. other group within the communication range. members. voice Make sure call participants are within the The signal may be weak.
-
Page 25: Care And Cleaning
8. Care and Cleaning To guarantee optimal performance as well as a long service life of the product, please follow the tips below. Product Care Do not pierce or scrape the product. Keep the product far away from substances that can corrode the circuit. Do not hold the product by its antenna or earpiece cable directly. -
Page 26: Optional Accessories
9. Optional Accessories Contact your local dealer for the optional accessories of the product. Caution Use the accessories specified by the Company only; otherwise, the Company shall not be liable for any loss or damage arising out of use of unauthorized accessories.
Need help?
Do you have a question about the PD98X and is the answer not in the manual?
Questions and answers