Mindray Accutorr 7 Operator's Manual
Vital signs monitor
Hide thumbs
Also See for Accutorr 7:
- Operator's manual (200 pages) ,
- Service manual (82 pages) ,
- Quick reference manual (22 pages)
Table of Contents
Advertisement
Quick Links
Advertisement
Table of Contents

Related Manuals for Mindray Accutorr 7


Summary of Contents for Mindray Accutorr 7
- Page 1 Vital Signs Monitor Operator’s Manual...
- Page 3 © Copyright 2013-2014 Shenzhen Mindray Bio-Medical Electronics Co., Ltd. All rights reserved. For this Operator’s Manual, the issue date is October 2014. Accutorr 7 Operator's Manual...
- Page 4 Manufacturer’s Responsibility Contents of this manual are subject to changes without prior notice. All information contained in this manual is believed to be correct. Mindray is not liable for errors contained herein nor for incidental or consequential damages in connection with the furnishing, performance, or use of this manual.
- Page 5 This warranty does not cover consumable items such as, but not limited to, batteries, external cables, and sensors. Mindray shall not be liable for any incidental, special, or consequential loss, damage, or expense directly or indirectly arising from the use of its products. Liability under this warranty and the buyer’s exclusive remedy under this warranty is limited to servicing or...
- Page 6 Malfunction of the instrument or part whose serial number is not legible. Others not caused by instrument or part itself. Company Contact Manufacturer: Shenzhen Mindray Bio-Medical Electronics Co., Ltd. Mindray Building, Keji 12th Road South, Hi-tech industrial Address park, Nanshan, Shenzhen 518057, P.R.China Website www.mindray.com E-mail Address: service@mindray.com.cn...
- Page 7 This manual is based on the maximum configuration and therefore some contents may not apply to your product. If you have any question, please contact Mindray. This manual is an integral part of the product. It should always be kept close to the equipment so that it can be conveniently obtained when needed.
- Page 8 FOR YOUR NOTES Accutorr 7 Operator's Manual...
-
Page 9: Table Of Contents
3.4 Using Key, Knob, Touchscreen ....................3-5 3.4.1 Using Keys..........................3-5 3.4.2 Using the Knob ........................3-6 3.4.3 Using the Touchscreen ..................... 3-6 3.5 Changing General Settings ......................3-6 3.5.1 Setting up a Monitor ......................3-6 Accutorr 7 Operator's Manual... - Page 10 6.1 Alarm Categories ..........................6-1 6.2 Alarm Levels ............................6-1 6.3 Alarm Indicators ..........................6-2 6.3.1 Alarm Lamp .......................... 6-2 6.3.2 Audible Alarm Tones ......................6-2 6.3.3 Alarm Messages ........................6-3 6.3.4 Flashing Numerics ......................6-3 Accutorr 7 Operator's Manual...
- Page 11 8.1 Overview ............................8-1 8.2 PR Source ............................8-1 8.3 Pulse Tone ............................8-1 9 Monitoring NIBP ........................9-1 9.1 Overview ............................9-1 9.2 Safety ..............................9-1 9.3 Measurement Limitations ......................9-2 9.4 NIBP Measurement Mode......................9-2 Accutorr 7 Operator's Manual...
- Page 12 11.5.4 Spot Check Trends Recording ..................11-4 11.6 Removing a Paper Jam ......................11-4 11.7 Cleaning the Recorder Printhead ..................11-4 12 Other Functions ......................12-1 12.1 MEWS System ..........................12-1 12.2 Network ............................12-2 12.2.1 Network Connection..................... 12-2 Accutorr 7 Operator's Manual...
- Page 13 15.4 Others ............................. 15-3 A Product Specifications ...................... A-1 A.1 Classifications ..........................A-1 A.2 Environmental Specifications ....................A-1 A.3 Power Supply Specifications ...................... A-2 A.4 Physical Specifications ......................... A-2 A.5 Hardware Specifications ......................A-2 A.6 Measurement Specifications ...................... A-4 Accutorr 7 Operator's Manual...
- Page 14 D Alarm Messages ......................... D-1 D.1 Physiological Alarm Messages ....................D-1 D.2 Technical Alarm Messages ......................D-1 E Symbols and Abbreviations ....................E-1 E.1 Symbols ..............................E-1 E.2 Abbreviations ...........................E-2 F Anomalies ..........................F-1 F.1 NIBP Smart Inflation Anomaly .....................F-1 Accutorr 7 Operator's Manual...
-
Page 15: Safety
Indicates a potential hazard or unsafe practice that, if not avoided, could result in minor personal injury or product/property damage. NOTE Provides application tips or other useful information to ensure that you get the most from your product. Accutorr 7 Operator's Manual... -
Page 16: Warnings
(such as gasoline). Do not open the equipment housings. All servicing or future upgrades must be carried out by Mindray trained and authorized personnel. Do not come into contact with patients during defibrillation. Otherwise serious injury or death could result. -
Page 17: Cautions
Always install or carry the equipment properly to avoid damage caused by a drop, impact, strong vibration or other mechanical force. If you spill liquid on the equipment or accessories, contact Mindray or your service personnel. 1.1.3 Notes... -
Page 18: Equipment Symbols
EUROPEAN COMMUNITY marked with this symbol The product bears CE mark indicating its conformity with the provisions of the Council Directive 93/42/EEC concerning medical devices and fulfills the essential requirements of Annex I of this directive. Accutorr 7 Operator's Manual... - Page 19 Conforms to AAMI Std ES 60601-1, IEC Std 60601-1-6, IEC Std 60601-1-8, IEC Std 60601-2-49, IEC Std 80601-2-30, ISO Std 80601-2-56, ISO Std 80601-2-61. Certified to CSA Std C22.2 NO. 60601-1, NO. 60601-1-6, NO. 60601-1-8, NO. 60601-2-49, NO. 80601-2-30, NO. 80601-2-56, NO. 80601-2-61. Accutorr 7 Operator's Manual...
- Page 20 FOR YOUR NOTES Accutorr 7 Operator's Manual...
-
Page 21: The Basics
2.2 Applied Parts The applied parts of the monitor are SpO sensor and cable, NIBP tubing and cuff, and Temp probes and cable. Accutorr 7 Operator's Manual... -
Page 22: Main Unit
When the monitor is on, press and hold this key for more than 2 seconds to turn the monitor off. An indicator is built into this switch. It turns on when the monitor is on and turns off when the monitor is off. Accutorr 7 Operator's Manual... - Page 23 Press this key to return to the main screen. 11. Knob Rotate the knob clockwise or counterclockwise to move the cursor. Press the knob to select one item, such as accessing a menu or confirming the selection. Accutorr 7 Operator's Manual...
-
Page 24: Side View
2.3.2 Side View Handle Recorder indicator Start/stop recording key Paper outlet Recorder door Connector for NIBP cuff Recorder door latch Connector for SpO cable Accutorr 7 Operator's Manual... -
Page 25: Rear View
USB connector: connects to barcode scanner or USB disk. AC power input Equipotential grounding terminal NOTE When using the equipment with other devices, their equipotential grounding terminals should be connected together to eliminate a possible difference in ground potential. Accutorr 7 Operator's Manual... -
Page 26: Bottom View
2.3.4 Bottom View Battery compartment door Quick release mount latch point Accutorr 7 Operator's Manual... -
Page 27: Main Screen
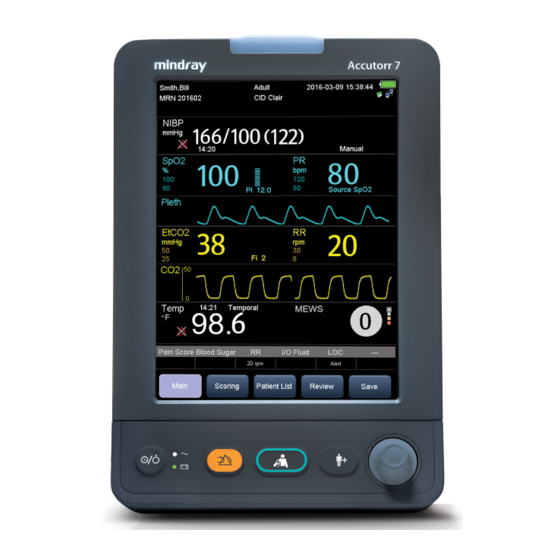
2.4 Main Screen The main screen has three display modes. They are all parameter screen, trend screen and NIBP list screen. All Parameter Screen Accutorr 7 Operator's Manual... - Page 28 Trend Screen NIBP List Screen Accutorr 7 Operator's Manual...
- Page 29 (optional) is working. indicates monitor has failed to connect a wired network. indicates the wireless function (optional) is not working. indicates a USB drive is inserted. Accutorr 7 Operator's Manual...
-
Page 30: Menu
Heading: provide a title or description for the current menu. Main body: displays options, buttons, prompt messages, etc. A menu button followed by “>>’’ opens a secondary window to reveal more options or information. : select to exit the current menu. 2-10 Accutorr 7 Operator's Manual... -
Page 31: Operating Modes
Configure and use NIBP Clock Configure and use NIBP Simultaneous Use STAT NIBP Configure and use Sat-Seconds (Nellcor) Access [Custom Program] tab (NIBP) Access [Alarm Setup] tab Access [Continuous Trends] tab Access [Graphic Trends] tab Connect to the CMS Accutorr 7 Operator's Manual 2-11... -
Page 32: Standby Mode
The Demo mode is for demonstration purpose only. To avoid the potential risk of the simulated data being mistaken for the monitored patient’s data, do not enter the Demo mode while monitoring a patient. Otherwise, improper patient monitoring and delayed treatment could result. 2-12 Accutorr 7 Operator's Manual... -
Page 33: Basic Operation
Basic Operation 3.1 Installation WARNING The equipment should be installed by authorized Mindray personnel. Do not open the equipment housings. All servicing and future upgrades must be carried out by Mindray trained and authorized personnel. The software copyright of the equipment is solely owned by us. No organization or individual shall resort to altering, copying, or exchanging it or to any other infringement on it in any form or by any means without due permission. -
Page 34: Environmental Requirements
In this case, never start the system before the condensation disappears. WARNING Make sure that the equipment operating environment meets the specifications. Otherwise unexpected consequences, e.g. damage to the equipment, could result. Accutorr 7 Operator's Manual... -
Page 35: General Operation
Insert the hose part of NIBP cuff to the connector on the side of monitor; insert the SpO cable into the SpO cable connector on the side of the monitor; insert the temperature probe cable into the TEMP probe connector on the back of the monitor. Accutorr 7 Operator's Manual... -
Page 36: Turning On/Off Power
WARNING Do not use the monitor on a patient if you suspect it is not working properly, or if it is mechanically damaged. Contact your service personnel or Mindray. NOTE Carefully check if the system performs the self-test as described above. Contact your service personnel or Mindray if the self-test is abnormal. -
Page 37: Turning Off The Monitor
Pop-Up Keys: Pop-up keys are task-related menu keys that appear automatically on the monitor screen when required. For example, the confirm pop-up key appears only when you need to confirm a change. Accutorr 7 Operator's Manual... -
Page 38: Using The Knob
ID is entered, but there is no activity on the monitor for a configured period of time, the monitor will clears the ID. Select [Main]→[Maintenance >>]→[User Settings >>]→Enter the required password→Select [Ok] and then access [User Settings] menu. Select [Clinician ID Time out] and then set the time. Accutorr 7 Operator's Manual... -
Page 39: Adjusting Alarm Volume
All Parameters display includes parameter area, waveform area, but no trend. Trend display includes parameter area, tabular trends, but no waveform area. NIBP List display includes parameter area, NIBP list, but no waveform area. Refer to 2.4 Main Screen for additional information. Accutorr 7 Operator's Manual... -
Page 40: Configuring The Timeout Of Measured Value
Save or record any needed data prior to changing the date and time. 3.5.11 Configuring Unit You can configure the measurement unit. To enter the [Unit Setup] menu, select [Main]→[General Setup>>]→[Unit Setup>>] and then the [Unit Setup] menu pops up. Accutorr 7 Operator's Manual... -
Page 41: Configuring Printout
CMS when it restarts 2 minutes after power-off. The selected CMS will not be cleared when only one CMS is configured, or the monitor is restarted within 2 minutes. [Off]: The monitor retains the selected CMS when it restarts. Accutorr 7 Operator's Manual... - Page 42 FOR YOUR NOTES 3-10 Accutorr 7 Operator's Manual...
-
Page 43: Patient Data Management
MRN, the patient information in the same MRN stored in ADT database will automatically synchronize to patient demographics of the monitor. Select [Ok]. You can configure the [Patient Demographics] menu. Select [Main]→[Maintenance >>]→[User Settings >>]→enter the required password→select [Ok] to access [User Settings] menu. Select [Patient Demographics >>]. Accutorr 7 Operator's Manual... -
Page 44: Admitting A Patient By Barcode Scanner
Select [Add New], and then [Patient Demographics] menu displays. Input patient information and then select [Ok] to admit the patient. Select [Delete] to remove currently selected patient from the monitor. Select [Delete All] to remove all the patients from the monitor. Accutorr 7 Operator's Manual... -
Page 45: Manually Input Patient Data
In the [Manual Inputs Setup] menu, you can Configure the items to be displayed in the manual input area. Select [Manual Input Area] and toggle between [On] and [Off] to display or hide the manual input area. Accutorr 7 Operator's Manual... - Page 46 The following picture shows the manual input area which is located at the bottom of the screen if turned on. After the manual input area is selected, the [Manual Inputs] menu pops up. The displayed items correspond to the settings in [Manual Inputs Setup]. Accutorr 7 Operator's Manual...
-
Page 47: Manually Save Patient Data
4.4 Reviewing Patient Data Select [Review] QuickKey, and you can review the trends. In Monitor mode, you can view: Spot check trends Continuous trends Graphic trends In Spot Check mode, you can only view Spot Check Trends. Accutorr 7 Operator's Manual... -
Page 48: Spot Check Trends
Select [Print] to print the trend data of selected patient. Select [Send] to transmit the selected patient’s trend data to the EMR through an eGateway. NOTE The trend data can only be sent out when the monitor is connected to Electric Medical Record system (EMR). Accutorr 7 Operator's Manual... -
Page 49: Continuous Trends
Select [Print] to print the trend data of selected patient. Select [Delete All] to delete the trend data of selected patient. Parameter value triggering high level alarm has a red background; parameter value triggering medium or low level alarm has a yellow background. Accutorr 7 Operator's Manual... -
Page 50: Graphic Trends
Select to move the cursor to the previous or next page. Select [Event] and control key to quickly locate the event. Select [Print] to print the selected patient’s graphic trend data currently on the screen. Accutorr 7 Operator's Manual... -
Page 51: Transferring Data From The Monitor To Usb Drive
USB drive for data transfer is in read/write mode. Do not remove the storage medium during data transfer process. Otherwise, data files may be damaged. The normal monitoring function will be affected during data export. Do not perform any monitoring activity during data export. Accutorr 7 Operator's Manual... - Page 52 FOR YOUR NOTES 4-10 Accutorr 7 Operator's Manual...
-
Page 53: Managing Configurations
The monitor restarts after being switched off for more than 120 seconds. A patient is admitted. A patient is discharged. Patient category is changed. The default configuration may come from the latest configuration, the factory default configuration or the user configuration. Accutorr 7 Operator's Manual... -
Page 54: Saving Current Settings
Select [Export Config >>] in the [Manage Configuration] menu. In the [Export Config] menu, select the configurations and the user maintenance settings to be exported. Then select the [Export] button. A status message will report completion of the transfer. Accutorr 7 Operator's Manual... -
Page 55: Loading A Configuration
And it restores the default configuration, rather than the latest configuration, if it restarts 120 seconds after a power failure. The monitor loads either the latest configuration or the default configuration if it restarts from 60-120 seconds after a power failure. Accutorr 7 Operator's Manual... - Page 56 FOR YOUR NOTES Accutorr 7 Operator's Manual...
-
Page 57: Alarms
Medium Indicate that your patient’s Indicate a device malfunction or an improper level vital signs appear abnormal operation, which may not threaten the Accutorr 7 Operator's Manual... -
Page 58: Alarm Indicators
The alarm tones identify the alarm levels as follows: High level alarms: triple+double beeps+triple+double beep Medium level alarms: triple beep Low level alarms: single beep The interval of alarm tone is configurable. Refer to section 6.5.3 Setting the Interval between Alarm Sounds. Accutorr 7 Operator's Manual... -
Page 59: Alarm Messages
6.3.5 Alarm Status Symbols Apart from the aforementioned alarm indicators, the equipment also uses the following symbols telling the alarm status: indicates alarms are paused. indicates alarms are reset. indicates the alarm sound is turned off. Accutorr 7 Operator's Manual... -
Page 60: Setting Alarms
(refer to 6.5.2 Setting the Minimum Alarm Volume), and 10 is the maximum volume. When alarm volume is set to 0, the alarm sound is turned off and a symbol appears on the screen. Accutorr 7 Operator's Manual... -
Page 61: Setting The Minimum Alarm Volume
[Ok] in the pop-up window. The monitor will create new alarm limits based on the measured values. Before applying these automatically created alarm limits, confirm if they are appropriate for your patient. If not, you can adjust them manually. Accutorr 7 Operator's Manual... - Page 62 95 30 to 245 mmHg whichever is mmHg, Pediatric: greater whichever is 30 to 180 mmHg smaller Neonate: 25 to 105 mmHg Temp Same as the (T-0.5) °C (T-0.5) °C (T+0.5) °C (T+0.5) °C measurement range Accutorr 7 Operator's Manual...
-
Page 63: Pausing Alarms
For physiological alarms, except the NIBP-related alarms, when the alarm system is reset: The alarm sound is silenced. A √ appears before the alarm message, indicating that the alarm is acknowledged. The icon appears in the alarm symbol area. The parameter numeric and alarm limits still flash. Accutorr 7 Operator's Manual... -
Page 64: Setting The Reminder Tone
The time when the alarm is last triggered is displayed after the alarm message. If an alarm is not latched, the alarm indications disappear as soon as the alarm conditions end. When the alarm system is reset, the latched physiological alarms are cleared. Accutorr 7 Operator's Manual... -
Page 65: Actions For Alarm Occurrence
[Pulse]: the nurse call signal is a pulse signal and each pulse lasts 1 second. When multiple alarms occur simultaneously, only one pulse signal is output. If an alarm occurs but the previous one is not cleared yet, a new pulse signal will also be outputted. Accutorr 7 Operator's Manual... - Page 66 Otherwise the nurse call function will not work and the monitor may be damaged. Do not rely exclusively on the nurse call system for alarm notification. Remember that the most reliable alarm notification combines audible and visual alarm indications with the patient’s clinical condition. 6-10 Accutorr 7 Operator's Manual...
-
Page 67: Monitoring Spo
Pulse rate (derived from pleth wave): detected pulsations per minute. Obtain PR through the SpO or NIBP measurement. When simultaneously measuring NIBP and SpO2, the PR source is from SpO Accutorr 7 Operator's Manual... -
Page 68: Safety
The color of the cable connector matches the company as shown below: Masimo SpO module: a purple connector with the Masimo SET logo Nellcor SpO module: a grey connector with the Nellcor logo The SpO sensor connectors are mutually exclusive. Accutorr 7 Operator's Manual... -
Page 69: Applying The Sensor
In this case, it is recommended that the sensitivity is set to [Low] or [Normal] so that the interference caused by motion can be filtered and therefore the measurement stability can be ensured. Accutorr 7 Operator's Manual... -
Page 70: Changing Averaging Time
The method of calculation is as follows: the number of percentage points that the SpO saturation falls outside the alarm limit is multiplied by the number of seconds that it remains outside the limit. This can be stated as the equation: Sat-Seconds= Points × Seconds Accutorr 7 Operator's Manual... -
Page 71: Changing The Speed Of Pleth Wave
7.5.7 Changing the Speed of Pleth Wave In the [SpO Setup] menu, select [Sweep] and then select the appropriate setting. The faster the waveform sweeps, the wider the waveform is. Accutorr 7 Operator's Manual... -
Page 72: Setting The Alarm Level For Spo
Presence of certain dyes, such as methylene and indigo carmine Inappropriate positioning of the SpO sensor, or use of incorrect SpO sensor Drop of arterial blood flow to immeasurable levels caused by shock, anemia, low temperature or vasoconstrictor. Accutorr 7 Operator's Manual... -
Page 73: Masimo Information
Possession or purchase of this device does not convey any express or implied license to use the device with unauthorized replacement parts which would, alone, or in combination with this device, fall within the scope of one or more of the patents relating to this device. Accutorr 7 Operator's Manual... - Page 74 FOR YOUR NOTES Accutorr 7 Operator's Manual...
-
Page 75: Monitoring Pr
8.3 Pulse Tone You can change the pulse tone volume by adjusting [Beat Volume] in the [SpO Setup] menu. When a valid SpO value exists, the system will adjust the pulse tone according to the SpO value. Accutorr 7 Operator's Manual... - Page 76 FOR YOUR NOTES Accutorr 7 Operator's Manual...
-
Page 77: Monitoring Nibp
Do not measure NIBP on patients with sickle-cell disease or on the limb where skin damage has occurred or is expected. Use clinical judgement to determine whether to perform frequent unattended blood pressure measurements on patients with severe blood clotting disorders Accutorr 7 Operator's Manual... -
Page 78: Measurement Limitations
Select [NIBP STAT] to start a continuous NIBP measurement. If the monitor is in Spot Check mode, you can only manually measure the NIBP. If the monitor is in Monitor mode, you can measure auto, continuous and manual NIBP. Accutorr 7 Operator's Manual... -
Page 79: Measuring Nibp
The width of the cuff should be 40% (50% for neonates) of the limb circumference, or 2/3 of the upper arm’s length. The inflatable part of the cuff should be long enough to encircle at least 50% to 80% of the limb. Accutorr 7 Operator's Manual... -
Page 80: Starting Nibp Measurement
NIBP measurement, or a continuous NIBP measurement. Access [NIBP Setup] menu and then select [Stop All] to stop all the NIBP measurement, including manual, continuous, and auto NIBP measurement. Accutorr 7 Operator's Manual... -
Page 81: Correcting The Measurement When Cuff Is Not At Heart Level
Select NIBP parameter area to access the [NIBP Setup] menu. In Spot Check mode, you can only set: Initial cuff inflation pressure NIBP end tone, and Venous Puncture In Monitor mode, you can additionally set: Interval Measurement on clock Custom program Alarms STAT NIBP Accutorr 7 Operator's Manual... -
Page 82: Setting Interval
For example, if [Clock] is set to [On], and [Interval] is set to [20min], and then you start an NIBP auto measurement at 14: 03, the next measurement will be taken at 14: 20, and the following measurement time will be 14:40, 15:00 and so on. Accutorr 7 Operator's Manual... -
Page 83: Configuring A Custom Program
Puncture vein and draw blood sample. When the puncture is complete, select [VeniPuncture] key, or press the hardkey on the monitor's front panel to deflate the cuff. The cuff deflates automatically after a set time if you do not deflate it. Accutorr 7 Operator's Manual... - Page 84 Prolonged use of disinfectant may cause discoloration of the cuff. Replace the bladder after cleaning and disinfecting the cuff: Place the bladder on the top of the cuff (as shown below). Roll the bladder lengthwise and insert it into the large opening. Accutorr 7 Operator's Manual...
- Page 85 Clean cuffs with warm water and a mild detergent. Do not use a detergent containing hand conditioners, softeners, or fragrances. Antimicrobial Definition Bladderless cuffs are treated with an antimicrobial coating. Antimicrobial technology effectively controls a broad spectrum of bacteria, fungi, algae and yeasts on a wide variety of treated substrates. Accutorr 7 Operator's Manual...
- Page 86 FOR YOUR NOTES 9-10 Accutorr 7 Operator's Manual...
-
Page 87: Monitoring Temp
Ensure that probe covers are disposed of according to local regulations or hospital's requirements. Accuracy verification of the temperature module is required every two years or according to your hospital’s policy. Please contact Mindray Technical Support department if accuracy verification is needed. Accutorr 7 Operator's Manual... -
Page 88: Setting Temp
Rectal probe: this probe type is intended for taking rectal temperature for adult and pediatric patients. When oral/axillary probe is used, the measurement site will automatically be set to [Oral]. You can change the site in [Temp Setup] menu. 10-2 Accutorr 7 Operator's Manual... -
Page 89: Taking A Temperature In Predictive Mode
Neither measurement is taken nor is the probe replaced in the probe well in 60 seconds after the probe is withdrawn from the well. The temperature type automatically changes to Predictive mode when the probe returns to the probe well. Accutorr 7 Operator's Manual 10-3... -
Page 90: Taking A Temperature In Monitor Mode
Replace the probe into the probe well. NOTE In Monitor mode, record the measured value prior to taking the probe away from the measurement site. The monitor will automatically stop measuring temperature after 10 minutes from the start of the measurement. 10-4 Accutorr 7 Operator's Manual... -
Page 91: Disinfecting Temperature Probe
Disinfect the probe with a soft cloth dampened with the recommended disinfectant. Wipe off all the remaining disinfectants from the probe with a soft cloth dampened with water. Dry the probe in a cool place. WARNING Properly dispose of the used soft cloth. Accutorr 7 Operator's Manual 10-5... - Page 92 FOR YOUR NOTES 10-6 Accutorr 7 Operator's Manual...
-
Page 93: Recording
Press the latch in the upper right corner of the recorder door to open the door. Insert a new roll into the compartment as shown below. Close the recorder door. Check if paper is loaded correctly and the paper end is feeding from the top. Accutorr 7 Operator's Manual 11-1... -
Page 94: Setting The Recorder
The monitor will automatically start recording when the [Save] QuickKey is selected to save the manual input patient data if [Automatically Record on Manual Save] is enabled from the [User Settings>>] menu. To manually stop the current recording, you select hardkey. 11-2 Accutorr 7 Operator's Manual... -
Page 95: Reports
Select [Record] to start recording. In the continuous trends strip: The mark "?" before the time indicates that system time is changed. The mark "*" before the parameter value indicates that an alarm is triggerd. Accutorr 7 Operator's Manual 11-3... -
Page 96: Spot Check Trends Recording
After the alcohol has completely been dried, reload the paper and close the recorder door. Refer to section 11.2 Loading Paper for additional information. CAUTION Do not use anything that may destroy the thermal element. Do not add unnecessary force to the thermal head. 11-4 Accutorr 7 Operator's Manual... -
Page 97: Other Functions
Select [Clear] to remove the parameter values and score from current screen. Select [MEWS Protocol>>] to view actions to be taken according to MEWS protocol. Select [Record] to print the parameter values and calculated score. Select [Review] to view all the MEWS scores. Accutorr 7 Operator's Manual 12-1... -
Page 98: Network
Accutorr 7. The central station transmits alarm settings, parameter settings, patient information and operating mode settings (enter or exit the Standby mode) to the Accutorr 7. The alarm settings, parameter settings, patients’ information and operating mode settings of the Accutorr 7 are consistent with central station. -
Page 99: Network Type And Settings
In a wireless (optional) network, the existence of obstacles (such as walls) will affect data transmission or even cause wireless (optional) network interruption. An access point (AP) supports a maximum of 16 monitors through the wireless (optional) network. Accutorr 7 Operator's Manual 12-3... -
Page 100: Requirements For Setting Up The Wireless Network (Optional)
The channel bandwidth should be 20 MHz. WPA2-PSK security method is recommended for authentication and encryption. The throughput capacity of each Accutorr 7 is 700 kbps. The total throughput of the wireless devices connected to a wireless AP should be less than the effective transmitting capability of the wireless AP. -
Page 101: Wireless Network Related Problems (Optional)
LAN and connect Accutorr 7 to the wired network; if WLAN is used, set the network type to WLAN and connect Accutorr 7 to the wireless network. 3. Check that the SSID and password of the monitor are consistent with those of the wireless AP. -
Page 102: Adt Communication Setup
Select [Main]→[Maintenance >>]→[User Settings >>]→Enter the required password→Select [Ok] to access User Settings menu. Select [Central Station Setup>>] to access [Central Station Setup] menu. Set the name of the CMS and IP addresses. Select [Ok] to exit the menu. 12-6 Accutorr 7 Operator's Manual... -
Page 103: Battery
When the battery is charging, the AC power indicator and battery indicator are both On. If the monitor is powered on, the battery status symbol on the monitor screen displays when the charging is complete. Accutorr 7 Operator's Manual 13-1... -
Page 104: Replacing A Battery
The Lithium-ion batteries have a service life of 3 years. Please replace your battery when it reaches the end of its service life. Failure to replace the battery may cause serious damage to your device from battery overheating. 13-2 Accutorr 7 Operator's Manual... -
Page 105: Battery Maintenance
Note the time again. Calculate the run time by subtracting the start time from the end time. The operating time of a battery directly reflects its performance. If the operating time of a battery is noticeably shorter than that stated in the specifications, contact your Mindray service personnel. Accutorr 7 Operator's Manual... -
Page 106: Recycling A Battery
Remove the old battery from the monitor and recycle it properly. Follow local laws for proper battery disposal. WARNING Do not disassemble batteries, dispose of them in fire, or cause them to short circuit. They may ignite, explode, leak or heat up, causing personal injury. 13-4 Accutorr 7 Operator's Manual... -
Page 107: Care And Maintenance
Be sure to turn off the monitor and disconnect all power cables from the outlets before cleaning the equipment. Use only Mindray approved cleaners and disinfectants and methods listed in this chapter to clean or disinfect your equipment. Warranty does not cover damage caused by unapproved substances or methods. -
Page 108: Cleaning
For infection control methods, consult your hospital’s Infection Control Officer or Epidemiologist. CAUTION If you spill liquid on the equipment or accessories, contact Mindray or your service personnel. 14.1.1 Cleaning Clean your equipment on a regular basis. Consult your hospital's regulations before cleaning the equipment. -
Page 109: General Inspection
1. If the user suspects that the measurement is incorrect. NIBP test Leakage test 2. Following any repairs or replacement of the module. 3. Once a year for NIBP tests. test 4. Once every two years for SpO test and Temp test. Temp test Accutorr 7 Operator's Manual 14-3... -
Page 110: Checking Monitor Information
14.4 Checking Monitor Information Select [Main]→[Maintenance >>]→[Monitor Information>>], you can view system software version copyright information system configuration by selecting [Monitor Configuration>>], or status information, such as start time, self-test error, and so on by selecting [Monitor Log>>] 14-4 Accutorr 7 Operator's Manual... -
Page 111: Battery Check
Select, in turn the central point of the symbol. After the calibration is completed, the message [Screen Calibration Completed! ! ! ! ] is displayed. Select [Ok] to confirm the completion of the calibration. Accutorr 7 Operator's Manual 14-5... -
Page 112: Formatting The Storage Card
Select [Format Storage Card], and then select [Ok] in the pop-up dialog. 14.10 Modifying Password Select [Main]→[Maintenance >>]→[User Settings >>]→Enter the required password→Select [Ok] to access the [User Settings] menu. Select [Modify Password>>]. Enter new password and then select [Ok]. 14-6 Accutorr 7 Operator's Manual... -
Page 113: Accessories
Neonate (<1 kg) 0600-00-0156 Disposable LNCS Neo Adult and Pediatric (>40 Kg), 0600-00-0157 neonate(<3 Kg) LNCS Inf Pediatric and Neonate (3 to 20 Kg) 0600-00-0158 LNCS DCI Adult (Finger) 0600-00-0126 Reusable LNCS DCIP Pediatric (Finger) 0600-00-0127 Accutorr 7 Operator's Manual 15-1... -
Page 114: Nibp Accessories
Category Site 3.1 to 5.7 001B-30-70692 4.3 to 8.0 001B-30-70693 Neonate 5.8 to 10.9 001B-30-70694 7.1 to 13.1 001B-30-70695 Child 10 to 19 0683-14-0001-01 Small Adult 18 to 26 0683-14-0002-01 Adult 24 to 35 0683-14-0003-01 15-2 Accutorr 7 Operator's Manual... -
Page 115: Temp Accessories
Quick Release Mounting Bracket for Rolling Stand 045-001054-00 Quick Release Mounting Bracket for Wall Mount 045-001055-00 Rolling Stand with Quick Release Mount 045-001057-00 Wall Mount Bracket 045-001059-00 Wall Mount Kit, 6" Arm 115-025386-00 Bedrail Clamp 115-020575-00 Nurse Call Cable 009-003116-00 Accutorr 7 Operator's Manual 15-3... - Page 116 Barcode Scanner Kit 1D Bar Code Scanners 023-000254-00 (115-008393-00) USB Cable of ASYMBOL Scanner 009-001397-00 Accutorr 7 Welch Allyn Accutorr 7 Welch Allyn Temp Support 115-022908-00 Temp Support Kit Assembly (115-025041-00) Accutorr 7 Welch Allyn Temp Support 046-006016-00 Installation Guide Li-ion Battery Kit Li-ion Battery, 11.1V 4500mAh...
-
Page 117: A Product Specifications
The equipment may not meet the performance specifications given here if stored or used outside the specified temperature and humidity ranges. NOTE The environmental specifications of parameter modules are the same as those of the main unit. Accutorr 7 Operator's Manual... -
Page 118: Power Supply Specifications
NIBP module, recorder module and a battery) A.5 Hardware Specifications Display Screen type Color TFT LCD Screen Size (diagonal) 8.4” Resolution 800×600 pixels Recorder Method Thermal dot array Paper speed 25 mm/s Number of waveform channels Accutorr 7 Operator's Manual... - Page 119 Alarm Output (Network connector) Alarm delay time from The alarm delay time form the monitor to remote equipment is monitor to remote ≤2 seconds, measured at the monitor’s signal output equipment connector. A.5.5 Data Storage Trends 5000 groups Accutorr 7 Operator's Manual...
-
Page 120: Measurement Specifications
Network switchover is automatically executed when the Roaming Accutorr 7 moves from the coverage area of one AP to that of another AP. Number of the Accutorr 7 supported by a single AP is ≤ 16. - Page 121 Refreshing rate * When the SpO sensor is applied for neonatal patients as indicated, the specified accuracy range is increased by ±1%, to compensate for the theoretical effect on oximeter measurements of fetal hemoglobin in neonatal blood. Accutorr 7 Operator's Manual...
- Page 122 Manual, Auto and STAT Auto mode repetition 1, 2, 2.5, 3, 5, 10, 15, 20, 30, 60, 90 or 120 min intervals STAT mode cycle time 5 min Adult, pediatric: 180 s Max measurement time Neonate: 90 s Accutorr 7 Operator's Manual...
- Page 123 Pediatric: (low limit+5) to 165 Neonate: (low limit+5) to 110 Mean Low 20 to (high limit-5) Adult: (low limit+5) to 210 Dia High Pediatric: (low limit+5) to 150 Neonate: (low limit+5) to 100 Dia Low 10 to (high limit-5) Accutorr 7 Operator's Manual...
- Page 124 Predictive mode: <20 s (typical test: < 12s ) Alarm limit Range Step (low limit +1) °C to 44°C Temp High (low limit +1.8) °C to 111.2°F 0.1°C 0.2°F 25°C to (high limit -1) °C Temp Low 77°F to (high limit -1.8) °F Accutorr 7 Operator's Manual...
-
Page 125: Bemc And Radio Regulatory Compliance
The device is suitable for use in all establishments other than domestic and those Harmonic emissions Class A directly connected to the public low-voltage IEC61000-3-2 power supply network that supplies buildings used for domestic purposes Voltage Complies Fluctuations/Flicker Emissions IEC 61000-3-3 Accutorr 7 Operator's Manual... - Page 126 ) for 5 s Power 3 A/m 3 A/m Power frequency magnetic frequency fields should be at levels (50/60 HZ) characteristic of a typical magnetic field location in a typical IEC 61000-4-8 commercial or hospital environment. Accutorr 7 Operator's Manual...
- Page 127 Note 2: These guidelines may not apply in all situations. Electromagnetic propagation is affected by absorption and reflection from structures, objects and people. Note 3: The device that intentionally receives RF electromagnetic energy at the exclusion band (2395.825MHz-2487.645MHz) is exempt from the essential performance requirements, but remains safe. Accutorr 7 Operator's Manual...
- Page 128 Note 1: At 80 MHz and 800 MHz, the separation distance for the higher frequency range applies. Note 2: These guidelines may not apply in all situations. Electromagnetic propagation is affected by absorption and reflection from structures, objects and people. Accutorr 7 Operator's Manual...
-
Page 129: Radio Regulatory Compliance
(2) this device must accept any interference received, including interference that may cause undesired operation. Any changes or modifications to this equipment not expressly approved by Mindray may cause harmful radio frequency interference and void your authority to operate this equipment. - Page 130 Directive 1999/5/EC (Radio Equipment and Telecommunications Terminal Equipment Directive). WARNING This compliance to general radiation exposure limits for an uncontrolled environment, and minimum of 20 cm separation between monitor and human body. Accutorr 7 Operator's Manual...
-
Page 131: C Default Configurations
Cuff Press. (mmHg) in Pediatric VeniPuncture Neonate Adult Initial Pressure Pediatric Neonate Adult NIBP-Sys High Pediatric (mmHg) Neonate Adult NIBP-Sys Low Pediatric (mmHg) Neonate Adult NIBP-Mean High Pediatric (mmHg) Neonate Adult NIBP-Mean Low Pediatric (mmHg) Neonate Accutorr 7 Operator's Manual... - Page 132 Failure Defaults Alarm On/Off Alarm Priority Adult/pediatric:100 High Neonate: 95 Desat Low Sat-Seconds (Nellcor) NIBP Simultaneous Sweep 25 mm/sec Beat Volume Monitor mode: Low Sensor Off Lev. Spot Check mode: Off Sensitivity (Masimo) Normal Averaging (Masimo) Accutorr 7 Operator's Manual...
- Page 133 Saved at Power Affected by Name Default Config Failure Defaults Alarm On/Off Alarm Priority Temp High 38.0 Temp Low 35.0 Temp Type Predictive Oral/Axillary probe: Oral for adult and pediatric Temp Position Axillary for neonate Rectal probe: Rectal Accutorr 7 Operator's Manual...
-
Page 134: General Configuration
Name/MRN button Filter Name/MRN button Continuous Option for Current patient Trends Name/MRN button Interval 30 s Graphic Zoom Trends C.2.3 Record Saved at Power Affected by Name Default Config Failure Defaults wave Selected Manual Inputs Selected Accutorr 7 Operator's Manual... -
Page 135: User Maintenance Items
24 h C.3 User Maintenance Items Saved at Power Affected by Name Default Config Failure Defaults Spot Check Tone Mode 1 Clinician ID Time Out 10 min Language English Network Type Clear CMS IP at Startup Off Accutorr 7 Operator's Manual... - Page 136 FOR YOUR NOTES Accutorr 7 Operator's Manual...
-
Page 137: D Alarm Messages
Solution Message Level (Yes/No) NIBP-Sys Limit The parameter alarm NIBP-Dia Limit limit is inadvertently changed. Contact Mindray or NIBP-Mean your service Limit Err personnel. NIBP-Sys The measured Overrange parameter value exceeds the NIBP-Dia measurement range. Overrange Accutorr 7 Operator's Manual... - Page 138 Signal site. If the error loose. persists, replace the cuff. The measured NIBP Contact Mindray or NIBP value is not within your service Overrange the specified range. personnel. Accutorr 7 Operator's Manual...
- Page 139 Type Wrong the patient category. the cuff. An illegal reset NIBP Illegally Check if the airway is occurred during Reset occluded. NIBP measurement. System deflates the VeniPuncture No operation is cuff after a certain timeout required. time. Accutorr 7 Operator's Manual...
- Page 140 There is a problem Do not use the Board with the SpO module and contact Fault measurement your service (Masimo) board. personnel. The SpO signal is Adjust the sensor Signal too low or too application site. weak. (Masimo) Accutorr 7 Operator's Manual...
- Page 141 Temp module, or there is a problem Restart the monitor. If with the the error remains, Temp Init Err High communications contact your service between the personnel. module and the monitor, or Temp calibration error. Accutorr 7 Operator's Manual...
- Page 142 The patient’s Raise the patient’s Temp Over temperature is too High temperature, or Low Limit low, or an error replace the module. occurs. Temp No The probe is Reconnect the probe. Probe disconnected. Accutorr 7 Operator's Manual...
- Page 143 The thermal head of Rec Head lever of the recorder the recorder is in Wrong Pos. to its previous wrong position. position. Recorder out The recorder paper Replace with a new of paper is used up. paper roll. Accutorr 7 Operator's Manual...
- Page 144 5 Mindray or your seconds. service personnel. Reset the system time and restart the RT Clock Need There is a problem monitor. If the Reset with the button cell. problem still exists, contact your service personnel. Accutorr 7 Operator's Manual...
-
Page 145: E Symbols And Abbreviations
ºC centigrade centimeter decibel dyne second ºF fahrenheit gram gigahertz hour hertz inch kilo kilogram kilopascal litre pound meter milliampere hour mega byte milligram minute milliliter millimeter mmHg millimeters of mercury millisecond Accutorr 7 Operator's Manual... -
Page 146: Abbreviations
× multiply © copyright E.2 Abbreviations AAMI Association for Advancement of Medical Instrumentation alternating current Admit/Discharge/Transfer adult Conformité Européenne CISPR International Special Committee on Radio Interference CMOS complementary metal oxide semiconductor central monitoring system Accutorr 7 Operator's Manual... - Page 147 NIBP noninvasive blood pressure NIBP-D NIBP-diastolic pressure NIBP-M NIBP-mean pressure NIBP-S NIBP-systolic pressure power photodetector pediatric Pleth plethysmogram pulse rate random access memory read-only memory arterial oxygen saturation from pulse oximetry temperature difference TEMP temperature Accutorr 7 Operator's Manual...
- Page 148 FOR YOUR NOTES Accutorr 7 Operator's Manual...
-
Page 149: F Anomalies
Although there is no distinct difference between smart inflation and normal inflation, it is recommended to keep the function [Off]. NOTE The anomaly would not present a safety hazard to either the operator or the patient. Accutorr 7 Operator's Manual... - Page 150 FOR YOUR NOTES Accutorr 7 Operator's Manual...
- Page 152 P/N: 046-005276-00 (2.0) SW Version: 03.05.00...
Need help?
Do you have a question about the Accutorr 7 and is the answer not in the manual?
Questions and answers