Table of Contents
Advertisement
ADVANCED MODEL ROCKET
Assembly and Operation Instructions
Assembly and Operation Instructions
BEFORE YOU BEGIN:
• Study the illustrations and sequence of assembly. The
sequence of assembly is important. Review the parts list
and become familiar with all parts before assembly. If any
parts are missing or damaged, contact AEROTECH™ at
1-702-641-2301.
• DO NOT MODIFY THE DESIGN OF THE ROCKET.
Changes to the design of the rocket such as, but not limited
to, reducing the fin size, shortening the body tube, or
modifying the motor tube assembly can adversely affect the
flight stability of the rocket.
• Only use AEROTECH™ Composite Model Rocket Motors
in this model rocket. See Motor Matrix for recommended
AEROTECH™ motors.
Read and follow the Model Rocket Safety Code
of the National Association of Rocketry (NAR)
and comply with all federal, state and local
laws in all activities with model rockets.
PARTS:
Thrust Ring
(7/16"/11mm)
Thrust Ring Flange
(1/16"/1.6mm)
Motor Tube
Motor Hook
FIN-LOK Rings (4 Fin)
Centering Rings
(2-17/32"/64mm)
Fins
Cooling Mesh
Ejection Gas Baffle
Screw Eye
Shock Cord
(8')
Lower Body Tube
(Slotted)
Upper Body Tube
(Launch Lug)
Bulkhead Disk
(1/16"/1.6mm)
Coupler Tube
(6"/15cm)
Launch Lugs
Nose Cone
Decal Sheet
30" Parachute
(Lower Body)
22" Parachute
(Upper Body)
Scale Plastic Launch Lug Piece
Scale Plastic Antenna Mounts
Aluminum Antenna Tubes
Scale Plastic Fasteners
Chrome Adhesive Band
'F' Spacer Tube
(1")
Scale Drawing
Instructions
Additional Tools Required:
Pliers
ASSEMBLY INSTRUCTIONS:
(14010)
1
(14011)
1
(12912)
1
(19001)
1
(19344)
2
(16629)
3
(11715)
4
(19011)
1
(19030)
1
(19015)
2
(17388)
2
(12628)
1
(12629)
1
(16609)
1
(12606)
1
(19035)
2
(11261)
1
(18015)
1
(13030)
1
(13022)
1
(18915)
1
(18925)
2
(18930)
2
(18935)
12
(18940)
1
(14003)
1
(19815)
1
(19915)
1
(Use medium viscosity cyanoacrylate cement.)
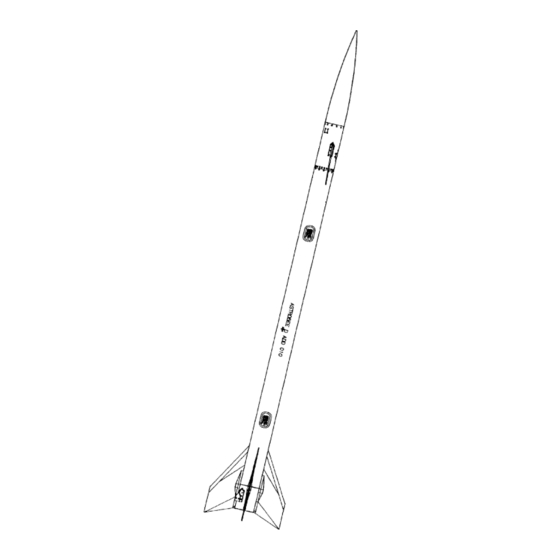
COMPLETED
ASTROBEE D
ADVANCED
MODEL
ROCKET
1
19915-1092
Rev.6/99
Read And
Follow All
Instructions
Astrobee D and the Aerojet logo
are trademarks of Gencorp and
Gummiwerke AG.
Advertisement
Table of Contents

Related Manuals for Aerotech ASTROBEE D


Summary of Contents for Aerotech ASTROBEE D
- Page 1 • Study the illustrations and sequence of assembly. The sequence of assembly is important. Review the parts list and become familiar with all parts before assembly. If any parts are missing or damaged, contact AEROTECH™ at 1-702-641-2301. • DO NOT MODIFY THE DESIGN OF THE ROCKET.
- Page 2 1-1/2" 3" 38 mm 76 mm LOCATION 3-9/16" 1/4" 1/2" 91 mm 6 mm 13 mm GUIDE 4-5/8" 117 mm Front Edge of Tube Coupler Motor Back Edge Of Back Edge Of Back FIN- Marking Guide Hook Front FIN-LOK™ Motor Tube LOK™...
- Page 3 DO NOT apply cement to the back edge of the fin does not snap into place, check to see that each FIN- back FIN-LOK™ ring. (NOTE: The unique AEROTECH LOK™ ring is the correct distance from the back end of the FIN-LOK™...
- Page 4 LOWER BODY PREPARATION 1. For a smooth finish, fill in the spiral in the body tube seam 4. Apply cement to the base of a launch lug. With the sloping with a filler material. Sand the seam flush with the surface portion of the launch lug toward the front of the lower body of the body tube.
- Page 5 LOWER BODY AND FIN ASSEMBLY 1. Mask off the FIN-LOK tab on each of the four Astrobee D slot in the body tube and snap the fin into place. Repeat this fins. Carefully wash the fins in a detergent/soap bath to process for the other three fins.
- Page 6 Guide. Make certain to line up the upper and lower body tubes for correct placement of decals. 5. The AeroTech Astrobee D kit may be completed in two different configurations: 7. Tie loops in the ends of both shock cords. Thread the 30"...
-
Page 7: Operation Instructions
5. LAUNCH PAD: Your AEROTECH rocket must be flown from a launch pad 2. RECOVERY SYSTEM PREPARATION: Roll the parachute and shroud with a 1/4"(6.4mm) diameter metal launch rod at least 36"(0.9m) long (as lines for the upper body assembly. - Page 8 DECAL INSTRUCTIONS 1. Handle the decal sheet carefully to avoid damage. Do not crease the decal sheet. 2. Use a pair of sharp scissors or a hobby knife to cut out the decals. 3. Cutting out decals that will be positioned close together on the rocket as one block will make them easier to apply.
- Page 9 READ THIS BEFORE FLYING YOUR ASTROBEE D The AEROTECH ASTROBEE D Advanced Model Rocket loaded with an AEROTECH "F" or "G" motor weighs more than one (1) pound at liftoff. When flying a model rocket that weighs over one (1) pound at liftoff you must observe certain FAA regulations.
- Page 10 ASTROBEE D MARKING AND CUTTING GUIDE FASTENER LOCATION GUIDE THIS AFT LAUNCH LUG CUTTING GUIDES PIECE...
Need help?
Do you have a question about the ASTROBEE D and is the answer not in the manual?
Questions and answers