Table of Contents
Advertisement
Quick Links
ADVANCED MODEL ROCKET
Assembly and Operation Instructions
Assembly and Operation Instructions
BEFORE YOU BEGIN:
• Study the illustrations and sequence of assembly. The
sequence of assembly is important. Review the parts list
and become familiar with all parts before assembly. If any
parts are missing or damaged, contact RCS at 1-435-865-
7100 or email at warranty@aerotech-rocketry.com.
• DO NOT MODIFY THE DESIGN OF THE ROCKET.
Changes to the design of the rocket such as, but not limited
to, reducing the fin size, shortening the body tube, or
modifying the motor tube assembly can adversely affect the
flight stability of the rocket.
• Only use AEROTECH™ Composite Model Rocket Motors
in this model rocket. See MOTOR MATRIX™ for recom-
mended AEROTECH™ motors.
Read and follow the Model Rocket Safety Code of the National Association of Rocketry
(NAR) and comply with all federal, state and local laws in all activities with model rockets.
PARTS:
Motor adaptor tube
(4-7/8"/124mm
Adaptor rings
(1/2"/13mm)
"E" spacer tube
(2-1/8"/54mm)
Thrust ring
(7/16"/11mm)
Thrust ring flange
(1/16"/1.6mm)
Motor tube
(12"/30.5cm)
Motor hook
FIN-LOK™ rings-3 fin
Centering rings
(1-25/32"/46mm)
Fins
Cooling mesh
Ejection gas baffle
Screw eyes
ASSEMBLY INSTRUCTIONS:
MOTOR ADAPTOR
1. Lightly sand the motor adaptor tube and then slide an
adaptor ring onto the tube until the end of the ring is flush
with the end of the tube. This ring marks the front end of
the adaptor tube. Slide the other adaptor ring onto the
other end of the adaptor tube until the back edge of the
ring is 3/4" (19 mm) from the back end of the tube. Apply
beads of cement where the rings meet the adaptor tube.
2. Insert the "E" motor spacer tube into the motor adaptor
tube and position it at the front end of the adaptor tube. DO
NOT cement in place.
)(12421)
1
(14001)
2
(14002)
1
(14010)
1
(14011)
1
(12912)
1
(19001)
1
(19343)
2
(14829)
2
(11720)
3
(19011)
1
(19030)
1
(19015)
2
(Use medium viscosity cyanoacrylate cement.)
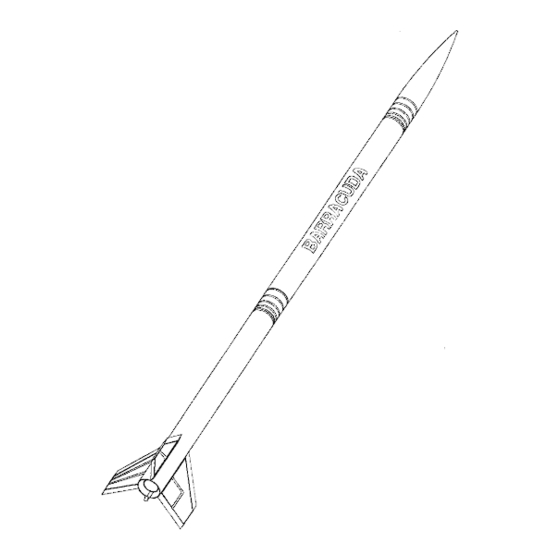
COMPLETED
BARRACUDA™
ADVANCED
MODEL
ROCKET
Shock cord
(8'/2.4m)
Body tube
(22-3/4"/58cm)
Upper body tube
Bulkhead
(1/16"/1.6mm)
Coupler tube
(4"/102mm)
Launch lugs
Nose cone
Adhesive decal sheet
Parachute
(22"/56cm diameter)
"F" spacer tube
Instructions
Cement
Bead
3/4"
19mm
1
Read And Follow
All Instructions
Designed by
Bob Sanford
(17388)
(11924)
(11926)
(22-3/4"/58cm)
(14809)
(11804)
(19035)
(11191)
(18020)
(13022)
(14003)
(1"/25mm)
(19920)
Adaptor
Rings
Motor
Adaptor
3/4"
Tube
19 mm
19920-3092
Rev. 8/12/04
1
1
1
1
1
2
1
1
1
1
1
Front
End
Cement
Bead
Advertisement
Table of Contents

Related Manuals for Aerotech Barracuda


Summary of Contents for Aerotech Barracuda
- Page 1 Designed by flight stability of the rocket. Bob Sanford • Only use AEROTECH™ Composite Model Rocket Motors in this model rocket. See MOTOR MATRIX™ for recom- mended AEROTECH™ motors. Read and follow the Model Rocket Safety Code of the National Association of Rocketry (NAR) and comply with all federal, state and local laws in all activities with model rockets.
- Page 2 7/8" LOCATION 1/2" 1/4" 22 mm 2-15/16" 13 mm 6 mm GUIDE 75 mm 4-5/8" 117 mm Back Edge Of Motor Front Edge Of Back Edge Of Front FIN-LOK™ Hook Back FIN-LOK™ Motor Tube Ring Slot Ring MOTOR TUBE ASSEMBLY Front Motor Hook...
- Page 3 DO NOT apply cement to the back edge of the any plastic flashing with a hobby knife or sandpaper. After back FIN-LOK™ ring. (NOTE: The unique AEROTECH making any adjustments, carefully remove the fins and FIN-LOK™ fin mounting system carries and distributes the back centering ring.
- Page 4 BODY AND FIN ASSEMBLY Lower half of FIN-LOK™ tab Launch (discard) Root Sand here to remove rough edges FIN DETAIL FIN-LOK™ Shock Cord Body Motor Launch Tube Tube Assembly Slot Slot 1. Using a hobby knife, carefully remove any body tube process for the other two fins.
- Page 5 FINAL ASSEMBLY AND FINISHING Shroud Self Lines Shroud Adhesive Line Decals Fabric Loops Parachute Canopy Centering Ring Shock Cord Nose Cone 3. Fasten the fabric parachute to the shock cord at a point 1. Slide the other centering ring over the back of the motor about one (1) foot away from the payload bay in the tube and motor hook and push it against the back FIN- following manner.
-
Page 6: Operation Instructions
OPERATION INSTRUCTIONS 1. RECOMMENDED MOTORS: Only use AEROTECH composite model 5. LAUNCH PAD: Your AEROTECH rocket must be flown from a launch pad rocket motors when flying your AEROTECH rocket. See enclosed chart with a 1/4"(6.4mm) diameter metal launch rod at least 36"(0.9m) long (as for recommended motors and projected altitudes.
Need help?
Do you have a question about the Barracuda and is the answer not in the manual?
Questions and answers