Table of Contents
Advertisement
Advertisement
Table of Contents

Related Manuals for Asko DBI644IG


Summary of Contents for Asko DBI644IG
- Page 1 OPERATING INSTRUCTIONS Dishwasher DBI644IG...
-
Page 2: Table Of Contents
To switch on the dishwasher, press and hold the main power switch until the display lights up. "Welcome to your new ASKO. This is a first time set up." is shown on the display the first time the dishwasher is switched on. It is important that you choose the right settings to ensure good dishwashing results. -
Page 3: Safety Instructions
Safety instructions Read the operating instructions and keep WARNING! them in a safe place! Children must be supervised – dishwasher Number of standard place settings: 14 detergent is corrosive! Never use the dishwasher for any purpose other than that specified in these operating Activate child lock (Kid Safe ) instructions. -
Page 4: Before Washing For The First Time
"Welcome to your new ASKO. This is a first time set up." is shown Water hardness is specified using the following scales: The German on the display. It is important that you choose the right settings to water hardness scale (°dH) and the French water hardness scale (°fH). - Page 5 3. Top up with rinse aid 4. Top up with salt Drying is faster and a better result is achieved if you use rinse aid. You Before you begin using a dishwasher with a water softener, you must will also achieve a better dishwashing result with clear and spotless fill the salt compartment with salt for the water supply to be softened dishes.
-
Page 6: Loading The Dishwasher
Loading the dishwasher Energy-efficient dishwashing Fragile dishes Run programmes only with a full load Some cookware is not dishwasher safe. This can be for several reasons. Some materials cannot withstand strong heat, others can be damaged Wait to run a programme until the dishwasher is full, this way you save by dishwashing detergent. -
Page 7: Upper Basket
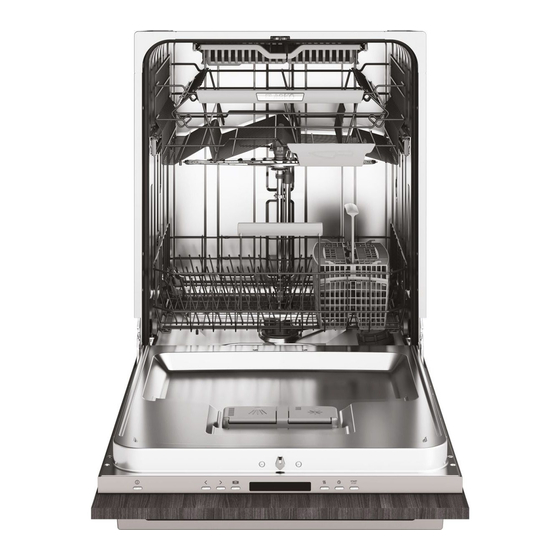
glasses are placed on the wine glass shelf and knives are placed in The dishwasher's baskets the knife stand on the right (if fitted). The dishwasher is equipped with a top cutlery tray, an upper basket and a lower basket with a cutlery basket. The appearance of the baskets may differ depending on the dishwasher setup. -
Page 8: Cutlery Basket
Cutlery basket with lid The cutlery basket lid can be removed and used, for example, as an extra cutlery basket in the upper basket (see below). Foldable tines Lower the foldable tines (plate supports) when washing pots. Release the foldable tines by pressing the catch inwards before adjusting their position. -
Page 9: Using The Dishwasher
Using the dishwasher Add detergent NOTE! Use only dishwasher detergent! Washing up liquid must not be used Press to open as the foam that forms prevents the dishwasher from operating effectively. Dishwasher tablets Halve the tablet if it is difficult to close the dispenser lid. There is a risk that the detergent will not be released properly if the lid is tight and will not open correctly. - Page 10 Press and hold the main power switch until the display lights up. Starting the dishwasher START STOP 2:00 Speed mode Select the programme Select a programme mode Select any options Crystal glass The main power switch A gentle dishwashing programme with a low temperature for washing fragile items made of crystal/glass, such as crystal glass from Orrefors.
-
Page 11: Power Failure
Night mode Green - Unload Lower noise level during the dishwashing programme. The programme The dishwashing programme is finished. Standby light for 60 minutes. time is extended. Stopping or changing a programme Intensive mode Improves the dishwashing results, but the dishwasher uses more energy If you want to change programme after starting the dishwasher, open and water. -
Page 13: Settings
Settings Open the dishwasher's Settings menu To open the dishwasher's Settings menu, press the Navigation button until Settings menu is shown on the display and confirm your selection with the mode selector To exit the dishwasher's Settings menu, select Exit and confirm your selection with the mode selector Navigation buttons for choosing setting Mode selector to confirm current setting START... - Page 14 Settings Options Rinse aid 0/1/2/3/4/5/TAB Setting for rinse aid dosage. The rinse aid dispenser can be adjusted between 0 (Off) and 5 (High dosage). Increase the rinse aid dosage: If the dishes have water marks. Decrease the rinse aid dosage: If the dishes have a sticky white/blue film.
-
Page 15: Care And Cleaning
Care and cleaning Top spray arm Coarse filter The upper basket must be removed before the top spray arm can The coarse filter traps larger food particles, which cannot get past the be released. Pull out the upper basket and turn the basket catch drainage pump. - Page 16 Unblocking the drainage pump NOTE! If the dishwasher still contains water after the programme has finished, Do not forget to replace the drainage pump stop. something may be blocking the drainage pump. Such items are easily removed. Unblocking the inlet hose filter 1 Turn off the machine using the main power switch and unplug it from the wall socket.
-
Page 17: Troubleshooting
Troubleshooting Type of fault on the display Action Overfilling water 1 Clear the drainage pump. See the section Care and cleaning. If the problem persists, call the service department. Water outlet fault See “Water remains in the dishwasher” in the table “Problem” below. If the problem persists, call the service department. - Page 18 Problem Possible causes Action The dishes are not clean. The spray arms do not rotate. Check that the dishes are not blocking the spray arms. Spray arm holes or bearings blocked. Clean the spray arms. See the chapter Care and cleaning.
- Page 19 Problem Possible causes Action Water remains in the dishwasher. The filters are blocked. Clean the coarse and fine filters. The filters are not fitted correctly. Check that the filter handle is locked in the stop position. The handle should point straight out from the dishwasher.
-
Page 20: Technical Information
Technical information Information on energy labelling Information sheet, in compliance with Commission Delegated Regulation (EU) No. 1059/2010 ASKO Model designation: DBI644IG Number of standard place settings: Energy efficiency class: A+++ Annual energy consumption(AE 236 kWh per year Energy consumption of the standard cleaning cycle(E 0.83 kWh... -
Page 21: Installation
Installation [mm] 1198 30-94 *Remove locking nuts for an installed height of 820-821 mm. Nominal dimensions. Actual measurements may vary. Safety instructions Transport protection for the door Connections to electricity, water and drainage must be performed Do not forget to remove the transport protection for the door when by a qualified professional. -
Page 22: Placing The Dishwasher
Placing the dishwasher Affix the protective film The dishwasher can be installed built-in, completely freestanding or Affix the protective film (packed in the document bag) to the underside partially built-in. of the worktop. The protective film is to protect the worktop from moisture. -
Page 23: Drainage Connection
Adjust the height and slide the Drainage connection dishwasher into place This dishwasher is suitable for installing in a raised recess (to attain an ergonomic working height). This means that the dishwasher can be 1 Start by measuring the height from the floor to the bottom edge of placed so that the drainage hose runs to a lower level than the bottom the worktop. -
Page 24: Screwing The Dishwasher Into Place
Connection to hot water supply Screwing the dishwasher into place Connect the dishwasher to the hot water supply (max. 70 °C) if the (Applicable only to built-in dishwashers.) building is heated using an energy-efficient means such as district heating, solar power or geothermal power. Choosing a hot water connection cuts dishwashing times and reduces the dishwasher's energy consumption. -
Page 25: Service
If you have encountered a problem that you cannot resolve, The dishwasher is supplied with a toe kick. please contact your nearest dealer, see www.asko.com. When making contact, provide the details on the serial number plate. Include the article number (1) and the serial number (2). -
Page 26: Information For Test Institute
Information for test institute Request test institute information via e-mail dishwashers@appliance-development.com. The request should include the details on the serial number plate. Include the article number (1) and the serial number (2). ART. NO. SERIAL NO. -
Page 27: Your Notes
Your notes... -
Page 28: Quick Guide
Top up salt and rinse aid to achieve good washing and drying results. (See page 4.) Top up rinse aid Top up salt Select a programme, programme mode and any options (See page 10.) Press Start/Stop, close the door START STOP ASKO APPLIANCES SOCKERBRUKSGATAN 3, SE-531 40 LIDKÖPING, SWEDEN WWW.ASKO.COM...
Need help?
Do you have a question about the DBI644IG and is the answer not in the manual?
Questions and answers