
Related Manuals for HEIDENHAIN EIB 741


Summary of Contents for HEIDENHAIN EIB 741
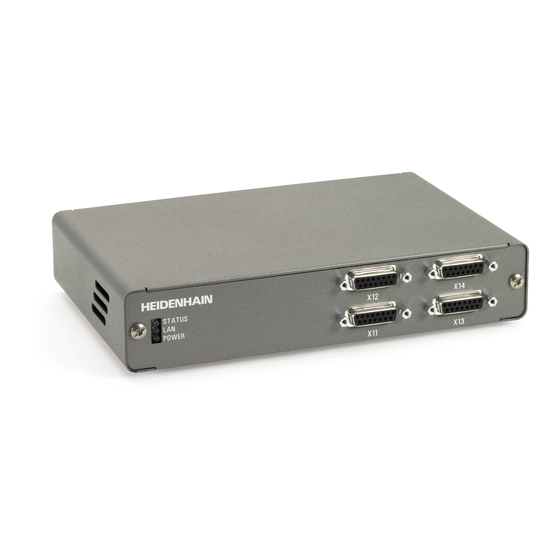
- Page 1 User’s Manual EIB 741 EIB 742 External Interface Box for Connecting HEIDENHAIN Encoders July 2013...
-
Page 2: Table Of Contents
DOCUMENTATION ..........................5 FIRMWARE VERSION ..........................5 CHANGE HISTORY ..........................5 PART 1: FEATURES ..........................6 1 GENERAL DESCRIPTION OF FUNCTION ..................6 2 CONFIGURATION OF THE ENCODER INPUTS ................. 7 Processing Incremental Signals ..........................7 Analog Values of the 1 V PP Incremental Signals A and B: ................. 9 Dealing with Reference Marks .......................... - Page 3 7 DEVICE FUNCTIONS ......................... 33 Opening a Connection to the EIB 74x ......................... 33 Closing the Connection to the EIB 74x ....................... 34 Polling the Connection Status ..........................34 Setting Up Timeout .............................. 34 Reading Out the Number of Axes ........................35 Requesting Handle for Axis ..........................
- Page 4 7.63 Starting a Reference Run for the Auxiliary Axis ....................61 7.64 Stopping a Reference Run for the Auxiliary Axis ....................62 7.65 Configuring a Timestamp for the Auxiliary Axis ....................62 7.66 Setting the Trigger Edge for the Reference Pulse of the Auxiliary Axis ............62 8 AXIS FUNCTIONS ..........................
-
Page 5: Documentation
Documentation The documentation for the EIB 741 and EIB 742, hereafter referred to as EIB 74x, comprises the following documents: • Commissioning Instructions: - Documents required for commissioning, as well as technical specifications. • User's Manual: - Description of features on the EIB 74x. -
Page 6: Part 1: Features
It also contains program examples demonstrating the performance range of the EIB 74x. Basic circuit diagram Encoder inputs: A maximum of four HEIDENHAIN encoders with the following interfaces (freely programmable) can be connected to the EIB 74x: • Incremental signals 1 V •... -
Page 7: Configuration Of The Encoder Inputs
2 Configuration of the Encoder Inputs After power-up, the power supply to the encoders is activated. The other parameters for operating the encoder input must be configured by initialization. • Interface type • Bandwidth for the 1 V input signals •... - Page 8 Block diagram Interpolation value At the time of the trigger event, the incremental signals are scanned and used to calculate a 12-bit wide interpolation value (not with the EnDat interface). The correlation between interpolation value and incremental signals is derived as follows: Setting options: Terminating resistor for the incremental signals The 120 ohm terminating resistor for the 1 V...
-
Page 9: Analog Values Of The 1 V Pp Incremental Signals A And B
Analog Values of the 1 V Incremental Signals A and B: The transmitted values correspond to the values of the AD converter at the time of the trigger event. Bit no. Width (bits) Contents 0..11 12-bit AD converter value 12..15 Reserved Value (HEX) Incremental signal value... -
Page 10: Monitoring The Reference Marks
Distance-coded reference marks With distance-coded encoders, the reference for generating absolute position values from the counter values is obtained through the distance of two traversed (adjacent) reference marks. For this purpose, the period counter value is saved twice, once each time a reference mark is traversed. The coded reference value is generated from the distance of the (adjacent) reference marks, and in doing so the reference for generating absolute position values is also created. -
Page 11: Processing Endat Signals
Activating the monitoring of the reference marks Processing EnDat Signals HEIDENHAIN absolute encoders are available with EnDat 2.1 or EnDat 2.2 interface. Especially in the case of EnDat 2.1 encoders, 1 V incremental signals are transmitted along with the EnDat signals. The EIB 74x is able to process all EnDat encoders with EnDat 2.1 or EnDat 2.2 interface both serially and also with 1 V... - Page 12 Delay compensation for the EnDat transmission can be activated or deactivated during axis configuration. Delay compensation is not approved by HEIDENHAIN for EnDat 2.1 encoders (exception: encoders with the ordering designation EnDat21). Delay compensation is approved by HEIDENHAIN for EnDat 2.2 encoders. This results in the following dependency of the maximum permitted EnDat clock frequency.
- Page 13 EnDat 2.2 additional data The EnDat 2.2 additional data can be transmitted in various ways in the Soft Real-Time, Streaming, and Recording operating modes. 1) No additional datum A position request is started with each trigger event. Additional data is not transmitted. 2) Fixed additional data Besides the position value, with each trigger event one piece of fixed information is sent as additional datum 1 and additional datum 2.
-
Page 14: Auxiliary Axis
Auxiliary Axis The auxiliary axis is coupled to axis 1 and can be used for encoders with 1 Vpp interface. The signals of axis 1 are interpolated and forwarded to a position counter. The interpolation factor can be set at specific intervals. Edge evaluation (1- fold, 2-fold or 4-fold) can also be selected. -
Page 15: Processing Of Trigger Events
3 Processing of Trigger Events Position value determination inside the EIB 74x is initiated via a so-called trigger event. The EIB 74x supports the following trigger sources: • 4 external trigger inputs • Internal periodic trigger source, timer-controlled • Software command •... -
Page 16: Logical Inputs And Outputs
Configuring the trigger inputs and outputs as logical inputs and outputs The trigger inputs/outputs can also be used as logical inputs/outputs. Trigger inputs and/or outputs are set by default. The ports can be individually configured as logical inputs and outputs or as trigger inputs and outputs by a software command. It is not possible to use them simultaneously as trigger inputs/outputs and logical inputs/outputs. - Page 17 The pulse counter is not a separate trigger source; it allows you to limit the number of trigger pulses of other sources. A selectable trigger source can supply pulses that are disabled until the gate is opened by the start signal. All trigger pulses are then counted, and the gate is closed again after a selectable number of pulses.
-
Page 18: Interval Counter
Interval Counter The interval counter permits position-dependent triggering in connection with an incremental encoder on axis 1. The encoder signal can be interpolated (see "Auxiliary Axis" chapter). The triggering occurs at a certain position, or equidistant trigger pulses with an adjustable position interval are generated. Output of the trigger pulses starts after an adjustable start position has been traversed, and is then continued at the position interval in both counting directions. -
Page 19: Timestamp
4 Timestamp The "timestamp" function is also used to monitor data flow. The timestamp counter is a free-running timer with a freely programmable time interval. Each trigger event that results in a position value determination also causes the current timer value to be saved to the timestamp register. - Page 20 Notes on the error bits Name Meaning 1 No error occurred Valid position This bit indicates whether the transmitted position is valid or not 1 EnDat additional datum was received Valid additional datum Otherwise, no additional datum has been selected or received 1 ...
- Page 21 Lost trigger The "lost trigger" bit indicates that at least one trigger event was processed incorrectly because the period between two trigger events was too short. The "lost trigger" bit can also occur if malfunctions superimpose the trigger line or EMC influences have a negative effect on the transmission.
-
Page 22: Ethernet Interface
6 Ethernet Interface The Ethernet (LAN) interface is used for configuring the EIB 74x and for transmitting the position data packets. TCP commands are used for configuration whilst UDP packets are used for transmitting the data in Soft Real-Time mode. The settings of the PC firewall must be selected correspondingly. - Page 23 The following example illustrates the configuration of a data packet for two axes. In addition, a region is inserted for the global information. Global information: Trigger counter Axis 1: Incremental interface (1 V One reference mark Axis 2: Incremental interface (1 V One reference mark Packet configuration: Region...
-
Page 24: Polling" Operating Mode
"Polling" Operating Mode This operating mode is activated by default after the EIB 74x is initialized. The position data is determined in the EIB 74x as soon as a corresponding command is received. The EIB 74x transmits the data inside the response packet to the customer application. -
Page 25: Soft Real-Time" Operating Mode
"Soft Real-Time" Operating Mode The position data is transported with UDP packets from the EIB 74x to the PC. This occurs parallel to the TCP communication via the standard Ethernet interface. The position data is generated when the EIB 74x receives a trigger signal. -
Page 26: Streaming" Operating Mode
"Streaming" Operating Mode The position data are buffered by the EIB 74x and transported to the PC. This occurs parallel to the TCP communication via the standard Ethernet interface. The position data is generated when the EIB 74x receives a trigger signal. A data packet is generated with each trigger event. -
Page 27: Recording" Operating Mode
"Recording" Operating Mode The position data is saved in the memory of the EIB 74x. A data packet is generated and saved with each trigger event. After the recording phase ends, the data can be transmitted. The Recording operating mode supports two further modes. In Single Shot mode, data recording is automatically ended as soon as the memory is full. -
Page 28: Firmware Update
8 Firmware Update The EIB 74x firmware can be updated by the user with a TFTP client. However, only special update files from HEIDENHAIN may be installed on the EIB 74x. The example below is based on a firmware update from a computer with "Windows" as its operating system. -
Page 29: Part 2: Driver Software
Part 2: Driver Software 1 General Information Functions are provided for accessing the EIB 74x from a software application. This group of functions is supplied as DLL for Windows systems and as SO library for Linux. The following operating systems are supported: −... -
Page 30: Polling Mode
Polling Mode The axis functions can be used to access the encoders. First, the axis must be configured via EIB7InitAxis(). The position values can then be read out or error messages acknowledged. It is not necessary to select a trigger source. The triggering occurs implicitly when the EIB7GetPosition() function is called. Soft Real-Time Mode First the axes have to be initialized with EIB7InitAxis() and the data packet as well as the trigger logic must be configured. -
Page 31: Data Types
4 Data Types Simple Data Types EIB7_HANDLE Handle for an EIB 74x EIB7_AXIS Handle for an axis on the EIB 74x EIB7_IO Handle for an input or output port on the EIB 74x EIB7_ERR Error message ENCODER_POSITION Position value (64-bit integer) EnDat Additional Datum struct ENDAT_ADDINFO Component... -
Page 32: Auxiliary Functions
6 Auxiliary Functions Determining the IP Address The host name of the EIB 74x or the IP address (as C string) is converted to an IP address in "Host Byte Order." The name must be transferred as a C string. Examples are "192.168.1.2" or "EIB74x-SN1234567". Function EIB7_ERR EIB7GetHostIP ( const char*... -
Page 33: Device Functions
7 Device Functions The device functions always refer to the entire EIB 74x. No distinction between the axes is possible. With some functions, parameters of all axes are influenced. All device functions are able to deliver the following error messages as a return code. They can also return further values individually. -
Page 34: Closing The Connection To The Eib 74X
Closing the Connection to the EIB 74x The connection to the EIB 74x is closed. The EIB Handle must not be used again. Likewise, all handles to axes generated from this EIB handle are invalid. If a special operating mode of the EIB 74x has been activated via this handle, Polling mode will be activated when the connection is closed. -
Page 35: Reading Out The Number Of Axes
Reading Out the Number of Axes The number of axes with D-sub input in the EIB 74x is read out. Function EIB7_ERR EIB7GetNumOfAxes ( EIB7_HANDLE eib, unsigned long* dsub, unsigned long* res1, unsigned long* res2, unsigned long* res3 Parameters EIB handle [return code] dsub Pointer to the target variable for the number of axes with D-sub input... -
Page 36: Creating A Data Packet
Creating a Data Packet You can use this function to write the configuration for the data packet. One element from the array per function call is initialized for the configuration data. The index indicates the element, whereby the first element has the index 0. Each element consists of a region and the data elements. -
Page 37: Selecting The Operating Mode
7.10 Selecting the Operating Mode The operating mode for the EIB 74x can be set. The Polling and Soft Real-Time, Streaming and Recording modes are supported. In the Recording operating mode you can choose between "single shot" and "rolling" operation. Function EIB7_ERR EIB7SelectMode ( EIB7_HANDLE... -
Page 38: Reading Out The Network Parameters
7.12 Reading out the Network Parameters The parameters for the Ethernet interface can be read. The user-defined settings are always displayed, even if standard settings are used for booting. Function EIB7_ERR EIB7GetNetwork ( EIB7_HANDLE eib, unsigned long* unsigned long* netmask, unsigned long* gateway, EIB7_MODE*... -
Page 39: Reading Out The Host Name
7.14 Reading out the Host Name The host name of the EIB 74x is read and saved in the target memory as a C string. The string is up to 32 characters long (incl. the null byte). If the target memory is not big enough to take the entire string, only the first part is copied. Function EIB7_ERR EIB7GetHostname ( EIB7_HANDLE... -
Page 40: Reading Out The Mac Address
7.17 Reading out the MAC Address The MAC address of the EIB 74x is displayed. The address is output in binary format. The target memory must be at least 6 bytes. The first six bytes are always used. The lowest-value byte of the MAC address is copied to the first byte of the target memory. -
Page 41: Reading Out The Boot Mode
7.19 Reading out the Boot Mode The boot mode in which the EIB 74x was started during the last boot process is read out. Function EIB7_ERR EIB7GetBootMode ( EIB7_HANDLE eib, EIB7_BOOT_MODE* mode Parameters EIB handle status [return code] Pointer to the variable for boot mode mode Description EIB7_BM_User... -
Page 42: Reading Out The Connection Data
7.22 Reading out the Connection Data The connection data of all currently open connections to the EIB 74x can be read. For each connection, an array entry is used. However, the maximum is the number specified by the "size" parameter. The number of valid elements in the array is returned by the "cnt"... -
Page 43: Setting The Timestamp Period Duration
7.25 Setting the Timestamp Period Duration The period duration of the freely running timestamp counter can be set. To do this, the length of the timestamp period must be indicated in timestamp ticks. This value must be a natural number greater than zero. Function EIB7_ERR EIB7SetTimestampPeriod ( EIB7_HANDLE... -
Page 44: Reading The Time Unit For The Delay Time At The Trigger Inputs
7.29 Reading the Time Unit for the Delay Time at the Trigger Inputs The trigger input delay ticks indicate how many clock pulses per microsecond are generated by the clock-pulse source for the delay time of the signals at the trigger input. The delay time of the trigger signals can be set to a multiple of the internal clock-pulse period. -
Page 45: Selecting The Master Trigger Source
7.32 Selecting the Master Trigger Source The master trigger signal can be selected from different sources. This function must be performed for the axes after configuring the trigger matrix and is permitted only in the Polling mode. Function EIB7_ERR EIB7MasterTriggerSource ( EIB7_HANDLE eib, EIB7_AxisTriggerSrc... -
Page 46: Activating Trigger Sources
7.33 Activating Trigger Sources The trigger sources of the EIB 74x can be activated/deactivated individually or collectively. The "src" parameter enables you to select multiple trigger sources by gating the corresponding constants with an OR gate. The period duration for the timer trigger must be configured before activation. -
Page 47: Configuring The Pulse Counter
7.34 Configuring the Pulse Counter A trigger signal and a start signal can be selected for the pulse counter. The start signal enables the pulse counter. The counter will then be decremented with each pulse at the trigger signal until a value of zero is reached. Then all further trigger pulses will be disabled. -
Page 48: Setting The Interpolation Factor For The Interval Counter
7.35 Setting the Interpolation Factor for the Interval Counter The interpolation factor for the interval counter is adjustable and determines the number of counting steps per signal period. This setting has an effect on both the interval counter and the auxiliary axis. The number of counting steps per signal period of the connected encoder is determined from the interpolation factor multiplied by the edge evaluation. -
Page 49: Configuring The Interval Counter
7.36 Configuring the Interval Counter This function is used to configure interval-counter triggering. The interval counter provides two modes. In the first mode, a trigger pulse is generated only at a fixed position. This position is adjustable. The second mode permits triggering at fixed intervals. -
Page 50: Reset
7.38 Reset The EIB 74x performs a reset and reboots. This function has the same effect as pressing the reset button. The standard boot mode is used (firmware of the last update with user’s network settings). The connection to the EIB 74x is automatically closed (as with EIB7Close). -
Page 51: Transferring The Recording Data
7.40 Transferring the Recording Data The transmission of data from the EIB 74x's internal recording buffer can be activated or deactivated. When the data transmission is activated, it is possible to select only one range of the recorded data for transmission. The first byte to be transmitted is given through the offset and the length specifies the number of bytes. -
Page 52: Reading The Recording Memory Size
7.42 Reading the Recording Memory Size The size of the memory for the recorded data in the EIB 74x can be read out. The size is provided as the number of data packets that can be accommodated by the memory. This number depends on the size of a data packet. The data packet must therefore be configured first. -
Page 53: Reading Data From The Fifo
7.44 Reading Data from the FIFO Data packets are copied from the FIFO to the target memory (in raw data format). The "cnt" parameter indicates the number of entries to be copied from the FIFO. If the FIFO contains fewer data records, the entire content of the FIFO is copied. The number of entries actually copied is returned via the "entries"... -
Page 54: Access To The Contents Of A Fifo Element
7.46 Access to the Contents of a FIFO Element This function can be used to access individual fields of a FIFO element (in raw data). A FIFO entry can contain, for example, the trigger counter, position data, the status word and additional data. The content of the data packet can vary depending on its configuration. -
Page 55: Reading And Converting Data From The Fifo
7.47 Reading and Converting Data from the FIFO Data packets are copied from the FIFO to the target memory and converted. The "cnt" parameter indicates the number of entries to be copied from the FIFO. If the FIFO contains fewer data records, the entire content of the FIFO is copied. The number of entries actually copied is returned via the "entries"... -
Page 56: Access To The Contents Of A Fifo Element With Converted Data
7.49 Access to the Contents of a FIFO Element with Converted Data This function can be used to access individual fields of a FIFO element with converted position data (ENCODER_POSITION format). A FIFO entry can contain, for example, the trigger counter, position data, the status word and additional data. The content of the data packet can vary depending on its configuration. -
Page 57: Clearing The Fifo
7.51 Clearing the FIFO The contents of the FIFO are cleared. This command has no effect if Polling mode is active. Function EIB7_ERR EIB7ClearFIFO ( EIB7_HANDLE Parameters EIB handle Return code The return code delivers a status for the function call. All potential values are listed for the standard return codes. 7.52 Setting the FIFO Size The size of the FIFO is reestablished. -
Page 58: Activating The Callback Mechanism
7.54 Activating the Callback Mechanism The callback mechanism is activated or deactivated and the function pointer saved where applicable. The callback function is called if there are at least as many elements saved in the FIFO as there are in the "threshold" parameter. This function will then not be called until new data has been written to the FIFO and then at least "threshold"... -
Page 59: Selecting The Trigger Source For The Auxiliary Axis
7.55 Selecting the Trigger Source for the Auxiliary Axis The trigger signal for the auxiliary axis can be selected from different sources. This setting is possible only in the Polling mode. Function EIB7_ERR EIB7AuxAxisTriggerSource ( EIB7_HANDLE eib, EIB7_AxisTriggerSrc Parameters EIB handle Trigger source Description EIB7_AT_TrgInput1... -
Page 60: Reading Out The Data Of The Auxiliary Axis
7.57 Reading Out the Data of the Auxiliary Axis The current position and certain additional parameters are determined and read out. The function may only be performed in Polling mode. The status word indicates whether the position and the reference position are valid. The position value and the timestamp are saved simultaneously. -
Page 61: Acknowledging The Trigger Errors Of The Auxiliary Axis
7.60 Acknowledging the Trigger Errors of the Auxiliary Axis The error messages for undetected trigger events for the auxiliary axis in the trigger logic are cleared. Function EIB7_ERR EIB7AuxClearLostTriggerError ( EIB7_HANDLE Parameters EIB handle Return code The return code delivers a status for the function call. All potential values are listed for the standard return codes. 7.61 Clearing the Status Bit for the Reference Mark of the Auxiliary Axis The "Reference position saved"... -
Page 62: Stopping A Reference Run For The Auxiliary Axis
7.64 Stopping a Reference Run for the Auxiliary Axis The reference run (mode for automatically saving the reference position) is stopped. Reference positions that have already been saved are not deleted. Function EIB7_ERR EIB7AuxStopRef ( EIB7_HANDLE Parameters EIB handle Return code The return code delivers a status for the function call. -
Page 63: Initializing The Axis
8 Axis Functions The axis functions always refer to just one axis on the EIB 74x. None of the other axes is affected. All axis functions are able to deliver the following error messages as a return code. They can also return further values individually. - Page 64 Function EIB7_ERR EIB7InitAxis ( EIB7_AXIS axis, unsigned long iface, EIB7_EncoderType type, EIB7_Refmarks refmarks, unsigned long linecounts, unsigned long increment, EIB7_Homing homing, EIB7_Limit limit, EIB7_Compensation comp, EIB7_Bandwidth bandwidth, unsigned long EnDatclock, EIB7_EnDatRecoveryTime recovery, EIB7_EnDatCalcTime calculation, Parameters axis AXIS handle iface Interface type of the encoder Iface Description EIB7_IT_Disabled...
- Page 65 bandwidth Input bandwidth for incremental signals (high/low) Bandwidth Description EIB7_BW_High High input bandwidth for 1 V signals EIB7_BW_Low Low input bandwidth for 1 V signals EnDatclock EnDat clock rate EnDatclock Description EIB7_CLK_Default Default EnDat 2.1 / EnDat 2.2 clock EIB7_CLK_100KHz EnDat clock 100 kHz EIB7_CLK_300KHz EnDat clock 300 kHz (default for EnDat 2.1)
-
Page 66: Selecting The Trigger Source For The Axis
Selecting the Trigger Source for the Axis The trigger signal for the axis can be selected from different sources. This setting is possible only in the Polling mode. Function EIB7_ERR EIB7AxisTriggerSource ( EIB7_AXIS axis, EIB7_AxisTriggerSrc Parameters axis AXIS handle Trigger source Description EIB7_AT_TrgInput1 Trigger input channel 1... -
Page 67: Clearing The Counter
Clearing the Counter The period counter of an axis is cleared. This function is permitted only if the axis is configured for incremental encoders. Otherwise an error message is generated. Only the period counter is reset. The interpolation value is not changed. Function EIB7_ERR EIB7ClearCounter ( EIB7_AXIS... -
Page 68: Reading Out Data For A Channel
Reading out Data for a Channel The current position and certain additional parameters are determined and read. The "refc" parameter is valid only if the axis is configured for encoders with distance-coded reference marks. The function may only be performed in Polling mode. The axis must be configured for incremental encoders. -
Page 69: Acknowledging The Trigger Error
Acknowledging the Trigger Error The error message for the trigger interface is acknowledged. The trigger error is cleared for all axes of an EIB 74x at the same time, regardless of which AXIS handle is transferred. Function EIB7_ERR EIB7ClearLostTriggerError ( EIB7_AXIS axis Parameter axis... -
Page 70: Clearing Status Bits For Reference Marks
8.11 Clearing Status Bits for Reference Marks The flags for the reference position in the status word are reset. The following flags are reset: "Reference position 1 saved", "Reference position 2 saved". This command is permitted only for axes configured for incremental encoders with reference marks. -
Page 71: Stopping The Reference Run
8.14 Stopping the Reference Run The reference run (mode for automatically saving the reference position) is stopped. If reference pulses have already been crossed, the corresponding position values will be retained. This command is permitted only for axes configured for incremental encoders. -
Page 72: Can Occur
8.17 EnDat 2.1: Reading the Position The position of an EnDat encoder is read. This occurs via an EnDat 2.1 command. This function may only be performed in Polling mode. The axis must be configured for EnDat01, EnDat21 or EnDat22 encoders. The position is always requested via an EnDat 2.1 command, even if the axis is configured for EnDat 2.2. -
Page 73: Endat 2.1: Sending Data
8.19 EnDat 2.1: Sending Data A data word is written to the memory of the EnDat encoder. 16-bit words are always saved. The address indicates the memory cell within the active memory block. This function may only be performed in Polling mode. The axis must be configured for EnDat01, EnDat21 or EnDat22 encoders. -
Page 74: Endat 2.1: Resetting The Encoder
8.21 EnDat 2.1: Resetting the Encoder The EnDat reset command is sent to the encoder. This function may only be performed in Polling mode. The axis must be configured for EnDat01, EnDat21 or EnDat22 encoders. An EnDat 2.1 reset is always sent, even if the axis is configured for EnDat 2.2. -
Page 75: Endat 2.1: Sending Test Command To Encoder
8.23 EnDat 2.1: Sending Test Command to Encoder A test command is sent to the EnDat encoder. The port address for the test command can be indicated using the "port" parameter. The axis must be configured for EnDat01, EnDat21 or EnDat22 encoders. An EnDat 2.1 command is always sent, even if the axis is configured for EnDat 2.2. -
Page 76: Endat 2.2: Reading The Position And Additional Datum And Selecting The Memory Area
8.25 EnDat 2.2: Reading the Position and Additional Datum and Selecting the Memory Area The position and additional datum of an EnDat22 encoder are transmitted as described in section 8.24. The encoder activates the memory area, which is determined using the MRS code and the block address. If no block is selected from the "section 2"... -
Page 77: Endat 2.2: Reading The Position And Additional Datum And Receiving Data
8.27 EnDat 2.2: Reading the Position and Additional Datum and Receiving Data The position and additional datum of an EnDat22 encoder are transmitted as described in section 8.24. The encoder reads a data word from its memory; the address of the memory cell inside the selected memory area is specified using the "addr" parameter. -
Page 78: Endat 2.2: Reading The Position And Additional Datum And Transmitting The Error Reset
8.29 EnDat 2.2: Reading the Position and Additional Datum and Transmitting the Error Reset The position and additional datum of an EnDat22 encoder are transmitted as described in section 8.24. The error memory of the EnDat22 encoder is also cleared. This function may only be performed in Polling mode. The axis must be configured for EnDat22 encoders. -
Page 79: Eib7_Paraminvalid
8.30 EnDat 2.2: Selecting the Additional Datum The additional data for an EnDat 2.2 encoder can be configured. The configuration must be in the Polling mode. The additional data is transmitted in the Soft Real-Time, Streaming, and Recording modes. The corresponding additional datum is selected in the encoder during a change from the Polling mode to another mode. It also remains possible to transmit only additional datum 1 or additional datum 2. -
Page 80: Axis Mode
8.31 EnDat 2.2: Selecting the Sequence for Additional Datum The additional data for an EnDat 2.2 encoder can be configured. The configuration must be in the Polling mode. The additional data is transmitted in the Soft Real-Time, Streaming, and Recording modes. The sequence of additional data is relayed with each trigger, and after the last entry it begins again with the first entry. -
Page 81: Eib7_Md_Enable
8.32 Reading Absolute and Incremental Position Values Simultaneously The position of an EnDat encoder is read. An EnDat command is sent to the encoder for this purpose. At the same time, the position value is generated from the incremental signals. The two position values are returned together with the status words. -
Page 82: Reading The Power Supply Status For Encoders
8.34 Reading the Power Supply Status for Encoders The power supply status for the encoder can be read. The "power" parameter can be used to determine whether the power supply for this axis is switched on or off. The "err" parameter indicates whether an error has occurred and the power supply has been switched off due to excessive current load. -
Page 83: Configuring The Input Port
9 IO Functions The IO functions always refer only to an individual output or input port on the EIB 74x. None of the other ports is affected. All IO functions can provide the following error messages as a return code. They can also return further values individually. These are listed separately for each function. -
Page 84: Parameter Invalid
Configuring the Output Port The mode for an output port can be configured using this function. The port can be used as a trigger output or a logical output. Also, the output driver can be deactivated. In this case, the output is in a high-impedance state. This function is only permitted in conjunction with handles to output ports. -
Page 85: Setting The Delay Time For The Trigger Input
Setting the Delay Time for the Trigger Input The time by which a trigger pulse is to be delayed can be set separately for each trigger input. The delay time must be indicated as integral multiple of the clock-pulse period, where the number of clock-pulse periods per microsecond can be read out (EIB7GetTriggerDelayTicks()). -
Page 86: Setting The Logical Output Port
Setting the Logical Output Port The level of a logical output port is set. The "level" parameter indicates whether the output is set to high or low. This function can only be applied to outputs that have been configured for logic mode. If the port is used as a trigger output, the function generates an error message. -
Page 87: Reading The Configuration Data For An Output
Reading the Configuration Data for an Output The configuration data for an output port is read. The "mode" parameter supplies the operating mode of the output. In "enable," the status of the output driver is returned. The function may only be used for output ports. Function EIB7_ERR EIB7GetOutputConfig ( EIB7_IO... -
Page 88: Reading The Driver Id Number
10 General Functions All general functions can supply the following error messages as a return code. They can also return further values individually. These are listed separately for each function. Standard return codes EIB7_NoError Function call successful EIB7_OutOfMemory The system is unable to allocate sufficient memory 10.1 Reading the Driver ID Number The product number (ID) of the driver is generated as a C string. - Page 89 752 925 · 02 · A · 02 · 7/2013 · PDF...
Need help?
Do you have a question about the EIB 741 and is the answer not in the manual?
Questions and answers